Hi There,
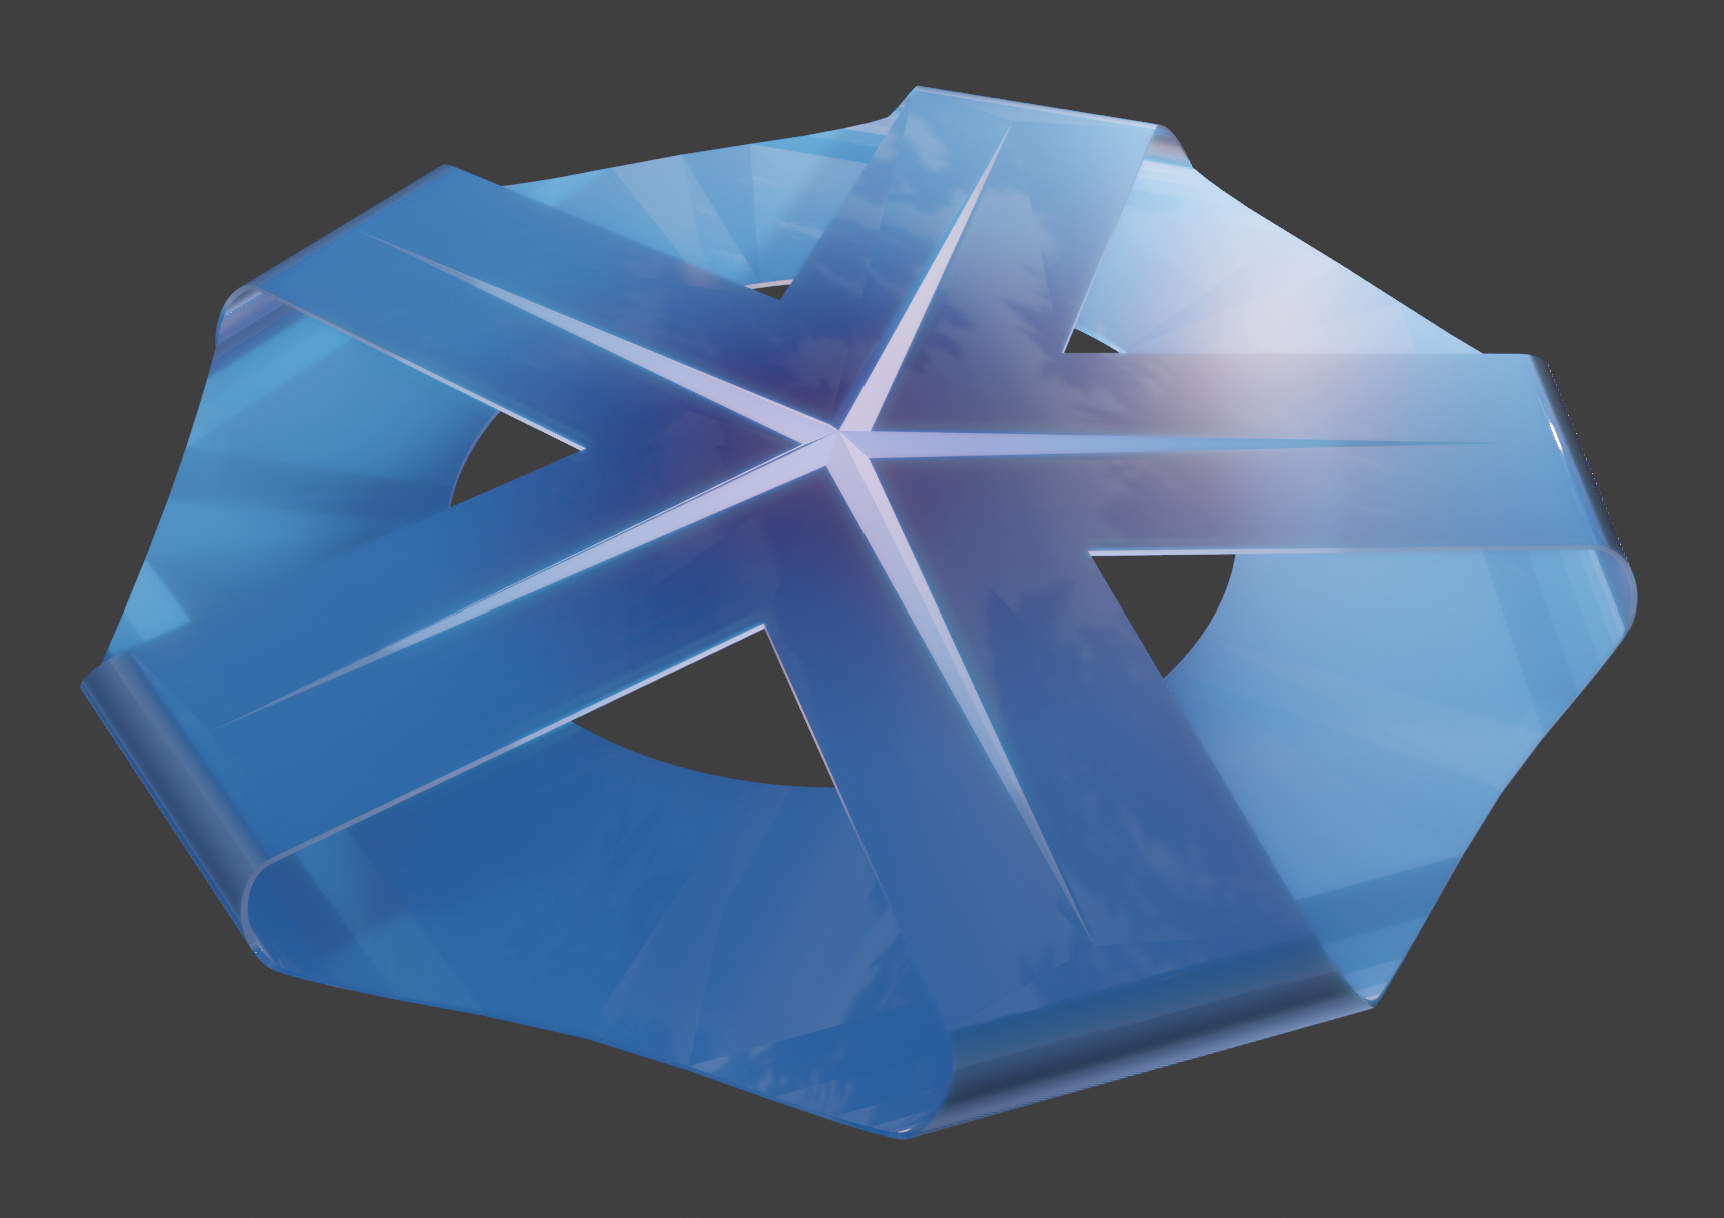
I’m trying to model a particularly challenging logo that appears to ‘fold back’ on itself. I’ve eventually managed to make the model, but now I’m trying to shade it, it has very obvious ‘cracked faces’ when trying to apply smooth shading. I’m guessing that it’s my topology, I’ve tried recalculating the normals, using an edge split modifier, but I can’t seem to find any way of getting rid of these artifacts. Can anyone help, or perhaps give some suggestions on how you’d go about modelling a shape like this that wouldn’t have this problem?
The faces that didn’t shade properly were slightly curved. I just flattened those, and manually marked the curved corners as smooth: LuckyLife Logo 2.8-fixed.blend (1.1 MB)
Edit: Mark sharp + edge split can fix it, but you should only mark the edges that need to be split. You had every face marked as sharp: LuckyLife Logo 2.8-Fixed 2.blend (1.0 MB)
Thanks so much for taking the time to have a look at this, zanzio, but I’m still getting the fractured look even after your edits.
I realise my topology is not exactly amazing, but I’ve done about 5 attempts at modelling it, and this is the closest I’ve been able to get so far - I created the hole with the curve geometry first, and then copied and rotated it 5 times before connecting them all together with edge bridging. Finally I added a circle for the bottom hole and filled in the faces. Any suggestions of a better way of going about this? Would there be a way to do it with subsurf modelling perhaps?
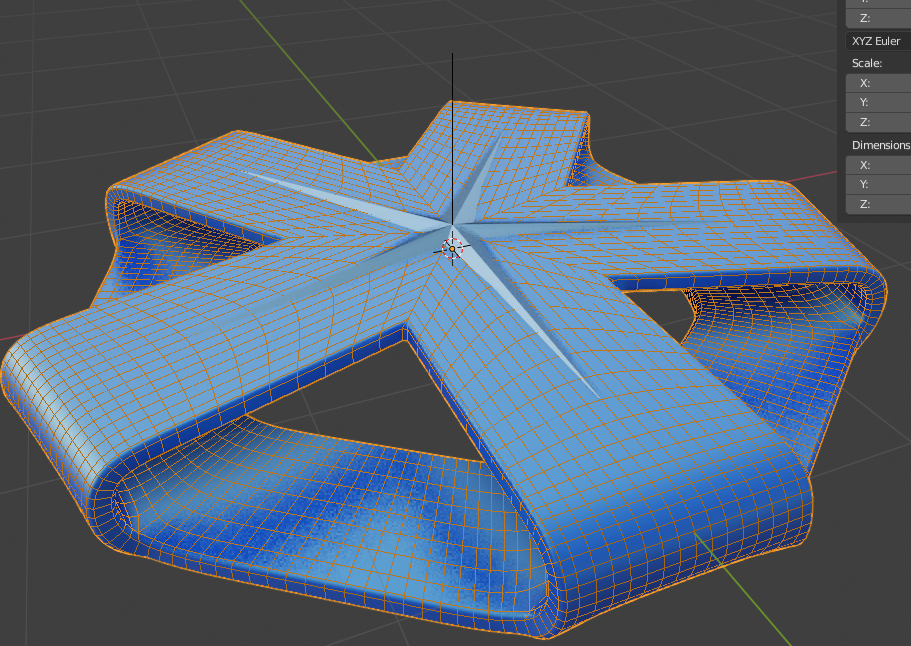
Modifiers can be your friend. In total there’s only about 30 manually placed vertices used to control this model. In particular, the array modifier with a control empty makes it so you only have to modify one “corner”. To work on one side vs the other, you can rotate the mesh via 72 degrees while in edit mode (or to work on the joining part, you can rotate by 36 degrees).
I notice your blender model of the logo has a round hole in the middle, but the image has a pentagonal hole. Because it’s using the subsurf modifier, it’s easy to move from one to the other by moving existing vertices.
The general “rule” of topology is: Work in quads, ideally flat ones. If you have triangles, then your shading will be funny. People go to great lengths to remove the triangles from their meshes…
I was working on this tutorial gif, but sdfgeoff managed to explain more or less the same approach I took. I’ll post the gif and blend here anyway since it might answer some questions people may have about using the modifier (large gifs seem to get scaled down to a thumbnail, so ill post a video instead)
sdfgeoff, zanzio - I can’t even begin to tell you how greatful I am to both of you - I was just looking for a couple of tips for how I might go about modelling this, and you both basically did it for me, and in less time than it would take to make a cup of tea, instead of the weekend I’ve had of nearly throwing my laptop out of the window!
There were definitely a few things in zanzio’s video that I would not have thought of doing, you’ve just shown me once again that no matter how close I think I am to mastering this amazing piece of software, there’s always more to learn!!
Also, I just realised another part of my error… Once I applied the shader I’d been working on to sdfgeoff’s model, the jagginess started showing again. Turning the specular value in the material right down smoothed everything out once again!