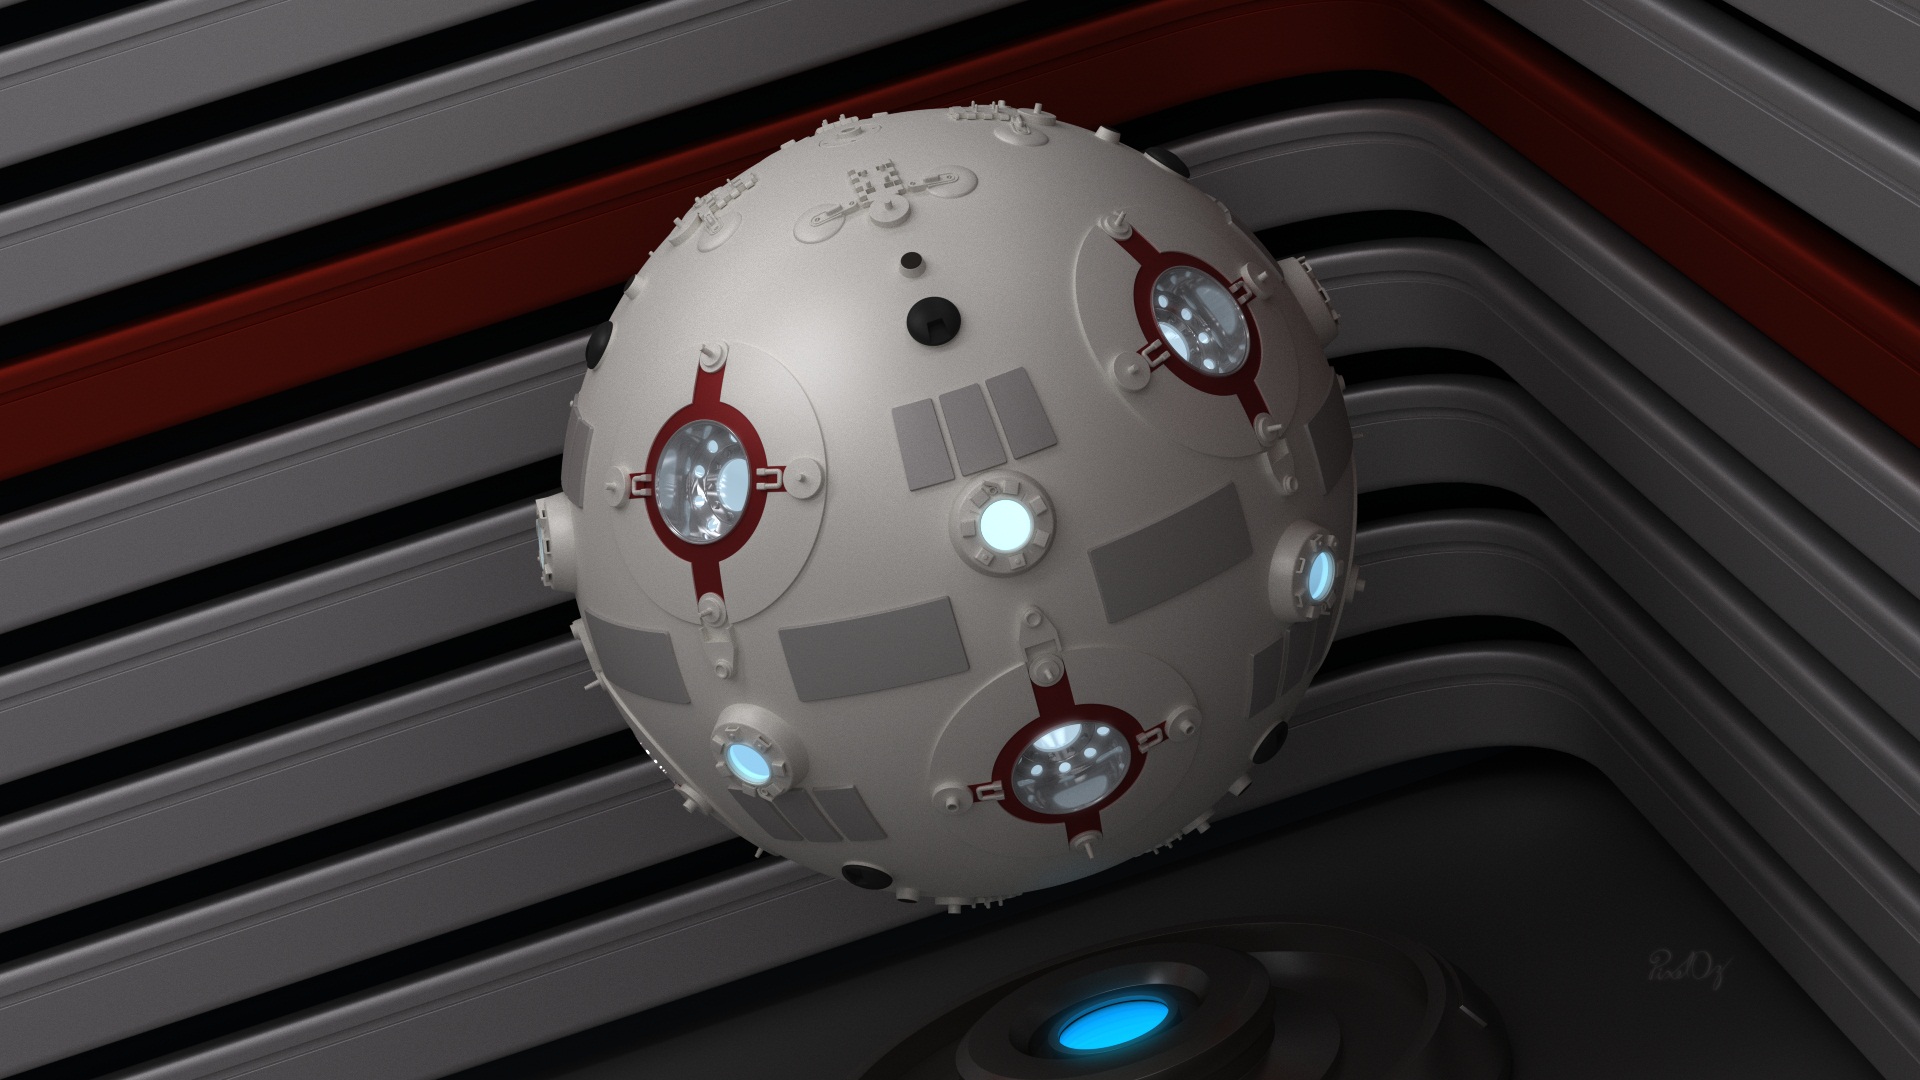
Star Wars Jedi Training Remote Blender 3D Model With Cycles Renderer Materials
Version 2.0 - New Very High Res Model (aprox. 1.8 million triangles in the remote) - Jedi Training Remote that appears in Episode II and in others (In Episode IV - A New Hope it originally appears but looking much more worn and old). Still even with all the improvements the model will be available for download completely free as it was with the older versions.
Model was created with Blender version 2.70a.
This is a new completely redone 3D model of the Jedi Training Remote that I did around 2012. This 2.0 version has every part remade and/or so heavily modified that is virtually a completely new model. Like the older version it has no texture artwork. So it is more like the one in Episode II cause those were newer (and by the way it was Episode II and not Episode I as I originally said in the older model documents cause that is where the young padawans appear using a bunch of these remotes for their training).
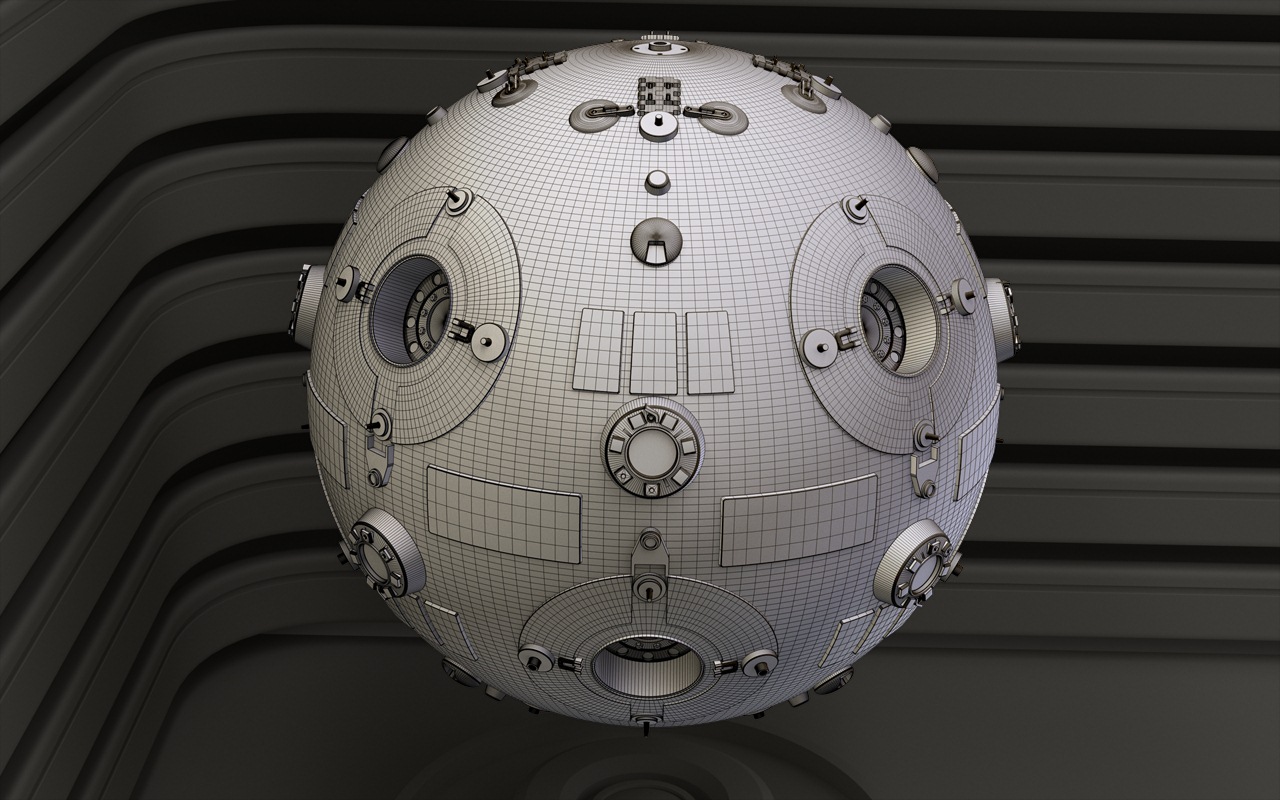
The older version that had the highest number of polygons had 253,154 vertices and 225,949 faces. This new version 2.0 has 968,213 vertices, 922,925 faces and 1,874,318 triangles. Most objects have been redone (from scratch) with more polygons for better close-up rendering quality and many other have been heavily edited to be much better.
All the objects have been cut or made flush with the corresponding surfaces on which they rest. What I mean is that in the older versions many objects went right through others and intersected with them instead and even though that worked fairly well now they have been trimmed and adjusted to end at the surface which is better. I redid the sphere with more polygons so when I cut these objects they were better fitted to its surface curvature.
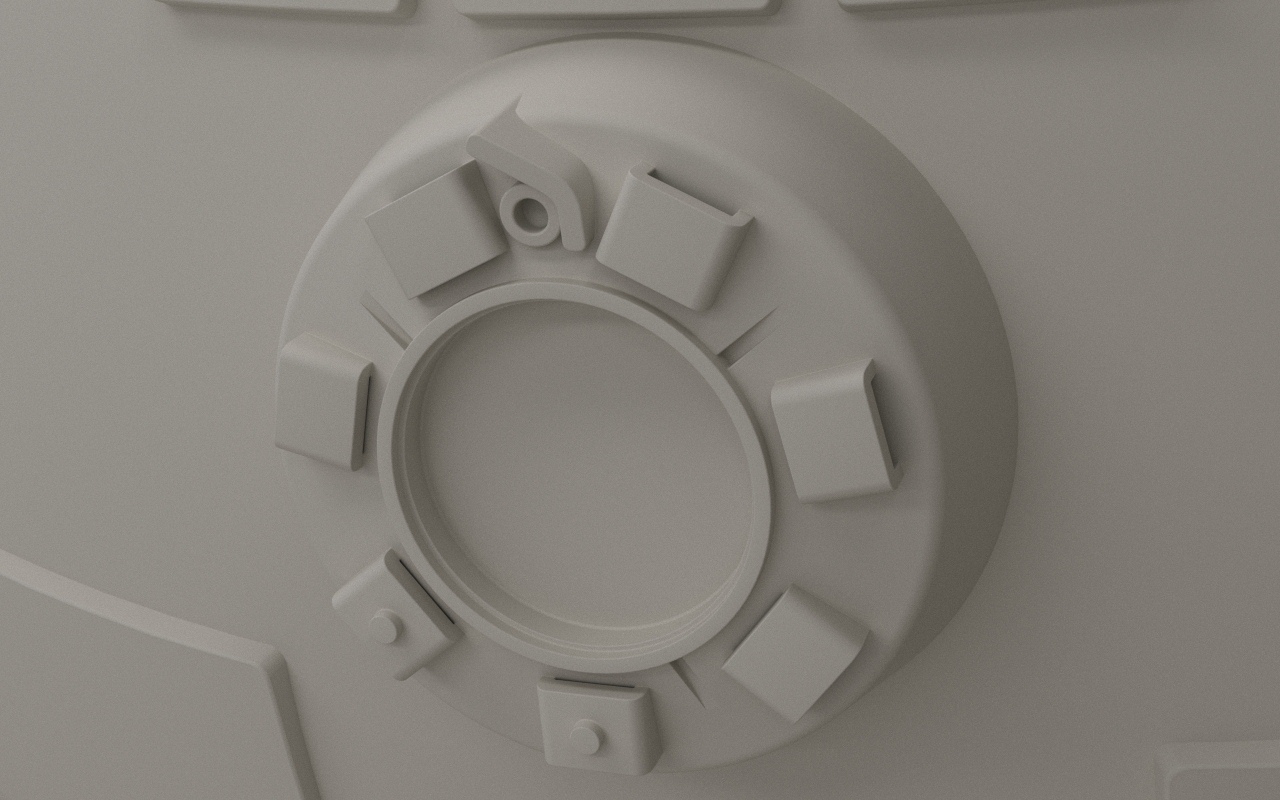
All the parts have been given round edges and/or round fillets contrary to the highest poly version in the older ones were only some edges were rounded and/or filleted. All parts have their details (greebles) welded together with the part seamlessly as a single mesh like in the real life prop when in the older models many of those details were just parented to those respective parts. That is why it has such a high poly resolution because of all the round edges and round fillets and all the added round resolution and integration so it can be rendered even in closeups without problems.
Look at the included clay render images particularly the ones named ClayRender4.jpg and Wire&ClayCombined1280x800-4.jpg and you will be able to see clearly how the parts have been completely welded together seamlessly. All parts are now done like that. Many parts sizes and proportions were adjusted to more accurately resemble the original prop dimensions and proportions. I think that this will make the model also better for 3D printing cause it will only need a few modifications for such a purpose (like giving thicknesses to the parts). The high poly res will make 3D printed models of better quality.
Note: The model needs an environment texture for it to render like the wallpaper that I did (otherwise the scene will render pinkish with the missing texture). Info on where to get this same free HDRI texture and how to put it back into the scene is in the accompanying docs titled AboutThis3DModelVer2-0.pdf.
Also in that document you will be given a much better description of the changes and improvements given to this new model.
You can download it from Deviantart here:
And my usual Mediafire backup folder:

Other images:


This last one similar to the older wallpaper but with the new model and rendered in Cycles instead:

Don’t be confused, in the render at first sight it may look very similar to the older models but I fixed a helluva lot of things all over the model, it is almost completely redone. Once you open the file and inspect it carefully you will know that is a whole new beast.