here my current attempt to model a stuka dive bomber.
Just started yesterday, with several failing attempts.
Needs a lot of work still… especially details and good texturing
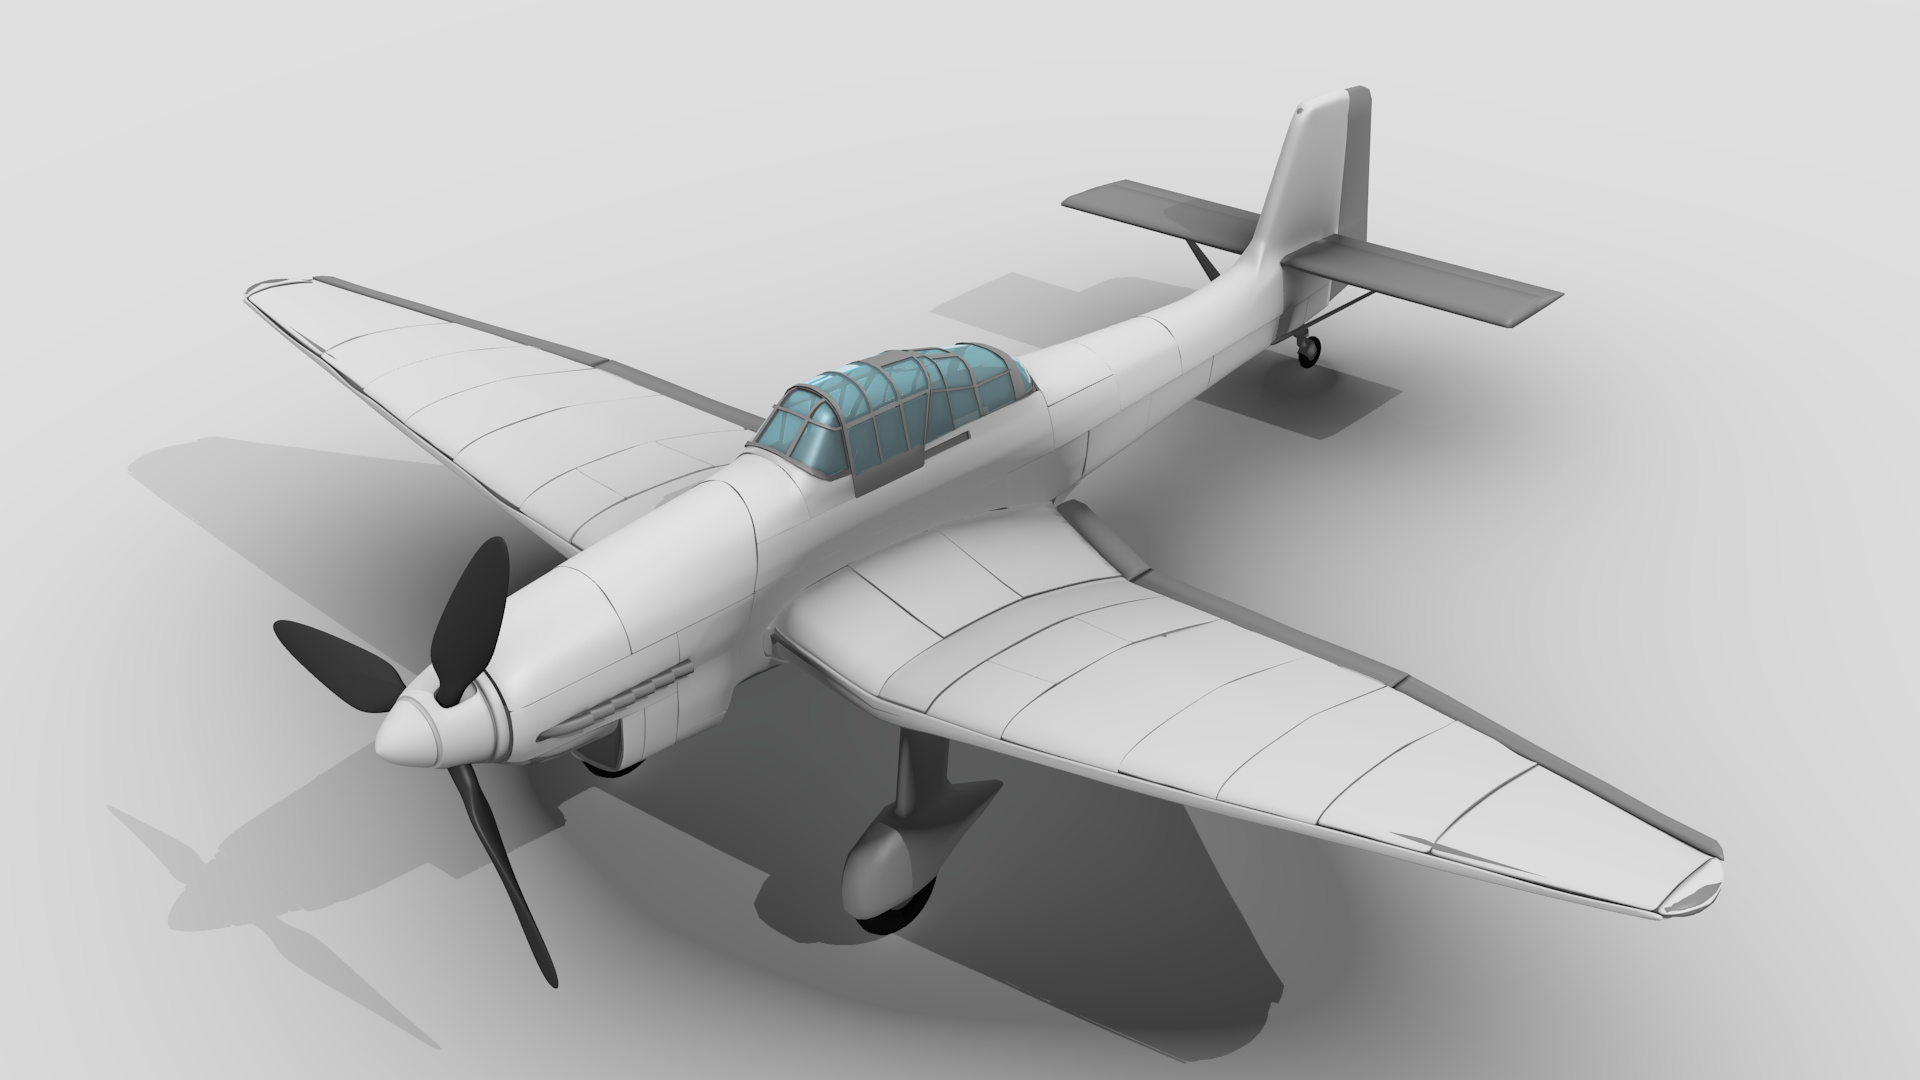
finished 1st pass of paneling mostly, need to do that at bottom of wing too and started with 2nd pass (engine bay and upper rear fuselage to sharpen and narrow the gaps between the panels, if you know a better / easier way to do this please let me know… i want to bake this to a normal map later so the polycount can be reduced, will also add further details when i know how they actually look on photos, since the blueprint i use is not the very best and leaves lots of room to guess how stuff looks.
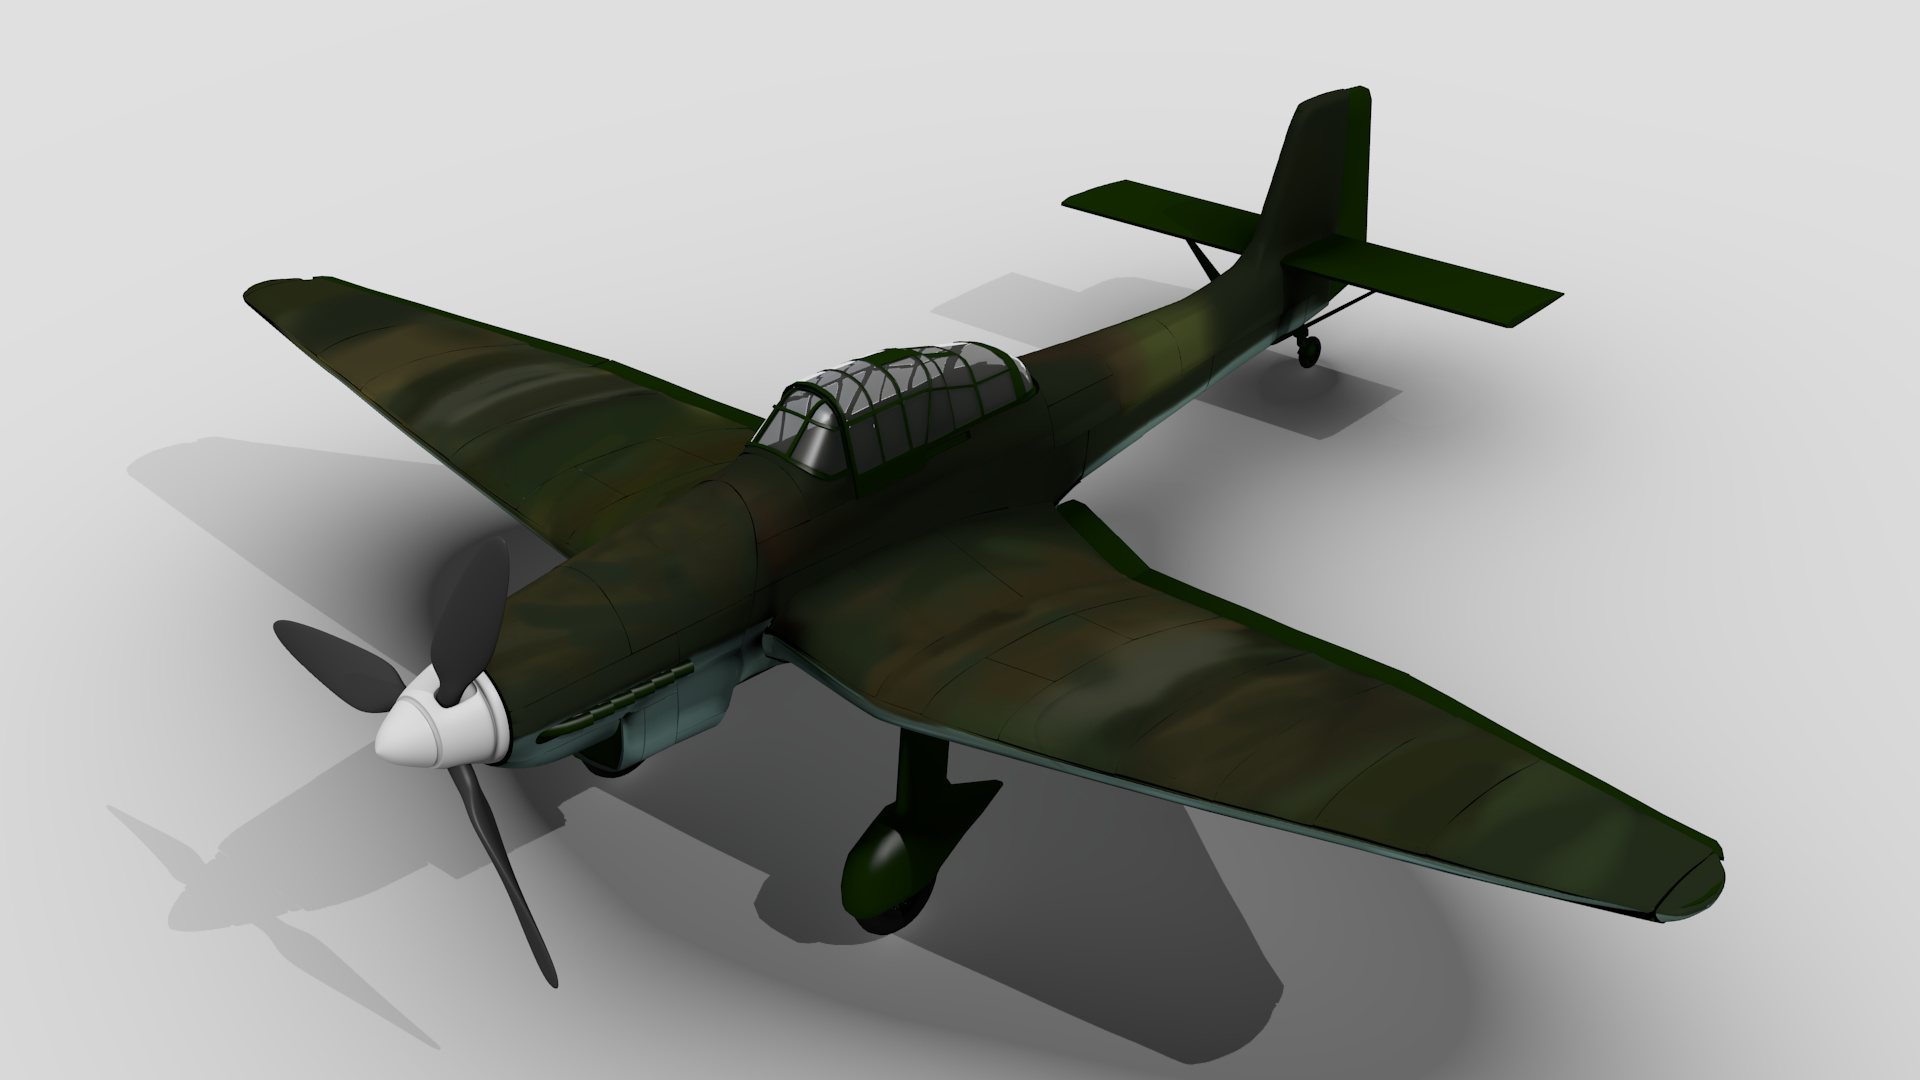
update: painted the stuka with basic camouflage, projection paint, but i lost newest image, thought packing enables autosave of image but its not enough, just forgot to re-save image, so enjoy this pic, wont be reproducible exactly.
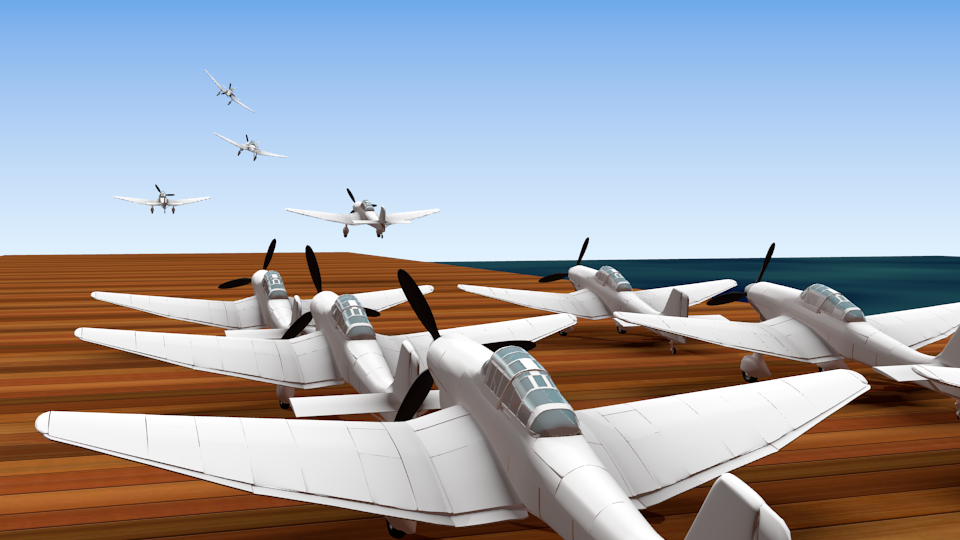
so… now i tried to quickly assembling a scene with my stuka model. I am still not sure what exactly i want to achieve - but i think i stick to a still image, then next question: closeup of 1 model or a more distant total view with more background visible - in this case a lower poly version would be enough, and not even that paneling was necessary i think. Hmm… ok i wanted to show the model on the ground, some instances of it lined up for take off and some already in the air. And i chose a carrier deck and a (terrible looking) water surface -> could have been on the graf zeppelin, if it was built… so here my first quick and dirty scene arrangement, with only the most basic stuff, instances of the same high poly model and so on, due to high poly count occlusion preprocessing took 5 minutes
so enough talking, here a “sketch” render after playing with the camera angle and some arrangement.
hmm, just need to find good tutorials about creating my own bump, normal and spec maps. But as prerequisite i need some panel texture. Trying to create my own one by unwrapping the underlying mesh and to “bake” the gap positions between the panels into a texture. I must find a simple way to do this… because paneling the aircraft took a while and was tedious.
you can try this (believe me, I would have gain years if I’ve read this before) : witold’s book But you’re right, it took a while. But unwrap all the mesh and paint panels over is the best way imo.
finally i just used the same blueprint as for modelling as bump map after uv-unwrapping the model project by view, needs some fixup at the bottom (not visible here), why repaint it all when i can use it directly… do you think the resolution of the bumpmap is ok ? i think yes. now need to paint in another image with the same uv-layout -> possible with 1 uv map or do i need another ? and the image sticks to the uv map somehow, do i need to re-unwrap or can i reuse that uv map ?
Well, it works a lot imo. For the resolution of the bump map, it could be enough if you don’t plan a close-up. For me, on the same uv layout (but different images of course), you should have bump map(s) (like the one you already have), the diffuse/color map and spec map. Mix the whole using nodes. Hope it helps !
[edit] the other - and prefered on my side - solution is to draw your own bump map based on references [/edit]
The bump map looks better but seems a little soft. The bump map has a more realistic panel look but I think a higher resolution would help the panels “pop-out” a little more. Awesome job!
so… i made a bumpmap with inkscape (traced the necessary blueprint parts by hand and begun with rivets, but they are too big and blurry, so i guess i make strokes smaller and reduce blur in inkscape. Also i tried to make a camouflage, a more geometric one.
where exactly does the part involving the nodes come in ? i have simply multiple textures on top of each other now (paint and bumpmap, but i used BI up to now as well)
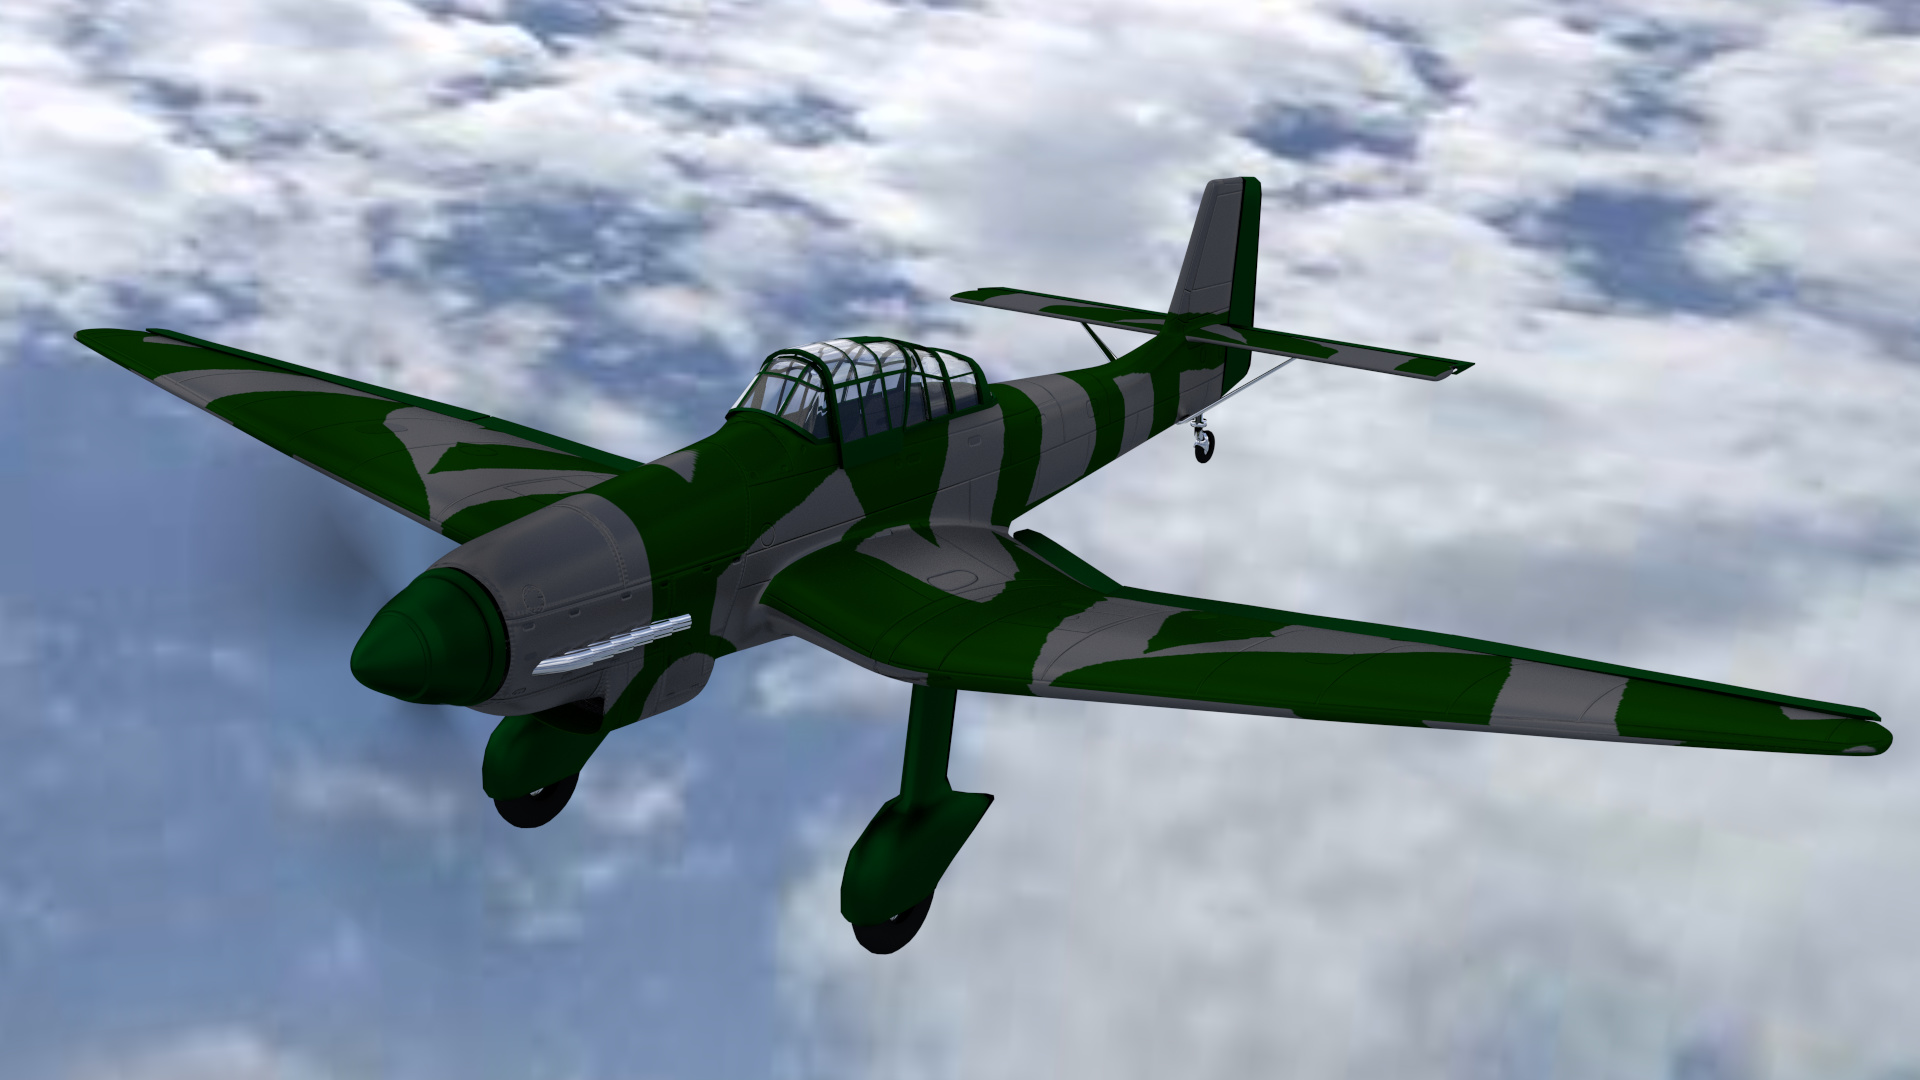
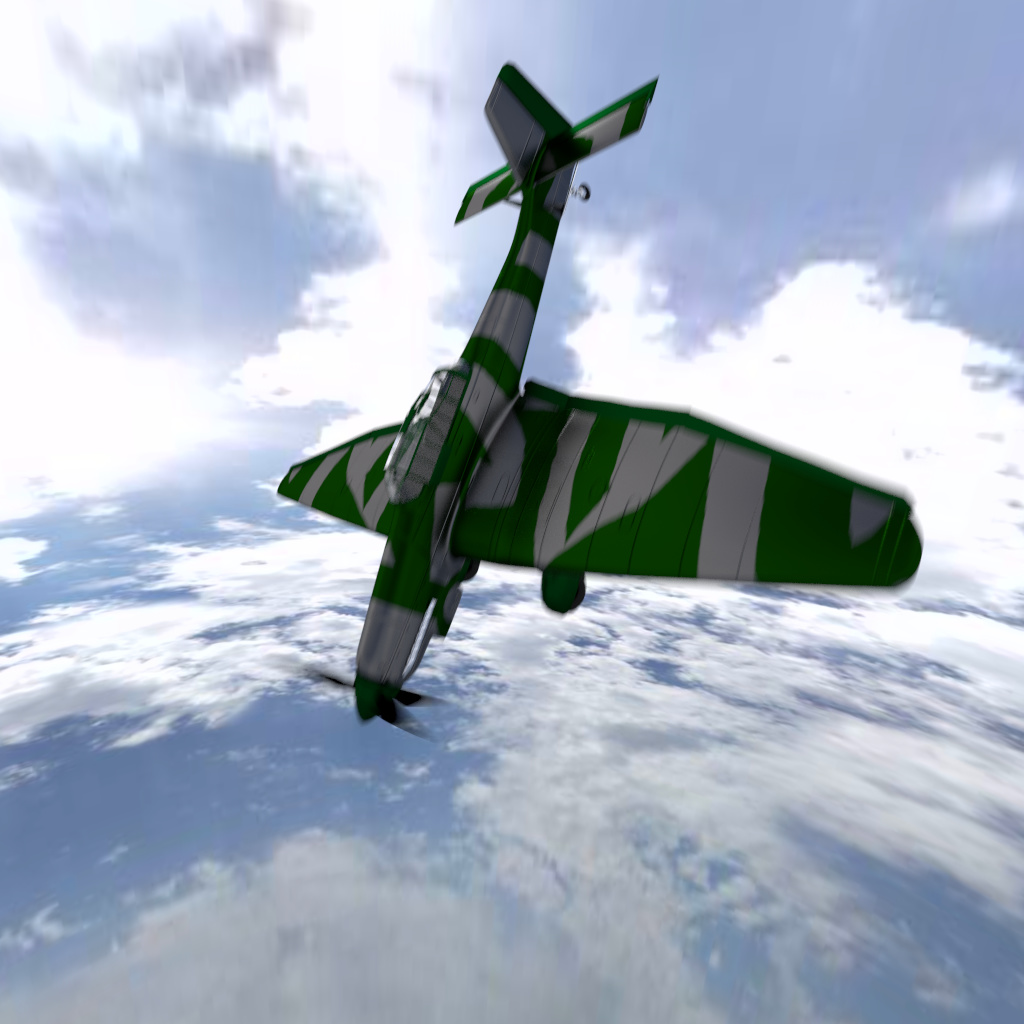
update: a cycles render to test out environments and such and how textures are applied in cycles, also used real motion blur, the shape is ok but its not dark enough, so the propeller is barely visible. unfortunately vector blur did not work properly (blades looked like not rotating at all and had artifacts on them… Any way to darken the spinning propeller a bit, tried with compositing renderlayers but i am not so good at that. Any good hints how to improve the render (i think another camera angle might be necessary too, and some more details on the plane maybe ) ?
The overall model shape looks good: you have properly recreated the general geometry and proportions of this airplane. Of course, it is not a detailed model, so this simple bump map is acceptable at its current level of details. If you want to recreate a historic scene, try to find painting scheme of a particular aircraft from the same period and appropriate Luftwaffe unit. Your model is missing its crew. You can use this free pilot model from my site for this purpose. (It wears an USAAC uniform from 1940-42, and does not resemble Hans-Ulrich Rudel at all :), but you can remake it).
When you are going to use motion blur effect, use a Directional Blur compositor node to blur the background (the preferred solution) or the airplane, but do not blur simultaneously both of them. (When the camera “stands on the ground”, the flying airplane is blurred. When it “flies in another airplane”, the background is blurred).
I hope that these short comments will help you to create a stunning scene!
Very good right now… whats about making a air combat scene with a hunted stuka and some explosion-effects (made with smoke system)? And doesn´t the paint of this plane has some glossyness or reflections ?
its been a while since the last attempts of mine…
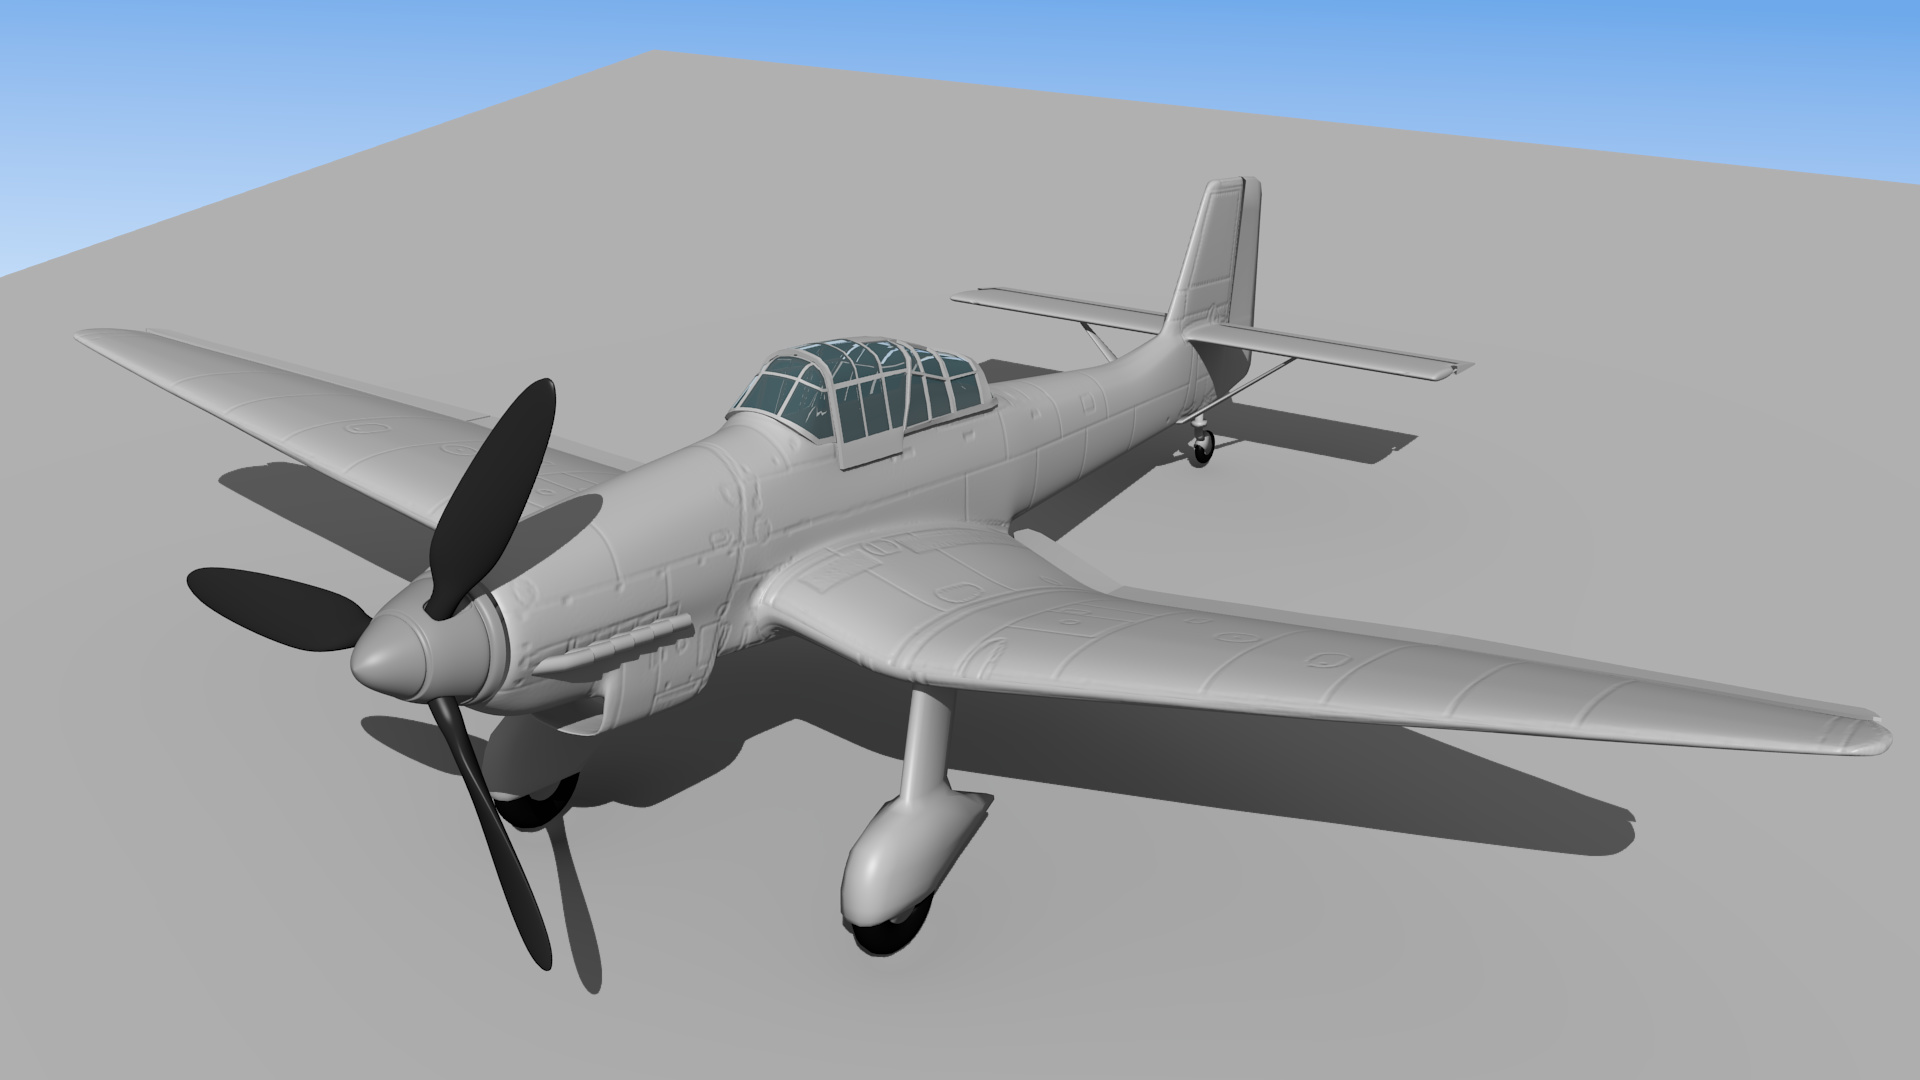
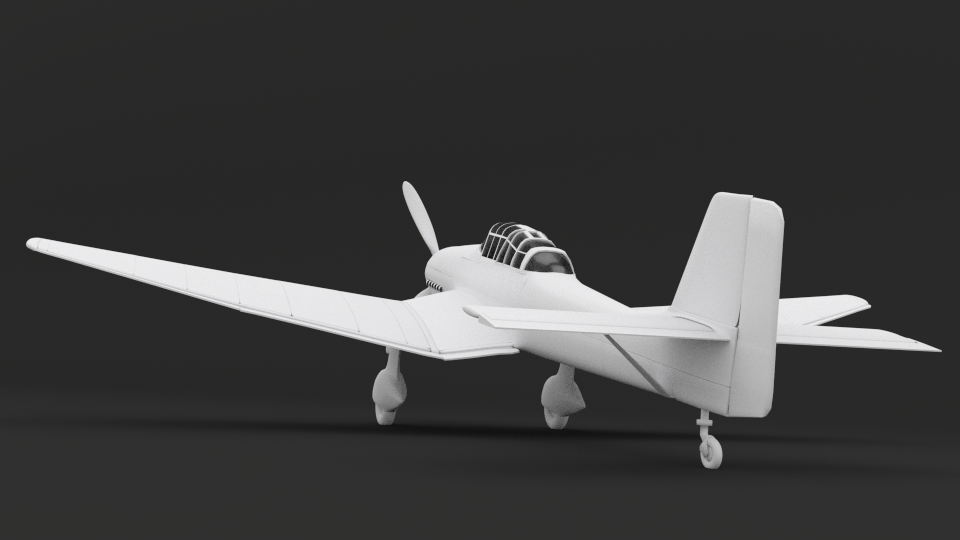
I basically gave up the bumpmap panel idea and decided to cut the plane in panels actually and solidify them.
In my opinion this looks better than faked with a bumpmap, but about the rivets… hmm i think those will remain a bumpmap, drawn with projection paint.
I tried to make 2 clay renders in cycles of my model, but i think i did not get the rendering right… in solid mode the model looks better… What do you think ?
This time i actually try to finish the modeling with more details before i start texturing, and dont mix up all steps together.
However I can’t help but notice it’s missing those little airfoil pieces that go on the ends of the horizontal stabilizer on the tail. They’re fairly small, but still distinctive enough to notice with this particular aircraft.
Some variants also seem to have spinners on the landing gear fairings. (I think those are the thing that give this plane it’s distinctive screaming divebomber sound.)
Keep in mind the more detailed you go on a historical model, the more people will notice the parts that are missing. Makes it more challenging, but worth it if you can get them all in there.


 here i tried to sharpen up the gaps, the bitmap exported from inkscape has 5000x3000 pixels roughly, that should suffice.
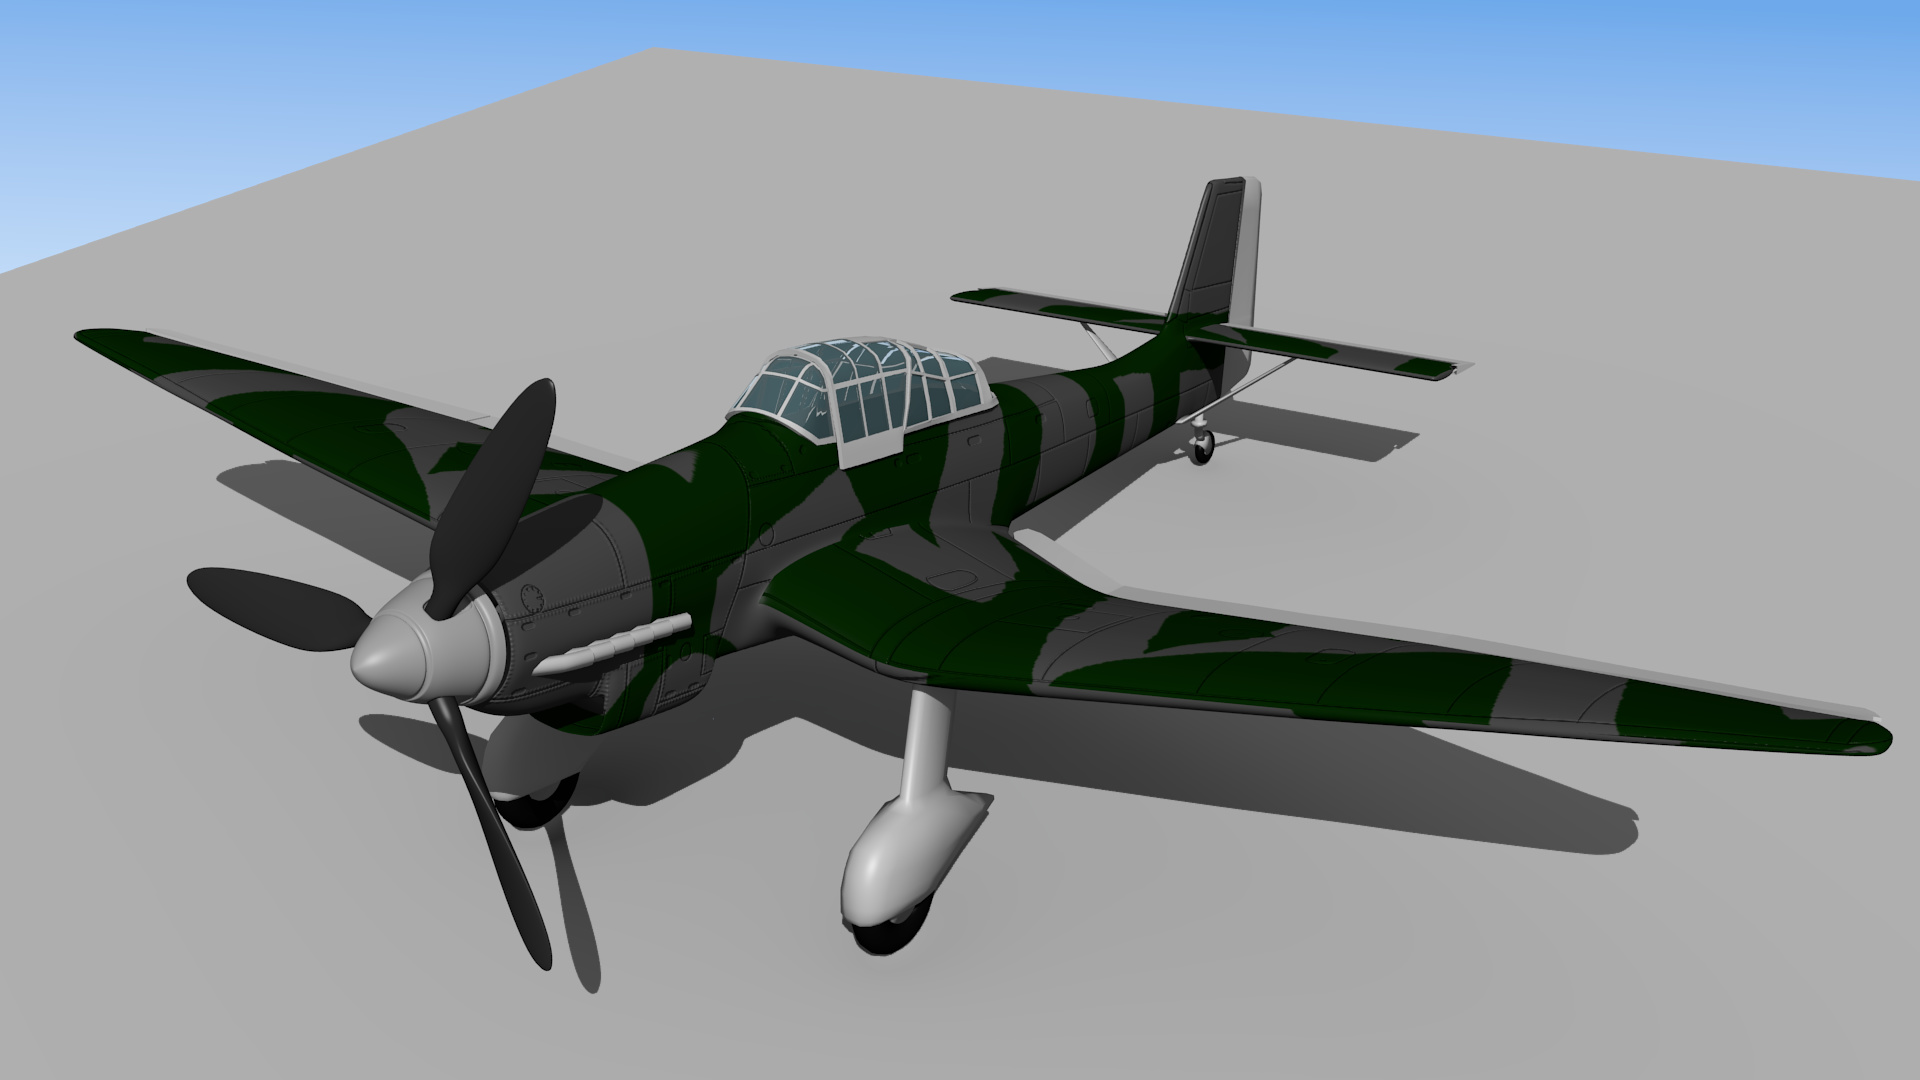
