Hi Guys,
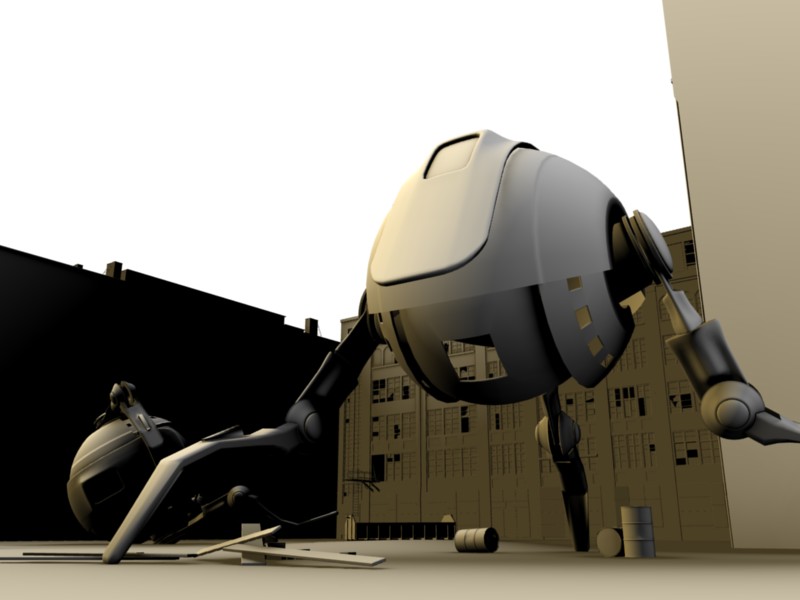
Taking a break from sterile interiors. The main item here is the environment, the two robots are old model I grabbed from a previous scene and re-shaded for Vray.
Some of you may recognise the set of the latest European Nissan Crossover ad, which was shot in Berlin by a bunch of Parisians. I just happen to live next door to the location so I went two weeks ago to take some photo refs and rebuilt this in Blender. I’ve added a few shots focusing on the environment in different light and weather conditions. The skies are modified version of CGTextures’ amazing panoramic skies.
The last one is my favorite, the first one close second favorite.
.
I’m not a fan of the over exposed sky style or the wonky camera style but oh well, the third render was quite interesting but lacking, something. Needless to say you got the shaders and lighting spot on, its extreemly realistic.
.
Out of interest, did you detail model the buildings or are they just a clever displacement map? The second, third and fourth renders have a slight, photo on a plane feel to them, they dont quite offer the same satisfying depth the last and first renders have.
.
The third and fourth renders are a bit too realistic over interesting for their own good, in fact i’m sure you could have got a more interesting shot with a camera.
.
Anyways, great work once again.
Animal: Thanks man. The building is actually modelled. It includes three meshes - one for the main shell; one for the window frames, wood planks, metal sheets and small details; and one for the windows. Each has its separate diffuse/bump maps. The naked walls to the side have far fewer details modelled. For the modelling, I started with a plane projected on a background photo of the texture and worked mainly by extruding faces. I can upload a wireframe or clay render next time I sit at my laptop so you can see what’s texture and what’s geometry.
Amazing!
Seriously, you could enter these into a photo contest, nobody would even know they were cg!
(not a good idea
Any chance of sharing that little shrub?
Amazing work as usual, I only see one flaw…the DoF is a little too much on that 3rd image…other than that I wouldn’t believe they werent photos. Just curious, is the DoF done with the vray Dof or zdepth?
TCrazy: Both, is the answer. Image 5 and 7 have in-camera DOF, the rest is post. I normally prefer using DOF Pro in PShop for DOF, because of the shorter render times and tweaking flexibility (and the fact that it allows you to do “non-physical” DOF. DOF Pro is amazingly accurate (provided that you have a decent Zbuffer image). The only exception is when you have lots of clip maps, transparent glass or reflective surfaces, in which case post-pro DOF doesn’t work because the ZBuffer can’t “see” those.
Rather then looking for semi-constructive comments which my monkey mind is always ready to generate endlessly; I am going to just say this work is very inspiring to me in terms of seeing what can be done by a talented artist, thank you for setting the bar so high and sharing this work
Ohhhh, wow. I could have guessed it’s a real photograph(?) with the absence of description. You nailed it again, BbB. The shading and lighting at atmosphere is perfect. And you really got me struck with those sphere mecha of yours. hehe!
Thanks a lot for the super nice comments, guys. Here’s a BI clay render showing the actual model without the textures (minus the vegetation).
Tcrazy: For the sky, I downloaded a few panoramic skies from CGtextures.com at the highest possible resolution (you need a subscription for those, but the skies alone are worth the money), then doubled the vertical resolution in Photoshop and filled the bottom half with a dark colour (you need to do this in order for Vray to project the map without distorsion, otherwise the sky will appear elongated vertically). Then I loaded these images as textures in Blender’s environment slot. for some images, I used the same texture as GI, background and reflectance maps (you need to load it three times - see Andrey’s website for an explanation). For some images, I used an HDR image - a different one - in the GI slot, for some, just the normal VRay sky.
About two weeks, working in the evening.
That doesn’t include the robots, which I plucked from an old scene of mine.
The modelling is pretty straightforward and boring. Most of the work actually went into making the textures, texturing the models and setting up the lights.