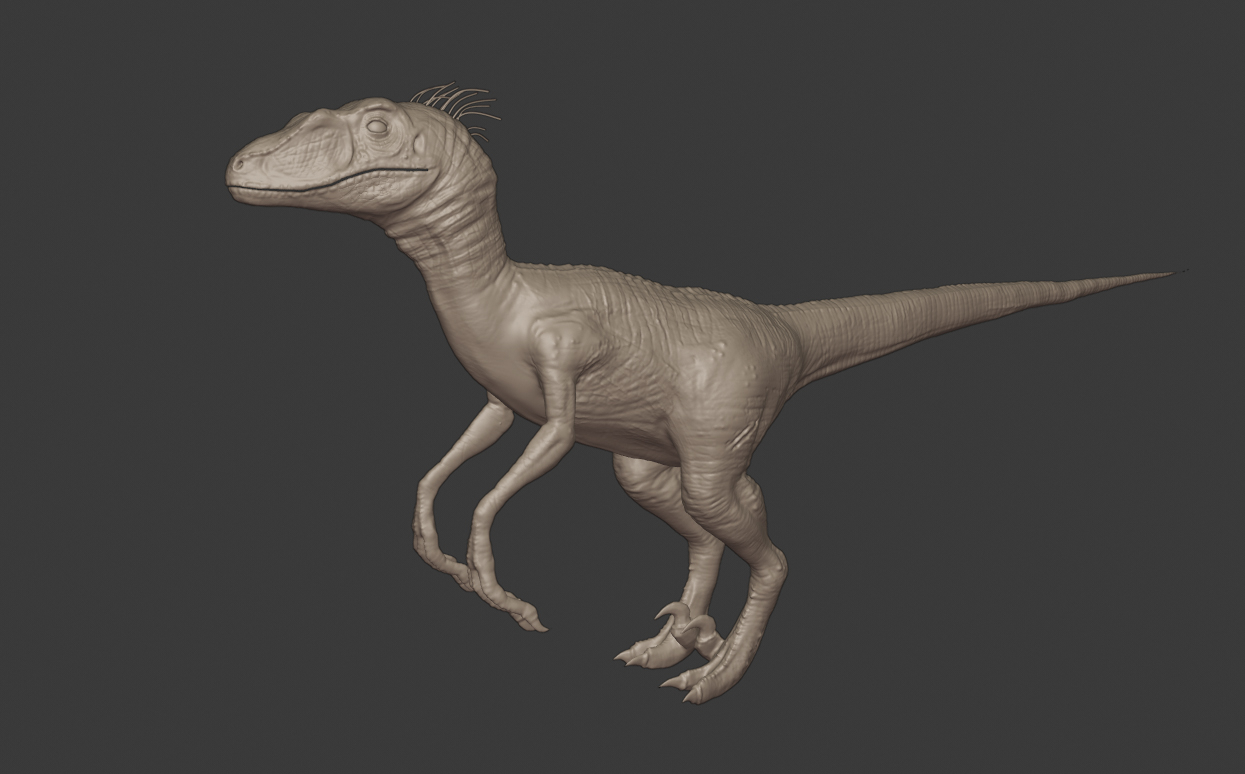
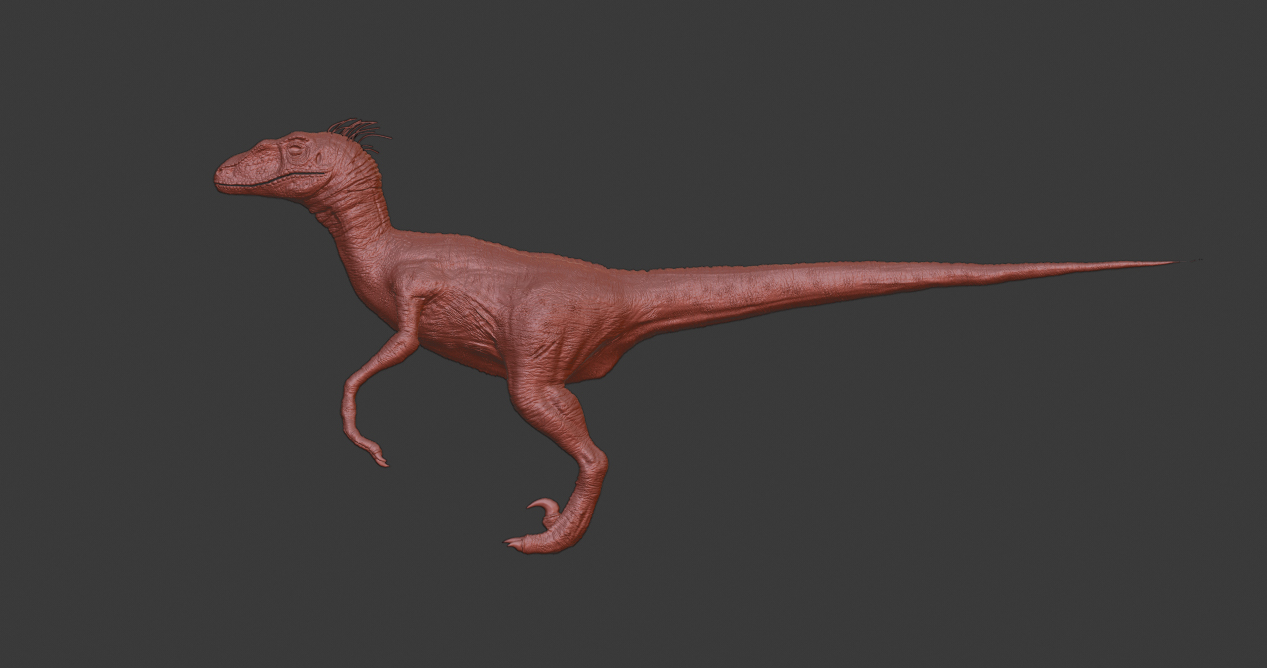
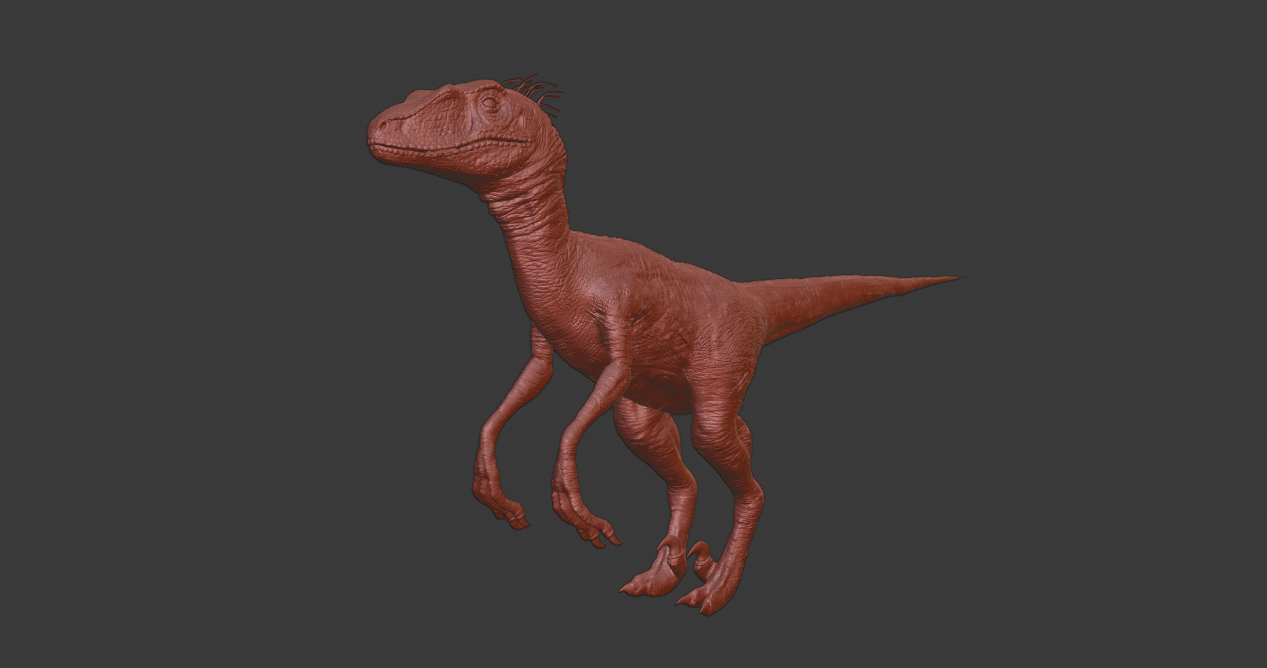
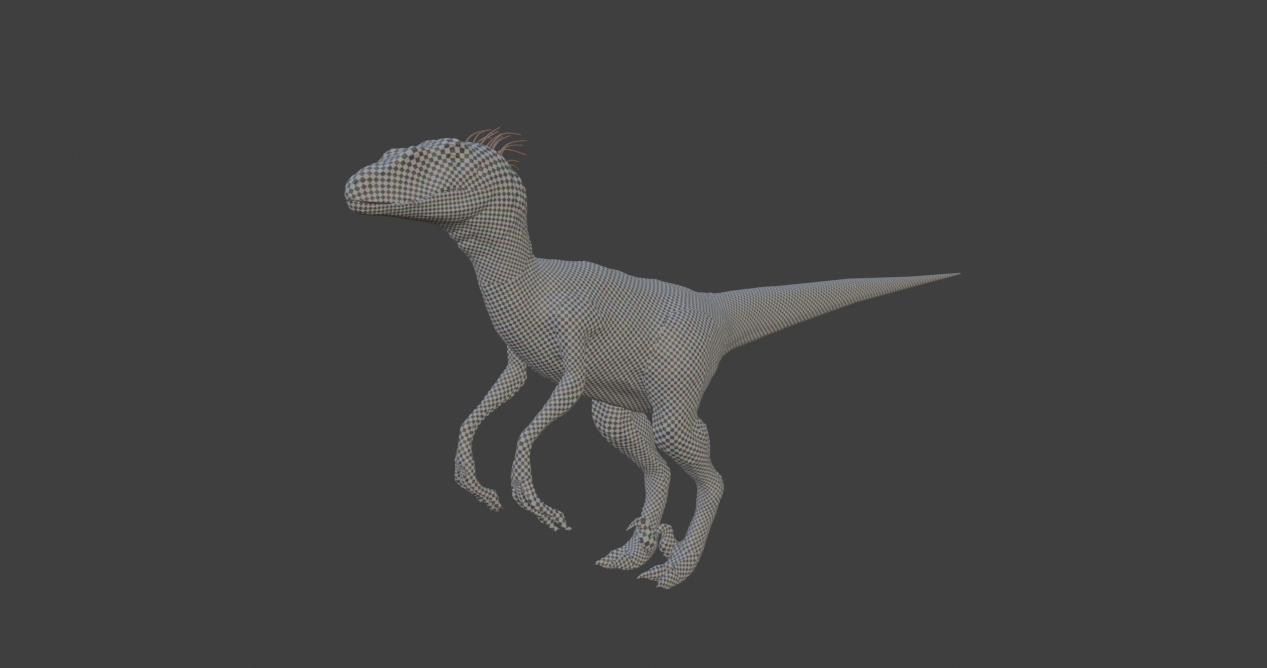
So I have have sculpted a velociraptor based on the Jurassic Park III movie. I used dynotopo and would love to get some opinions on how to push the model even further. It was completely sculpted with a mouse so it’s quite a pain.
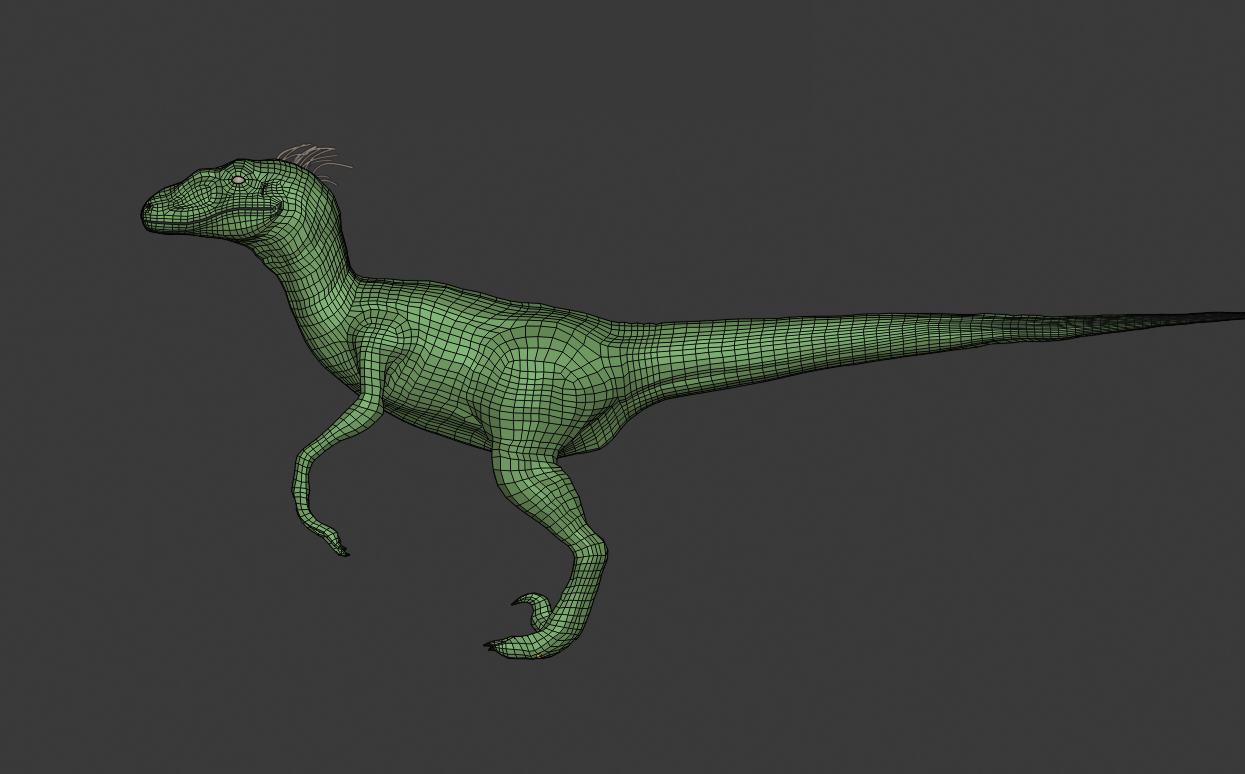
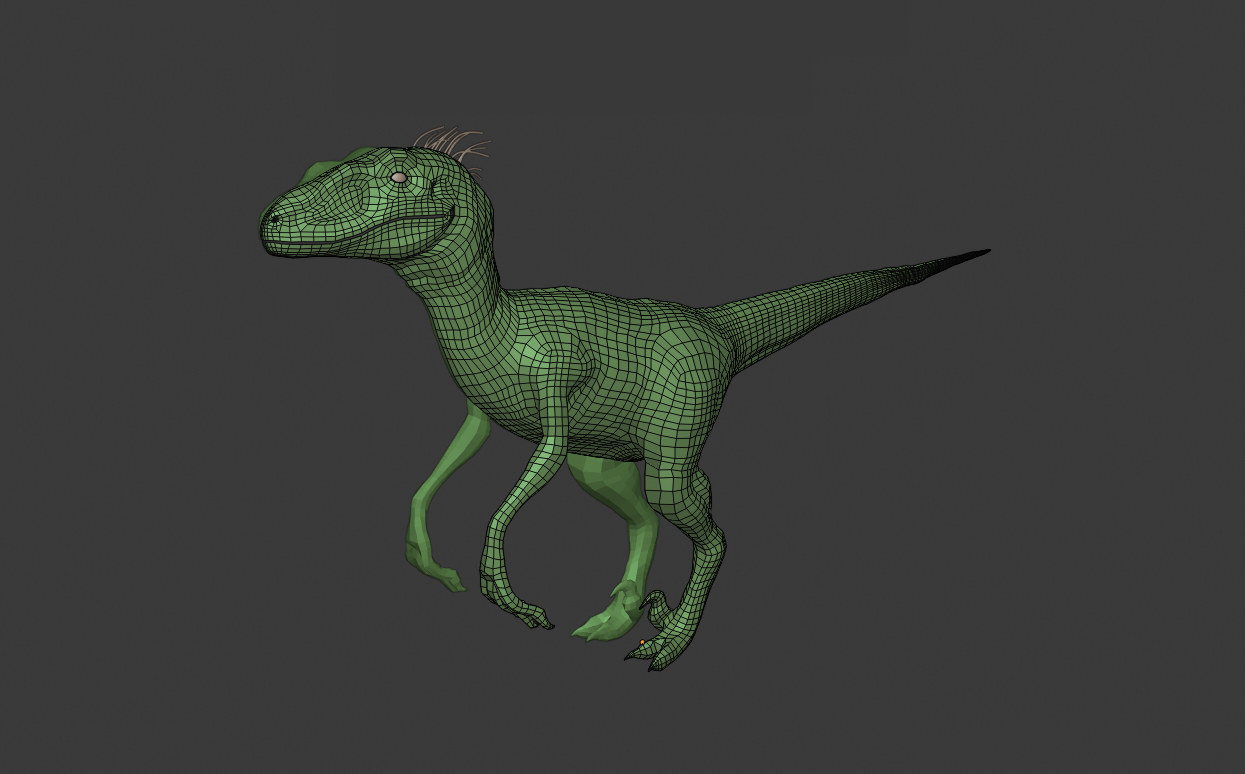
I have also started doing some retopology using the shrinkwrap modified because I plan to rig the dino when everything is finished.
Hopefully you can answer some of my questions:
Should I go more detailed on the sculpt? My computer is struggling quite a lot with the poly count as it is or should this be good enough?
What would be the best way to model/sculpt the inside of the mouth at this stage?
What steps do I have to follow to bake a displacement map from the sculpted model onto the retopologized model?
ok to add more detail in the mouth you will need to add some shape key or single bone with automatic weights as parenting mode to that part, but i dont know if that will be a good idea… always ensure when sculpting someting likes this, that parts like the mouth or something similar must have a open space to be able to sculpt, LOL i also did a velocirator but i couldnt finish it lol… for the baking of displacement go to bake settings with cycles as render engine, then go to node editor add a material to the low poly model, and add a image texture, create a texture of 2k or 4k of resolution, then keep selected the node with being conected to other node, then go to the bake settings and select displacement option in bake setting, mark selected to active, set a margin of 16 px if your are using 2k, if its 4k double it…then right click select the high poly and then shift+right click select the low poly and click in the bake button…PD: in sampling set the sample of render in 16 and performance set the tile option to to the texture size you are using if you dont do that its gonna bake damn slow… PD again lol : there is no displacement option in b3d 2.82 LOL dafuq… i think your retopo needs a bit more smoothing in the edge flow in some parts…
Yeah, I just found out there is probably no way to bake a displacement map in Blender if you are not using bake from multi-res. So I am pretty much stuck on baking for now, I got no idea how to solve this.
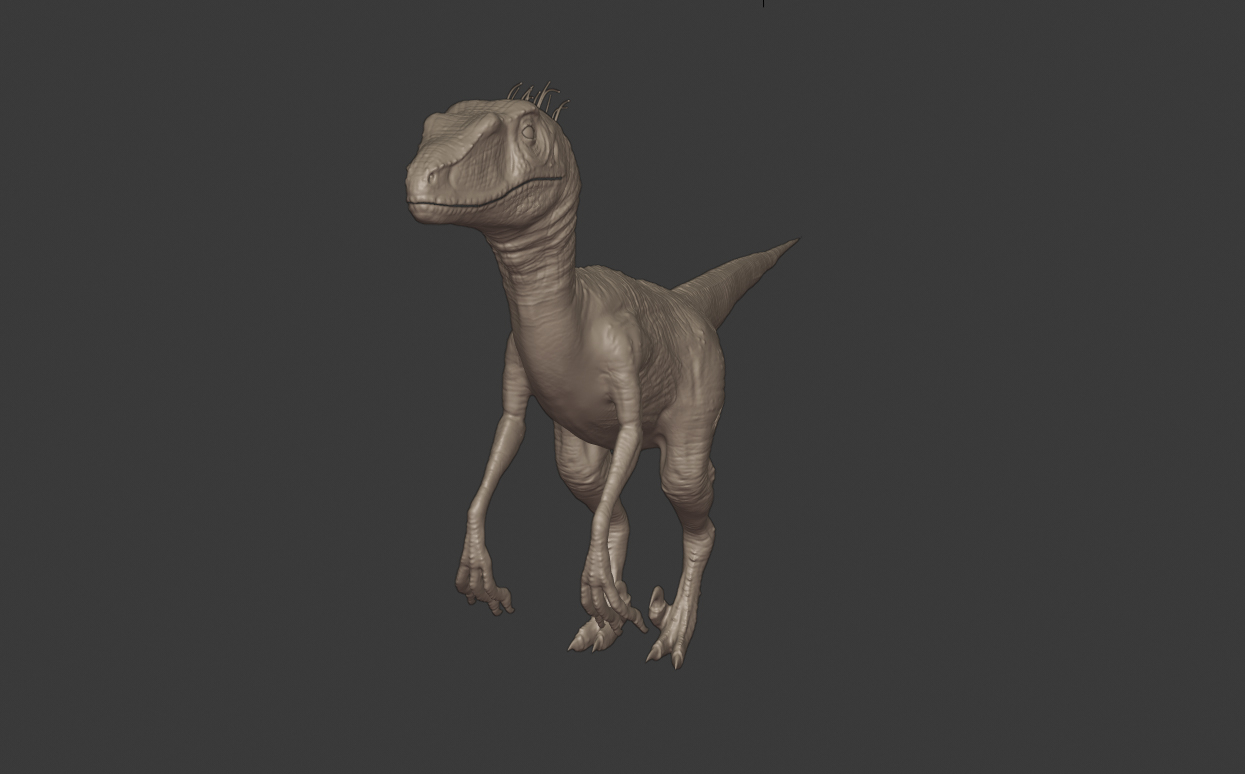
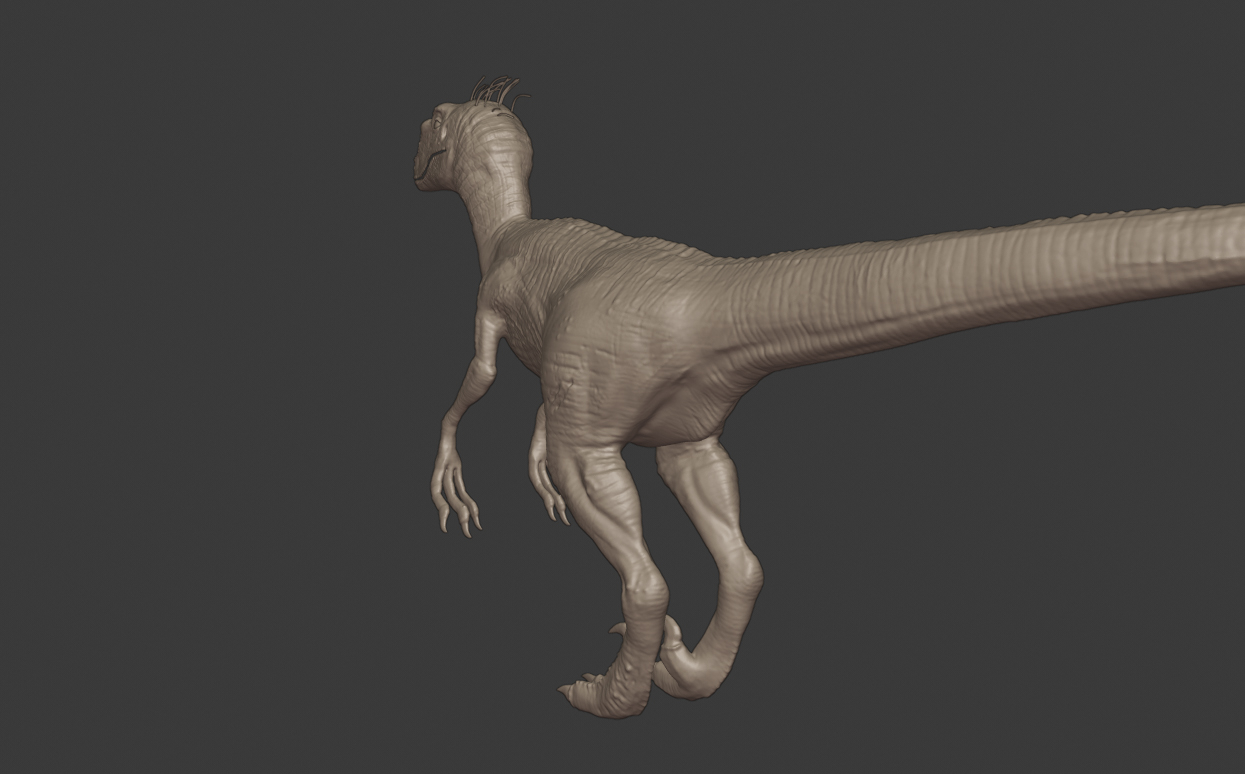
Some update pictures, finished the sculpt (pushed the details a lot more), retopologized the model and unwrapped it.
Please let me know if anyone has any suggestions on how to bake displacement from a dynotopo mesh onto a retopologized model.
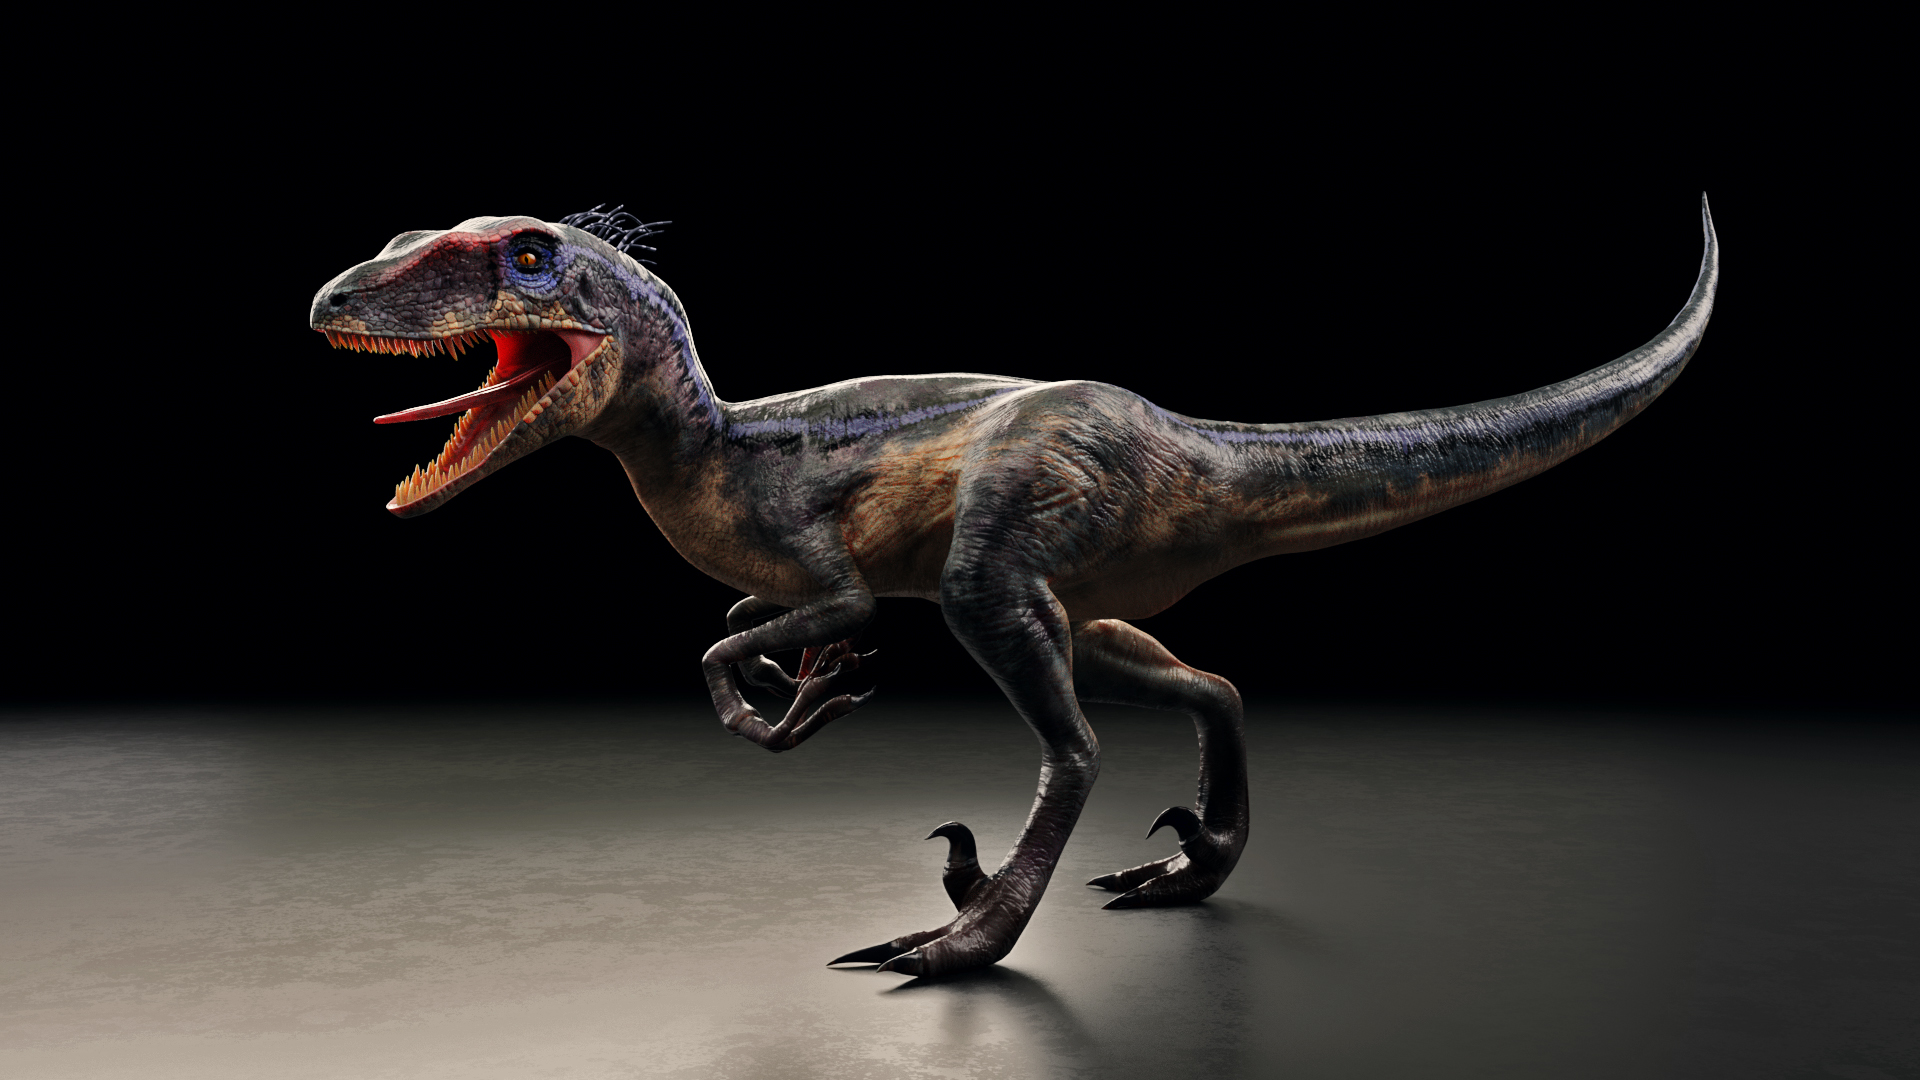
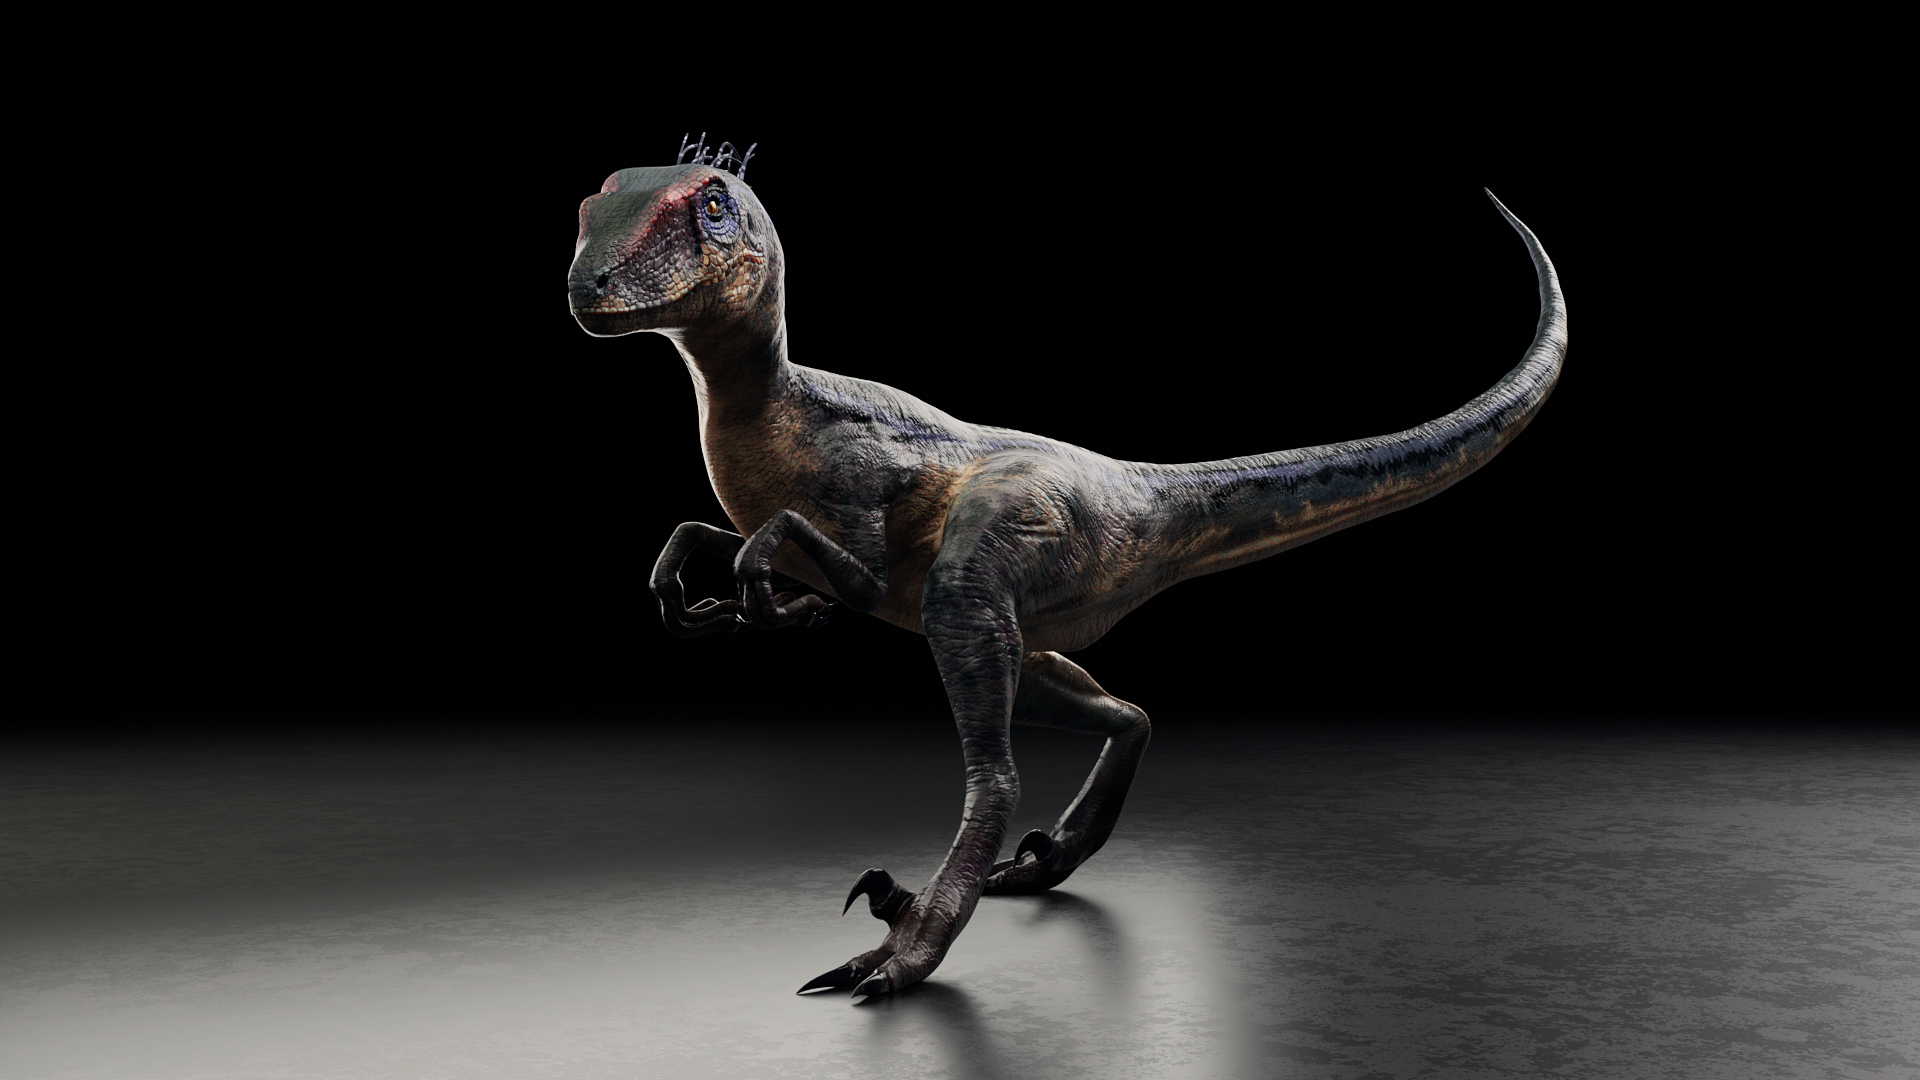
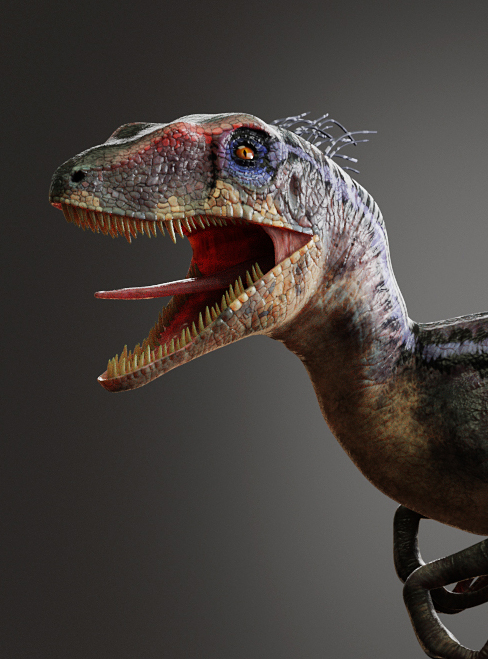
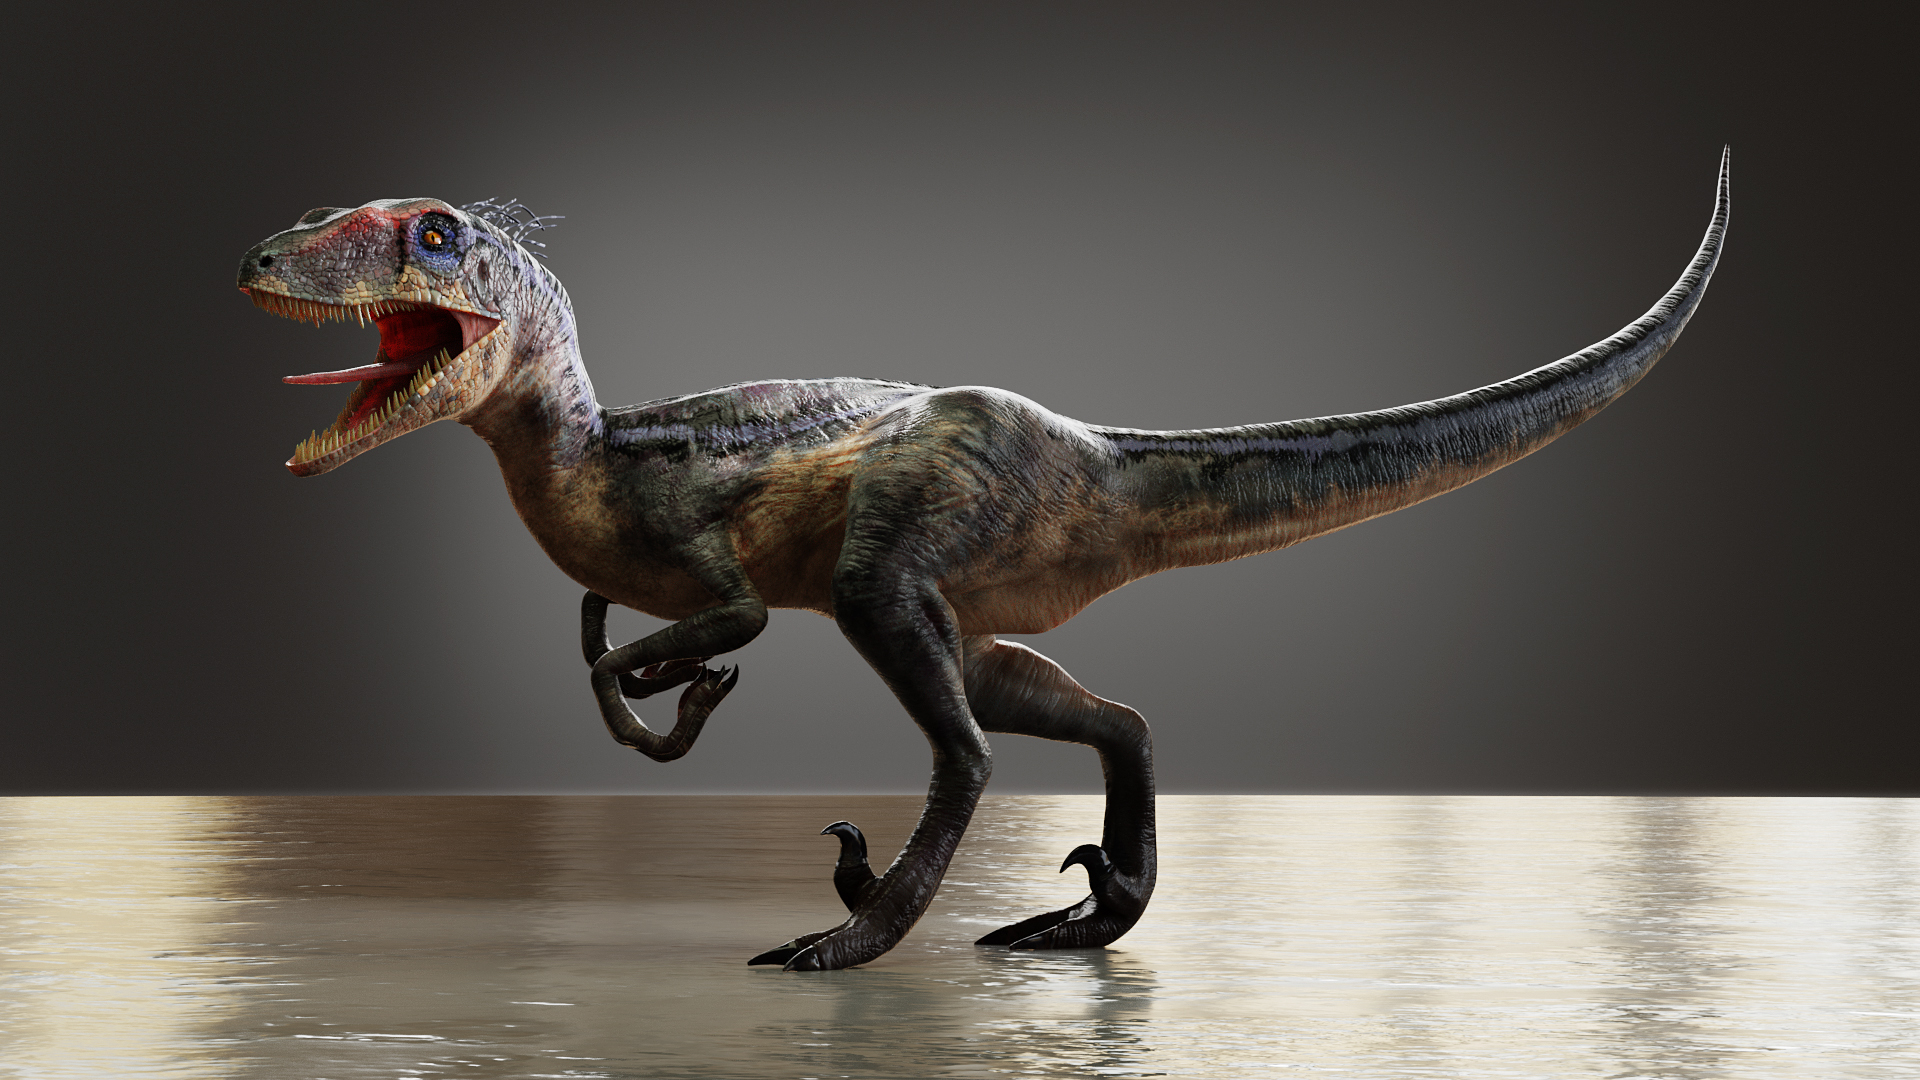
So project has moved quite far ahead now. Painted the raptor in Substance Painter, rigged it in Blender and then did a quick render. Going to model a simple scene to add the raptor into soon.
Thank you. I actually have bones in the tongue but for some reason I thought the straight tongue looks more aggressive… I don’t know. It should probably be more fat in the back now that I look at it yeah.
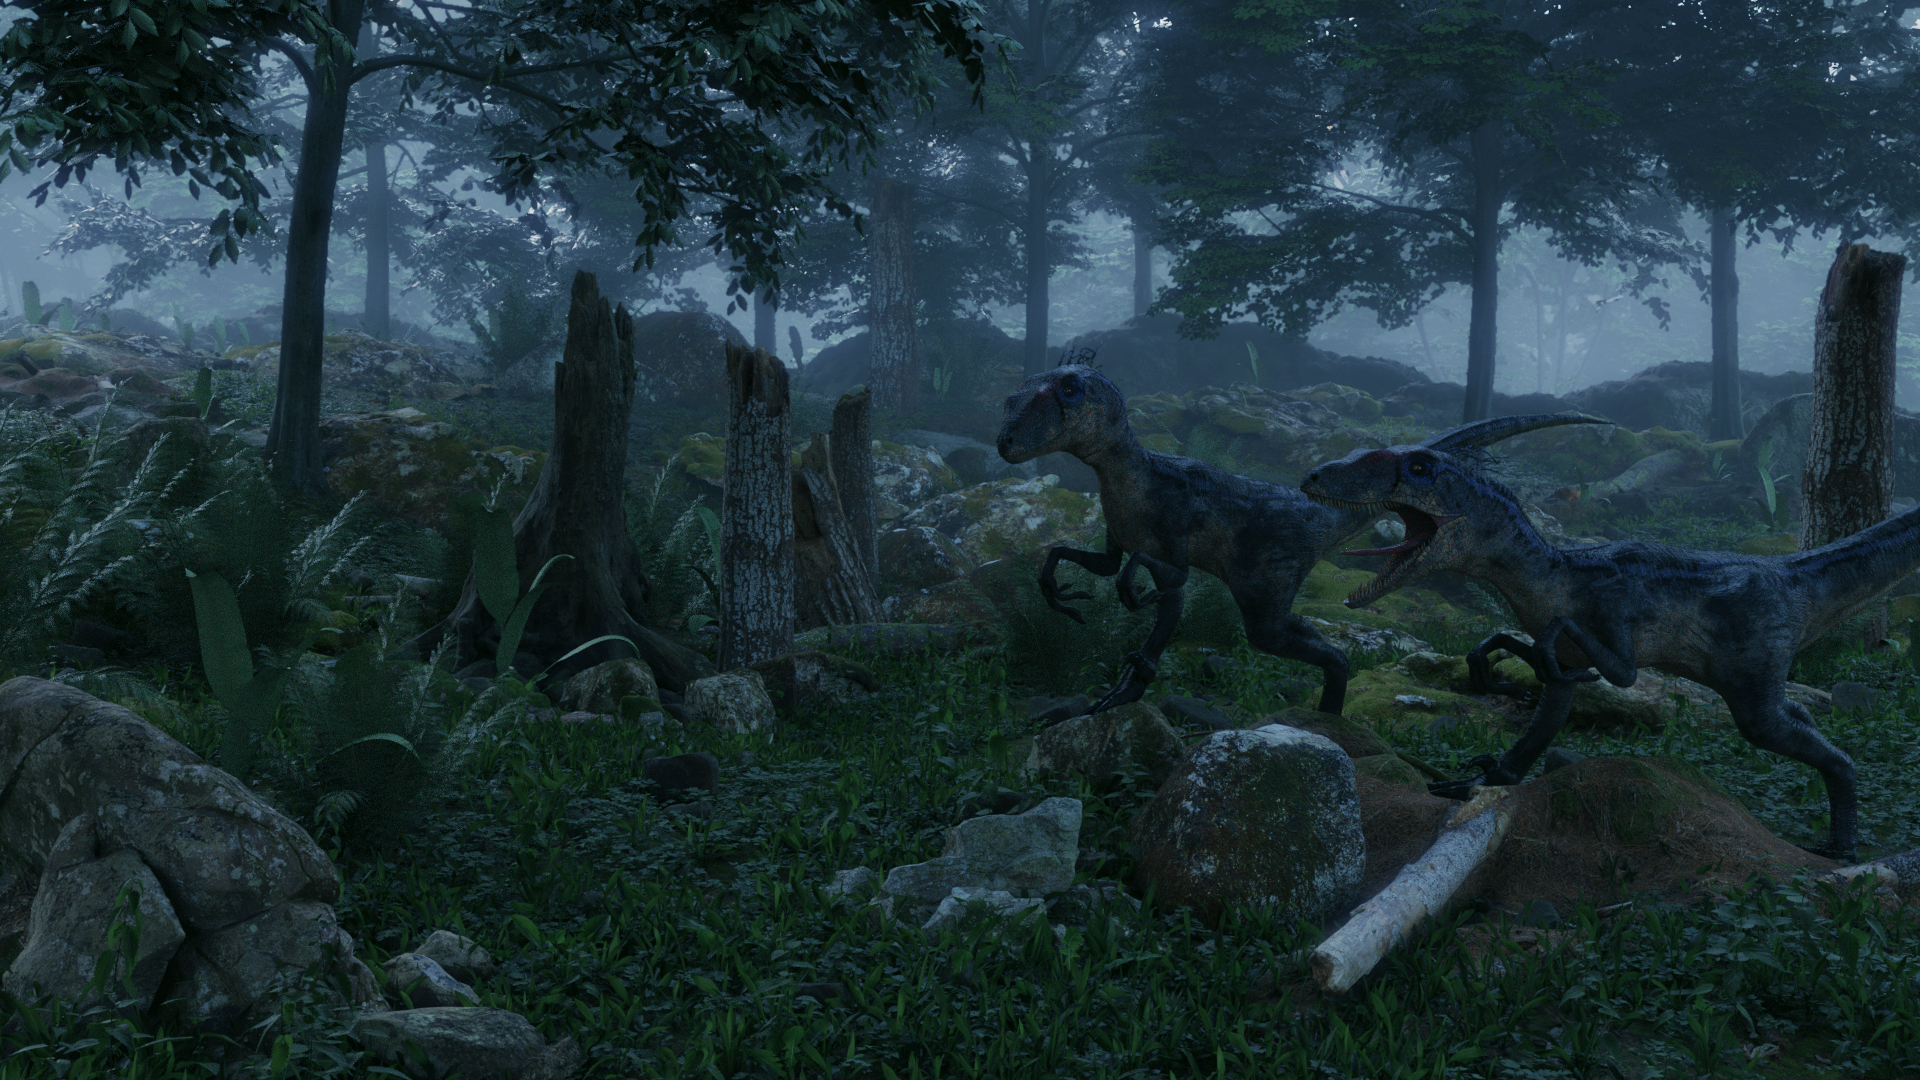
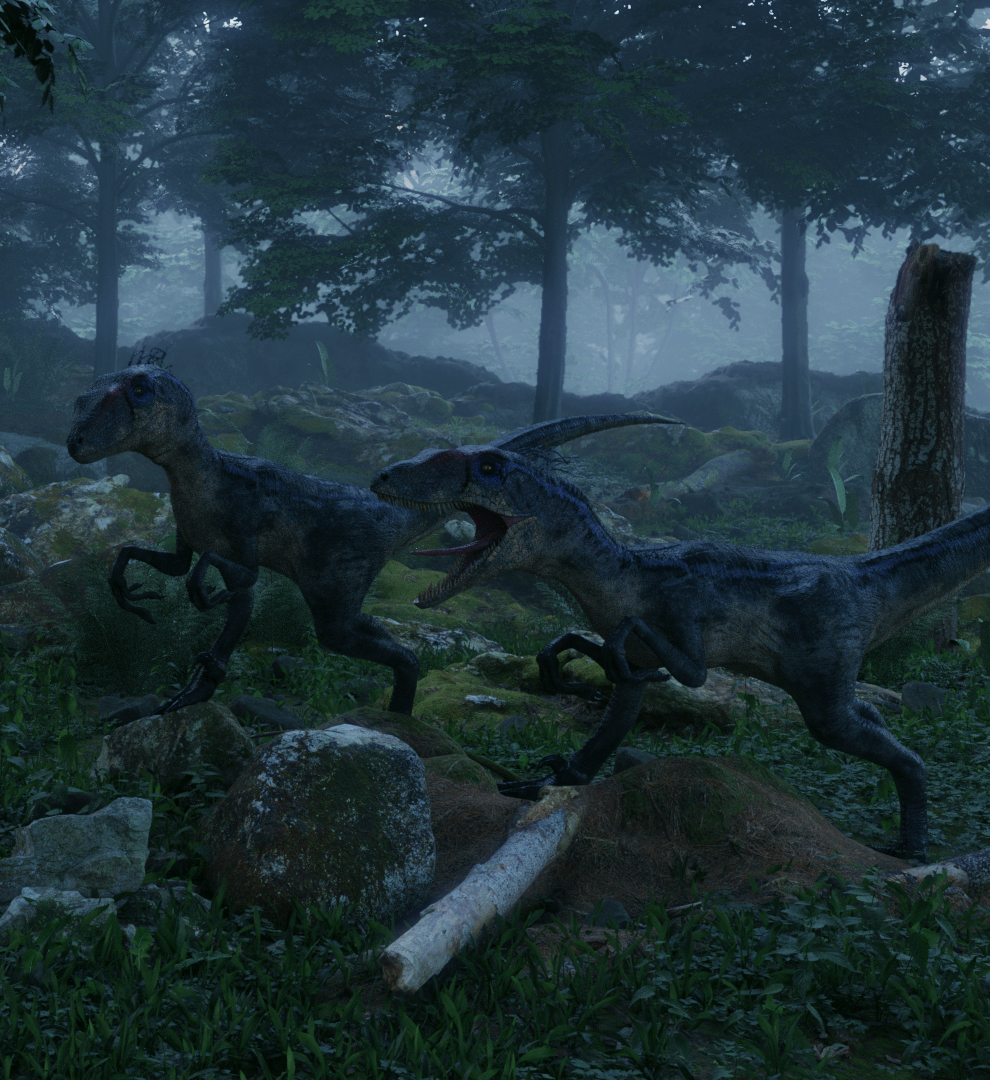
Made a quick scene using grasswald, evermotion trees and some quixel assets. Think I am done in this project for now. Just bought a graphic tablet today so hopefully my sculpts should improve even more in the future
Hey again! Nice job once again! I loved the new renders of the “beast”
Regarding this last complete scene you’ve rendered… kind of feels a bit to the grey side… the raptors were previously colorful and now they kind of blend a bit too much with the rest. That said, I do liked it! Nice job!


 yup it is