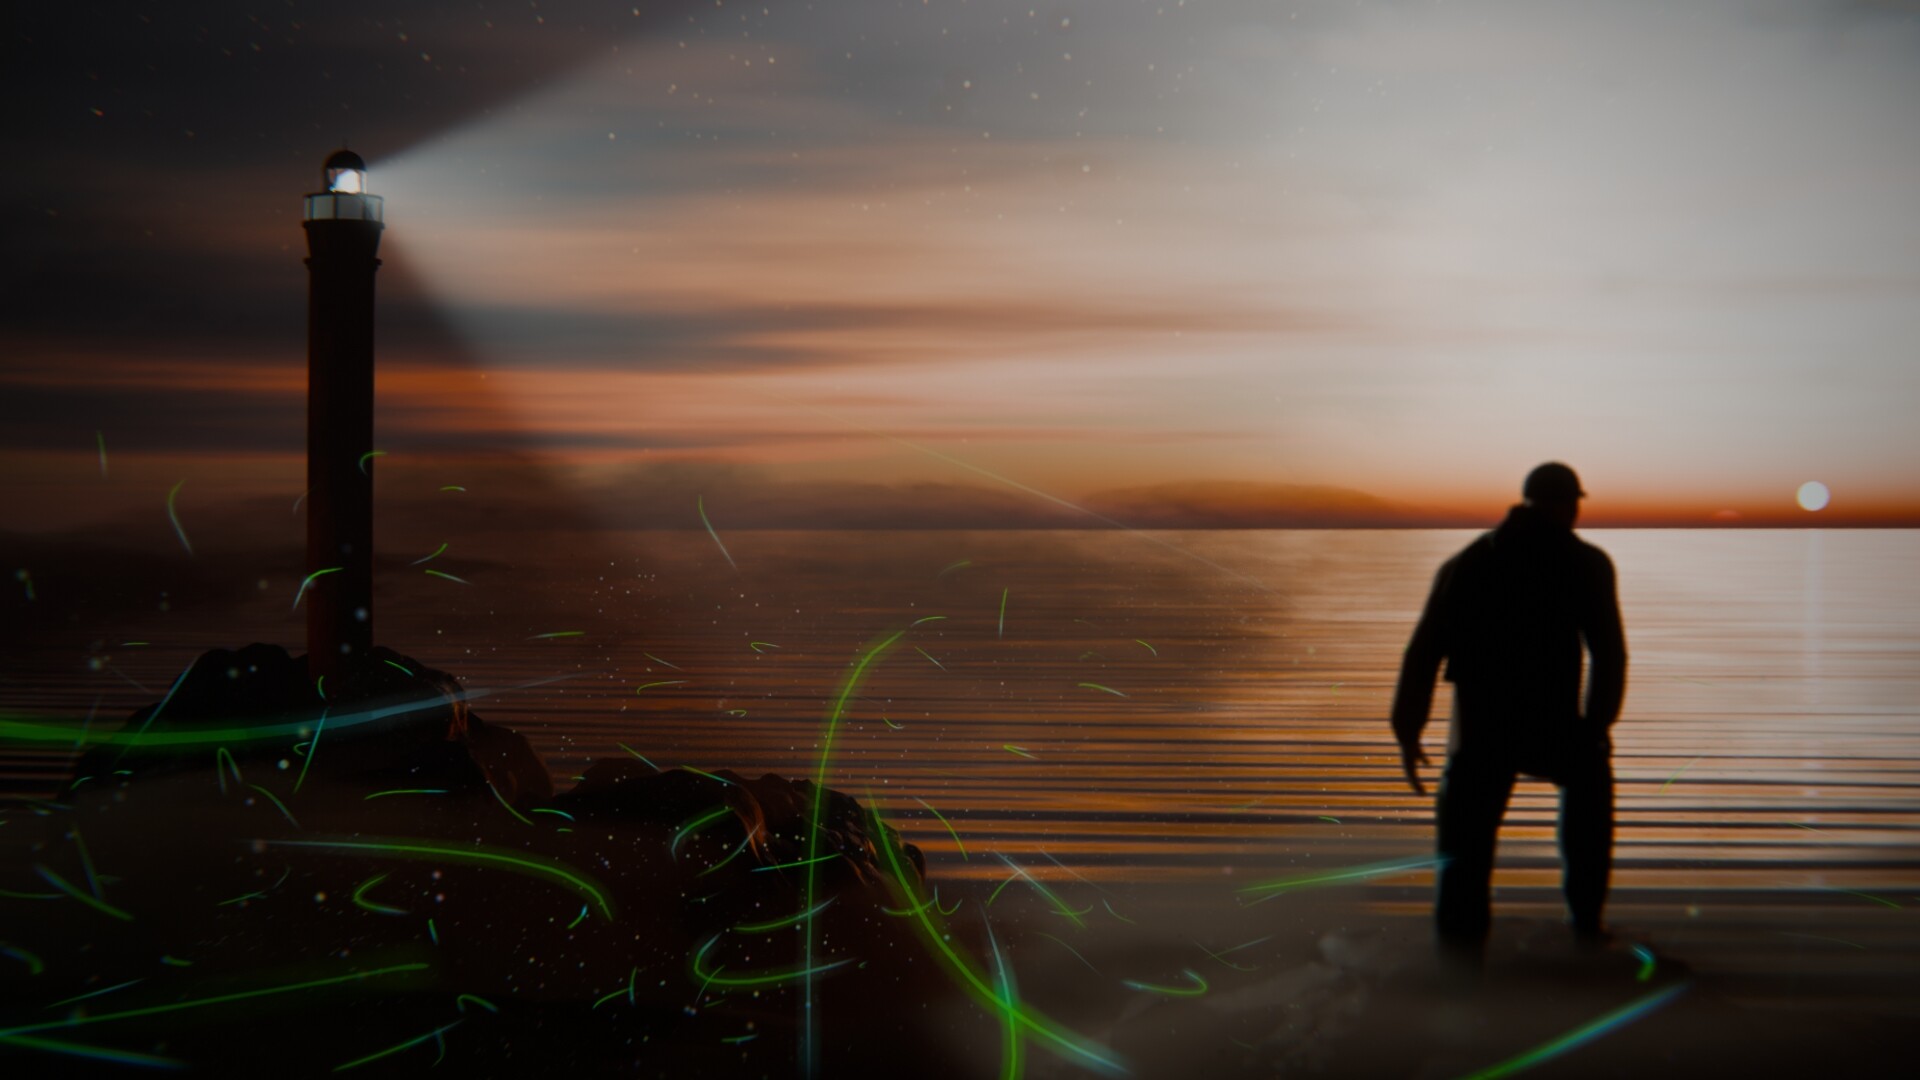
When creating a Facebook account, the friendly algorithm motivated by philanthropic intentions advised me to create a “banner”: which I tried to do, with the image below.
The sea lighthouse is a model that I had already made.
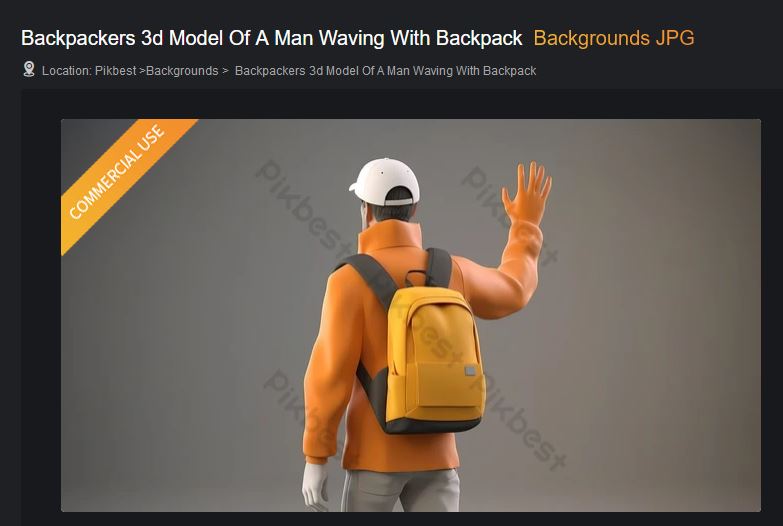
The character is a free low poly model: I stuck clothes on him (technique of copying part of the mesh, then transforming, adding subsurface and solidify modifiers, then a little sculpting), taking inspiration from an image taken from the site pikbest.com (ci-jointe).
Photoshop to improve rendering.
I first used “VDBs” for the clouds and the mist: but the rendering time was too long, with a problem with artifacts perhaps coming from VDBs inserted in a volume. Finally, I replaced them with simple volume, after seeing an interesting tutorial that I will certainly use elsewhere; here :
Oh yes, I also wanted to learn how to make “light trails” on Blender - in any case, find a way - I’m a little surprised that it’s not a little simpler. There is a good addon, “Magic Trails Light”, but I didn’t know how to do anything with the free version (I didn’t buy the addon). So I learned two methods through tutorial: with particles (that didn’t seem ideal to me), then, with geometry nodes (that seemed better to me). It wasn’t that simple though. And ultimately the result is not quite what I would have wanted.
But since I didn’t have a completely clear idea of what I wanted… So be it.
If you have any information on what I could have done to improve everything… Thank you.
Use of depth of field on the camera, for blurring and focusing on the lighthouse: perhaps a little mystery about the character.
Two good, very practical addons:
Auto-Rig pro.
Physical Starlight and Atmosphere.
(Question: Can we put a promotional link for addons that we like? And how?)
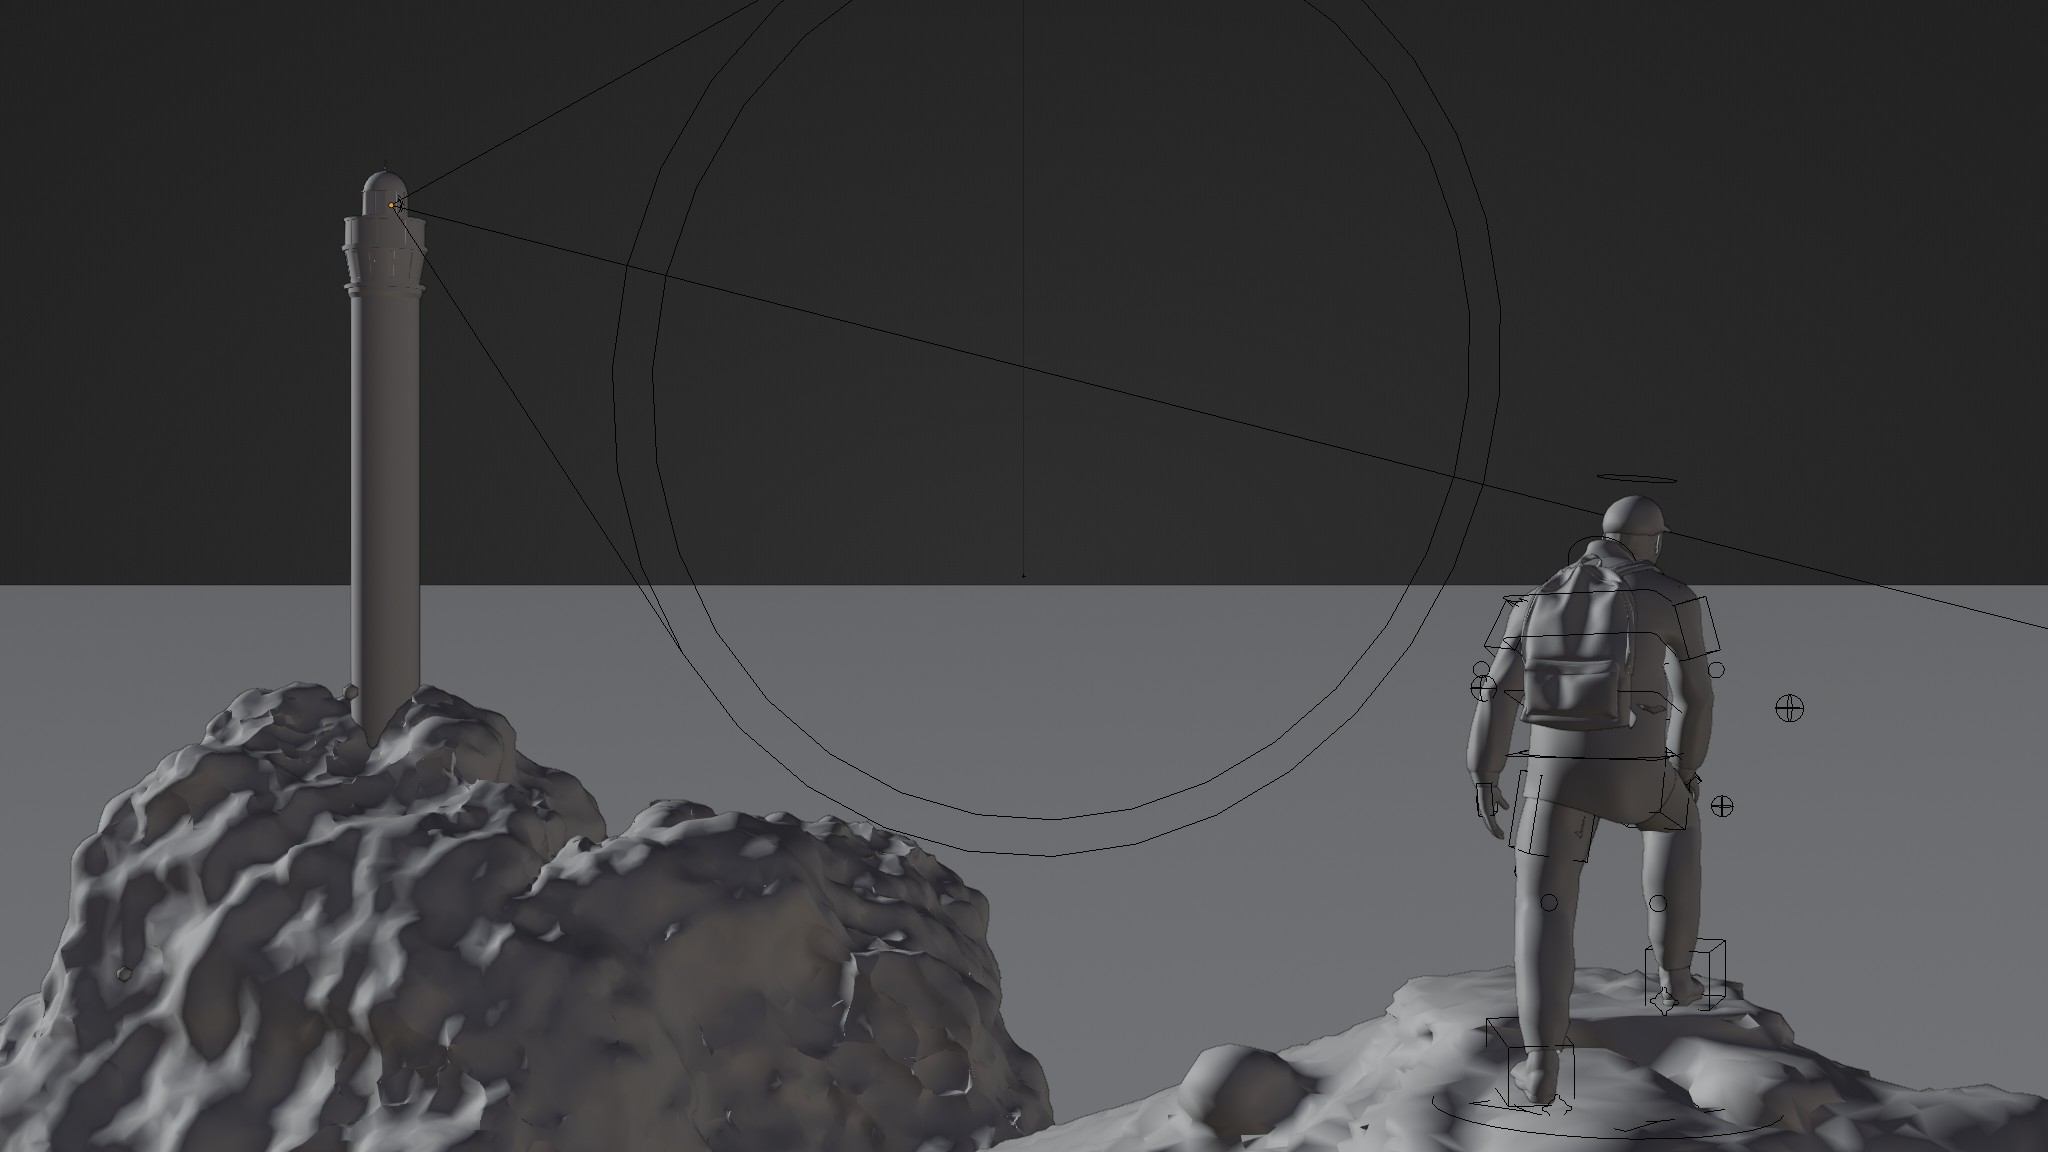
The viewport is minimalist. Except for a few VDBs of free clouds here invisible, two or three volumes for mist. And a volume for particles (emission randomised with “object” node).
And! : a volume for particles (emission randomized with “object” node).
Isn’t that fabulous, huh?
The main issue I can see is the way the cliff at the guy’s feet is in fog. At first, I thought he was walking through the water and the rock was the ripples. This confused me until I saw the viewport render.
Yes, it’s a bit confusing. I don’t know why I was so keen on this little fog at the character’s feet. The visual error is perhaps reinforced by the too large scale of the waves (just one node moving towards the bump node, with variation in the x and y scales in mapping).
I should have extended the ocean all the way behind the lighthouse: in fact, it’s empty around it, to the point that I still duplicated the rock under this lighthouse to move this copy towards the foreground, but it’s invisible : a sword strike in the water.
I would just need to lower the level of this mist a little, for greater visibility of the base… And lower the scale of the waves for a better impression of distance: the character is supposed to “dominate the horizon”. I wanted to make this image quickly.
And great merit comes from the addon “Physical starlight and atmosphere” (!).
For compositing: glare and lens nodes, very weakly.
Too bad it’s not easier to produce light trails natively in blender (?).
Thank you for your interest (!).
I thought my image was a bit “simplistic”. :o1