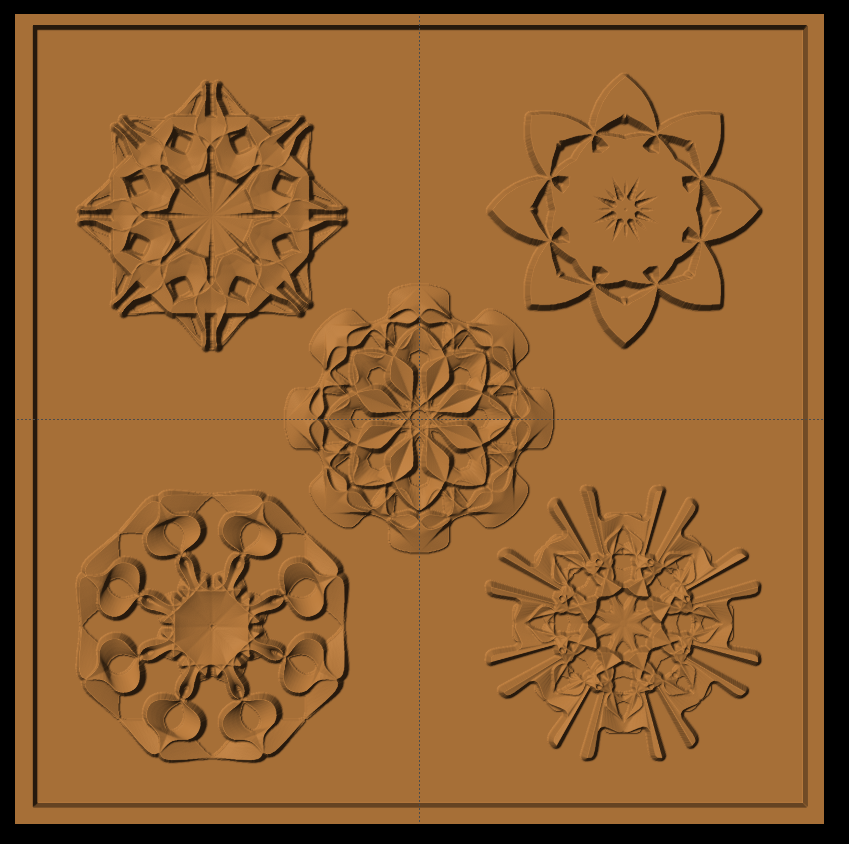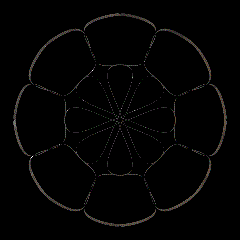
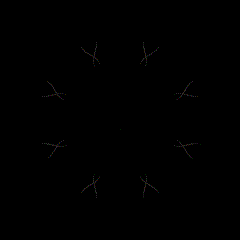
Just a fun little project to quickly make a kaleidoscope generated rosette for cnc pattern creation. Any frame geometry can be exported as stl as a model.
Just a fun little project to quickly make a kaleidoscope generated rosette for cnc pattern creation. Any frame geometry can be exported as stl as a model.
The effect is hypnotizing 
I’m not sure why but they almost look like a liquid during the animation.
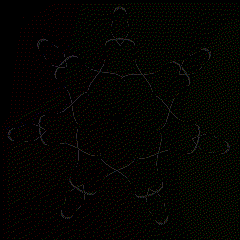
Just adding some point lights and making the model material metallic reflective
Awesome! The colored one is really cool.
SShhh. Don’t tell my wife but I kind of agree with her. She calls this push button art. Push a button and a piece of art comes out. She is not talking about 3d modeling or digital art where skill is involved or artistic vision is applied. She is talking about stuff like this. I made a squigley line and then applied some modifiers to it and I got some really cool shapes.
but…
They are really cool shapes. These are all cnc models that can be routed or 3d printed. Super cool.
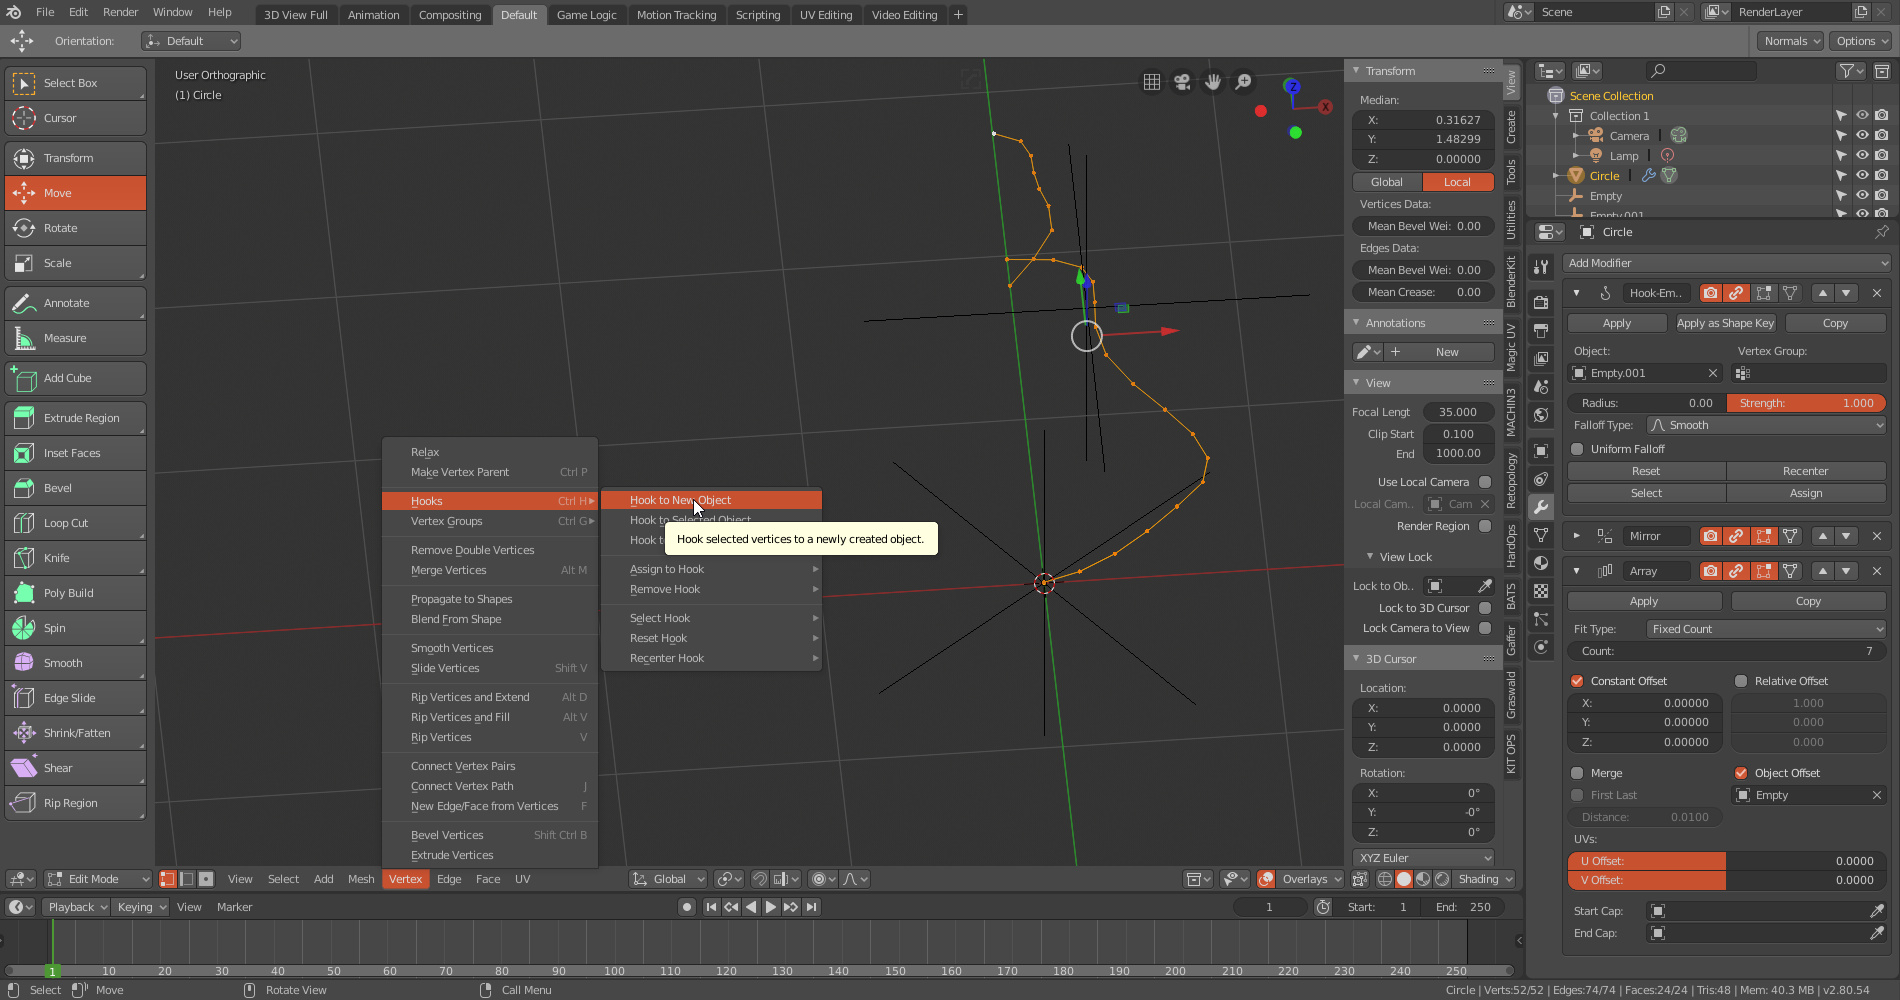
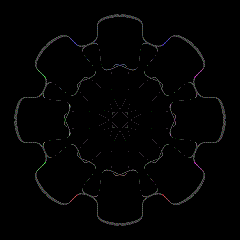
@Philstix, I was just playing around trying to figure out how to automatically generate architectural center rosettes using a kaleidoscope effect for cnc pattern building when I stumbled on this technique. I have not seen a tutorial that lays this out but it is probably out there. All you need an radial array and the hook modifier.
Start with a simple shape around an empty.
Set up a radial array using the empty as a center.
In edit mode, use the hook modifier on the verts.
Select extrude on the verts and then go to object mode.
Animate the hook empty 360 degrees.
Each degree will give you an individual geometry to use as a model or to export as an stl.
But it also makes a pretty cool kaleidoscope effect.
This setup can then be animated and setting up a reflective material and colored lights can give you this kaleidoscope effect. Here is a kaleidoscope effect using the above geometry.
Thanks for sharing your method.
Unfortunately I seem to be having an obtuse day. I’m trying to replicate your setup but I can’t get anything (except a mess), so I’ve obviously missed something.
Is your initial shape simply a series of connected vertices flat on the XY plane?
What do you do after assigning a hook to the vertices in edit mode? You say ‘select extrude on the verts and then go to object mode’. So you don’t actually extrude the vertices at all?
Which axis do you rotate the hook empty around?
I’ve tried all the alternatives I can think of but it doesn’t generate a mesh unless I extrude the shape in edit mode, and then when I rotate the hook around various axes it just makes a mess.
It looks as though you’re using the hook empty to extrude the shape, but I don’t know how.
Sorry if I’m being a bit thick 
You are not being thick. It was not obvious the first time doing it (at least for me). And if you skip a step or do it out of order it does make a big mess.
The initial shape is simply a series of connected vertices flat on the XY plane. I mirrored it so I could have a symmetric shape. This looking down orientation is the default for STL export.
After selecting all the verts and using the hook modifier just use the “E” for extrude but don’t extrude in edit mode.
In object mode grab the hook empty and move up the Z axis. You can extrude and manipulate the verts now because of the hook. Option is to tilt the hook empty a few degrees to get additional height differences during the animation.
You then rotate the hook empty which will change each element in the radial array giving you the different shapes.
I am planning on making a short tutorial later today and let you know when I post on Youtube. Once you have the steps down its literally 5 min start to finish.
@Philstix, see if this helps. You will see how quick and easy this is. Let me know if anything is unclear.
Regards
Wonderful. Thanks for the help, I’ve got it now.
The trivially obvious thing I was missing was pressing the ‘Enter’ key after selecting ‘Extrude’ 
and the mirror modifier helps to create the rosette shape I was after.
Thanks again.