Hey,
I’m Christopher and currently learning Blender. In my work I often think about easy solutions for repetitive or complex work. So I often end up with a small script or a procedural workflow.
This time I made a quick keyboard animation using animation nodes. I discovered some tricks, that I want to share with you. So you will learn how to create perfect looping animations and how to randomize a texture to create the letters on the keys.
Keyboard Animation (Blender 2.80) from Christopher Baumeister on Vimeo.

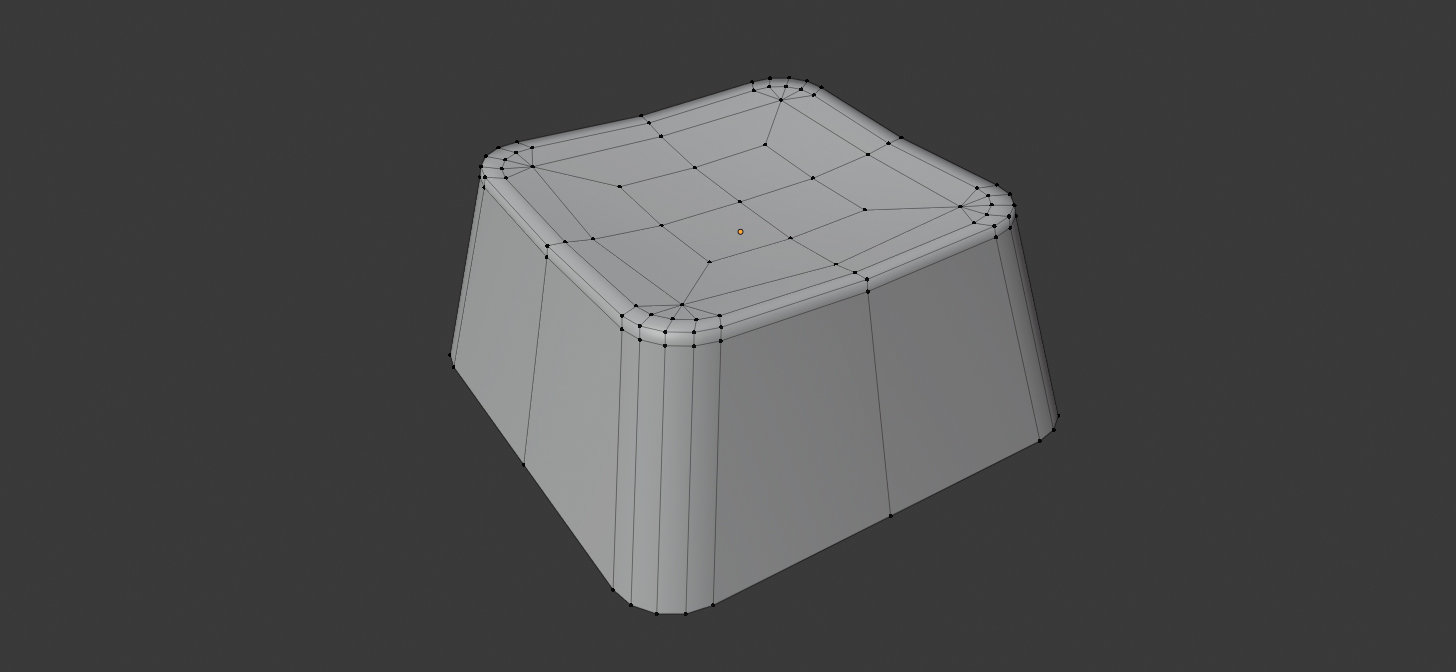
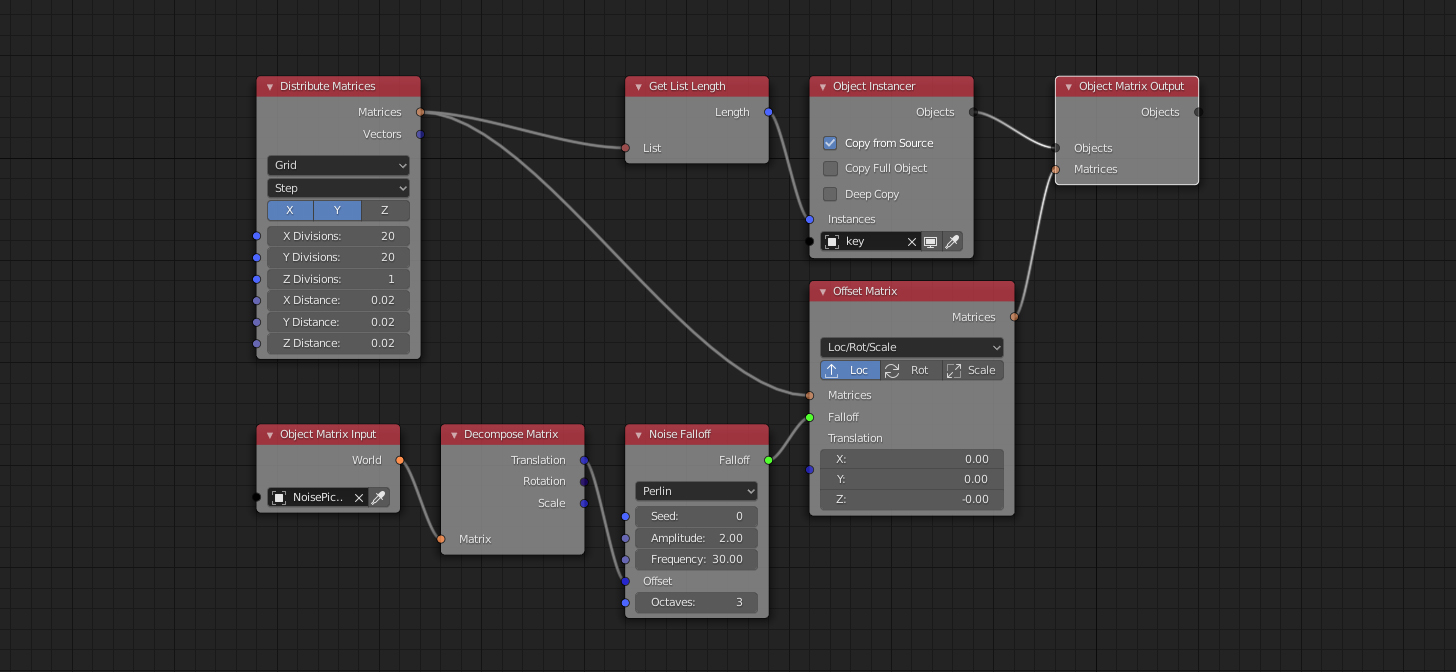
I modeled a basic and simple key and applied a subdivision surface modifier. To create a grid I used Animation Nodes. This way I could directly animate the keys. I offset the matrices in z-direction to animate a “key-down” (On the picture it seems that the value is zero, but it such a small number that it isn’t displayed correctly). For the animation I used an animated falloff, controlled by an empty. I will explain this concept later on.
I was thinking about how to randomize these letters on the keys and ended up with a solution that could be achieved completely in the shader editor.
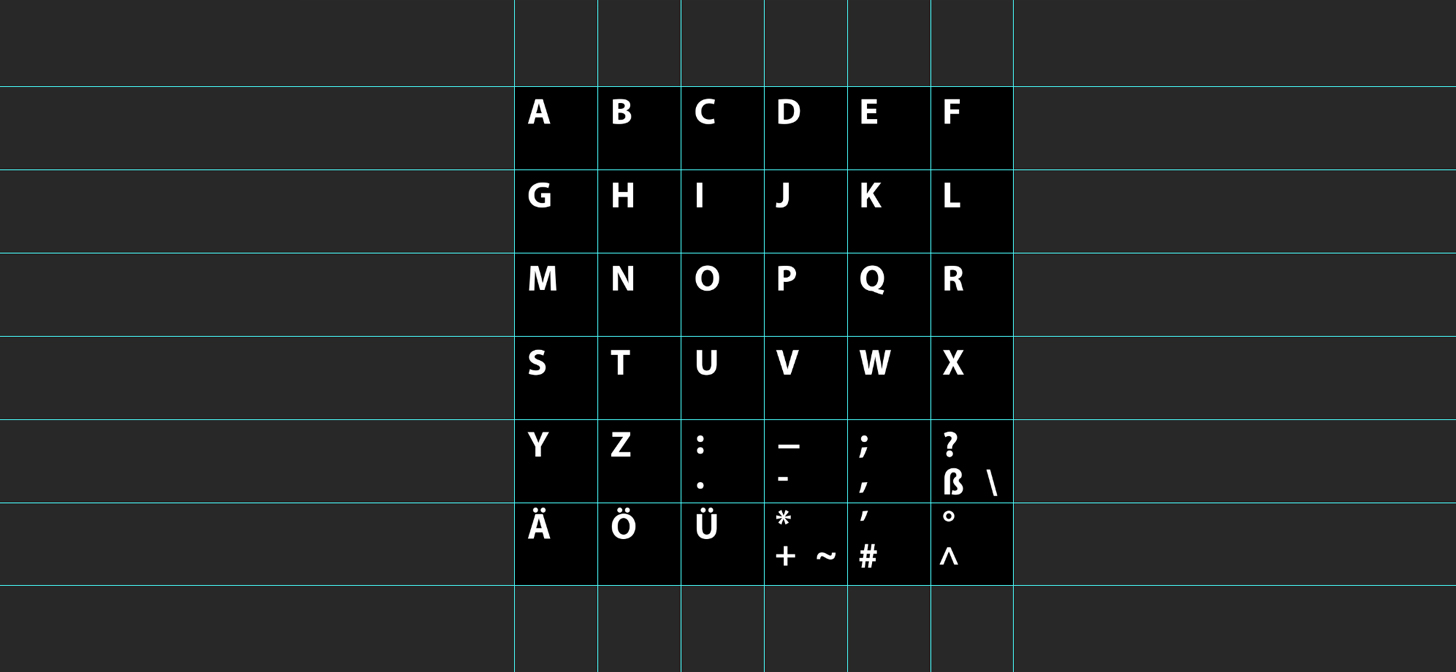
Therefore I had to create a texture, that includes all letters. In Photoshop I generated a grid layout and and placed all letters. It’s important, that every cell has got the same dimension. In my case I ended up with 36 cells. I saved the texture as a psd-file with a transparent background, so that I could use the alpha channel. The alpha channel was used as a factor for a mix shader, that mixed a letter- and a key-shader.
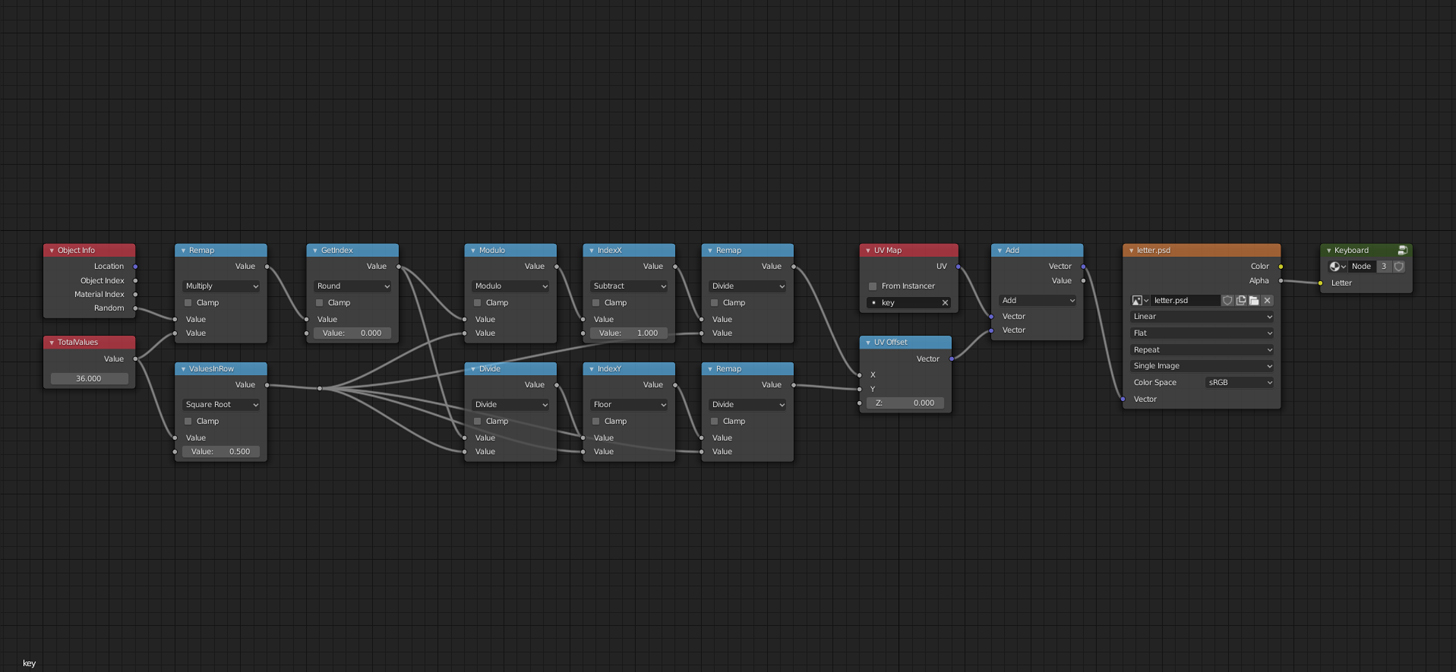
I used two UV-maps for the model. One Map for controlling the letters and the other one for texturing. To create the map for the key I created a new UV-Map in the context menu. I unwrapped the model in top view and placed it directly on top of my first cell. I unwrapped the rest of the key model and scaled it down to zero.
UV-Map for the letters:

Main UV-map:

The Idea was to offset the UV-island randomly in the grid to pick a random letter. So I used the object info node to create a random color for each object. This node will give random values between 0 and 1. So I remapped it to a range of 0 to 36 and rounded the result so I get a random index between 0 and 36. To calculated the position on my uv-layout I used the modulo-function wich returns the X-value. To get the Y-Value I simply divided the index by the number of cells in one column. Then I remapped the coordinates to a 0 to 1 range again. The result could be used to offset our custom uv-coordinate:
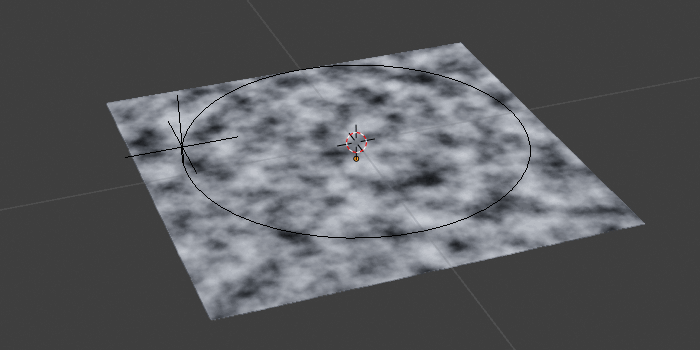
To create a perfect loop I used a small trick:
In animation nodes I used a noise falloff. As a type I chose a Perlin noise. A Perlin noise gives random values in space, wich are “connected” to each other. [https://www.youtube.com/watch?v=8ZEMLCnn8v0]
So I animated an empty (noisePicker), that travels along a circle in a perfect loop. To do so, add a “Follow Path” constraint, choose a circle as the target and click on animate path. Make sure that the “Animate Path” option for the circle is enabled. I used the empties position to offset the perlin noise. When the empty travels one round around the circle, it picks the exact same value at the beginning and at the end of the animation. In my case I set the path animation to 100 frames. With this setup you can even control the animation frequency by scaling the circle up or down.
I hope you liked these Insights. Make sure to watch my work on Instagram or ArtSation:
https://www.artstation.com/baumeister
Best wishes,
Christopher