I have background experience in 2D Animation software; it can be quite frustrating Blender doesn’t provide a straightforward solution to this.
But if I’m not wrong there should be reasonable workaround for Animation in Blender.
One is called Stepped Interpolation. It is a Modifier made for Animation Strips in the NLA Editor.
I’ve started with a Frequency of 24 FPS, with a Stepped Interpolation Modifier on that specific Animation Strip “CubeAction”, I was able to emulate 12 FPS and 8 FPS, by just adjusting the Step Size property (any value bigger than 1.000 should provide a Frequency lesser than default 24 FPS). But I think it doesn’t seem to be able to the inverse (then for such case, the base Frame Rate of the Scene, accessible in Properties Editor > Output Tab > Format Panel > Frame Rate, should be a bigger value (e.g., 60 FPS).
This tutorial at this timestamp shows an example of this method.
I believe it just caused some back-and-forth movement because not all of the Model’s Animation Strips were subject to the same Stepped Interpolation Modifier in the 3D Animation… in fact, the Model’s Root Bone was probably Sliding (as in video-games) On Ones, but the Frame Rate was 60 FPS (shown very early), this is why Step Size had to be bigger (4.000) in the example. So, basically, he achieved a Frequency of 15 FPS (60/4.000) but only for the Body of the Model which was part of the Animation Strip affected by the Stepped Interpolation Modifier.
Hope that helps.
PS: Because I’ve never used this resource in Blender for a project, I cannot recommend it 100%; but it seems quite right.
EDIT: There seem to also be a Baking (3D Animation) approach. Although it is destructive, and further away from in-built Frame Rate, it can be still applied to localized portions (Range) of the Key Framed Animation. In this sense, the Baking method is quite similar to the Stepped Interpolation Modifier method, except that the Modifier would be “Procedural”.
A keyframe has no velocity.
You can create keyframes to change velocity on things that have a velocity setting.
Most of 3D Objects animated in 3D Viewport have location values. Keyframes are created on those settings. A re-timing of that kind of animation just consists in scaling space between location keyframes.
In NLA editor keyframe actions are simplified as action strips. Those strips can have a keyframed Animated Strip Time.
In Video Sequence Editor, you can create Retiming keys for a Scene Strip or add a Speed Control effect strip to a Scene Strip.
I don’t know why AE separates both things but it is basically the same as using easing in Blender.
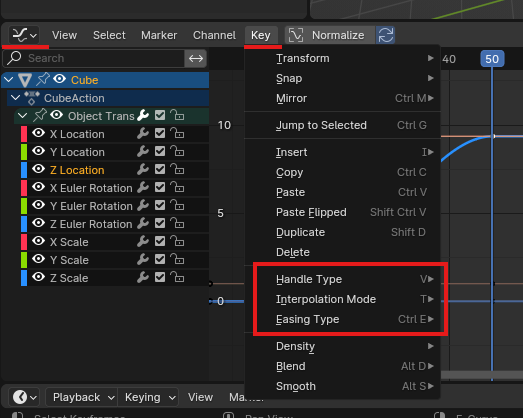
The presets for different types of easing are on the Key menu on the Graph Editor.
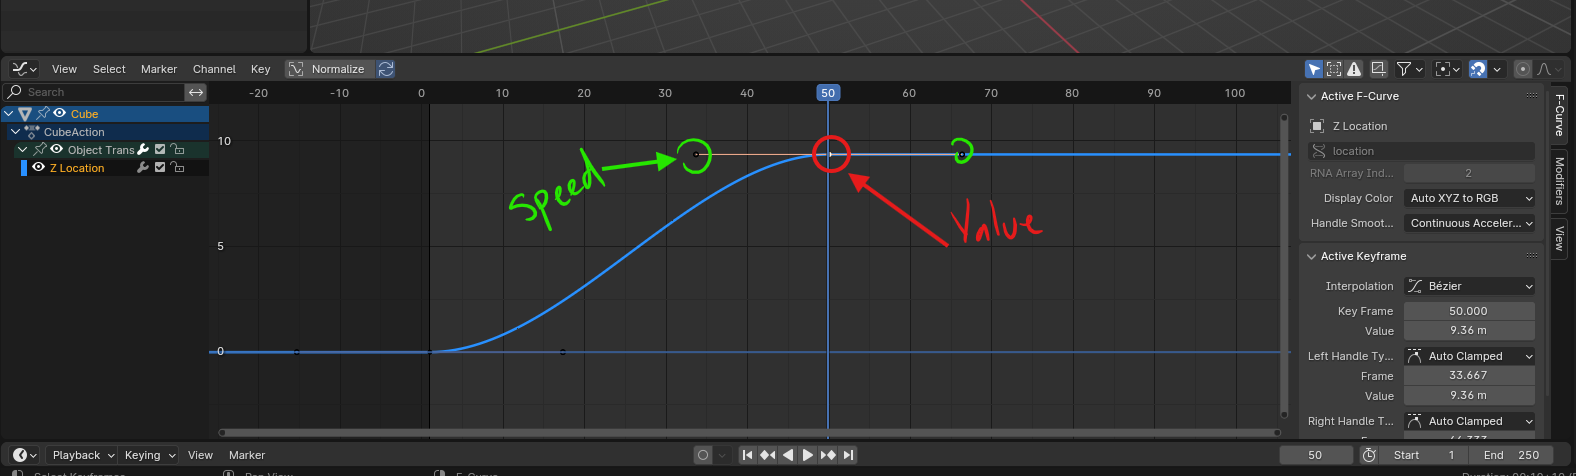
Blender doesn’t have a separate representation for Value Graph and Speed Graph but they can still be controlled separately in the Graph Editor
If you move the Keys you’re modifying the values of the animation.
If you move the handles of each key you’re modifying the curve, or the speed of the animation.
Of course there is, it’s just not called the same, nor presented the same way; in AE the Speed/Velocity basically refers to the interpolation between keyframes, in Blender it can be controlled with the curves in the graph editor.
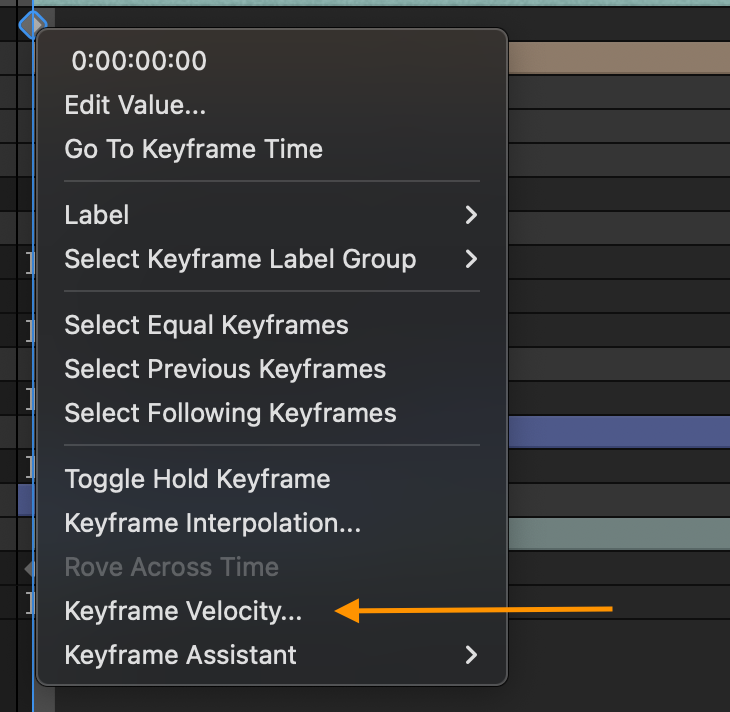
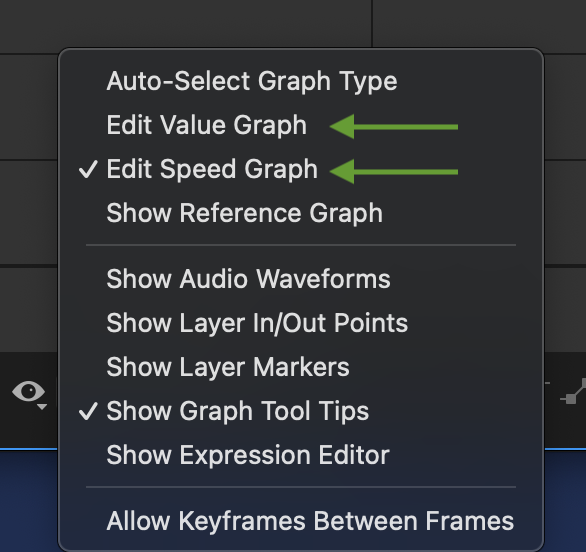
No. What OP asks for, velocity in After Effects is completely different thing. Its measurement for speed of movement in pixels per second. AE has regular value graphs too which is representation of value change over time. Its different method of representing animation, its not “separating” speed and value.
Yes, I know, I use AE too, the exact implementation is not the same in blender, but still, the equivalent in Blender is already there with the curves. That’s what I’m trying to explain
Thank you, everyone, for responding to my question. I’m sorry for the delay in my response. I was busy with the project.
The handle type, interpolation mode, and ease type still affect the value graph. Look at the video below and please notice the motion blur. I had to match the motion blur from one scene to the motion blur for the same object in another.
I have been told that C4D has such a feature, but it’s ok I found a work around for my project. Thanks.
Oh, I think it’s a velocity graph ! first derivative of displacement. Blender doesn’t have this.
I suppose the closest thing you can get is run your animation through a geometry nodes simulation, this way you can specify a velocity variable and the solver will integrate it as displacement. But this is really involved and honestly impractical (for animation or mograph purposes).
I played around a little with the idea of controlling velocity with an external object. I tried to make it work with the new gizmos, but they’re hidden while the animation plays,… so I reverted to using an empty. NB it relies on a simulation zone, so it needs to be baked (top-left corner, I left the relevant panel open) for it to be reliable when scrubbing the timeline.
You should be able to add the modifier on any object, connect a “controller” to it via the modifier interface and animate it this way.
Here is another one with rotation. Thanks @zeroskilz for the tips about integrating rotations the other day. It’s effectively a steering wheel… I am done experimenting for now but it was a fun exercise ! geonodes_velocity_controller_02.blend (1.1 MB)


")