Make sure and use a correct offset in the shrinkwrap.
It sounds like it, which is why I’m baffled he made this claim.
2 Likes
Again I apologize Machin3. For some reason I didn’t see this feature. I’m still new to all this stuff.
1 Like
Yep, I am. I’ve been fiddling around a lot with the settings. It’s interesting that I keep coming back to the 27 decal, and it looks like the wrap doesn’t hold. I reset the offset and it wraps again, but doesn’t render right.

Try the project mode instead of nearest surface point. Also turn on negative.
Dang, that looked a lot better in the viewport - but rendered the same. Another oddity I am having with both Decal Machine and Kit Ops is that I am trying to place an object - was just trying to put a rivet in with DM, and I can’t get it to align to the surface, it goes at odd angles. Now, I DO have a bunch of hidden cutters of all shapes and sizes in different collections. Is the insert “seeing” those shapes and trying to align to them?


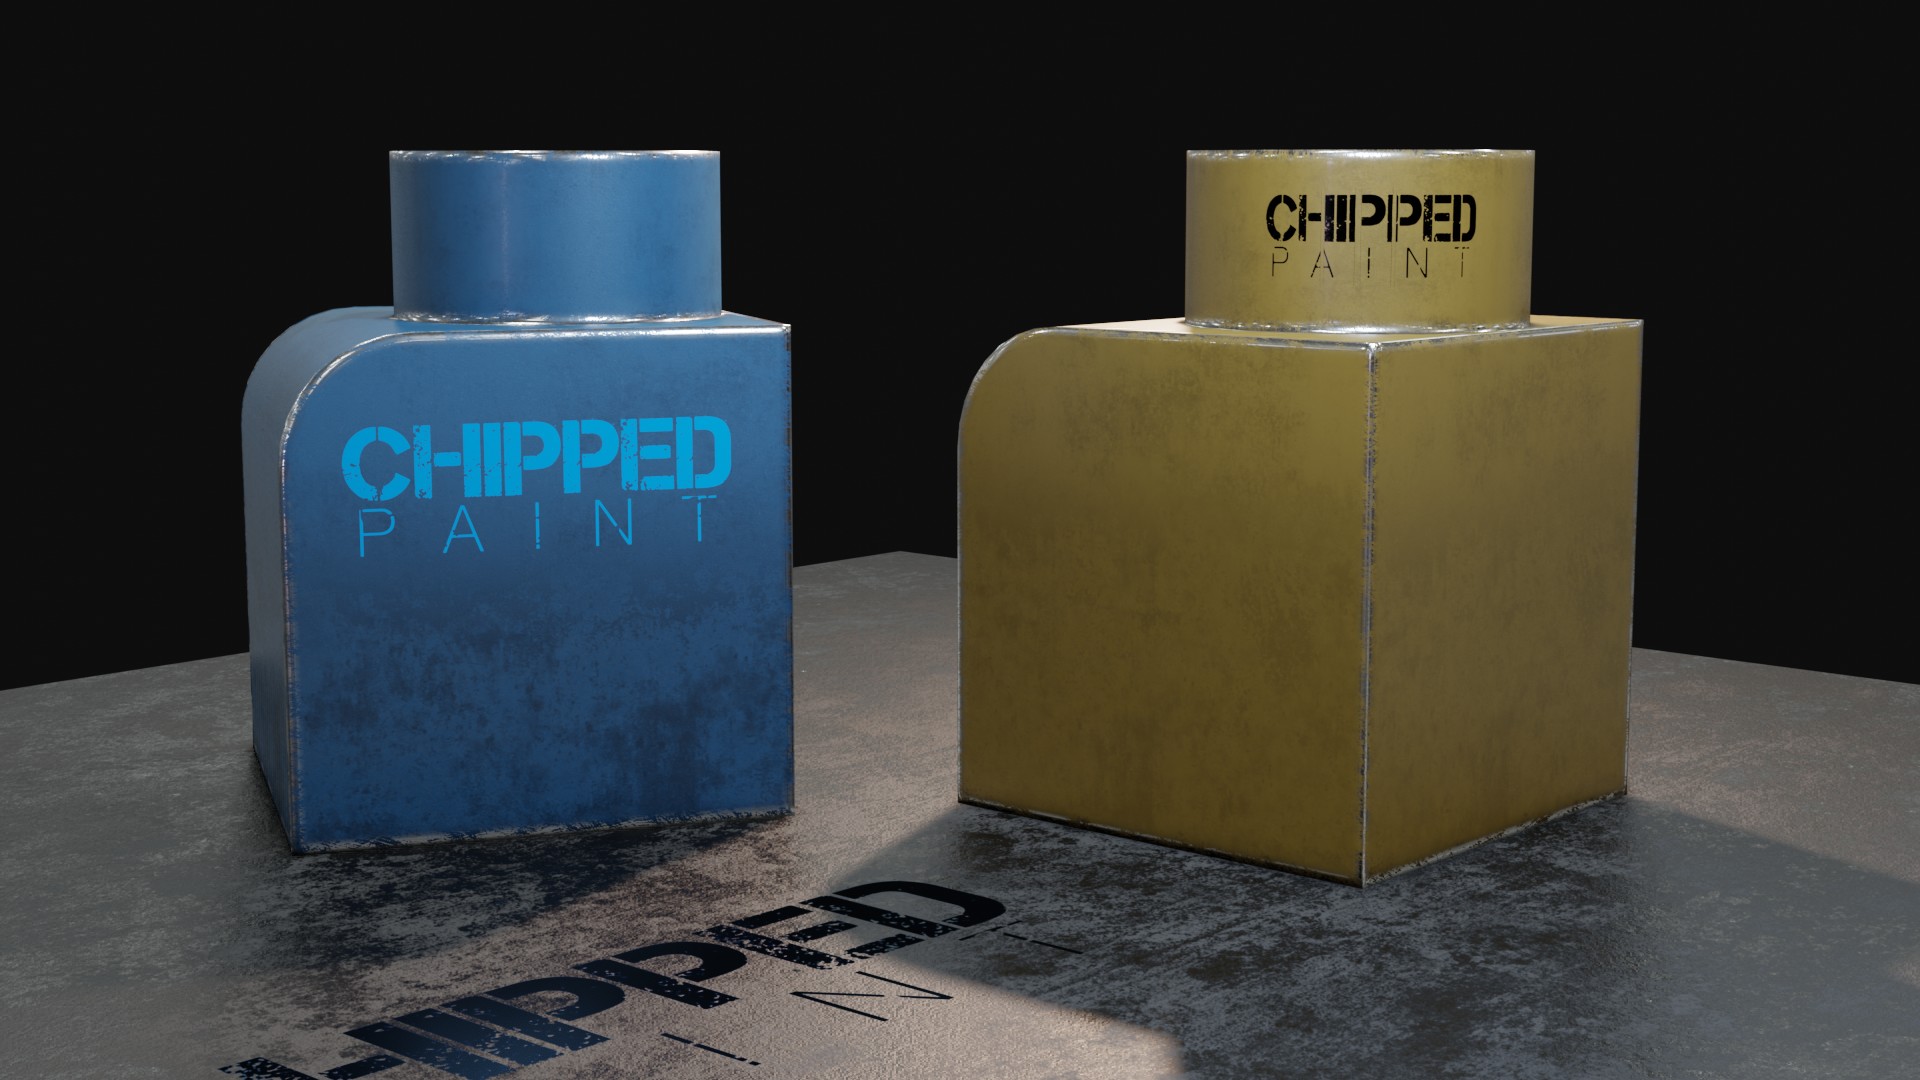
Now we are here together, an experiment with one of Decal Machine’s decals (2.79), KITops (2.80) and the EV Express:

It works, but it seems to me I miss the paralax effect. Target Normal Project works better because it takes normals in consideration and is a new (a year old?) feature of the shrink-wrap modifier as @MACHIN3 mentioned already ( I suppose, you said Project though…). Here applied. For some reason when I put metalic 100% it shows up black. Not sure what that is.
Here’s an interesting issue I’ve had with a couple Kit Ops decals. To me it looks like the shrinkwrap is trying to jump to different places. This is a challenging spot, it starts flat and then bumps out in a half circle almost.

Don’t use project mode in the shrinkwrap modifier, but Target Normal Project

Strange, must be something else then.
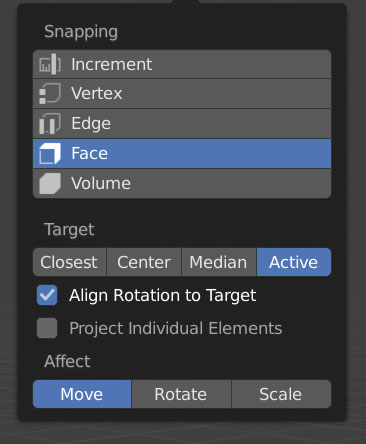
In the snapping menu you have: (press Alt Tab few times to see what menu I mean)
- Snapping to face
- Align Rotation to target
- Project individual Elements
- Target closest (not sure if thats important)
Then not realy need to turn snap on but grab and then press Ctrl. Then is will snap as defined in that menu.
Otherwise restart Blender one time and try again to see if it was temporaly issue.
Here is more info about the Target Normal Project: https://developer.blender.org/D3836
So I pulled that object, made a NEW file. Killed all the modifiers on it, deleted all cutters. All that is there is an object with nothing on it. Same result.
For the snapping, I’m showing my settings. I indeed to that like you say - just use the CTRL key to activate snap. I’ve played around with the target setting - it seems like active works best to place things, although there doesn’t seem to be too much of a difference between them.


Going back to settings from Machin3 - I switched to “outside surface”, project, and put negative back on. Scaled it down a bit, and it’s very close. There’s still a glitch or two, but super close.

I think I am shot for tonight. If anyone wants to look at my .blend it’s here:
https://www.dropbox.com/s/q0rfefkfu5unqqg/F89-packed.blend?dl=0
I think I found the cause. That was pretty weird experience, but before you apply an insert you have to select the object first. So first select body base, and then click on “Add Insert”. Then the rest should be ok
@MACHIN3 Thanks for the tip on the RGB color node. Didn’t know that would work! For some reason I thought it was adding an alpha, but of course not. I’ll update. 
That is how I have been doing it, I think Chipp says to do that in one of his videos. Anyway, tried it again, same results.
Also working on a KIT OPS workflow for creating the chipped paint effect in EEVEE without using pointedness-- so it will work on low poly models and be more robust and predictable.
The biggest challenge is in creating a UI that folks can follow.
1 Like
Cant wait to see this when its done. Proper Ferrari F1 era Nos. 27 & 28, Berger and Alesi. About the last time F1 was exciting.
1 Like
Saw your comment on Discord (answering here, easier and more peeps can benefit) to install a portable 2.8 blender. Your instructions are for the PC, I’m on a Mac - but I’m assuming file structure wise it’s the same. So I added the config folder in the 2.80 folder (after choosing Blender and choosing “open package” to reveal the file structure.)
When hitting “next” on the opening screen, I get an error that tells me the system doesn’t have write access to the new folder I made. I went into info and changed the permissions, but I still get the same error.
So the userpref.blend file never shows up in the config, and I’m stuck there, even though it seems it has read and write permission.
Edit: I tried setting the permissions one and two folders above as well, to no avail.
