Trying to make a photo-realistic kitchen counter scene. Thoughts?
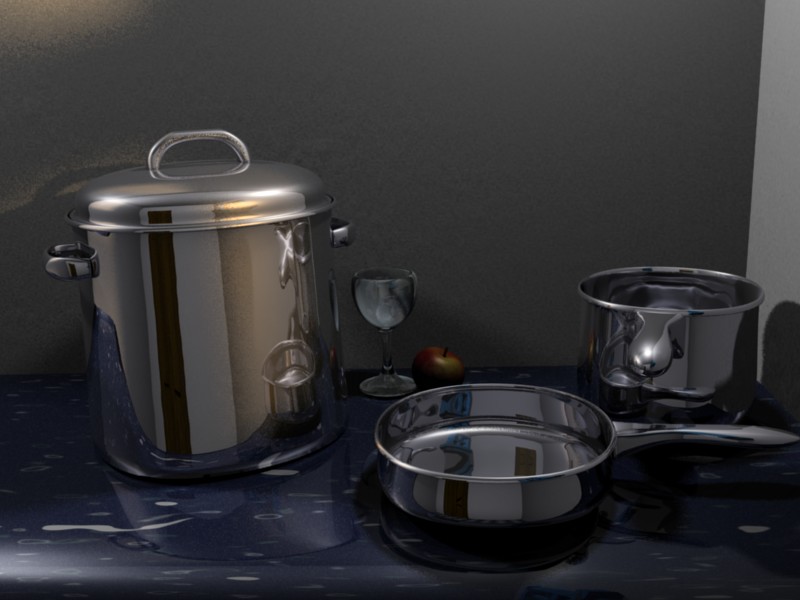
Wow that’s really good! It is a little dark and kind of hard to see everything though. And the texture for the floor looks a little weird but might just be the lighting too. If you could add a nice background with maybe a windows and a nice scene outside this could look awesome! Keep it up!
Thanks! I wanted to keep it simple for my first scene.
I wonder if it might be the difference in monitors, etc. that makes it look dark, because it looks okay for that on my computer. I’ll try messing around with it though. 
Oh, and the “floor” is supposed to be a counter-top, where they often do have such weird textures, haha …
Thanks again for your comments!
The shadows look a bit heavy here too.
What about a splashback and change the work surface material. (It does look odd)
All right, then. Looks like we have a consensus - I need to add more light and change the counter-top!
By splashback, do you mean a surface at the back of the counter, parallel to the wall and made of the same stuff as the counter?
Yeah. Could be made of anything. Tile, stainless steel, marble, slate.
It’s not that it’s too dark, just the shadows are heavy. Some Hemi’s, or an HDR image - (It’s Blender though, huh?)
Yes, I made this in Blender. Sorry, I’ve only been using Blender for a couple weeks; what do you mean by “hemi’s” and “HDR image”?
Thanks for the help, by the way!
Looks good, for the counter top texture how about a classic boomerang see:
See? Thank you, Dichotomymatt! I’m not crazy! Counter-tops often have crazy textures. 
I’ll render another image of the scene with a different texture for the counter-top and a splashback. We’ll see if it looks any less weird.
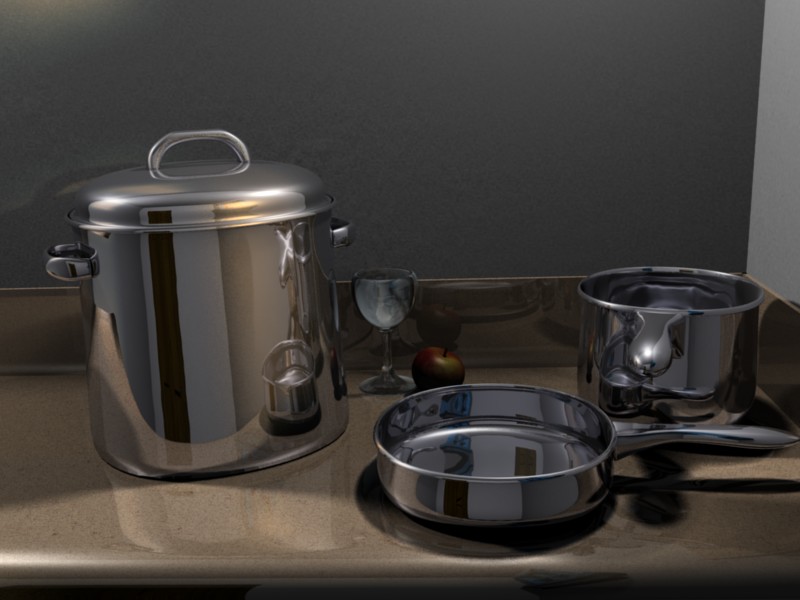
Okay, here we go. New texture, slightly different lighting and splashback. What do you think?
Attachments

Yeah! That looks better.
Hemi’s are lights, they are in the light ‘Preview’ panel (F5), after Lamp, Area, Spot, Sun. They don’t cast shadows, so are ideal fill lights to lift shadows.
HDRI - High Dynamic Range Image lighting. http://www.debevec.org/probes/
Don’t be intimidated by the science, it’s not as complex as it sounds. You apply an image texture to the World background and Blender uses the image as a light source. It gives a very natural looking light. http://en.wikibooks.org/wiki/Blender_3D:_Noob_to_Pro/HDRi
You can use them when rendering with Yafray - I think(not certain) there is a patch you can compile in to use them with Blender, but you would need to build from source.
@DichotomyMatt - have you been reading my diary? I downloaded a whole bunch of Formica textures just a few weeks ago. Boomerang is the one I was Googling for - I ended up with 300Mb of them in one download - Joy!
Cool, I’ll give it a shot! Thanks for the tip.
one thing that jumped out at me is that you need a reflection of you taking the picture in at least the tall pot. To do this, take a picture of you taking a picture, and use it to texture a plane just behind the camera (parent it to the camera). Also, a tad bit on anistrophic stretching on the pots would be realistic - no pot is that perfectly smooth - or a little cloud affecting the reflectivity.
I didn’t like the shadows, so I redid it.
Really? You think I should put a photographer in there? I guess it makes sense.
I kind of like how smooth it is, but maybe I’ll put some dents or something in it. 
Attachments
You could always do a variation-Like a rusty 100year old countertop. Just an idea. I’m only suggesting this because I think this is done! Make that apple stand out though, can’t really see it. Maybe put it in a pot!
Hmmm … how would I make the counter rusty, do you think? Just add a texture?
I’m still figuring out how to do UV mapping and the like, haha, I’m such a noob.
Some picky points on the pots themselves. Like PapaSmurf said, no pot is ever perfect. In addition to that, the interior of stainless steel pots is never as polished as the exterior. There is always a slight brushed look on the inside of the pot, which tends to be more pronounced on the bottom (cooking surface). Also, the handles are almost always cast aluminium instead of Stainless steel. (Sorry, in additions to other things I am a fan of fine cooking.)
As for UV mapping, give it a go. It seems much harder then it really is when you are a noob. Trust me I am still a Noob and have had some success with UV mapping. The wiki has great articles that explain the process well and you couldn’t ask for a better thing to unwrap then your counter top. The top is a basically square shape, so no funky compound curves to navigate.
@organic: Yes I have been reading your diary, but after reading about your odd fantasy on page 32, I am never opening it again. So you can rest better now. If that is possible with the thoughts in your head. 
Hmm … I’m denting up the stock pot as we speak, and I’m going to try a “brushed metal”-type material on the bottom of the pots, and see how they look. I might even see how a black plastic handle would look on the pots.
As for the counter, It curves at the edge (you can tell from the reflexions), so it’ll be a bit of work, but not much. I think I understand the basic concept of UV mapping - take an image and tell Blender what faces of the 3D object you want to correspond to what parts of the image.
I’m just not sure how I’m gonna generate an image of rust that I like. I’ll try messing around in GIMP and see what I can make. If you have tips on that, let me know!
Okay, so I’ve changed the lighting significantly, and dented the stockpot a bit. I’m working on the handles, and added a sink that you can see in the reflexion in the left of the stockpot. What would you guys think about black plastic handles?
Attachments
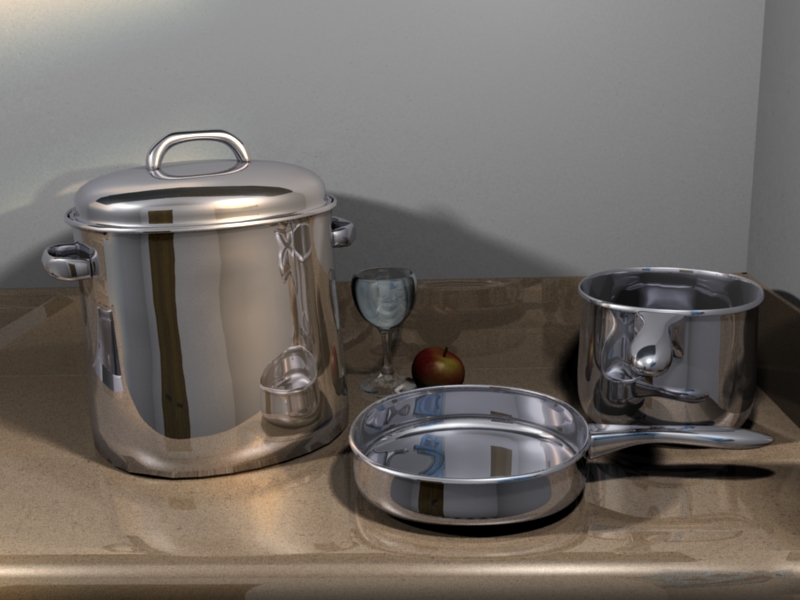
Looking good. But I think that the shadows are a little distracting to the rest of the image. Especially since they cast over the cup and apple. I like how the whole scene is brighter but the shadows could still use some work Good luck!