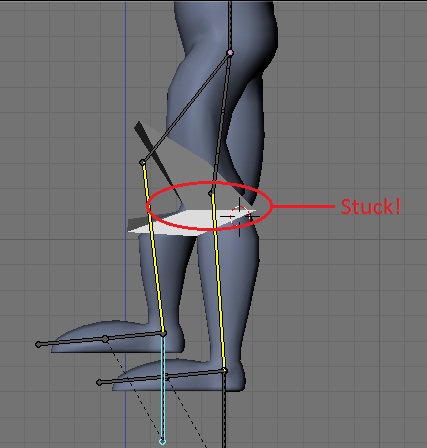
Hey, I have been following the intro to character animation tutorial from the BSoD. My character is slightly different from the tut character because the tut gives us freedom in positioning verts. I also added a loop to help define my character’s knee cap. My legs are therefore different and I am unable to achieve a good deformation, shown by the nasty overlap in the attached picture. Any weight painting ideas? Rigging idea is fine too, but not too advanced or else I won’t be able to use the tutorial for animation.
My first thought is to move the vertex of the knee joint portion of the upper and lower leg bones to the back of the knee, but the tutorial wants it at the front to help “lock” the knee.
Hi, I’m dealing with the same problem. You can reduce the crease by smoothing the influences of both the upper and lower leg vertex groups. The tutorial you have linked shows a steep transition between red and blue. try to avoid that. however you can’t avoid that problem completely by only using two bones and vertex groups since this movement is not the way a joint works. you have to create a more natural movement which bends the joint smoothly instead of creasing it. try the mesh deform modifier: with it, you can assign a lower detailed “cage” to the mesh you want to deform. this cage can be deformed by armatures two. however your models vertices are assigned to the cages vertices which allowes you to achieve more natural movements. check the chinchilla demo on this page: http://www.blender.org/development/release-logs/blender-246/mesh-deform/ it uses mesh deform at problematic regions.
Hi DrScheusal, I tried the deform mesh modifier but I ran into the problem in the image. Any ideas? If you have any free time can you set it up for me (just the left knee), I will learn from it and do the right knee.
I made vertex group knee.l of left knee vertexes and in the modifiers I set the “cage” to act on those. But the cage isn’t exactly following my bones…
I’ve looked over your file. You’re close actually. First off, you have to build a cage for the whole body, it must enclose all of the model’s vertices. You should also turn on drawtype wire in the objects panel, so you can see the actual model. To make this thing work, you don’t need to change any of the vertex groups already made from armature bones. Instead, you need to assign a new vertex group to all vertices from the model. It will determine which parts of the model are going to be deformed by armature and which by deformer cage. since mesh deform will affect the opposite parts, you have to check “inversed”. Next, go into weight paint and edit the group. hands, feet and head should be painted red. finally bind the model to the cage. btw, the chinchilla demo is a good reference.