I’ve been learning blender for a little while now… I’ve realized that it’s best to have a very complete model before you move on to uv and animation but I got impatient.
I’ve gone back to the drawing board trying to fix my model… any comments suggestions much appreciated.
will provide more images
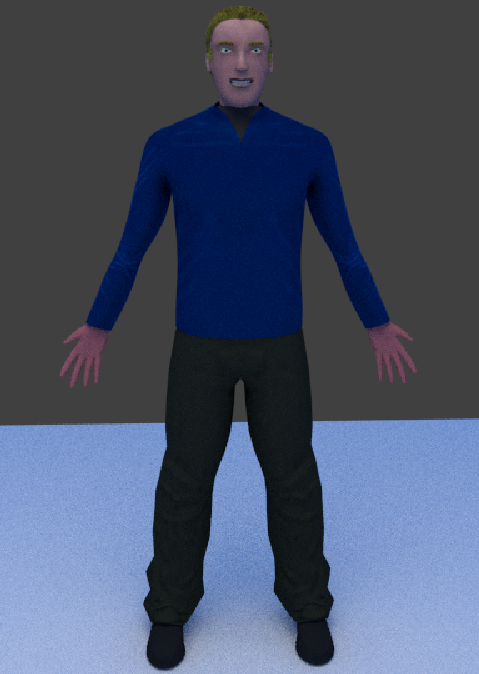
The full body attached image bottom of this first post is my latest version of the model (reduced shoulders, fixed hands, updated face, scaled down body proportions.
Any criticism, suggestions would be greatly appreciated… since these images / renders were done I’ve updated the hands as I found that I couldn’t make a proper fist. The shoulders and biceps were way to big so I re-did them. Scaled things down, re-made two UVs (one for skin and one for suit) images here have the skin type materials applied to both. When I applied the hair modifier, It no longer shows up when I render… WIP is certainly the right place for this. I’m trying to get through each of the steps in a full workflow.
My original plan for this guy was to put him into an action pose to create a scene around him some cool effects and a background etc. At this point it feels like I could just be adjusting the model to infinity
I will be replacing my guy with this one which I have just started modeling clothes onto… Trying to start to work out the scene and pose in parallel with updating / finishing my model.
seems every minute you spend on this is a minute in doing better. even with or because of all mistakes. the curious thing is that mostly the mistakes happen unplanned, so diving into it without a plan could be a way for developing a workflow just by doing. its too bad if only reply’s on a wip thread keep you rolling and the motivation is not for the fun of it. this could lead to more waiting and less doing.
1024 is pretty low, but you’ll have to figure out by yourself which res is affordable for your system regarding rendertimes. 4096px+ should be appropriate for animation - closeups.
…the post refers to the resolution of the 1024px - texture
…there is no checklist for completion, if the look and feel is alright the next steps will follow naturally. the experience of fiddling often appears symptomatic for lack of self-confidence or/and the longing for getting lost in doing negligible things. if you’re forced to do so, there is no way around it. to carry on without regard for evaluation will result in a new, better quality of doing as quantity always results in a new quality, so nevermind.
…don’t know.
…why not? export of assets to unity-engine is possible, export of logic and assets to ogre/irrlicht-engine also, there are many ways to do so. but its not as trivial as exporting to different filetypes. blenders game engine is pretty cool, espc. logic - handling with bricks is the big pro for people without programming-knowledge…
…depends on the viewpoints and close-ups ingame, the time you’ll invest and the goal you want to achieve with this. you’ll have to figure out yourself, regarding performance and appeal.
…keep it simple.
…i created the armatures for the characters “traditionally” and didn’t use rigify by now, sorry - but there are lots of good examples and tutorials on this forum and the web. it would be better if the modeling part is finished before rigging and animating the character but with some basic knowledge about rigging, you should be able to apply changes of the mesh to the rig. as said before, there is no reason for being afraid in getting lost while fiddling or getting to complex because getting lost is exactly the reason to do so. you could take a break and meditate instead but as far as getting lost by fiddling is also meditation, this wouldn’t be better, faster or make more sense - it would just be different.
ask the questions - forums are a place to communicate, that’s the reason people are visiting these places.
You make good points jester, I’m enjoying it so I’ll keep fiddling. You are right about the #2) confidence part maybe… if someone said keep your day job I might have been crushed …
what I meant was, if I increase texture resolution do I also have to add more subsurf.
a) i noticed that people have been baking high resolution models and using the baked image as normal map on lower poly models… at least I think that’s what they do, it’s a bit over my head.
I’ve added clothes and deleted the mesh body under the clothes since they are not visible anyway.
Any idea what is better?
8a) parent the head hands and feet to a shirt and pants
8b) join all of the parts on the same mesh and join them and add faces?
…as long as you enjoy your doing, being crushed is yet another chance to reinvent yourself.
not necessarily - depends on the uv’s resolution. if there is a appropriate subsurf level for mapping, you can change resolution of the texture without adding more subsurf resolution. if you are using displacement maps, the resolution of the subsurf matters - if you want to add more detail you’ll have to increase the subdivision and find a balance between resolution of the texture and the subsurf level.
a) its a common workflow to bake textures. there often is a large discrepancy between where thoughts lead to and how it turns out to be at last - texture baking is pretty easy with blender. you are familiar with uv unwrapping and mapping textures. for texture baking you’ll have to add a new uv-map in objects vertex’ properties tab and add a new, empty image at the uv-mapping layout for that uv-map. scroll down in render properties-tab, choose what kind of texture you want to bake (eg. for details from high to low poly normals and displacement if you do not want to bake all textures) and hit the bake button. head back to uv-mapping window after baking process is finished and save the baked texture. now you can reduce subsurf level of your model and map the baked uv-map for the high-poly details to the lower subsurf-resolution of the mesh (ref.: http://wiki.blender.org/index.php/Doc:2.6/Manual/Render/Bake)
8b) depends on what you want to achieve. for a realistic cloth simulation, you should keep the body mesh. if you’re aiming at a simple, easy to animate character, joining the meshes would probably be a good choice. you’ll have to figure out yourself.
as you might already know, the proportions of the mesh need a bit of work, for example the hands…
Baked the textures on the clothing wow it is awesome how that works… high detail where no detail actually exists…next time I will exaggerate the details so they show up a bit better in the baking. Switching to blender renderer to do the normal and displacement maps then back a gain was a bit tricky to figure out from the info I was using as my guide… Followed by getting the nodes set up to display things properly.
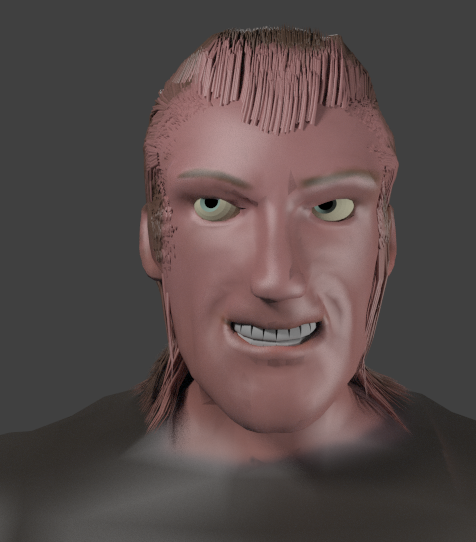
Per your suggestion I’ve adjusted the proportions again.
The head looks a little odd now but I think I’m going to move on to the hair and hopefully cover up the oddities… Like you said Jester, if I can live with it then it’s done ;)…
My next try at a character will be more perfect from the start… need to move on to other things…
hair
skin
finish the eyeballs
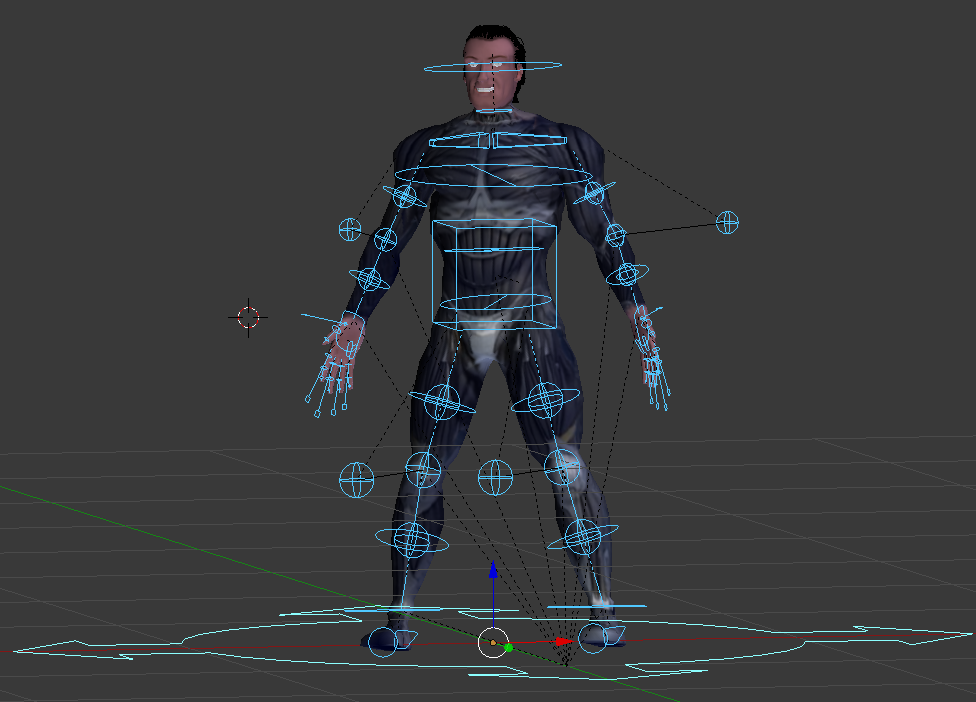
rig character (body with rigify and face with custom rig)
build a scene with lighting and atmosphere effects
wow I have learned so much … In the interrim I’m setting up a sever to do my rendering for me with this tutorial.
It’s pretty apparent that the more work I do the longer the renders are taking.
v3ny - It really looks like every post is a leap in the right direction. I shudder to give advice as I have very little experience but I would say that the new head mesh is much cleaner than the first one and I like the detail you have added to the clothes. I’m still not ready to try a full human myself but it is one of my goals and this thread is energizing me toward that goal! Keep up the good work!
Thanks for the feedback, any kind of response is so nice… negative is better though since I would have to go back and fix something you found to be broken… You don’t need to be good at modeling to detect imperfections… I’m a newbie, completely so I’ll take what I get…


 …
…