Learning Character Animation through self-education and sharing.

In a way to learn from my own mistakes I am starting this thread and in this process, if anyone else interested in Character Animation may learn few things or two… I always loved Character Animation in an entire CGI film making process, I’m pretty much a noob in this part though. So, finally I call it a day to devote more time on this rather modeling, lighting or rendering any further (apart from my paid projects). I guess, a couple of hours a day is sufficient to groom and bring up that fluency and efficiency.

I thought what would be the best way to practice on my own? Participating in some kind of challenge/competition would be very fruitful, where you get valuable feedback to know about your shortcomings. I find 11 Second Club is the best place to get yourself involved, what you’d say?

However, at this point in time if someone wants to jump-start on animating a pre-modeled character rig, s/he will find it somewhat difficult to get started as there is a lack of quality tutorials or documentation (post 2.5x) on this particular subject. If I could accumulate enough materials, I will move all these valuable information to wiki.blender.org which can be reviewed and edited by others.

Here, I will be talking about workflow, basic principles/fundamentals and few tricks right from Level_0. As I am learning myself from all the techniques available in Richard Williams’s The Animator’s Survival Kit which I own a copy of, most of the things would be very much relevant but at times you may come across few orthodox way of making things work. So, one needs to research some other journals, books or web articles and should be careful enough to develop only the GOOD practices/habits from the rest. How can you do that? Just by simply sharing your knowledge, that’s the power of any online forum.


For this month’s challenge, I will be using a Norman Rig. Initially designed for Maya by
Leif Jeffers,
Morgan Loomis,
Peter Starostin, and
Neal Thibodeaux

It’s a pretty neat and powerful rig, licensed under Creative Commons (CC-BY NC SA). Thanks to Ivo Grigull, who made this wonderful rig compatible for Blender (he goes by Loolarge here in BlenderArtists). For maximum efficiency and smooth workflow, he made two amazing plug-ins too, viz: Ivo Animation Toolbox and Norman Rig Addon. You would just love it, when you see that most of the controls are available in the 3D viewport itself.

Get the rig from here.

To get all the required controls in one place, I have re-arranged my windows like this.

So, here’s a playblast of a Lip Sync I made really quick. It involves, jaw and tongue movement along with inserting keyframes for certain ShapeKeys.

Download link to the sound file: http://www.11secondclub.com/competitions/january12/download/

For translation and other info, click here.

So, here is some minute improvements to lip-sync along with some eyelids, eyebrows movement along with some pupil dilation, there’re very subtle though. I fixed some weird tongue movements from the 1st Pass and animated few more ShapeKeys for some consonants like ‘beee’ and ‘ammm’ (he is not showing his teeth much, would add those relevant ShapeKeys while posing the body, so it matches with the ‘line of action’). It does look like a Muppet babbling at the moment but that’s okay as I’ll be exaggerating few words when the dialogue intensity ascends or smooth out few movements later down the line.

Now few things (or tricks) I learnt while doing the lip sync.

  1. We usually go with Pose-to-Pose while blocking the actions, but I choose to do Straight-Ahead for the Jaw movements (which is up and down motion along with some front-in) while scrubbing through the audio strip. PS: Preview of the Waveform helps a lot to adjust some anticipation when the sound pitch go too high, yet keeping it simple and not allowing too many things to happen at the same time.

  2. For the tongue, keep the f-curve in always Constant Mode because tongue movements are too fast and don’t have a smooth transition.

  3. Keep a small mirror in front of you to read the lips movement or have few reference videos of the audio clip, which in case it’s easily available on Youtube.

I choose to do the lip sync and facial movement before anything else as eyes and such draws lot of attention, I wanted to get these right before jumping on to bodily movements and it’s somewhat easy to do so in 3D unlike 2D animation. And anyways, we can add/mix different Actions through NLA Editor at any point in time.

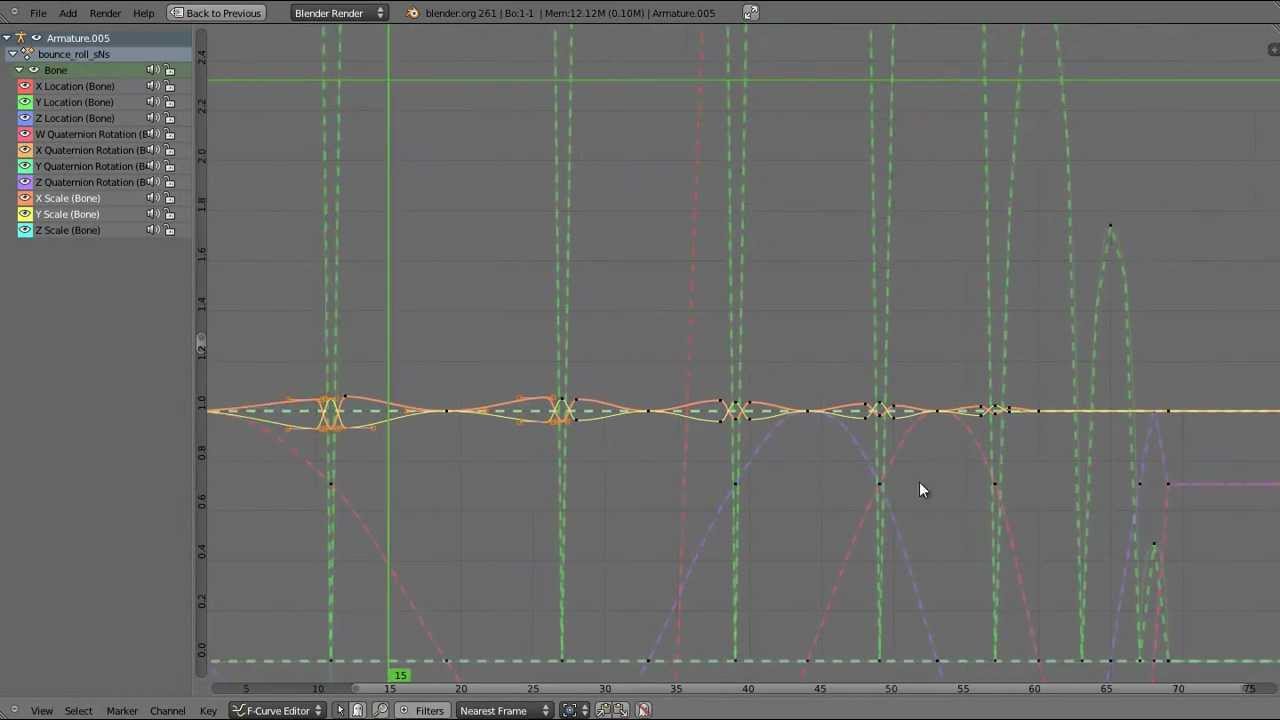
Now something about the f-curves/interpolation one should be aware of while blocking out the animation. Always set them to CONSTANT mode, and later when we have added adequate Breakdowns, we can change it into LINEAR but rarely we’ll be using BEZIER (*unless we are using Bart Crouch’s Motion Trail). Initially, I always tend to do this mistake by keeping the interpolation in Bezier Mode, thinking machine will compute the in-between frames but doesn’t work much with Character Animation specially. Even if you keep the IPO in Linear Mode, you’ll have to copy the whole set of Keys from the immediate frames to hold-down certain poses at times.

(ref: http://db.tt/i1pTFdD5)

Bezier mode can be activated when all the Breakdowns and In-Betweens have been put in, but I would still prefer to smooth out the required curves individually.

You might have noticed some of the Markers that I laid down in the Timeline, it’s there to make the workflow a bit less cumbersome when I need to pay more attention at such instances, viz: Anticipation or Exaggerating a few or changing different camera movements.

*Info on Motion Trail: https://sites.google.com/site/bartiuscrouch/scripts/motion_trail

Mere pass Blender hai
sorry

That’s a good one. :wink: No need to feel sorry, cheers!

Finally, here is a rough animatic, just to get the Key/Extreme Poses. In some frames the timing is bit off. I was bit lazy, drawing only a handful of sketches and those ‘stick figures’ are weird IMO. Anyways, I think it’s going to serve my purpose for the time being and hopefully make my workflow a little less painful.

I have one more scenario to play with but I guess, I will stick with this one.

I am still undecided about the camera positioning/staging. Will use multiple cameras for sure, or shall I go for a stationary one? Sorry, I have nothing much to say, as it’s all sketching making use of GIMP Paint Studio and Pencil. Will talk about the staging the key poses or extreme poses in my later posts.

After some commitments on other projects and personal life: family & friends; I finally able to find some time animating again, yay!

So, here I post my blocking pass. It took much time than I initially presumed. May be it’s my inexperience showing up, nonetheless I am learning fast and feeding my incognito brain!

The extreme poses are not very polished yet, but am somewhat happy how things turning out as of now. Remember it’s all in Constant Interpolation except few facial ShapeKeys and Camera movements, which have been changed to Linear for some smoothness. :slight_smile:

If you stumble on this, please leave your thoughts (specially on the acting choices), what and how it can be improved further. Thanks :smiley:

Please Note:

  1. Initial 4 secs just added up to get into the mood, I may stretch or reduce this at some point in time.
  2. I have isolated the second character to study the actions of the main character better (I can remove the props, if someone would like to see the more clear picture here)
  3. I have multiple cam-setup to read the correct silhouettes, line of action and negative spaces, will update most of the captures from different camera placement soon), I know, am going to settle down with few of them in my final shot though.

Your process is very advanced. Normally people just get a crazy concept and get going. It took me a long time to plan before doing. Your blocking is excellent. The devil (as you know) will be in the details.

Your process is very advanced. Normally people just get a crazy concept and get going. It took me a long time to plan before doing. Your blocking is excellent.
Thanks daren, am glad that you liked it. I hope, others visiting this thread would equally benefit and comment, critique or give some sort of feedback. Positive or negative, both helps to grow further and move to the next higher level.

The devil (as you know) will be in the details.
I learned during my research that animators from Pixar, Dreamworks or Blue Sky would spend couple of hours on one particular Golden Pose or even more. Guys at Animation Mentor will advocate that it’s okay if you’ve spent more time on Extreme Poses than your Breakdowns because you can tell whole lot a story just out of your Key Poses and secondly, if you’ve made your main poses right where it should be, breakdowns and inbetweens falls just at the right places otherwise you’ve to back-track a lot and loose much more time in fixing those errors.

As of me, I spent like a day or two (working 3-6 hours a day, hard to resist though) on some of those poses! Anyways, I am just at the nascent stage of my learning curve. I believe by the end of 2012, I will be more fluent and efficient.

Okay, here is another update that shows some of the ‘Line of Actions’ you need during posing/staging your character.

In case, if you don’t see any of these, click here to preview the stills.

And still if you don’t understand, what I am talking about, have a look at this.

Great to see you working on this. I’ve recently started on character animation too, a bit behind you at the moment, but expecting to improve significantly over the coming year. I’m not in a good position to critique just yet but I’ll keep an eye on this thread.

I’ve recently started on character animation too, a bit behind you at the moment, …

Christina, I do read your very ‘thoughtful’ thread and keep myself updated. I see you’ve set your goals somewhat like me. I really liked your idea of picking up short-term projects or assignment that would take less time to accomplish. I think, it would be a great journey together. And lets not say you lag behind me just because you start with a walk-cycle and I am straight off to the ‘acting stuff’. We can always help each other in our quest to become a better animator (CA to be precise) any given day. It’s a life-long process and the day you cease to learn from your or other’s mistake, you’re going to miss something.

I’m not in a good position to critique just yet …

By the way, I should have made it bit clear when I ask for feedback, is just to have some kind of discussion going on here - forum is meant for that. I am so new to this character animation and fear, I may go in some wrong direction and pick up some bad practices that we may never come across knowingly. If you don’t have anything to critique about, you may ask some question instead. You wouldn’t believe me but it’s true that I have learned more about Blender by answering other’s queries than solving for my own problems. I may be delayed a bit in my response but I will be here now and then, to make sure that I could reply everyone to best of my knowledge.


Okay here is my breakdown poses (still in stepped animation). I need to add few more breakdowns in my next 2-3 passes before I jump in to cushioning in-and-out and finally polishing all the stuff. And, that means a lot of animation still needs to be done! I hope, I will be able to wrap it up the way I’ve planned before the submission date.

If you would like to review it in QuickTime for each frame, here are the links:

http://db.tt/6BKkBSbU

http://db.tt/Ok7yGGjo

I will document all this things that I came across. What mistake or issues popped and what remedies I discovered/invented from time and again. A lot of insight to my way of working around with something, that many may find quite intimidating at times. I am stacking up all these materials that would require to understand these things in much lucrative way for any new CA enthusiasts, it would be mostly text with reference photos/illustration and few videos (for real-time explanation) as well.

So, all of my posts will be thoroughly reviewed and edited with more imparting knowledge that would add more meaning to this thread tittle.

Sorry for no updates for a long time, I’ve been really busy with couple of projects. Still I am very much tired and thinking of taking some much needed rest.

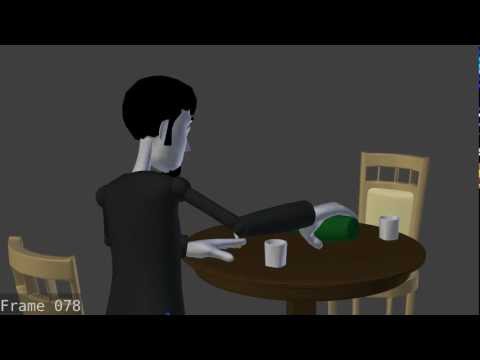
Okay, less talk and lets show you my final ‘crappy’ submission for Jan 2012 competition.

http://dl.dropbox.com/u/13535210/11%20Second%20Club/Jan%202012/page_preview.png

The picture shown above is a full test render. I guess, a complete render would have relate the story to some extend (as one can’t tell much from the Lambert OpenGL shaders, like which glass is filled and which is not). Unfortunately, I couldn’t submit the rendered version due to some last minute changes and (unexpected) trouble and it was as usual :expressionless:

I may document what problems I faced and how I tried to overcome those along with lots of tricks and tips. Luckily, I’ve uploaded the OpenGL playblast as an official entry. :wink:

I know it’s far from perfect. I wish I would have more time to polish and add more details to the facial expressions especially.

I am thinking of writing stuff, about my workflow (Blender specific, but can be transferred to any other CG app meant for animators) and emphasizing more on the basic principle and fundamentals than just mastering the use of any particular software. Unfortunately, I don’t see much interest among visitors here. So, I am not too sure if I should continue this selfless initiative. Thanks for reading though. :slight_smile:

very cool, I love the way its coming! Thanks for this post I have been looking for things that will actually show the long process of animation much more clearly. thank you

Thanks for the kind words Animelovers411, definitely helps to stay motivated and keep doing things I like most, i.e. sharing knowledge. But, unfortunately I find few people are skeptical about things I’m doing here. Anyways, I’ll move on without much ado.

*** Warning: Any of the content you read here is not from a professional animator, he doesn’t have any formal training in this area. Read at your own discretion. ***

Today, I will just start off with the mindset (very useful ones, wish I knew this much earlier) one needs to have before jumping onto Character Animation. I will try to keep it simple and readable, as well as enjoyable. :slight_smile:

  1. Character Animation process does take much longer time than one can speculate. So, if you don’t have time and patience, it’s probably not meant for you. Remember, even professional animator takes a week time for animating 100 frames shot (http://blog.navone.org/2006/06/infamous-interview.html). You got it right, you’ll have to live half of your life in front of your workstation now. No worries, if you start producing good result, it will be very rewarding experience and animators do have a life. :yes:

  2. To be an animator, you need not to be a 3D-modeler, rigger or master any other discipline within CGI. However, a subtle knowledge of rigging would be helpful. Over time, as your animation skills enhances, you would be able to rig and then later, you’ll be able to script a few as well. Did you know that during production phase of Toy Story back in mid 90s, out of 3 animators 2 were cell-artists; they never animated in CG before.

  3. If you’re here to make only money, then you’ll have look for other avenues (you can make loads of quick props for gaming industry, they’re really booming). You should be an animator, only when you’ve a passion for it. Money will automatically flow in after a while.

  4. Don’t be overwhelmed or biased with different software packages, what one can do and what others can’t. If you know the basic principle and fundamentals , it wouldn’t be too difficult to shift your gears from one app to another. From my little experience, blender’s animation tools is pretty well developed now (post 2.5x). Thanks to Aligorith, for continuously improvising on these tool-set. Caution: don’t show your blender fanboyism or rant about it on other forums, it looks very unprofessional.

  5. Have a keen interest in developing your basic drawing and acting skills. Animatic and Storyboards helps a lot in blocking your scene/character than without having any one of those. You must have heard that some animators take acting lessons from industry professional. Try to act your scene in front of the mirror (don’t try this in front of your girlfriend, she may start dating someone else :eek:)

  6. Character Animation is mostly about story-telling abilities and it’s definitely not a “no story - high impact” thing. Your story can be weird, funny, silly and sometime quite serious; if you want to convey certain message across society. So, to develop original ideas, read books/novels, watch good films (which relies more on acting performances than visual effects, i.e. in short avoid any Micheal Bay kind of films). Study other people’s body language, how they react at certain situation. Recapture those moments by drawing some ‘stick-figure’ in your hand-book.

  7. Animation needs a lot of concentration, so get rid off all the distraction factor. You should switch off your music/speakers too (if any) and if possible plug-off your Ethernet/Internet cable as well; you certainly wouldn’t like to get some pop-ups like Skype alerts while getting the right ‘golden’ pose.

  8. Character Animation is like making a dish. Different animators may have different style of animating (read as cooking) characters/props and that’s where different art-form (read as cuisine) come in existence. So, the keywords are; get your recipe and ingredients ready. Here recipe would be the method/workflow you would implement and ingredients could be the software, the character rig you have chosen for a particular shot, some pre-production notes/pre-visualization (storyboards/animatic) and reference videos. But always remember, software wouldn’t make you great animator or artist (in general terms), it only aids you to get your ideas/thought process across.

  9. Okay as I’ve talked about making dishes, your mouth must be watering by now. So, my next statement would be “Anyone can cook*”, umm sorry “Anyone can animate”. Yes, you heard it right… someone may defy you like “Hey Mikey, I want to tell you something for long. You can’t draw simple figures, you wouldn’t probably able to animate characters, ever.” Your reaction should be, nod your head and flush out those words from your mind, but the foremost thing is that YOU SHOULD NEVER GIVE UP. Have a look at this thread (and read it in order, don’t jump up to some random posts). Some people cried after reading out the original thread, even I was taken aback.

*So, to rephrase my last point, I’ve put up an avatar to remind you always, “Anyone can Animate”. Just a little remembrance of Remy carrying on Gusteau’s Legacy forward.

That’s all for today, in my next post I’ll try to cover Timing and Spacing with real-world example or I would take out few frames from my above animation.


And yes, it’s worth mentioning that the above animation still needs lot of improvisation. You would see, sudden jerks here and there. I’ll see to it, if I can make it more smoother movements and correcting several other mistakes.

I’m a relative newcomer to animation, but I’d like to make one point. Animation does take a long time, so don’t do what you don’t need to do. I’ve recently had my eyes opened to what can be achieved simply through camera work. Another discussion here put me on to hollywoodcamerawork, which uses expressionless 3D models with almost no animation (occasional turn of the head and sliding in/out of stage) to demonstrate the power of camera work in conveying story and emotion, and seems to me if you’ve got a handle on that you could get by with less than half the amount of animation that a non camera savvy person might produce. So, as an animator, you need to think like a director.

I like it!. Since your characters are ‘toon style’ you can exaggerate a little more than reality to give it more drama (suddenly I want animate toons). Bravo for this!. It’s coming along very nice.

And it’s true what crazychristina just said, camera can be useful with the scene. I would recommend see the best scenes in movies to check out the spectacular of camera effects and learn.

First time I noticed this thread. I’ve read everything here and was up to speed on everything you have done until this:

I have multiple cam-setup to read the correct silhouettes, line of action and negative spaces, will update most of the captures from different camera placement soon), I know, am going to settle down with few of them in my final shot though.

The ‘Line of Actions’ I’ve not heard of, is that in the ‘Animator’s Survival Kit’ book? I’ll have to look into that book if it is.

I was just checking out the 11 second club for this month yesterday and thinking about entering, but I’m a bit too busy to enter. I’m currently doing a mechanical animation and I’m finding it’s too stiff, lacks ‘overlap’ in the action. I should probably think about lines of action as well, even though it’s not a character.

Like daren said, I just dove into the animation (but with a clear idea of the action) using bezier curves instead of constant or linear curves first, and indeed, the devil was in the details.

Great work so far! Keep at it…
Randy

I know, you can cheat a lot through different camera techniques and I even know that you should work smarter than work hard. I am also interested in knowing different style of cinematography, that’s in my to-do list for sure. But the thing I want to put across is that, lets the learn the hardest way and by that I don’t want you to put lot of hard work into something which wouldn’t bear any fruitful result and can only be considered as futile.

Let me give you a simple example. Suppose, if you’re into a shot, which only captures the emotion or gesture of the upper body, you may not animate the legs or vise-versa. But, it’s always useful if you can pose the entire body mechanics, however, not going onto animating all the secondary and overlapping actions in details.

And if you’ve followed that link of Victor Navone’s Interview; he says "Any Pixar animator are allowed to work for 5-6 days just to finalize 3 or 5 seconds shot; that only signifies, how much effort they put in each frame to get it as authentic as possible. I presume, many production houses may have some time and budget constraints so they bypass every single details and degrade the finishing touch. But, we are here to learn all that comes our way, we shouldn’t compromise on quality and time at the very beginning of our learning experience. So please, no short-cuts at the early stage.

Oh, I tried to get some squash-n-stretch there, but this Norman rig which I linked through library proxy wouldn’t allow me to get the desired result. I put a keyframe for a scaling-factor and it vanishes the very next moment as I move to a different frame or playback the animation at times. This is so broken (main reason being the change in blender API now and then), every time I try to fix something, something else go haywire. Even some facial ShapeKeys can’t be animated through Graph Editor, i.e. I don’t get any interpolation curves for MouthShapes.

But, the best part of Norman rig is that you can customize it into any form you like, it’s also very lite; not too many unnecessary geometry. One of the best rig for practicing purpose. However, I would like change few things. Lets see, if I can get some helping hand from Ivo, I would put up a repository of different character set for blender users to take advantage of it. Such a beauty shouldn’t be lost just due to technical advancement it can’t cope up with.

Oh, it’s all over there. Most of the lessons are through illustrative sketches and he may have used a different phase at times. If you follow the last link of post# 7 here, you will get to know what exactly it is. I will be explaining in detail at some later stage, while dealing with body motion, fluidity and mechanics. And yes, any animator must have this particular book; it’s definitely a “survival kit” for me as of now.

I was just checking out the 11 second club for this month yesterday and thinking about entering,

I think, it’s the best place to hang around with best of the best animators around the world. This site is meticulously designed, these competitions are held every single month in a very transparent manner, you can also go for some weekend challenges as well. The forum is evenly organized with very helpful members/moderators/admins to keep you on track. There is a resource section, loads of helpful tips and hints (which I’ll be referencing at up coming relevant posts).


I may take a few days time to get all that you need to know about Timing and Spacing thing, it’s the most basic fundamentals one should cultivate as early as possible but I’ve seen that this simple thing have been overlooked by many at the very beginning of their understanding of animation in particular.

I’ve also added few more points to my previous post# 12, you may check it out. Thanks.

Awesome thread :smiley: Been dabbling in blender for a while and I am interested in animation more then anything else hehe finally got a handle on rigging(not a master but enough to get me by at least for humanoid characters) just had one question. What kind of camera setup do you use? At first I had tried to use the setup I had been using for everything else(which makes aiming the camera at things easy in the 3d view but makes animating the camera motion horribly difficult…) which is the camera with a dampened track to constraint pointed at an empty but yeah trying to animate them both and have them be perfect is near impossible in a decent time frame… I’ve seen some rigs on blendswap and somewhere else(can’t remember where XD) but I think they are from older version and I couldn’t get them to work sadly :frowning: Does anyone have any suggestion I can try to see if it’s easier or faster then just the simple aim the camera which I am happy with but if there is more options I think it would benefit everyone not just me :smiley:
What kind of camera setup do you use?

If you’re referring to my last submission entry, I used only two camera setup (both are stationary).

  1. Over the shoulder, and
  2. Face to face

In my earlier attempt, I’ve had several other setups and mostly I track my cams to an empty (using only, track-to constraints) and use it as rotating mechanism; very handy for dolly shots and various other camera movements. However, I haven’t tried my hand with the more advanced camera rig (made by Wayne Dixon, I guess) but when I will be studying more about camera animation at later stages, I may give it a try.


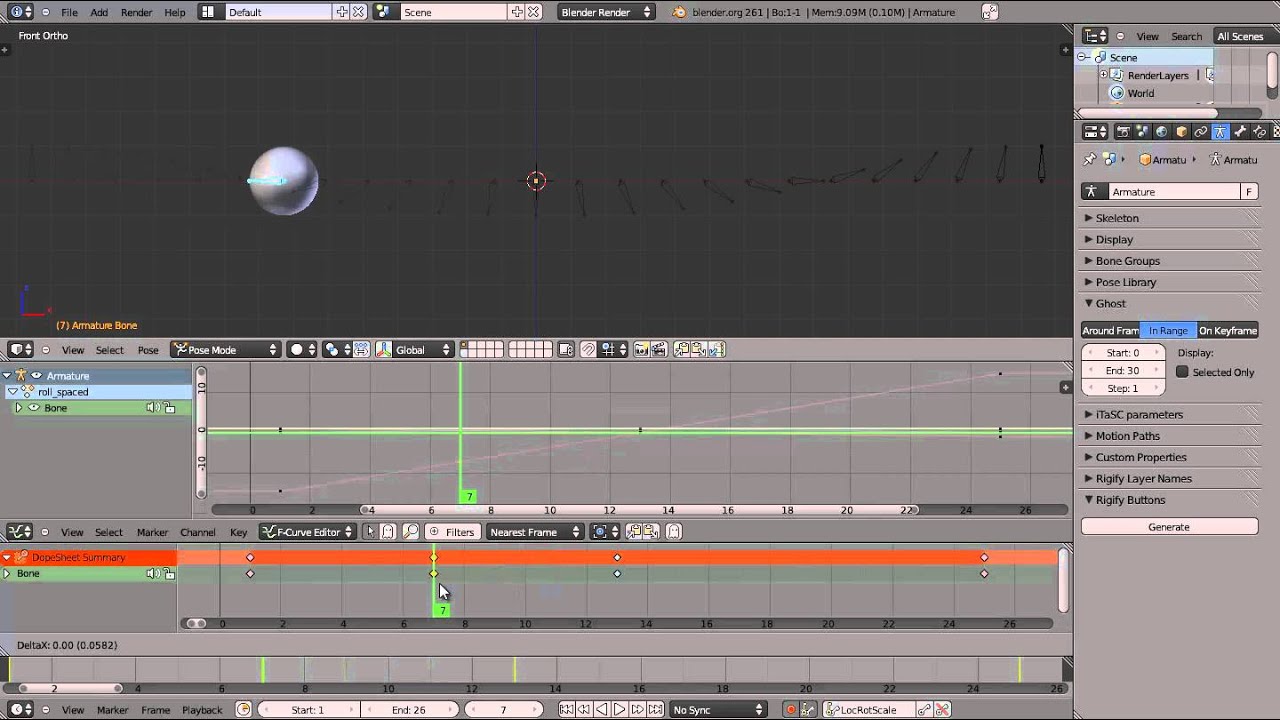
Okay, now moving back to things that I would like to share. Yes, it’s about my exercises that I’ll be taking over the course of time. So, lets start with the very basing concepts about Timing and Spacing. Hope you’ll enjoy these exercise as much as I did.

PS: The audio is not of very superior quality, I don’t have a high fidelity microphone, so pardon me on that part. Also these videos may be a bit lengthy. You may download the HD version of these videos using some plug-ins available for your respective browser and go through each one of these at chunks.

I have left these very same links at 11 Second Club for review it by someone more experienced but I couldn’t wait to share with you guys. If any things comes up that needs to be modified/rectified, I’ll make sure to leave a note here too. Thanks :slight_smile: