So how would i go about bump mapping the head to get all those pores on there. I mean there are thousands so what is the trick to putting them all on there?
And then how would i go about setting up the materials?
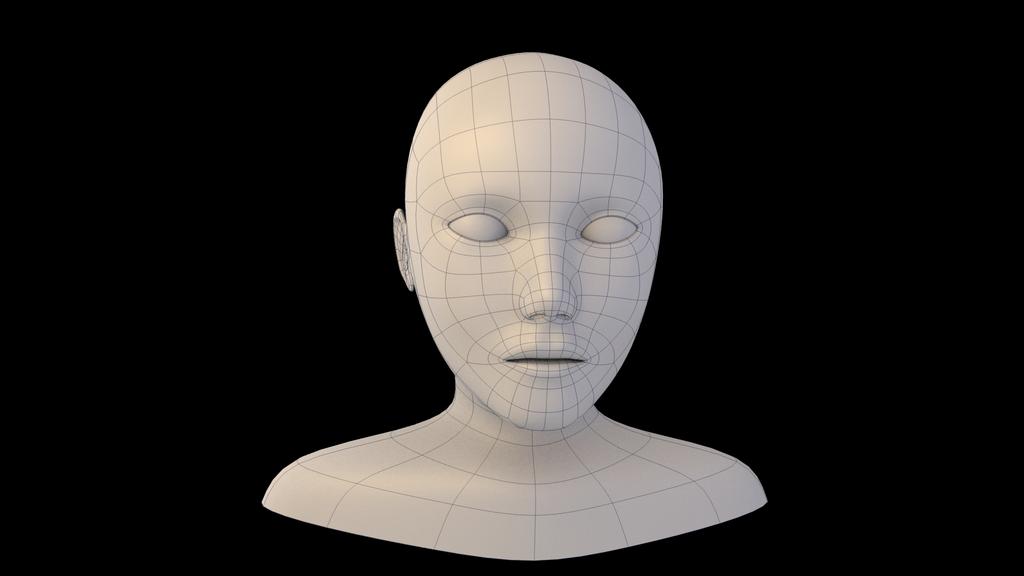
I did some shape corrections…at least i hope they were corrections and didnt make the model worse. The topology remains the same, so no need for wires.
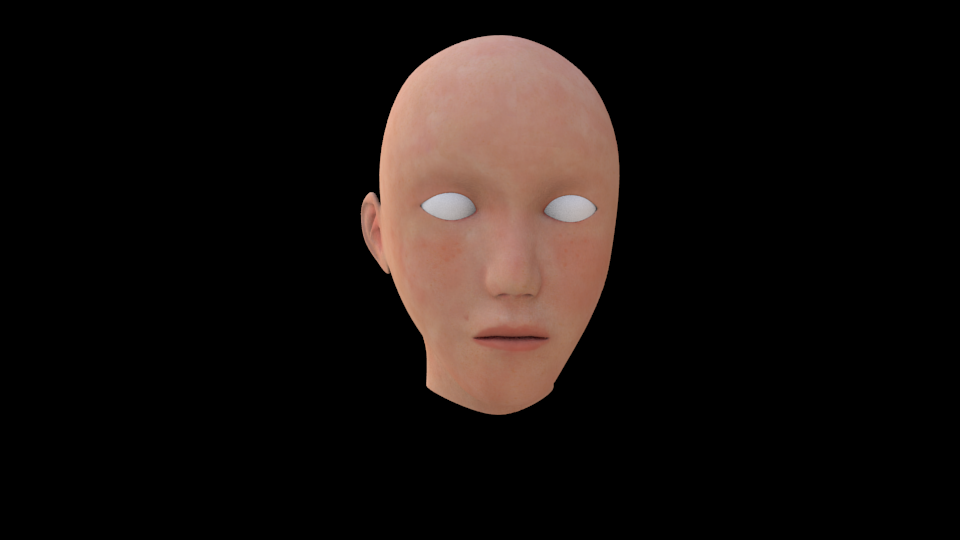
Here is a render with SSS settings applied. I pretty much copied them from this tutorial http://bensimonds.com/2010/05/31/three-layer-sss-in-blender-demystified/ , but used solid colors instead of textures since i didnt have any. Which brings me to my…
CALL FOR HELP, any resources on how i can texture the face from this point are much appreciated. How would i go about making the skin look realistic? (color, pores on the skin, folds on the lips) I have no idea on where to start. Please point me in the right direction.
Im on dial up so don’t have time to sift through the links but if you go to the link below you will find a face texturing tutorial by a lightwave artist that explains a lot of info.
If you got 10 Dollars to spare I highly recommend you join. I did.
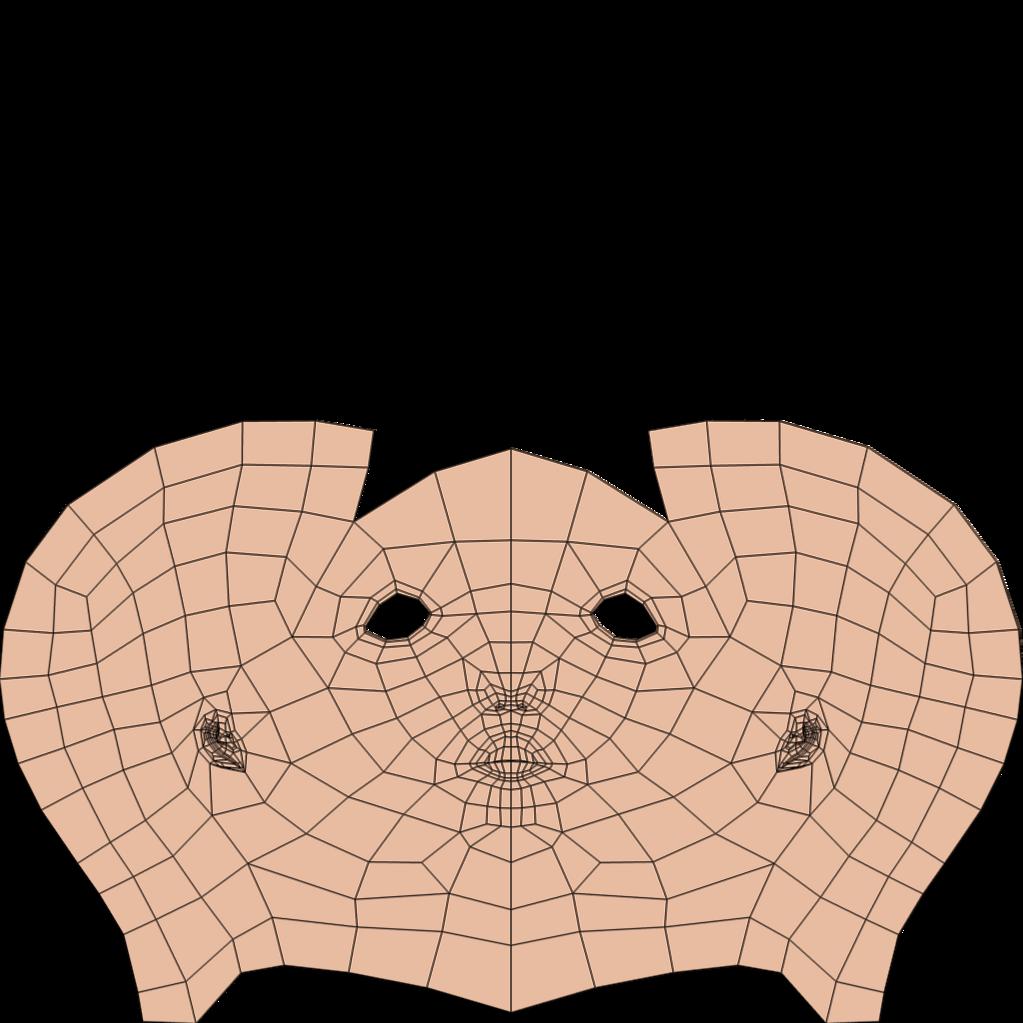
First you need to unwrap the modeled human head and then
you can export out a texture map of the UV Islands to use as a guide
to make skin textures.
Well, i am currently making a human head but just unwrap and place on picture of skin, its called texturing but you will be using uv mapping, there are many ways to do this because of the setup of each blender version is different so what blender do you have, 2.49b, 2.57b(stable)
@superfootbal, lol i think my signature is outdated now. I switched to 2.5 awhile back, and have not use 2.49 in a while.
I am not looking to “projection paint” my head, i want to create a new skin for it, rather slapping on a random picture of someone. This is more useful for BGE, whereas i am looking to create something original.
@icey-cooley, thanks but i am not concerned about the shoulders at all, they are not the focus of this exercise. The cranium and jaw,
i can take under consideration if you wouldn’t mind showing me more specifically, maybe a paint over or something. But i think i would rather not change the mesh b/c i already unwrapped it and started painting. But still i wouldn’t mind the correction.
@jonothandone
Ok so i looked through the site and found this tutorial, wich matched your description. http://www.computerarts.co.uk/tutorials/premium_content/3d__and__animation/gimme_some_skin
The tutorial provides the base skin texture and then tells you to pain areas darker red then goes into bump mapping…
I only got to the bump map itself. And here is a render with one material with 2 texture channels the diffuse, and the general bump(no modifications yet,the texture is the same all throughout, ill get to painting it soon) And i also enables SSS, wich doesnt seem do really do anything (i changes the rgb radius to 6,3,1.5, all other settings are default).
So from here i am wondering on how to actually create the base texture. And also where to really paint the heavier red in the diffuse. I guess i am painting the blood concentrations? since the lips are the reddest…
How would i go from here and separate this into sub-dermal and epidermal maps?
(Oh i should probably mention that i did the painting of the diffuse in texture paint mode in blender, as it proved to give me better results than when i did it in Photoshop…2048x2048)
If it*s some help, you may take a look of this article. Also Sintel Lite is an excellent reference.
You must remember the awesome flexibility in blender with its libraries. so apparently you just have to do specific textures for your own model and learn from the variants of these nodes.
You won’t have any problems if you’re just gonna push and pull vertices. The UVs won’t be affected with the tweaking. It’ll only get affected if you added edges, extruded faces, etc… Another advice based from experience is you should make sure your model already has right proportions before texturing. You’ll never know if you need to add more polys or not.


