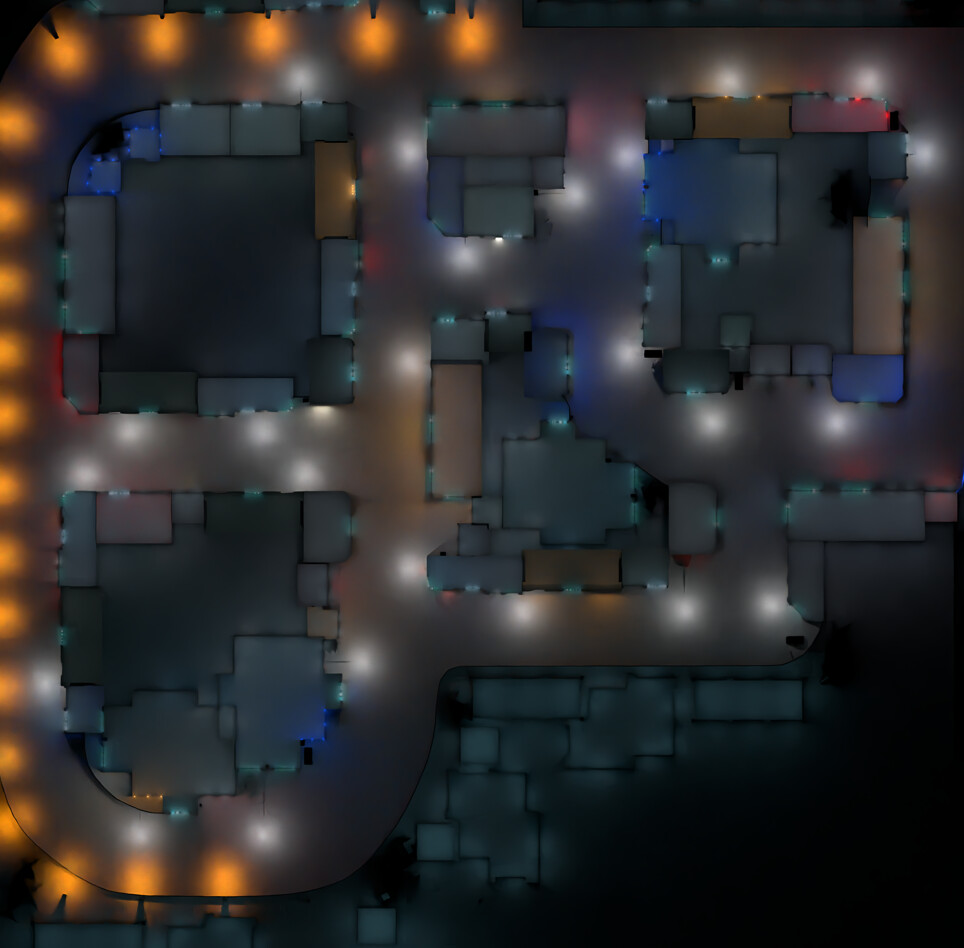
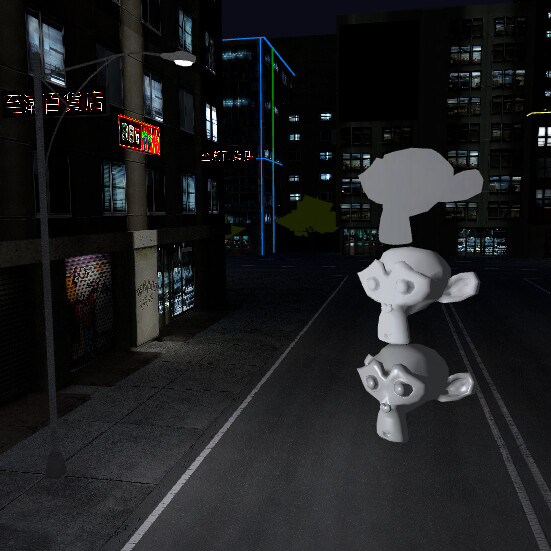
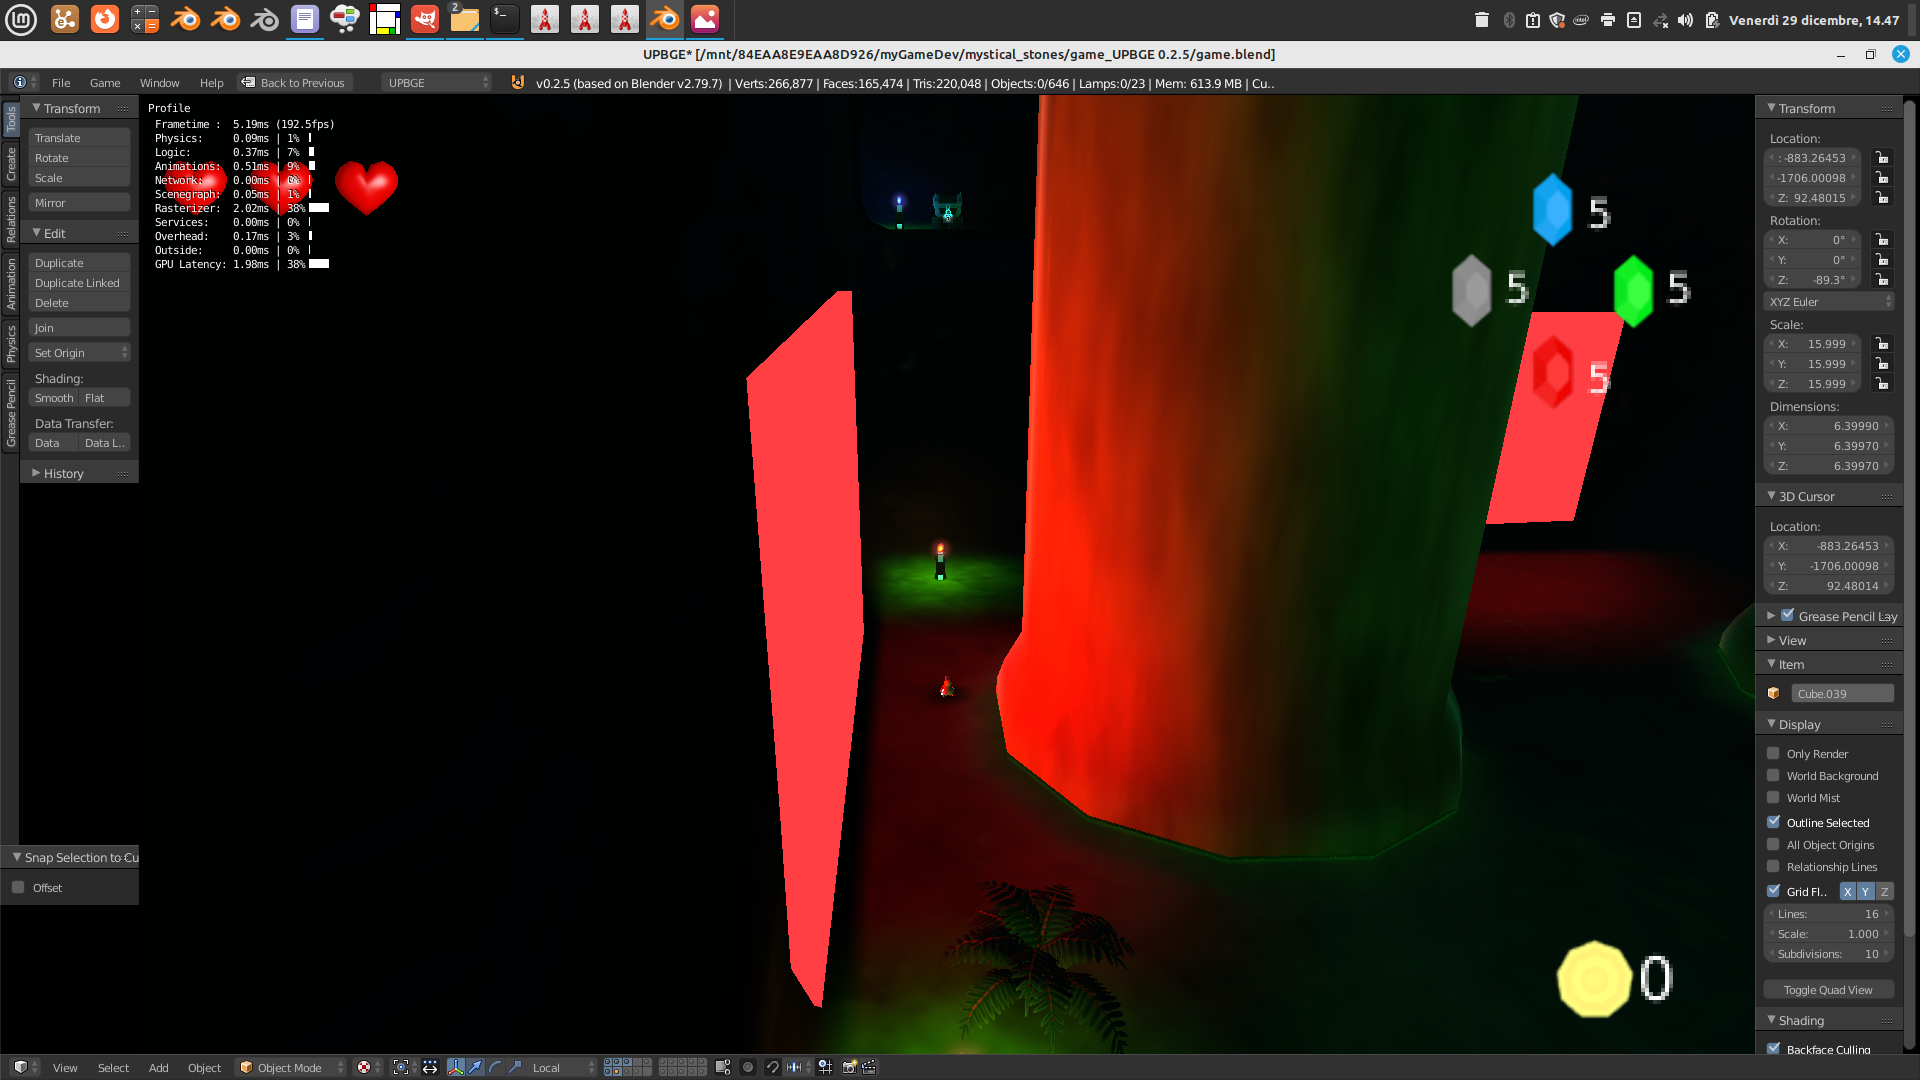
Now, you can flood your map with infinite baked soft light source and your character will react to them.
Extreme performance, game-oriented
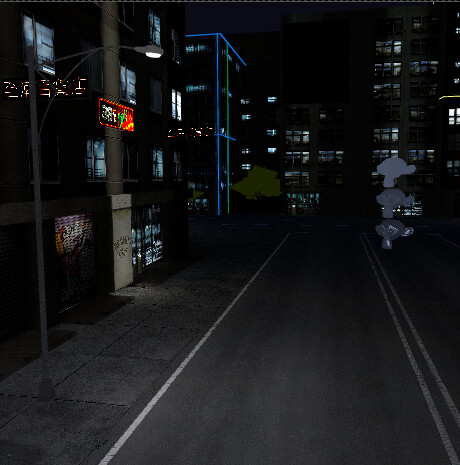
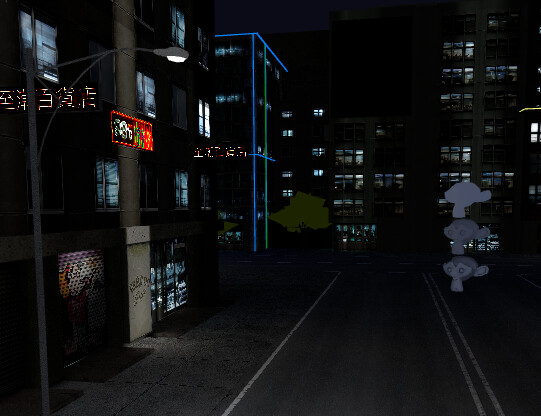
without 2d filters
with 2d filters
Still some improvements to make but its roughly this
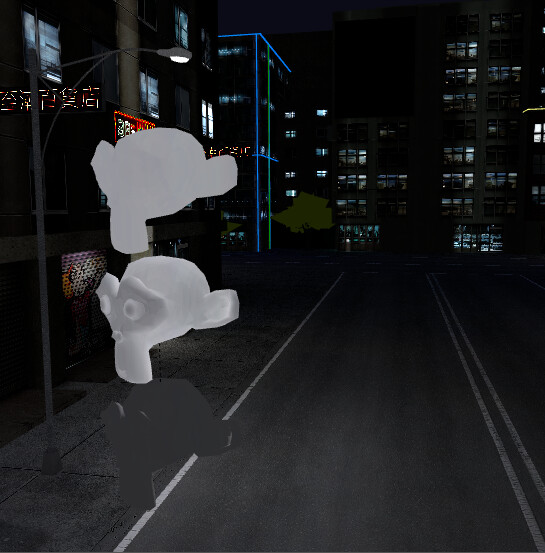
Now, you can flood your map with infinite baked soft light source and your character will react to them.
Extreme performance, game-oriented
without 2d filters
with 2d filters
Still some improvements to make but its roughly this
Glad to see you are making progress.
If you haven’t tried yet, it’s possible to get some basic specular highlights too:
thats amazing once again ![]() if i understand well, it fakes specular as it emphasizes the ambiant more on the edges and sharp geometry ? You don’t use the specular socket for this ?
if i understand well, it fakes specular as it emphasizes the ambiant more on the edges and sharp geometry ? You don’t use the specular socket for this ?
Gonna showcase this above tomorrow ![]()
4 things :
With this Normal Plan , only X and Y directions are variables, Z is some derivative. When you see the neutral color in a typical tangent map , its some purple color (0.5 , 0.5 , 1.0) and even in extreme cases, the blue channel never goes below 0.5 ? . Whatever, i don’t think one can see something like (0.5 , 0.5 , 0.0) that would say the light comes from below
Maybe a second plan - same pose but facing the ground - should be baked in order to compute something that would actively include Z in the process. Or - based on the first Plan - simply assume that the more bright, the more Z is taking over X and Y ? I don’t know … having the possibility that the light comes from below would be cool too
How the emit input can be used properly? Sometimes i use something like
emit = -1+ [ 1.01 / (1.01-Ambiant) ]
so, only high value ambiant makes the emit boom a lot.
Faking self-shadowing : Was thinking of baking a 3 RGB mask thx to 3 suns (red, green and blue) on vertex color to combine with Geometry normals and the Normal Plan … so for example, no suzanne eyes geometry would receive any ambiant at all if the light is meant to come from behind her head. It’s the case as it is now coz her eyes are almost spherical) . I would try to make this tomorrow
the cherry on the pie would be to integrate a normal texture that would react with the whole thing (so to fake complex geometry) ![]()
Really nice!!
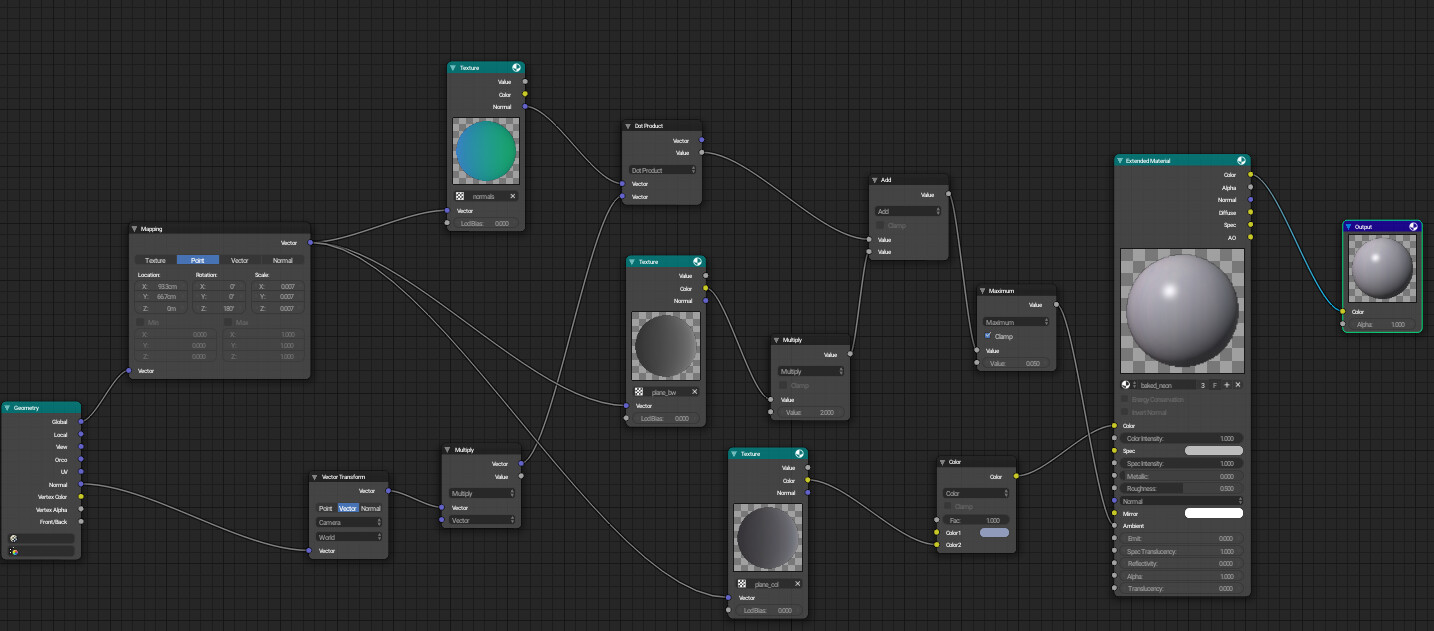
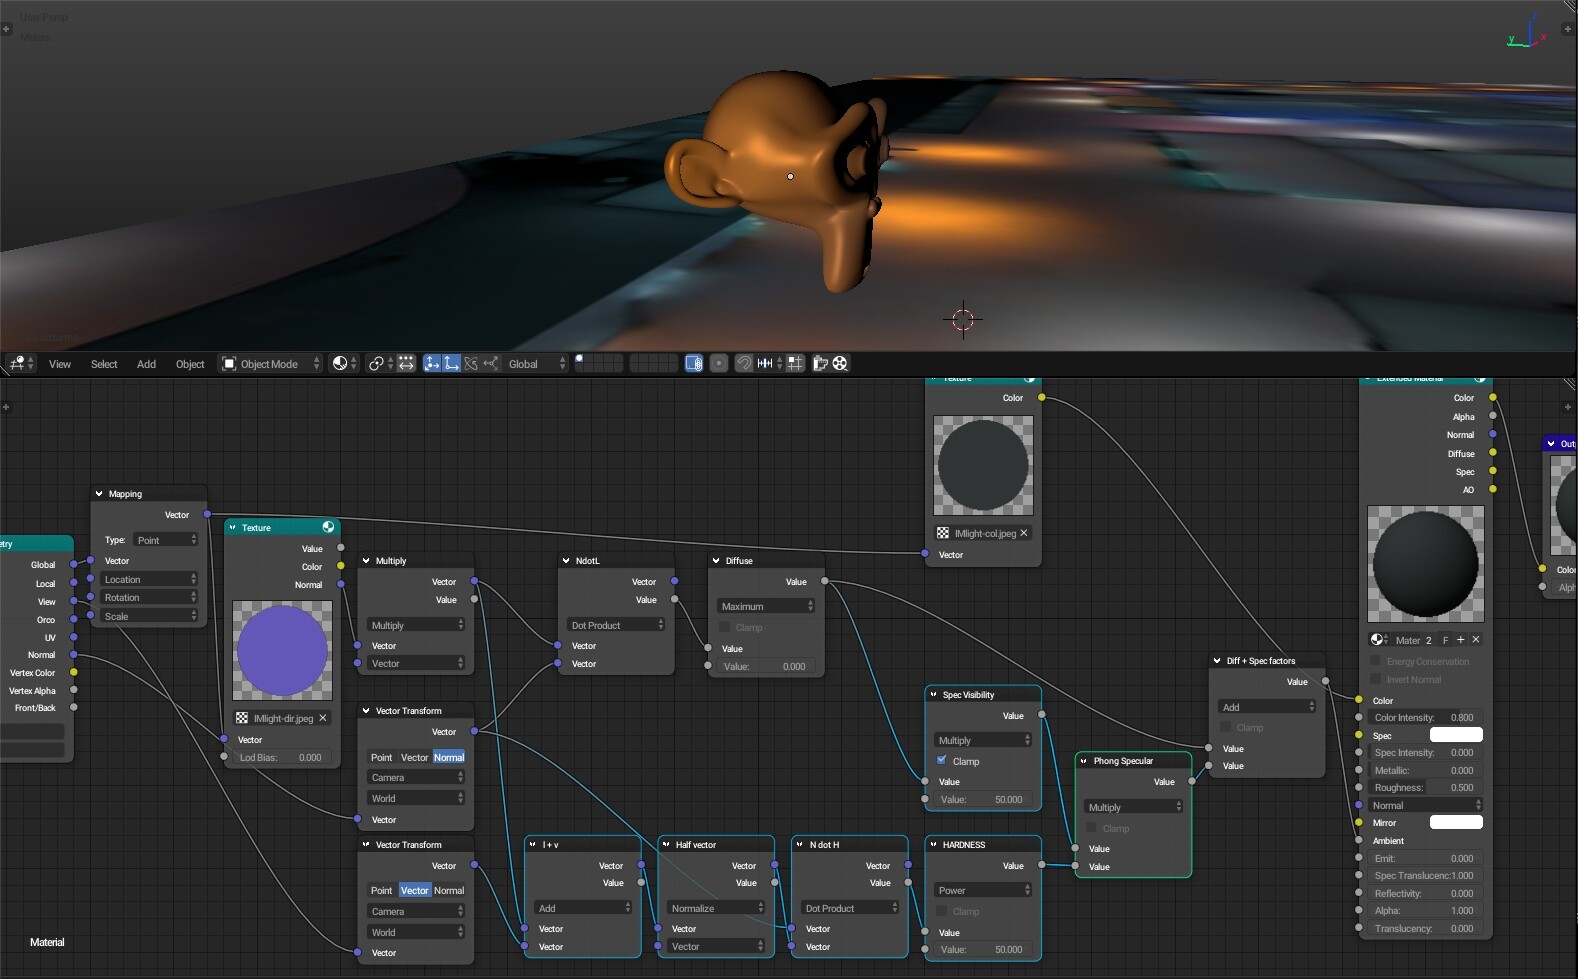
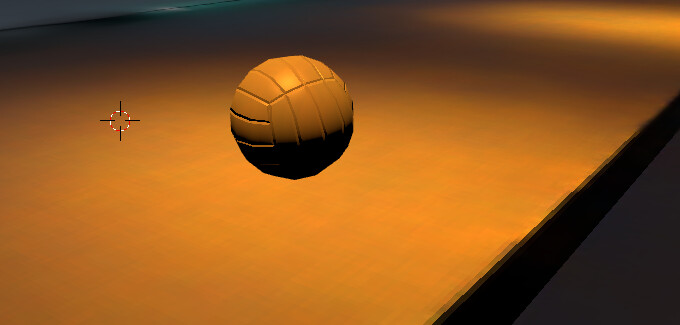
The selected nodes at the bottom perform a phong specular shading, the same method used for the Phong and CookTorr specular models.
The valued are converted from range [0,1] to [-1,1], 0.5 turns into 0.0, values lower than 0.5 will result in negative -Z, meaning an inverted normal, rarely used on normal mapping.
You can subtract the Global Z (*-1) from the vector texture and normalize it. This would give the light direction a global position, it will always be at z=0.0, but you can subtract a z offset before normalizing it to control the height.
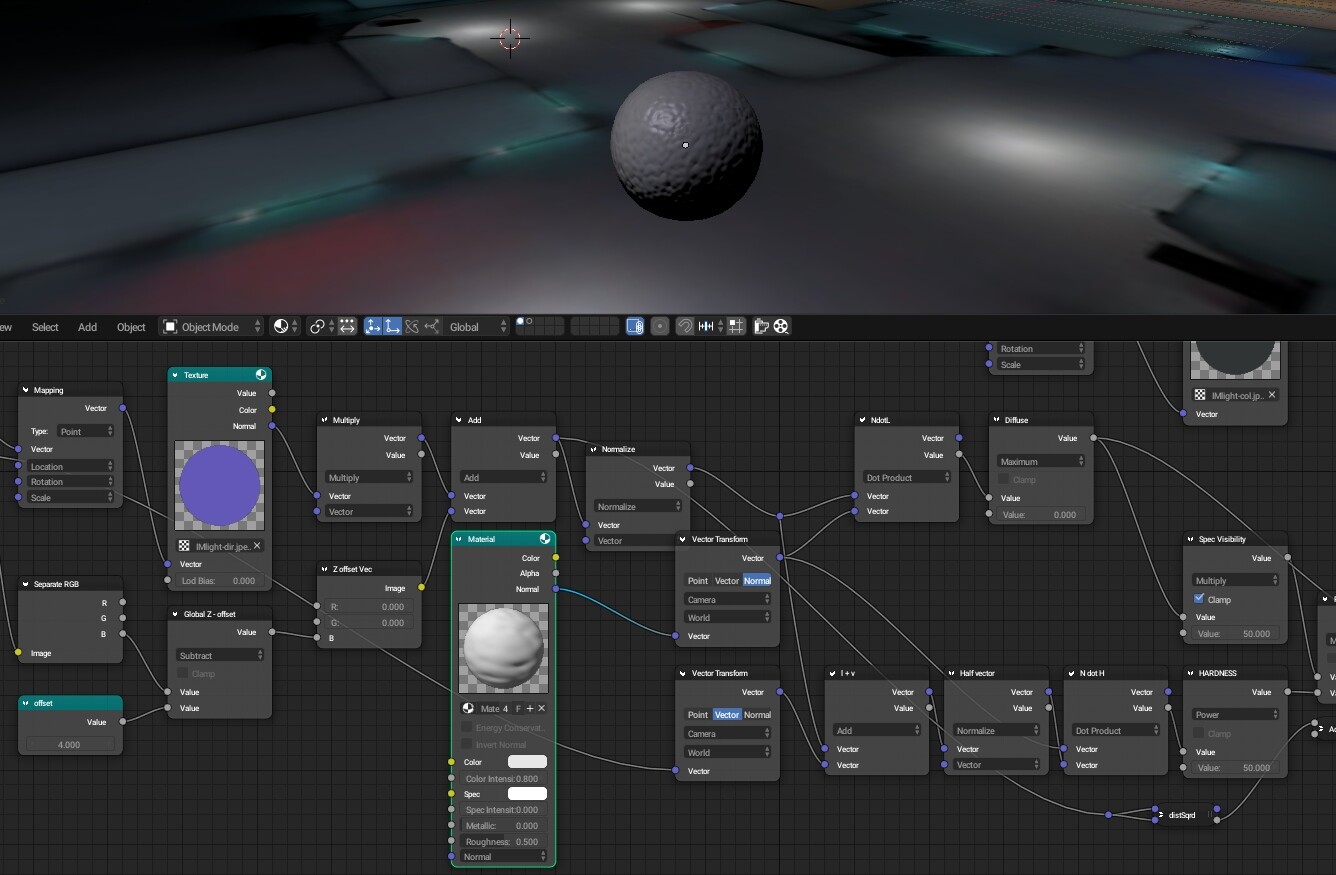
Above : Ambiant set by Height texture only
Middle : Using Height * Normal texture
Below : Your Phong specular shader
Your material shines very nice here ! Looks like there’s a true lamp. It’s smooth and sharp in the same time. I like how the object seems to be less transparent and have a consistent skin ![]()
When being straight above a white spot on the map, we have those limit case that makes both ugly and incorrect. Z should take over X and Y on this case
Here, when being in dark flat zones, the specular should be tuned down.
But i replaced the 2 scalars of “50” by multiplying “ColorMap * 50”, so looks fine like that.
In action ! (@MattFrnndz if you want the map, tell me ) . You can post videos of your new findings. What about setting up a little car game for your showcases ![]()
Here’s the method I mentioned for giving the lights a global Z position:
The intensity remains the same when moving up/down, but the z offset distance could be used to calculate some falloff.
Just out of curiosity, how do you manage to achieve 200 fps + during your animation demo, which looks amazing ?.
range engine has GPU armature skinning I think*
edit he is not using a armature - the lighting here is all baked / faked
we can pass in the player position as 2 uv layers also*
yes, the thing here is to try to extend baking capabilities to dynamic objects (whilst baking is often associated to static) . The approximation of lighting is made in the materials.
This solution is suited when there’s lot and lot of very diffused sources of lighting… just like in a city, there’s like a big global environment lighting soup but with many local soft variations.
Ofc, you can may add some real lights to your scene… those dynamic lighting : ie, lamp torch, gun fire …etc …
you, lopas and MattFrnndz came to me with that idea at first . But the problem with that is that its object-based and not point-shader-based so your mesh will tickling/variate as a whole … and even more if there’s lot of noise in the baked texture.
Very cool ! it’s gives somehow a spherical effect to the fake lighting . I gonna test this in the next release.
Oh, you can come with another miracle for the normals too ? ![]() Normals usually require a true light source. But here, there’s none.
Normals usually require a true light source. But here, there’s none.
I’m planning to give the map to people here with our super-material for the car. I want people to use it some car racing RangeEngine game.
Btw, if what we have here is roundly “Cube mapping” ? I guess CubeMapping is not dynamic and just reflects some Dome texture on your material … No ? Cubemapping is very CPU expensive i guess
Are you talking about normal mapped normals?
You can use the normal from a material node of the current material instead of the geometry normal.
do you have a .blend ? ![]()
i gonna set up a little car game i think and ship your material with it. We have really cool stuff here
Here’s a blend:
BakedAmbientSpecNormals.range (388.8 KB)
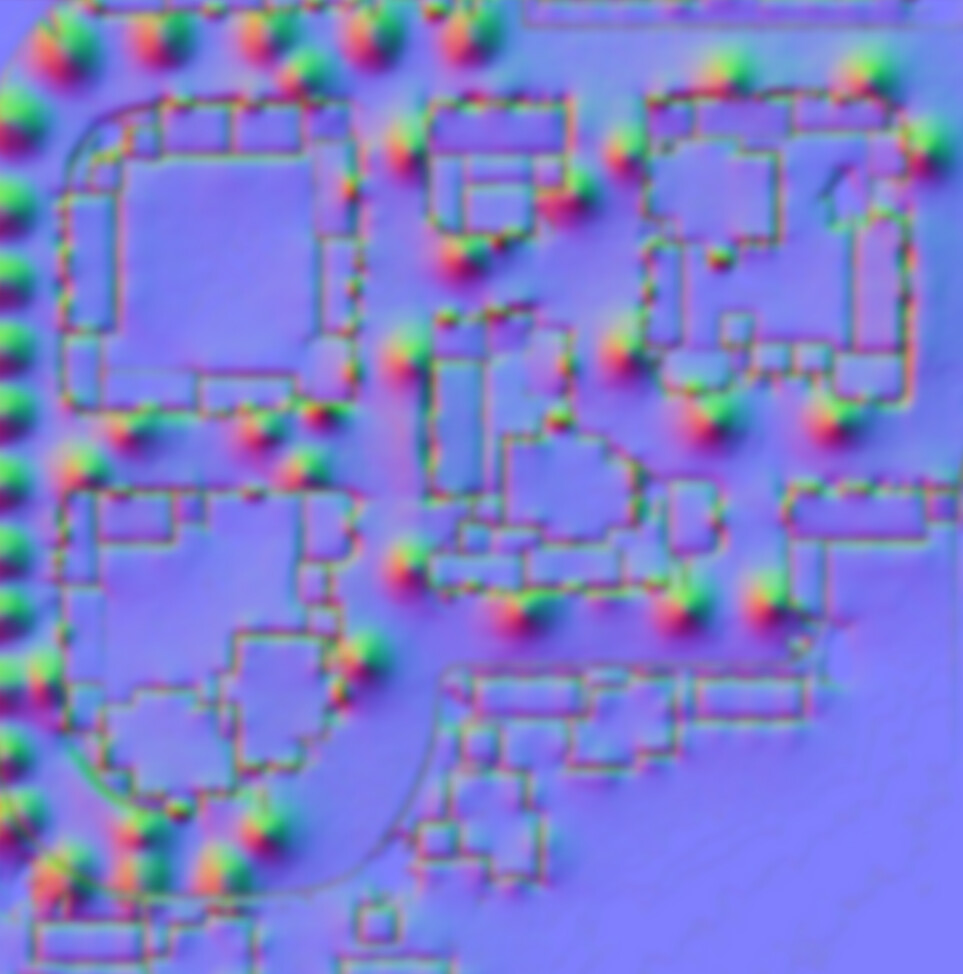
I noticed the light direction map has more visible map at the bottom than the light map, they have to match otherwise the light color and direction won’t be properly aligned.
thank you a lot! I will have a deeper look on this next month since i’m very busy. Curious to see how that Z height thing work / render to make it maybe less sharp . Having a global soft lighting material is just amazing for range game creators . See you
Also, i see there’s some unknown node you are using here … looks like the mapping node but with capabilities to parameter loc,rot, scale
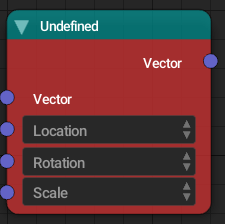
That’s the Mapping node from Range 1.4, I like that they added inputs for each transformation, rather than having the values ‘hard coded’ as the only option.
ah yes, ofc … i’m using 1.0
here, interesting, youtuber playing with the thing

Same idea is applicable in 3x as well ?
It should work, maybe using the emission since there’s no way to control the ambient as far as I know.

This is an experiment for static area lamps baked into textures (color, direction, and position)
For each object it is as if there were constantly an area lamp whose light varies depending on the position of the object, because the worldPos is used, as you also did, to determine the sampling point in textures.
Despite the other graphic effects, fps remains above 180 in full hd (gpu: mobile gtx 1050Ti)
Here in the image, using a better baking method → more soft energy decay (better on the ground)