Light beam bounce on mirror – Caustics reflective

Hi everyone.

This is my first post on this forum.

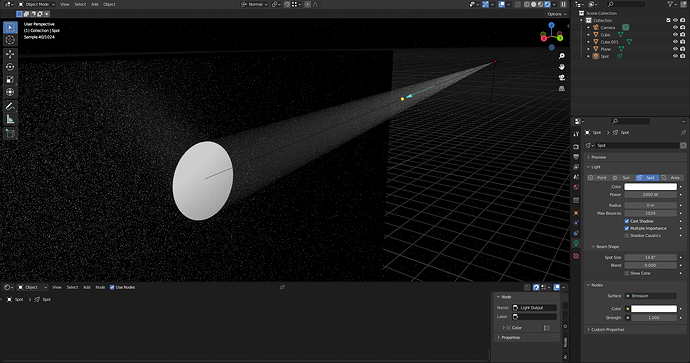
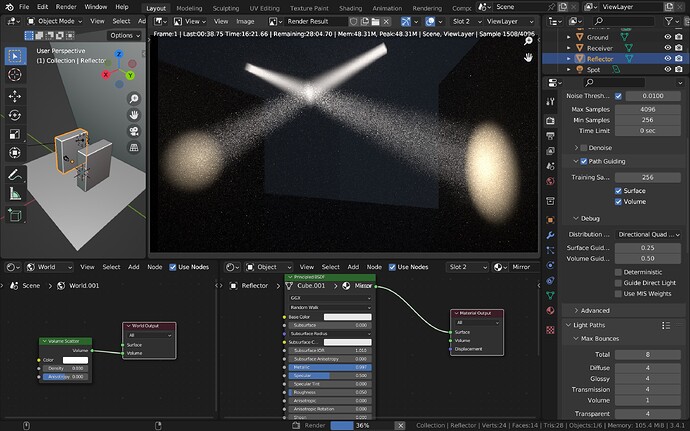
Premise: I’m trying to bounce a “spotlight” light beam with a sharp/defined (not soft) light edge on a mirror with as little “roughness” as possible to respect the sharpness of the light beam.

– Blender v.3.3 – I’m using “Cycle” as render engine.

– The “caustic reflective” option is active and on “Light paths” (in the “Render properties” drop-down list) I increased the “glossy” and “total” max bounces.

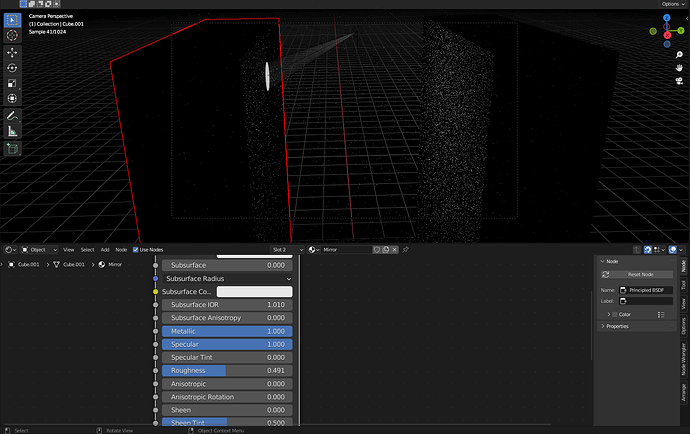
Result = it doesn’t work, or better: if I increase the roughness of the mirror surface the “bright circle” of the bounced light starts to appear but the more I increase the roughness the more the sharpness/definition of the edge of the bright circle is lost.

To make this problem more evident I activated the principle volume/smoke in the world to highlight the beam of light. Again, volumetric light doesn’t bounce either. However, while doing some tests I noticed that during the render before the final denoising, some white dots of light were forming right in the area where I would like to see the beam bouncing and passing with smoke in the void between the two walls. This gave me a hint that maybe it’s a mirror material/shader issue. I made several attempts but I haven’t solved the problem yet (it’s probably a technical limitation of Blender).

p.s I also tried changing the radius of the light beam but the problem has not yet been solved.

p.s I have seen that some users manage to get the desired result using the LuxCore render engine on Blender. Personally I don’t use it because it has obvious limitations and the support seems very small and limited to me. I would also like to avoid using other programs outside Blender as well.

Last thing: I highlight that in my case/use I am not interested in creating fiction, imitating the final result I would like to obtain, through montages or tricks, because what I would like is to obtain this result because Blender can simulate this optical/physical phenomenon ( without tricks) to make sure that the bounced 3D beam graphically adapts automatically to any animation, film short or other that does not include only a static situation/a single frame. I say this because if I make a montage to “put a patch” on this problem and to get only a static frame, I get away with it. If, on the other hand, I have to make an animation with several frames, it is no longer a question of using a photomontage to temporarily solve this problem, but of having to deal with more complex graphic editing that requires much more time and in some cases a lot of money (eg. After effects etc.).

Some test about it (Screenshot):

Light sharp edge:

Hight roughness:

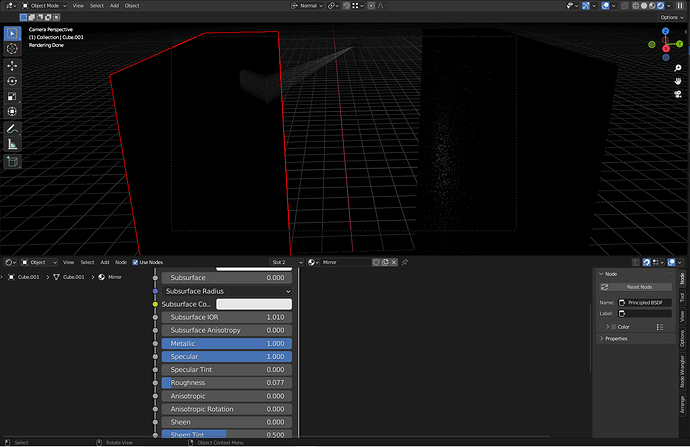
Low roughness:

Almost nothing roughness:

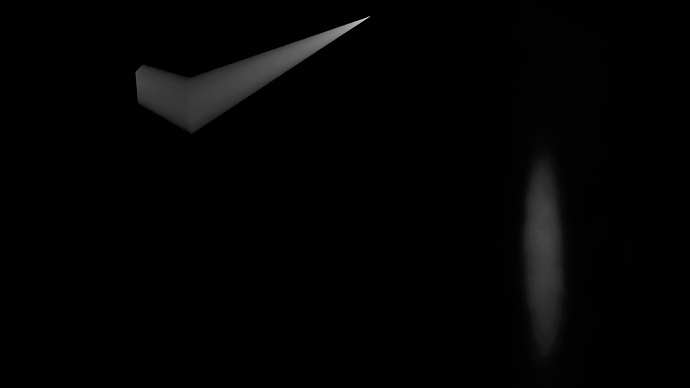
Best resoult (but edge is not sharp as the original):

Then the perfect result would be a light bounce with sharp circle edge at the right wall and not a blurry and not volumetric light not visible after bouncing into the wall on the left.

The .blend utilized:
Test reflective caustics blender.blend (911.7 KB)

Thank you all for your time.

If I find any solution to this problem I will update you.

– Daniel.
You can upload images directly into your post- just drag and drop, or click this button in the toolbar:
2023-02-16 11_02_10-Window

I’m having this problem about it:

“An error occurred: Sorry, new users can only put one embedded media item in a post.”

so i upload my 5 images in a cloud instead of creating 5 different replys.

1 Like

I just raised your permissions, you should be able to add multiple images now :slight_smile:

1 Like

Welcome Daniel!

Your task (reflective volumetric caustics) is very hard to render for path tracers but since version 3.4 a new help for this problem is included: Path Guiding.

Path tracing means a ray starts from the camera and tries to find a light by bouncing through the scene. To get some probability to hit a light through a mirror the light must be intersectable, that means it cannot be a spotlight with radius zero. That now means the beam will be not sharp but somewhat fuzzy. Only the fuzzyness provides the necessary wiggle room for the ray to finally hit the light.
So sharp edges of the beam will be problematic.

I have modified your file in order to firstly make the beams visible.
The spotlight was changed to an area light with narrow spread.
The reflecting cube got some roughness.
Filter glossy got a small value to, both help with the caustics.
An emissive background was added.
Path guiding (CPU only ATM) was enabled with directional quadtree (best for caustics).
Training samples and minimum samples for adaptive render sampling were set to 256 (possibly not enough).
I made the camera angle wider and brought the cam close to catch all reflections.
Volume and material settings were adjusted.

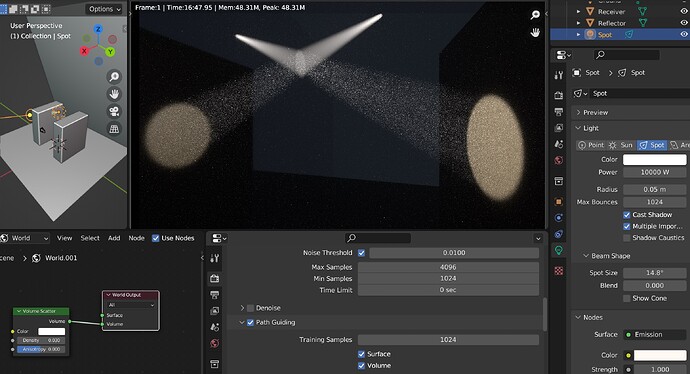
In the end we see the reflected beams in the render though still converging slowly and with fuzzy edges.
Sharper edges by smaller area light and less glossy filter and reflection roughness will all slow down the render further though I encourage you to play around with those settings.
So here’s the adjusted file:
Test reflective caustics blender modified.blend.zip (132.5 KB)

EDIT: After changing back to spot light with radius 0.05 and 1024 minimum and training samples I get this after 17min:

3 Likes

Thank you so much for your time and support. Very helpful.

From what I see, Blender certainly doesn’t have a good tool yet to get a realistic result (indeed you have to use a high light intensity and help the video camera capture the rays in a less conventional way).

An example that came to mind, imagine being in a theater with smoke and having a shaped blue colored light with a well defined edge bouncing off a flat mirror.
In reality, the bounced light would be seen on the surface that receives that bounce quite easily, if anything with a slight decrease in brightness (excluding long distances).

In Blender instead with high probability after the bounce on the mirror the light will disappear, also because in the real case it is a light from 600 to 1000W (differently from the test in Blender in which I used a 10000W and white one).

It seems that to obtain a similar result you have to compromise with the light intensity and the definition of the shape of the light (becoming more blurry) as well as greatly increasing the sample renders to get as many beams and light bounces as possible to the camera.

In the case of a light with a gobo the problem gets bigger because usually to have a defined shape I put the “radius = 0” because the more I increase the more the shape of the shaped light becomes less defined and more blurred.

Blender still has to make some progress to achieve that result of efficiency and coherence with reality. I am very confident.

So epilectrolytics thank you very much.
If I have any updates or find out anything I will update you.

Thank you again

Daniel

1 Like

The new path guiding build may help

https://builder.blender.org/download/experimental/blender-3.5.0-alpha+cycles_path_guiding.0925bfac34bb-windows.amd64-release.zip

Also see this thread

2 Likes