Seeing as I have discovered the awsomeness of the Cycles render a few days ago, I started to create a
lightsaber worthy of a Sith/Jedi.But my inexperience stands between me and the lightsaber in my imagination, which is
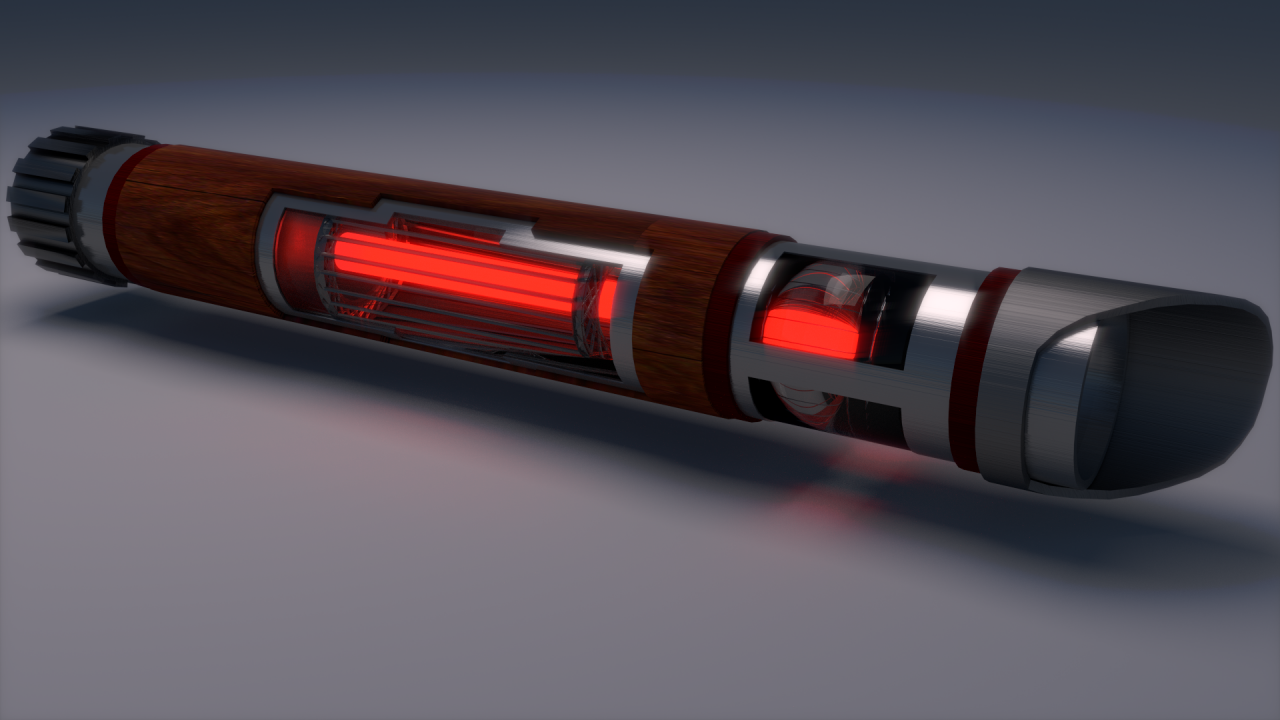
why I ask for your feedback to improve my work and grow with it.The Lightsaber I made first is intended to emit
a red blade, but if I manage it, I’ll be doing a version with green or blue one, too.
As you can see, the shape is pretty basic, but with the wood/metal combo I try to make it an unique saber.
Currently I have the problems of adding a satisfying looking blade as well as further improvements to the handle.
I have difficulties visualizing the energy inside the saber and am not satisfied with the way the glass looks.
Criticism and tips would be very much appreciated.
(I’m not sure wether this post will display all right, seeing as it’s my first thread)
I’ll try to keep you posted on the state of this lightsaber
Well sabre should be sharp and you should see just the flare not the model. That is just my opinion about star wars swords, i was always fan of the classical types. But i really like the work of materials on the first picture!
I am honored that you like my materials.I wasn’t sure wether I could manage to capture my mental picture of the materials, seeing as this is
my first cycles-project, but if they can convince someone who can model such a cool Knight Rider, they are propably ok.
In this second render with the blade, I had the problem that blender crashed when I had additional light sources, which is why the picture is this dark.That is the reason the materials on the handle don’t show probably.You are right about the visibility of the model, I will have a second take on the blade.Maybe I will try using particles, I am not sure yet.
Anyway, thanks for your tips and advise, it is really helpful to have an opinion of someone who can look unbiased at the picture.
Thanks for your good advice, this will propably solve the issue. I will give this a try, but I won’t be able to do it in the next three days, seeing
as I am on vacation during this time, where I won’t have access to a computer (I hate vacations)
Anyway, I thank you for your help and informative feedback, I will post an update with these improvements in around three days, when I am back. I have a question tough: Is it better to use Renderlayers to seperate blade and handle in compositing, or would it be more sufficient to use Object Passes, as I do currently?
You can use an ID pass to pull for adding incremental blur nodes to get the softness worked out in Compositor, CGCookie had a tutorial a couple of years ago on it.
Finally, I am back from vacation. Now I have access to my computer again!
It is high time to answer to your posts, which I am going to do bundled:
@cpfeiffer: With your advice, I got rid of the caustics finally! Only problem is, that blender still crashes with the light,
but at least it worked.On the topic of seperation for compositing, I will probably use the material nodes in future, seeing as the aspect of precise control has convinced me.
@Craig Jones: I tried this way, but my result wasn’t that great.But thanks for your tip, I am going to keep this technique in mind!
@cegaton: Thanks a lot for your link, this node setup helped me a lot, and I guess it is a convincing enough materia for the goal I wanted to achieve at the beginning: Getting used to Cycles and Nodes!
The blade in this picture was created the way that is described in the link provided by cegaton, and I am content with it for a first try.I guess there are many people who could get a better result, but in the end, I’m not a pro.
As everyone can see, this picture is way to dark.This is because my blender still crashes whenever I try to render the scene with light.
Maybe I am underestimating the power of the dark side of the force…
I have no clue why this happens, but I will search for a solution and do a render with proper light, so the handle is better visible again.
Anyway, I want to thank everyone here for providing good advice, node setups and opinions, you are all really helpful!


 (I hate vacations)
