lowest point of the (heavily subdivided) plane mesh corresponds to a pixel with value 0 (black), and the highest point to 255, with absolutely linear mapping for everything in between (eg. 0.5*(Z[SUB]max[/SUB] + Z[SUB]min[/SUB]) -> “127.5”).
What I’m doing now is this:
create plane, scale by 8, apply that scale, subdivide a healthy number of times, and manually deform plane as desired
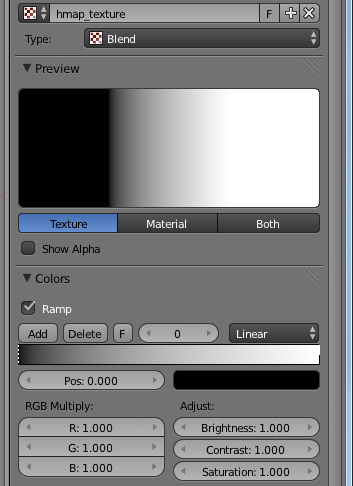
add material and enable Shadeless. Add texture, select Blend as type, enable Ramp (linear, RGBA(0,0,0,1) to RGBA(1,1,1,1)), mapping Z,Z,Z. Mapping = Generated, Projection = Flat.
move camera on top, pointing downwards, orthographic, scale 16.000
select appropriate output image dimensions, format, bit depth and all that stuff
render, save to image
However, just by looking at a height map generated using this method in the UV/Image editor view there are no exactly zero or white pixels to be found, which is not what I was aiming for. Also, I’m not entirely convinced of the actual linearity of this mapping, based on my tests on the game engine and the fact that the gradient texture preview looks rather obviously not linear (see picture below)
I’ve successfully done this the other way around, ie. deformed a subdivided plane mesh according to a height map generated with GIMP, but wasn’t quite proficient enough to create natural looking landscapes that way. :o
So now, what am I missing? Is there a way to generate a perfectly linear, (Z[SUB]min [/SUB]-> 0; Z[SUB]max[/SUB] -> 255) heightmap directly from Blender? Thanks.
by Z-deformed I mean only Z-displacement is ever applied; the top-orthographic projection of my meshes is always square.
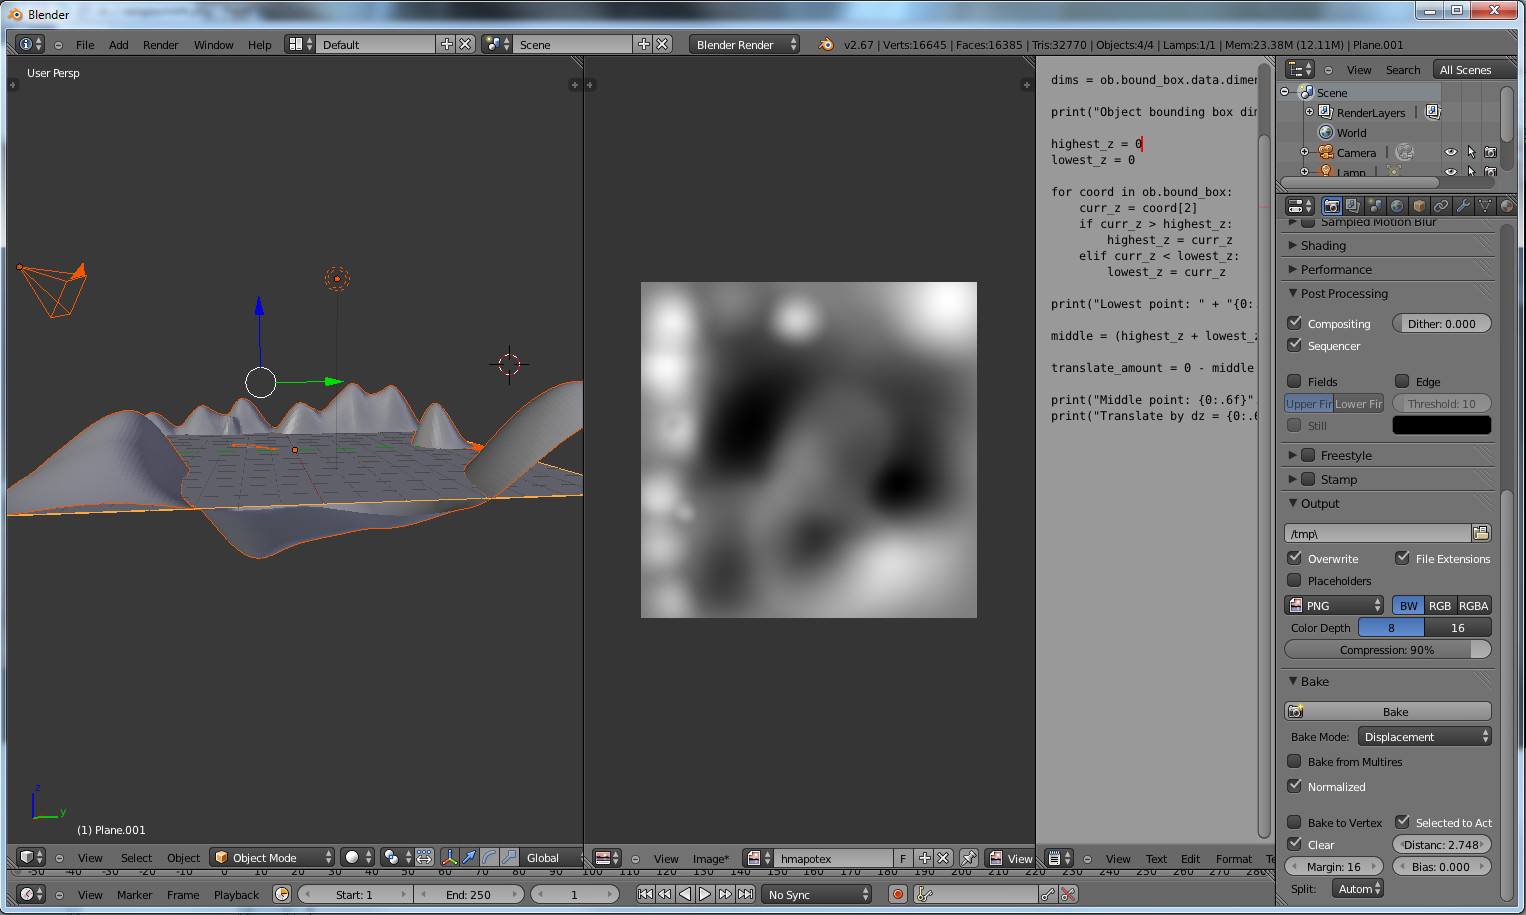
Fantastic! Using Displacement Bake I managed to do exactly what I wanted.
Basically what I did was to add a second plane of similar xy-dimensions on top of my manually displaced terrain mesh, UV-unwrapped it and provided a blank 1024-by-1024 image (from the UV/Image editor view -> New) for baking.
Then I switched to Object mode and first selected the displaced mesh and then the baking plane (in that order!), went to the Render->Bake submenu, selected Displacement from the Bake Mode-dropdown, enabled Selected to Active (this is why the order was important) and pressed Bake. And voilà, we have a perfectly linear height map, with Z[SUB]min [/SUB]mapped to 0 and Z[SUB]max [/SUB]to 255 (or 65535 if using 16-bit color depth).
There are also a couple of unmentioned manual parameter-tweaking steps involved (such as finding the correct value for the maximum distance param in the bake menu), but I would guess those, along with the rest of the procedure, can just be scripted later on.
Very cool guy… also thanks for your explaination on what you did there… it always helps to share… I’m still learning cycles and textureing and baking myself in Blender…