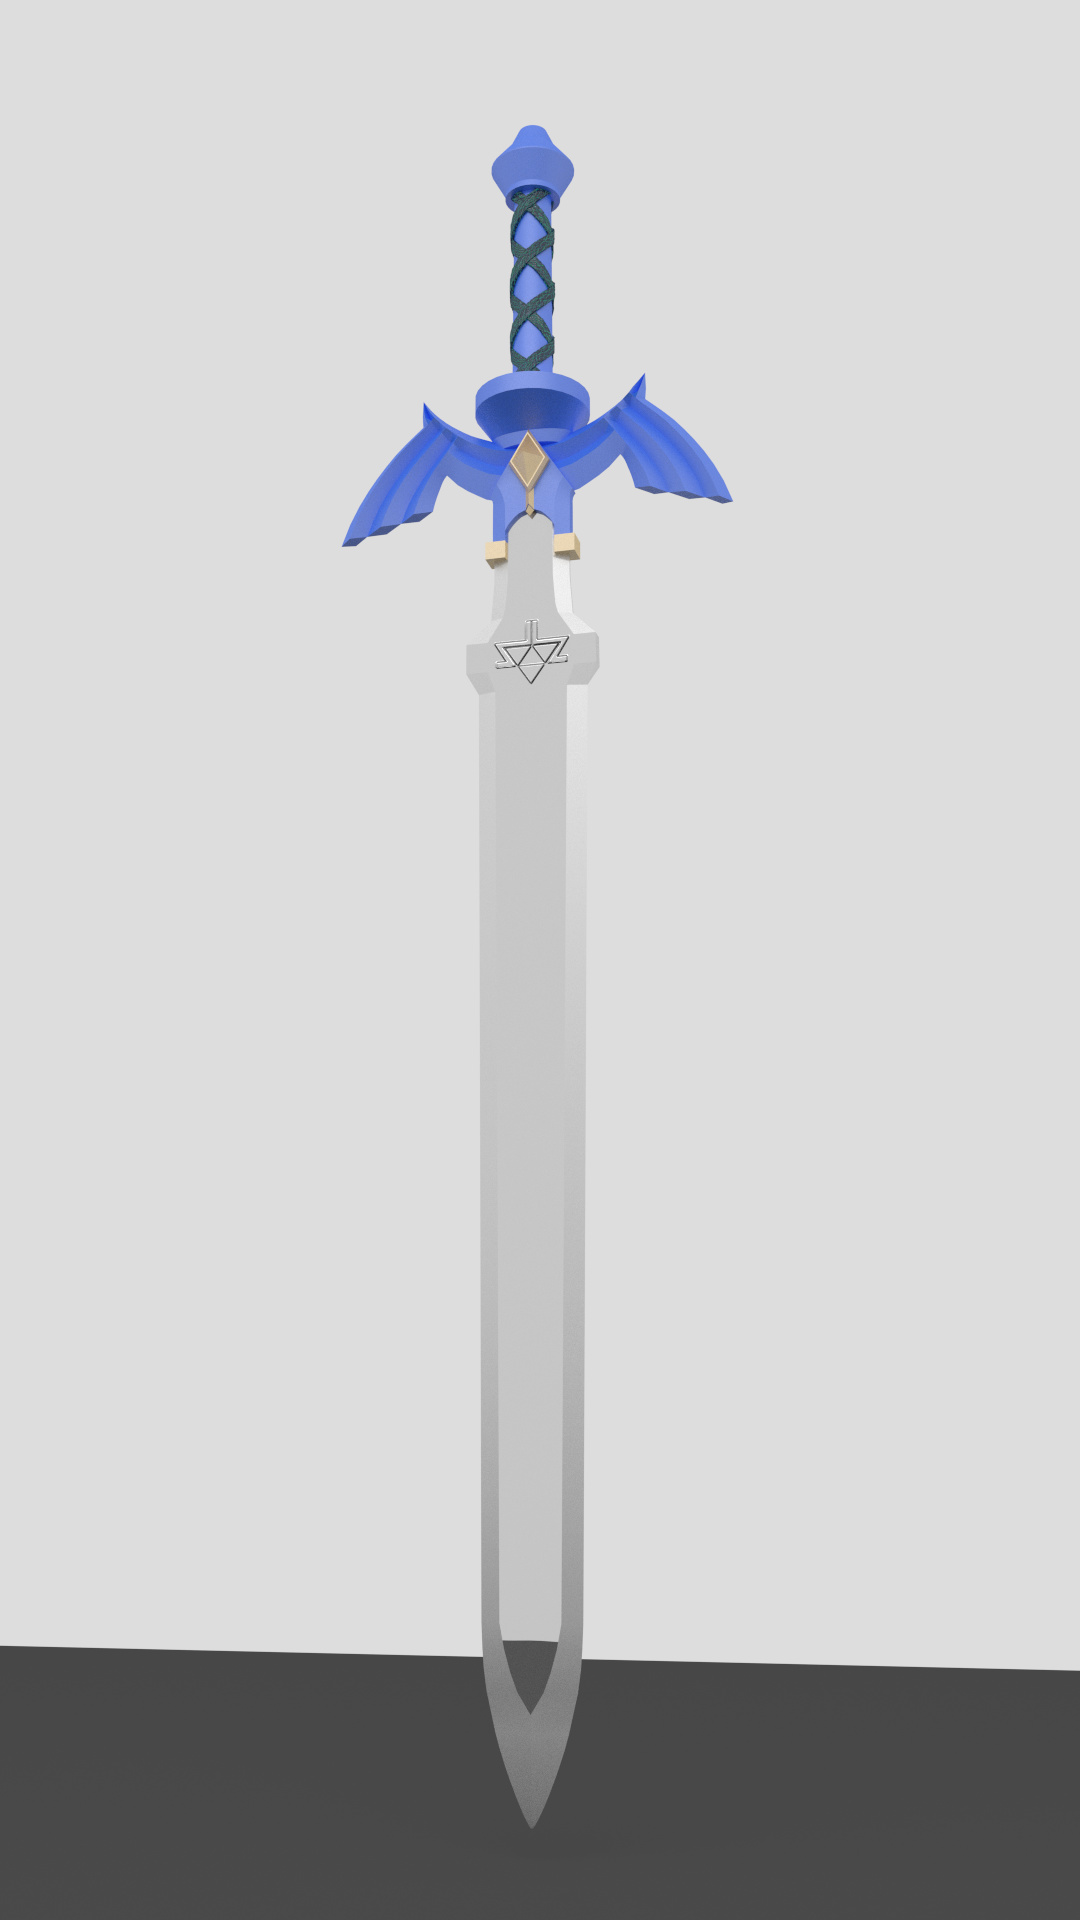
For my first Blender project I wanted to challenge myself while also creating something I really enjoy. That’s why I decided to make the Master Sword from the Legend of Zelda video game series. I believe the one I modeled it after was the Skyward Sword version. I started by modeling the blade, then I modeled the handle, and then I modeled the guard in three separate objects. For the handle I used a leather texture with a normal, displacement, and specularity map. For the Triforce symbol on the blade I used a displacement modifier along with a subdivision surface modifier. It could be better, but I want to move onto other things.
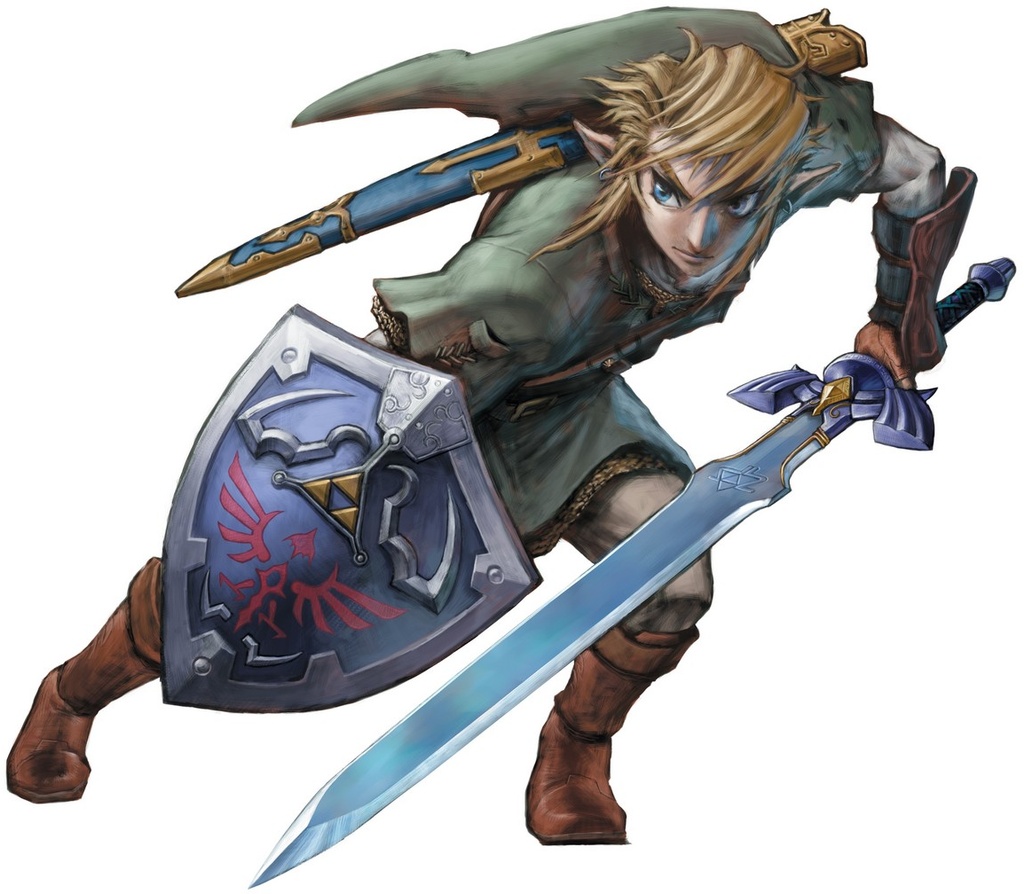
It’s hard to give you any relevant feedback when we don’t know what you are trying to improve. What is an LoZ Master Sword supposed to look like? What about this one are you not satisfied with?
That letter “M” shaped guard looks kind of flat, but for all I know, LoZ swords are supposed to be like that.
People here like to be helpful, dankollar, but you have to give us something to work with.
Hi dankollar, you got a really good basic model, the next step is to give it the details, like Orinoco says the M shape is a little flat, and start to adding the wing shape to it, also in the grip, the master sword have some type of pattern down there, its only a matter of details. Keep working on it and you would have a really nice Master Sword. I’m a big fan of Legend of Zelda too, i’m hoping to see it done!.
guessing you’d be right, unless you count the text-only version on a TRS 80…
Anyway, you have some minor proportion issues that can be cleared up by rotating your first image so the sword is aligned either in x or y, (flat images don’t have z axes) and using it as a background image behind your mesh. The grip, in particular, seems a bit narrow. You have some decisions to make, since the design shown in the two images is slightly different. Personally, I’d go with the second image.
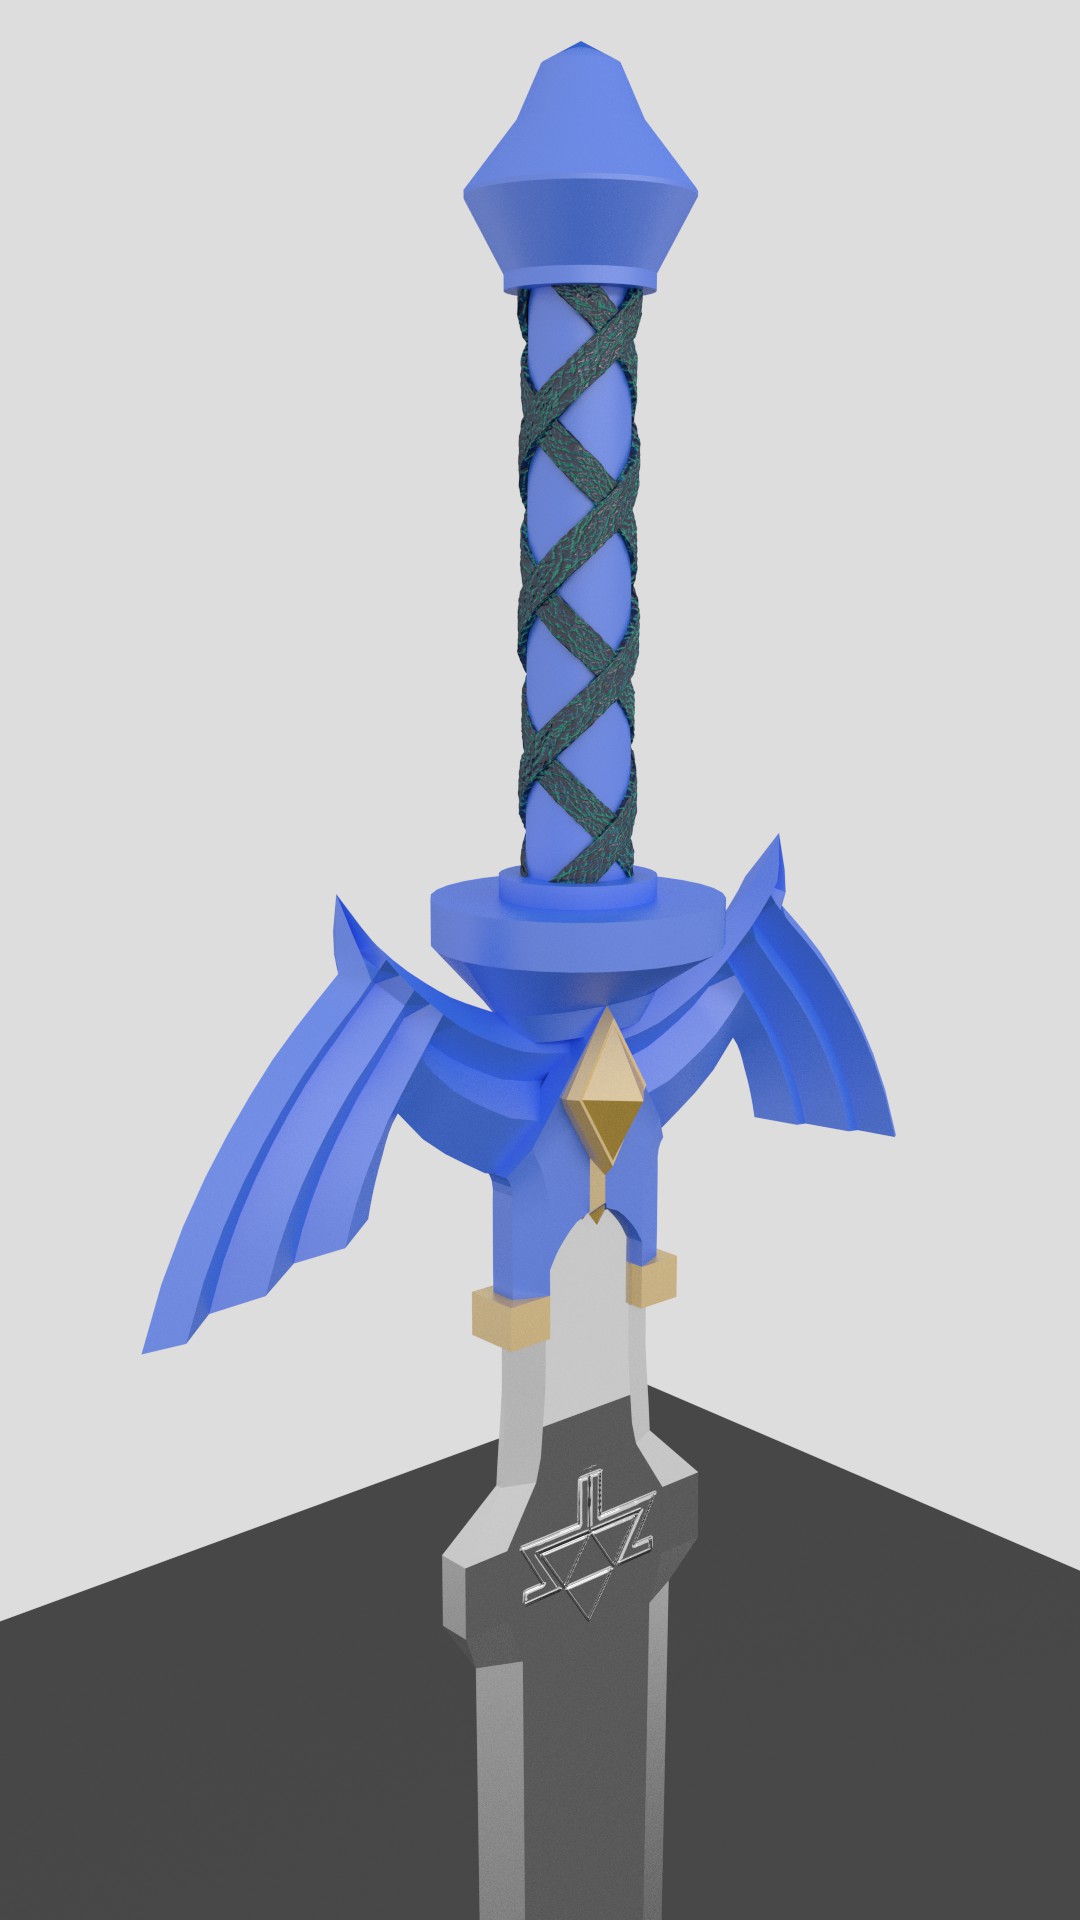
The sword hand guard needs a lot of work. Take a look at your model from the same angle as the second image. It needs some thickness, and the three ridges should probably be modeled in.
The engraving on the blade, the details on the blade near the hilt and the details on the grip can be done with materials and bump maps or normal maps.
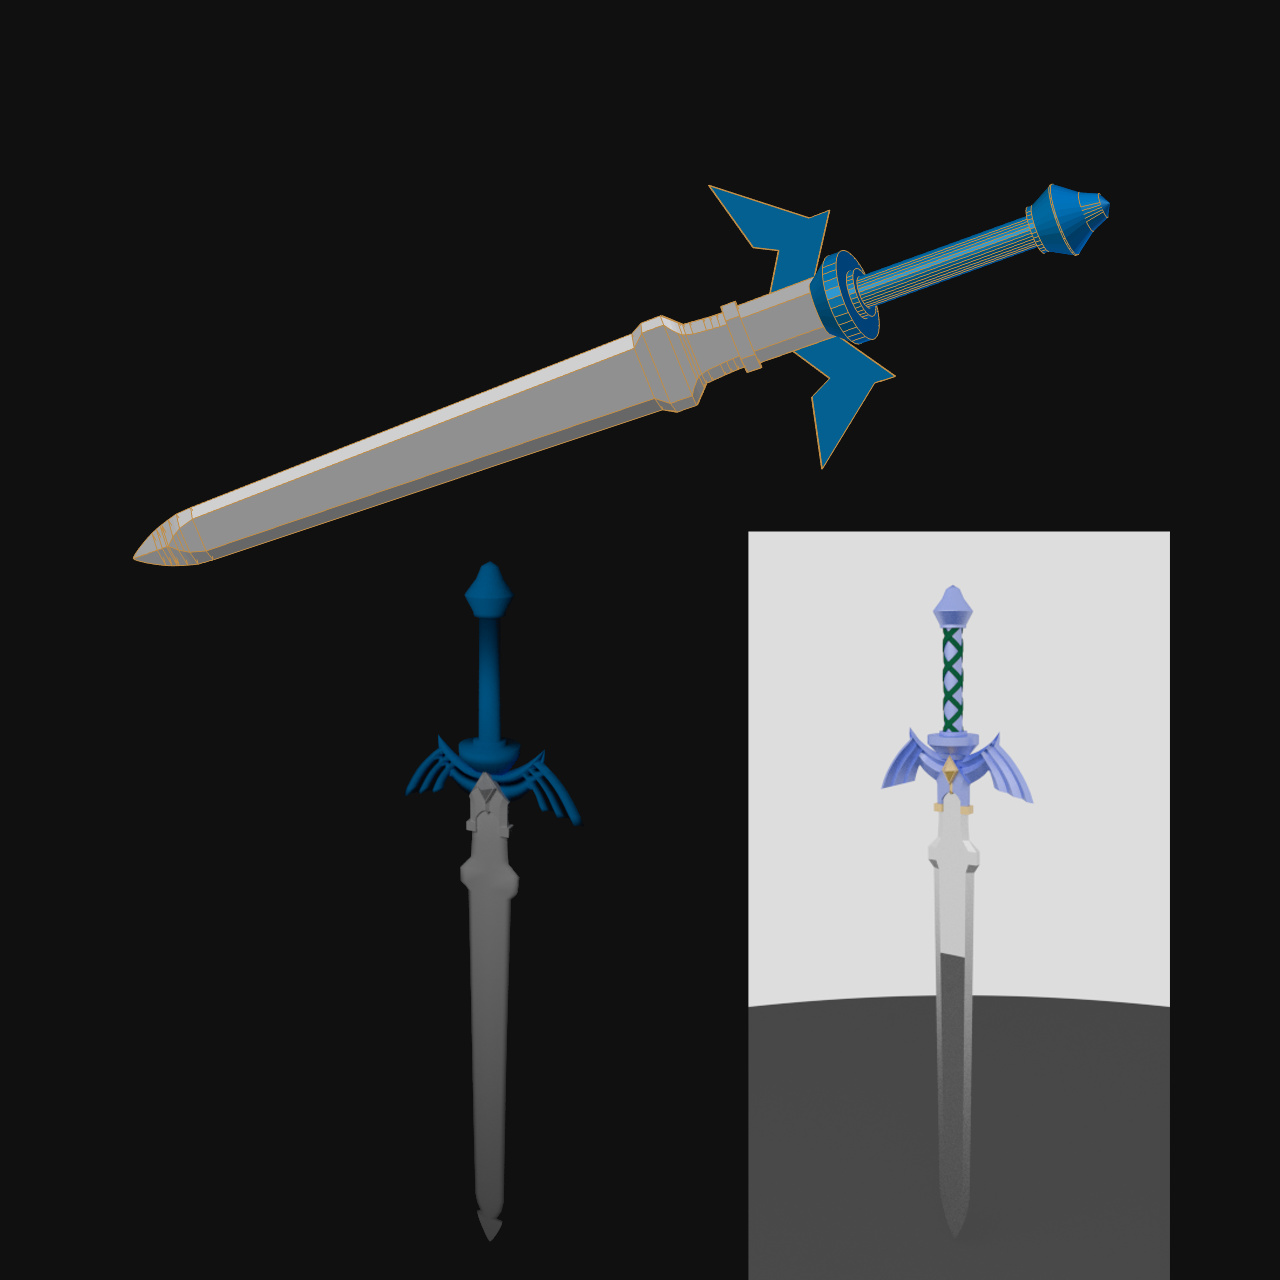
Overall modeling advice: you can cut back on the number of segments on the cylinders. Use ‘set smooth’ to round out the shapes rather than dozens of quads. Blender’s defaults for meshes err on the side of too much geometry rather than too little. You also seem to have a few more segments than you need at the sword tip, and at the transition section near the hilt. See if you can get rid of some of those edges and retain the shape.
You are doing pretty good for your first month of Blendering. Keep it up!
Ok, so I’ve done some more work in my spare time between classes. I worked on the guard and also the blade near the guard. As you can see I need to clean up the mesh a little bit since I still have some artifacts showing up. Still no textures and basic materials just to distinguish the parts. Also, I rendered this at very low sampling rate.