Make a volumetric material fade out as the object grows?

Here’s the context to what I’m doing:

Both of that materials I’ll show you below are on spheres that will be used as emitted particles. These particles will be emitted from a stationary emitter, and the particles themselves won’t move in any direction whatsoever either, only their size will be growing as they age, by using a blend texture that influences their size.

It’s also very important to mention that I’m using eevee for this project, so for that reason the particle info node won’t be of any use in this case. So because of that, since I want my particles to fade out as they grow, I need to use other methods to make the material fade out.

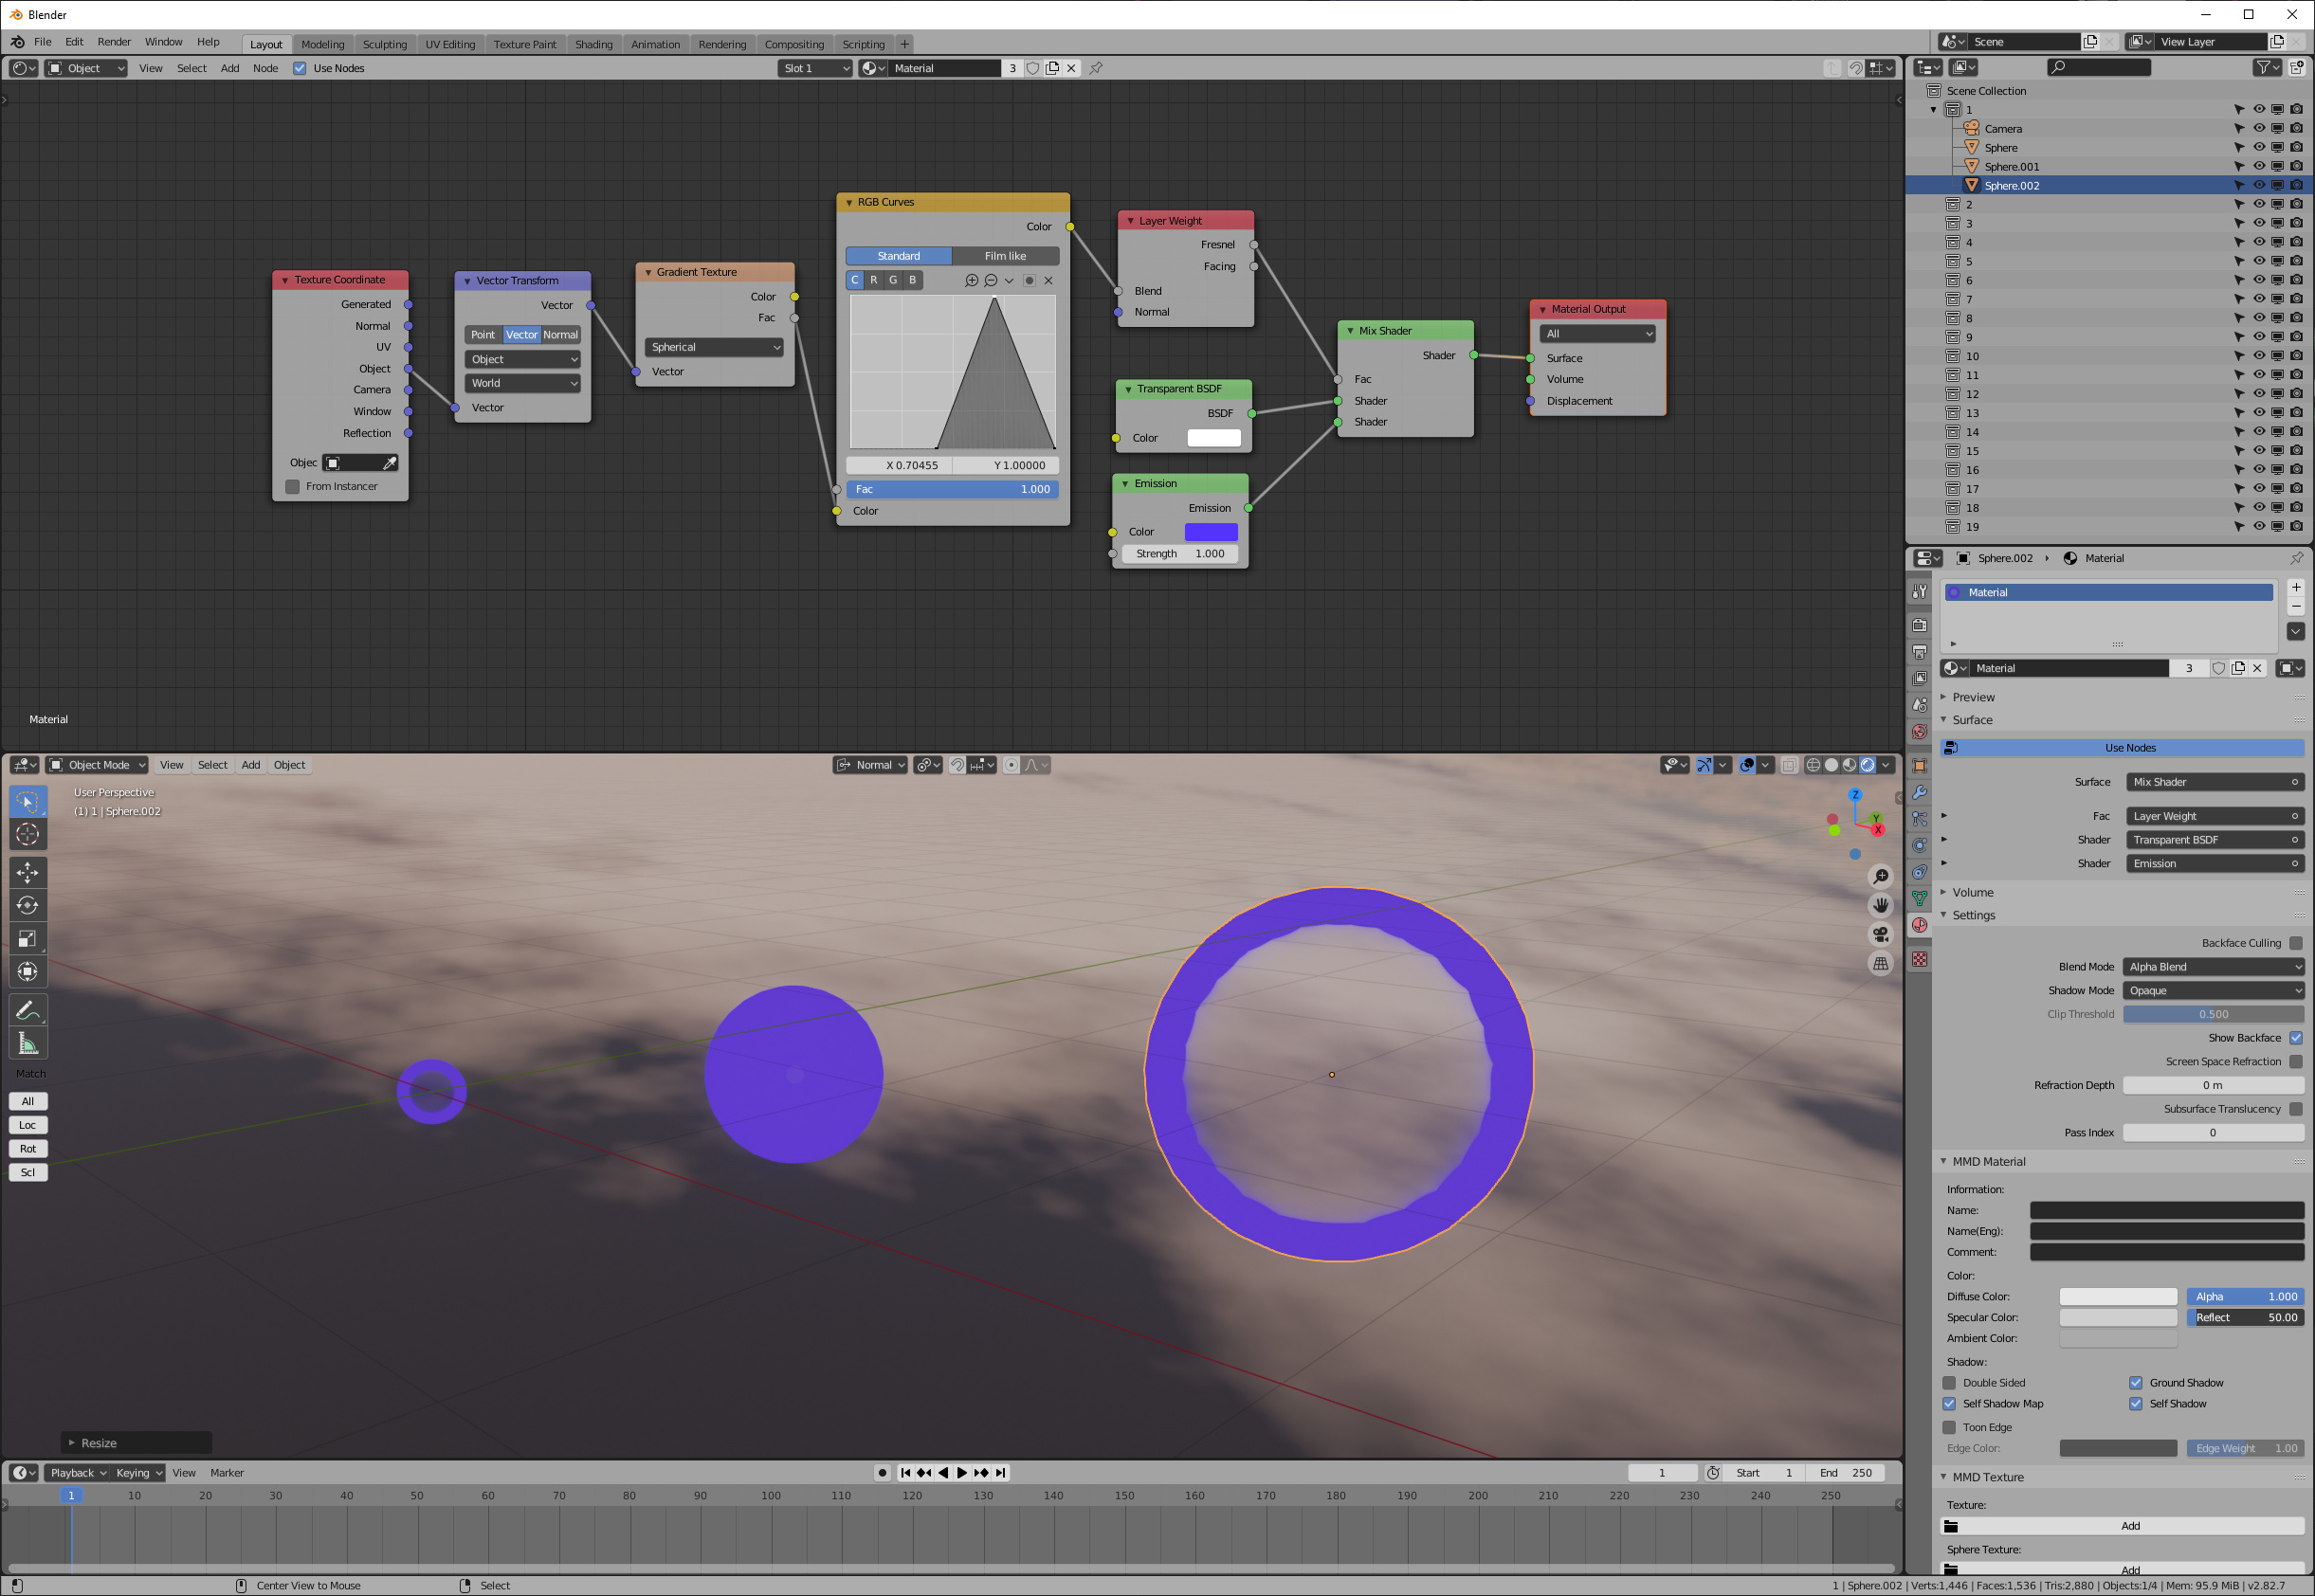
You can see below a non-volumetric material I made that fades out as I scale it up:

1

And the node tree of the material:

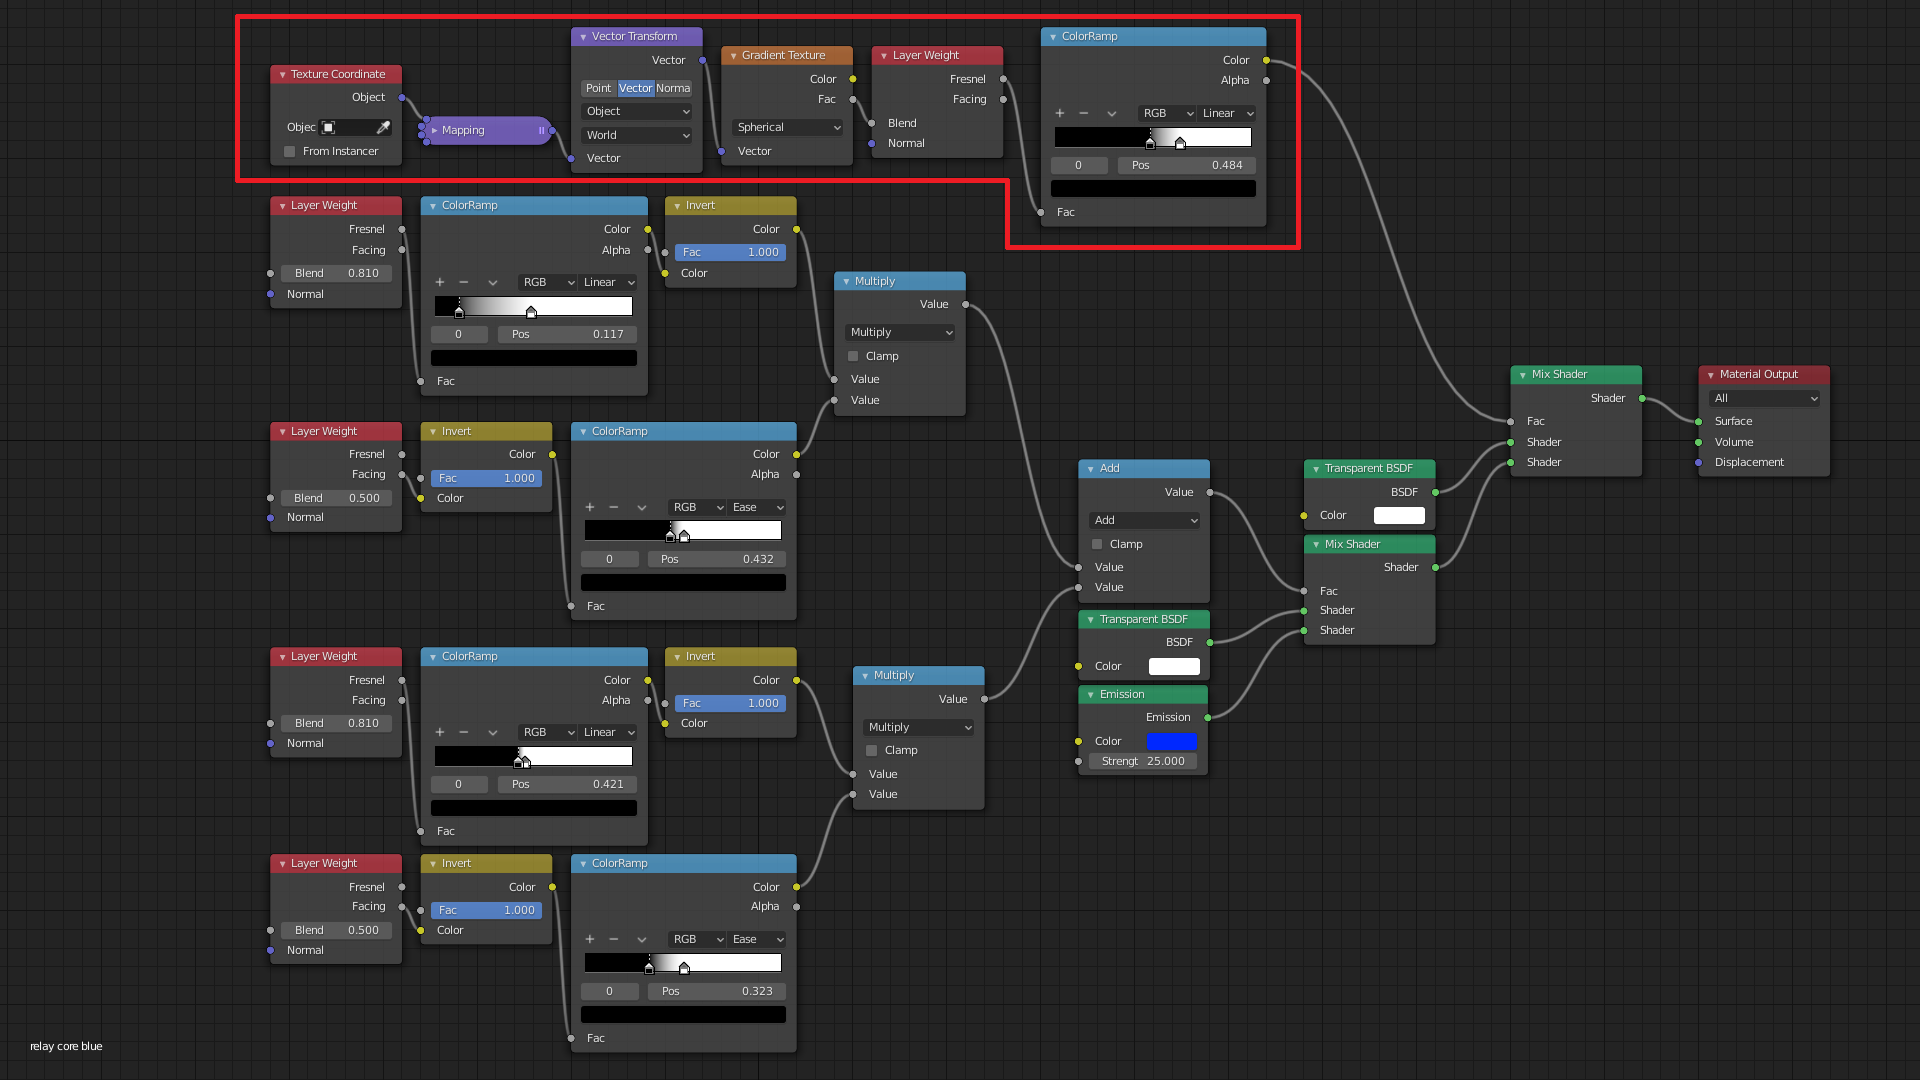
The highlighted nodes are the ones that achieve this fading out effect, by basically creating a spherical gradient texture that’s fixed to world coordinates, and is driving the mix value between the material itself, and a transparent shader.

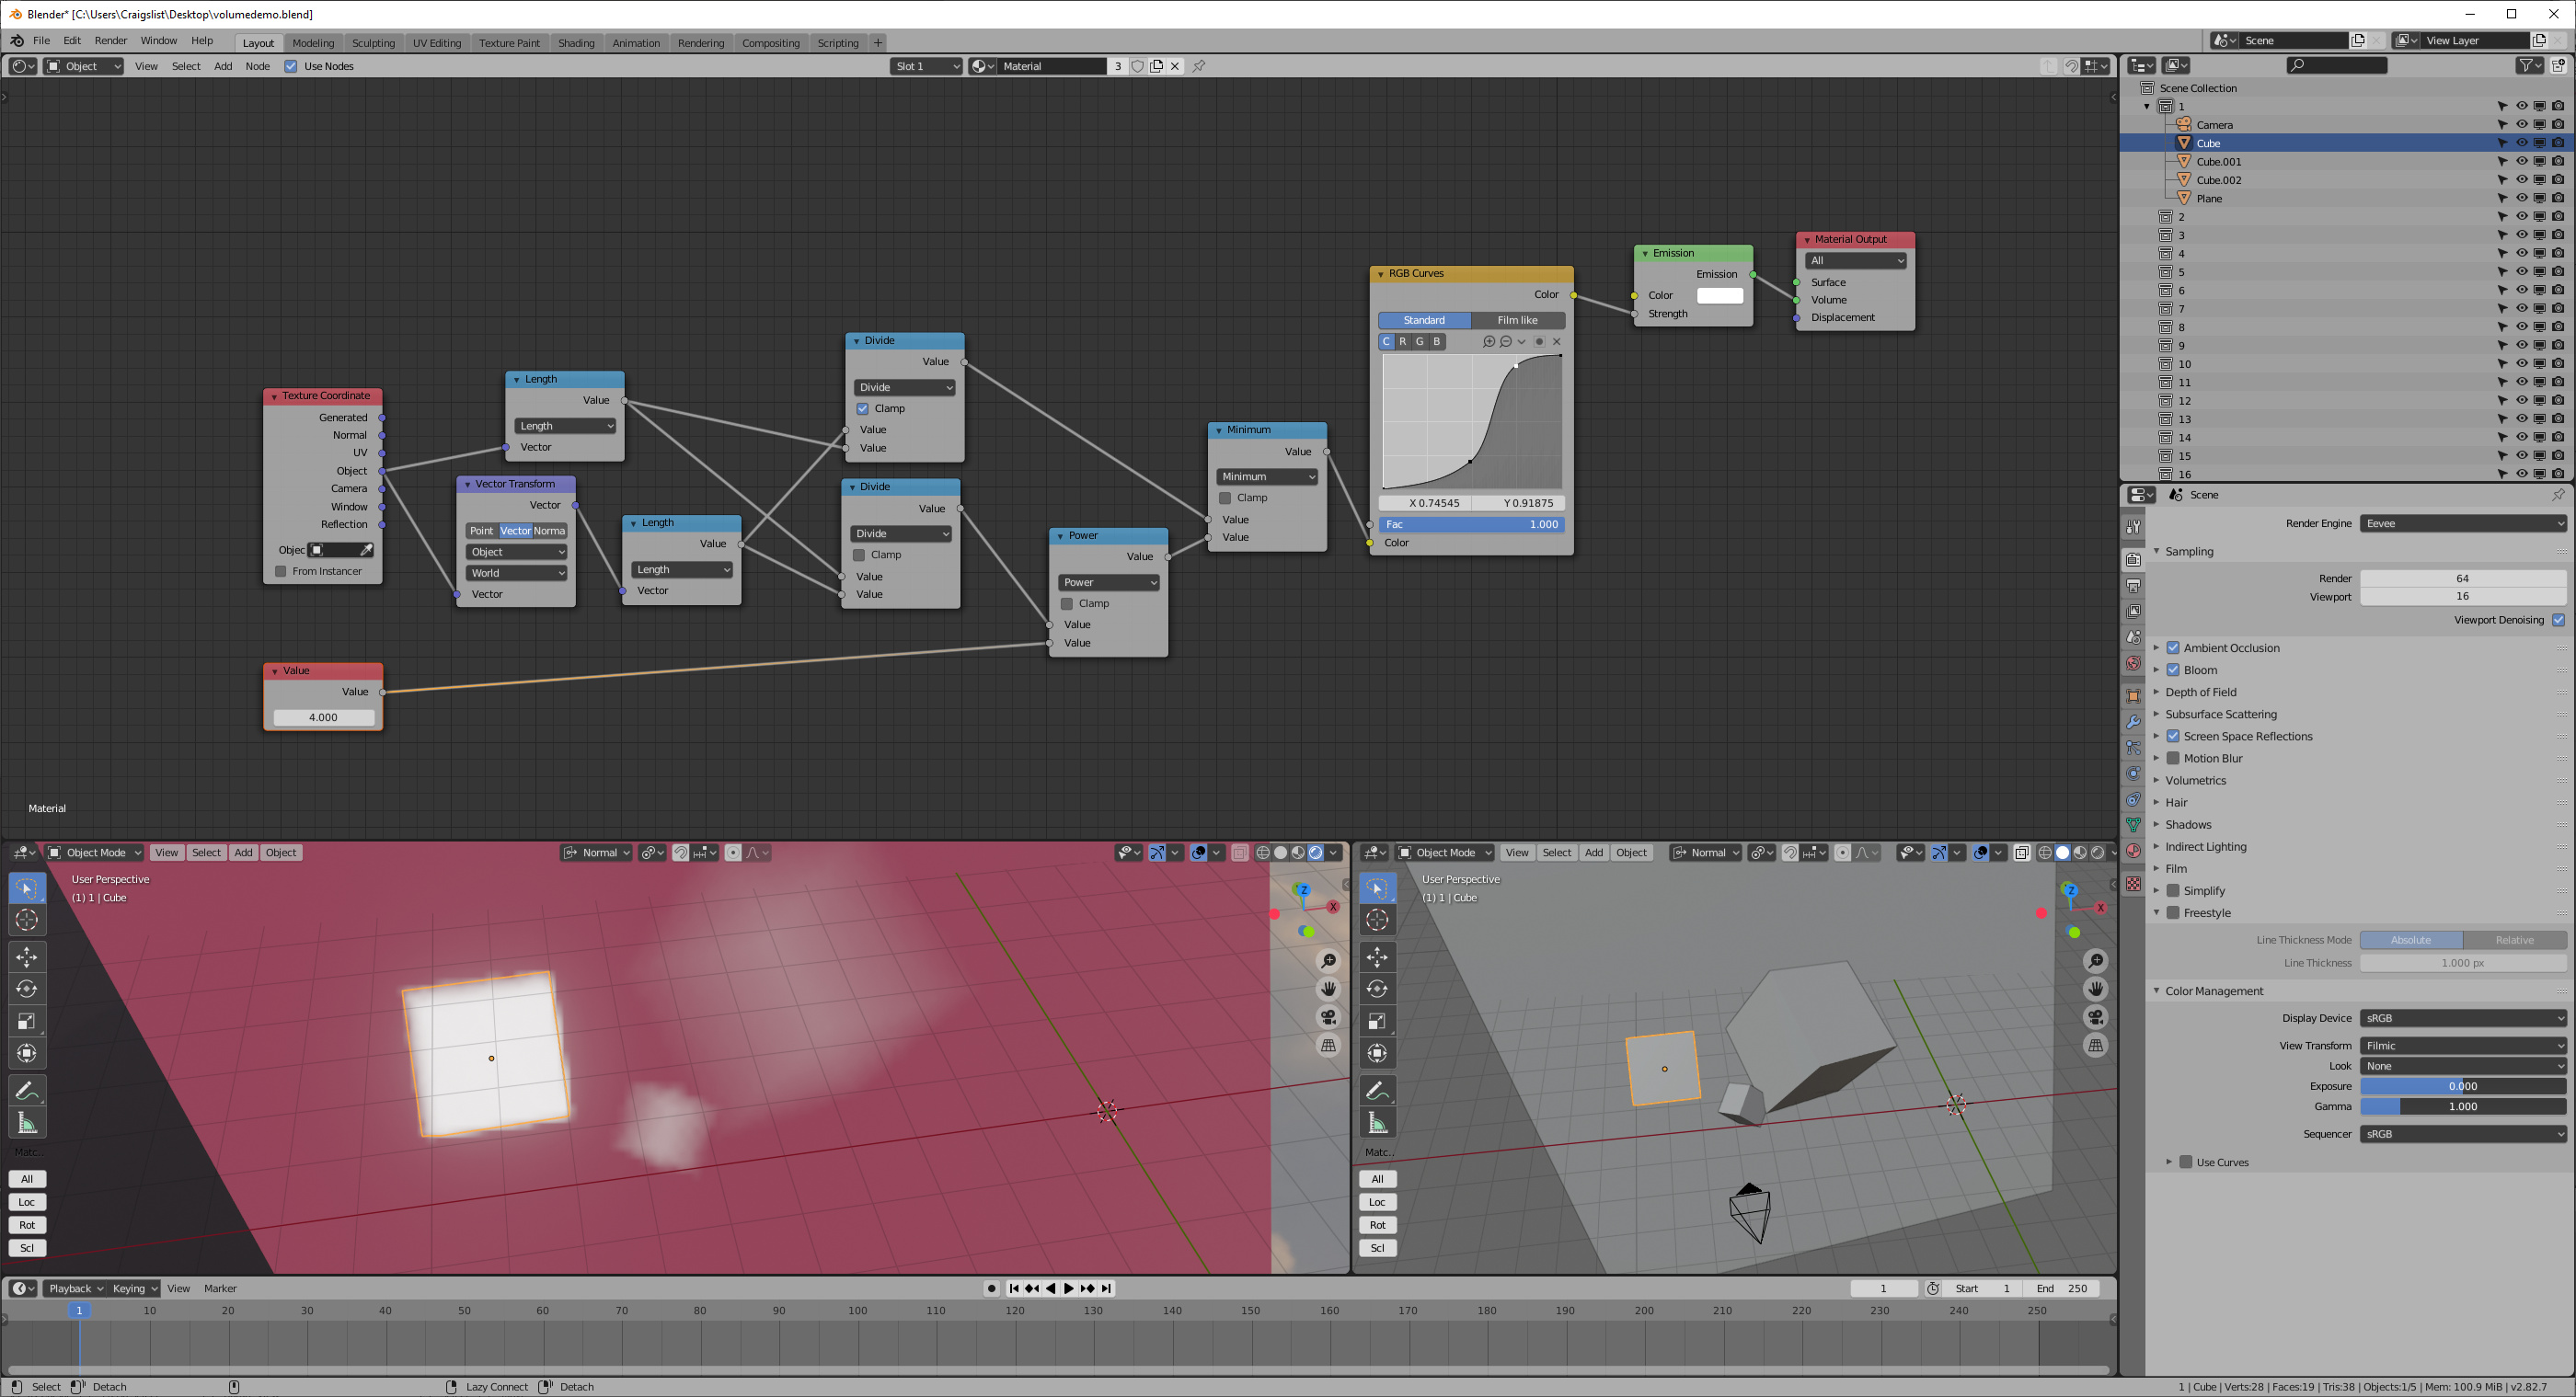
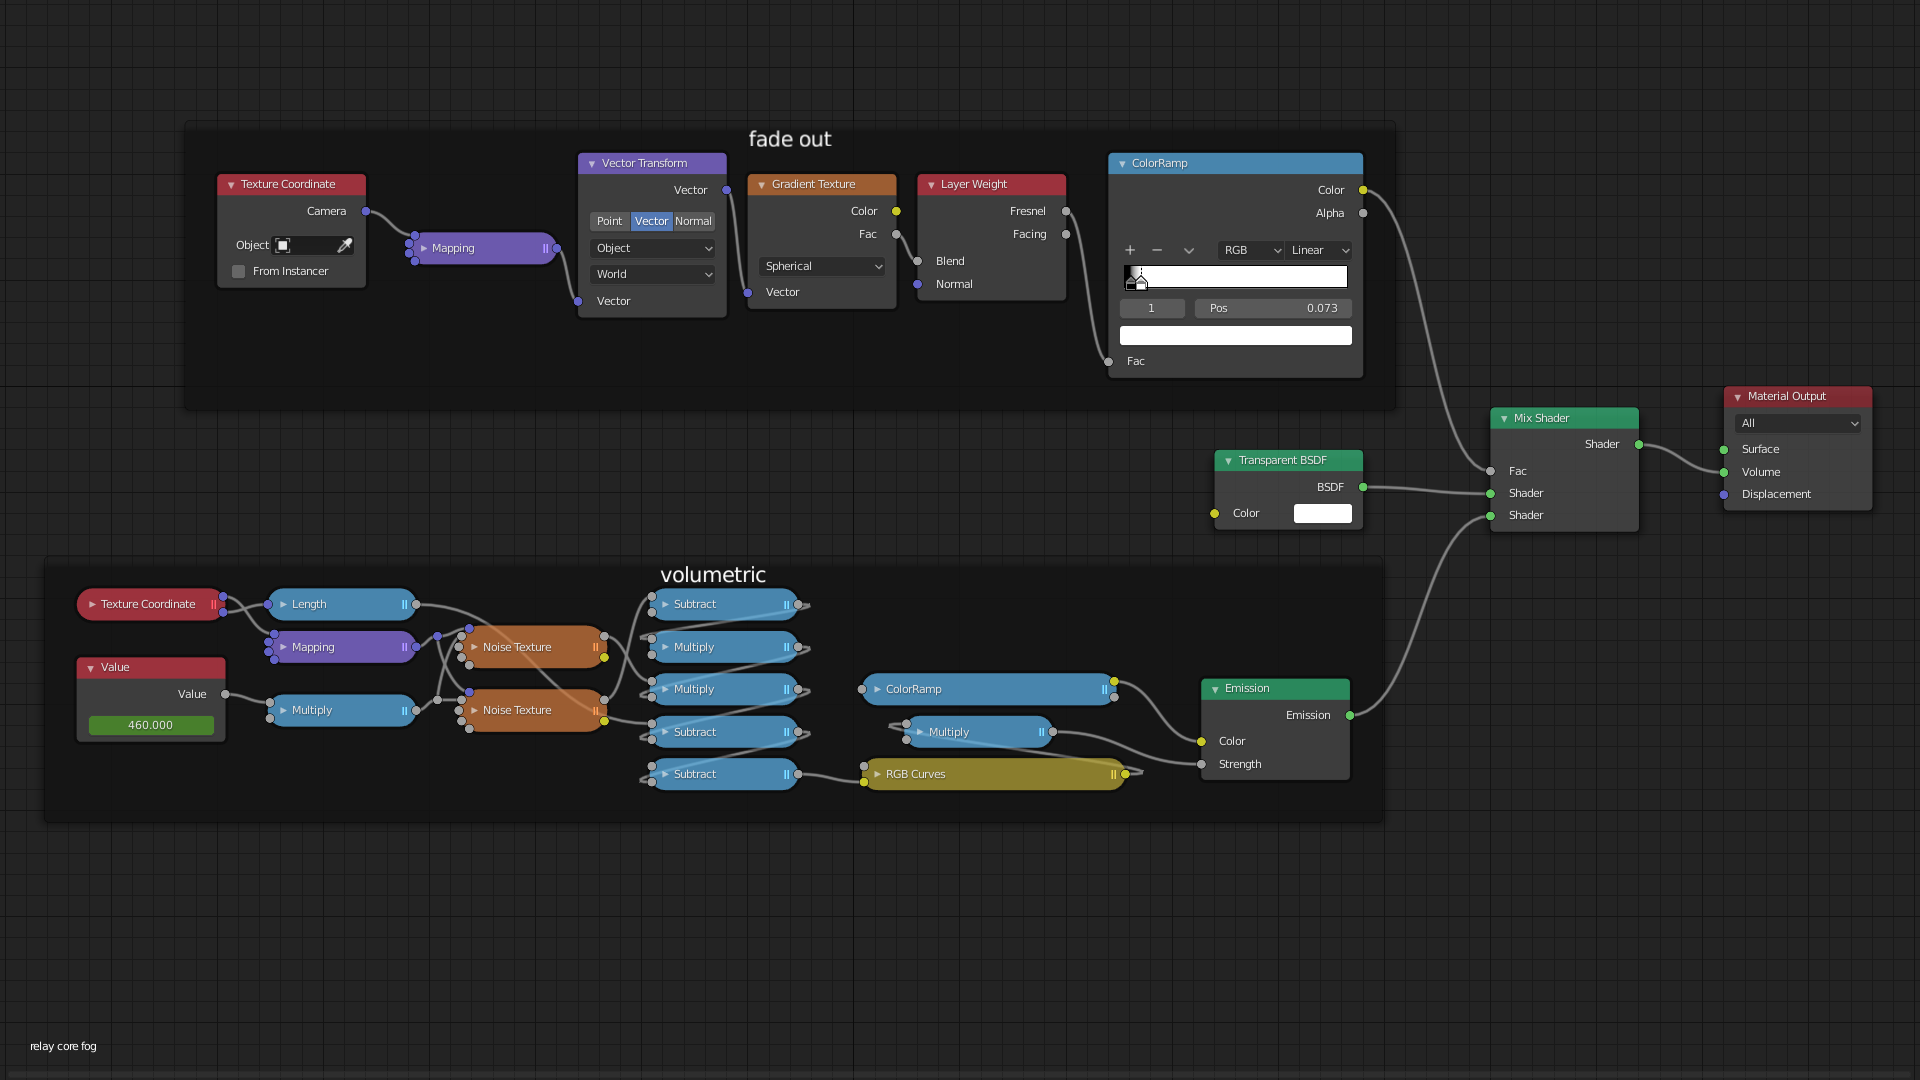
Now here’s the second object with a volumetric material:

2

For this material I used the same highlighted nodes to drive the factor of the mix shader between the volumetric material itself, and the transparent shader. But as you see, the result is not the same, and I’m honestly not sure why. In this case the gradient texture seems to just act as a boundary between the volumetric shader and the transparent shader.

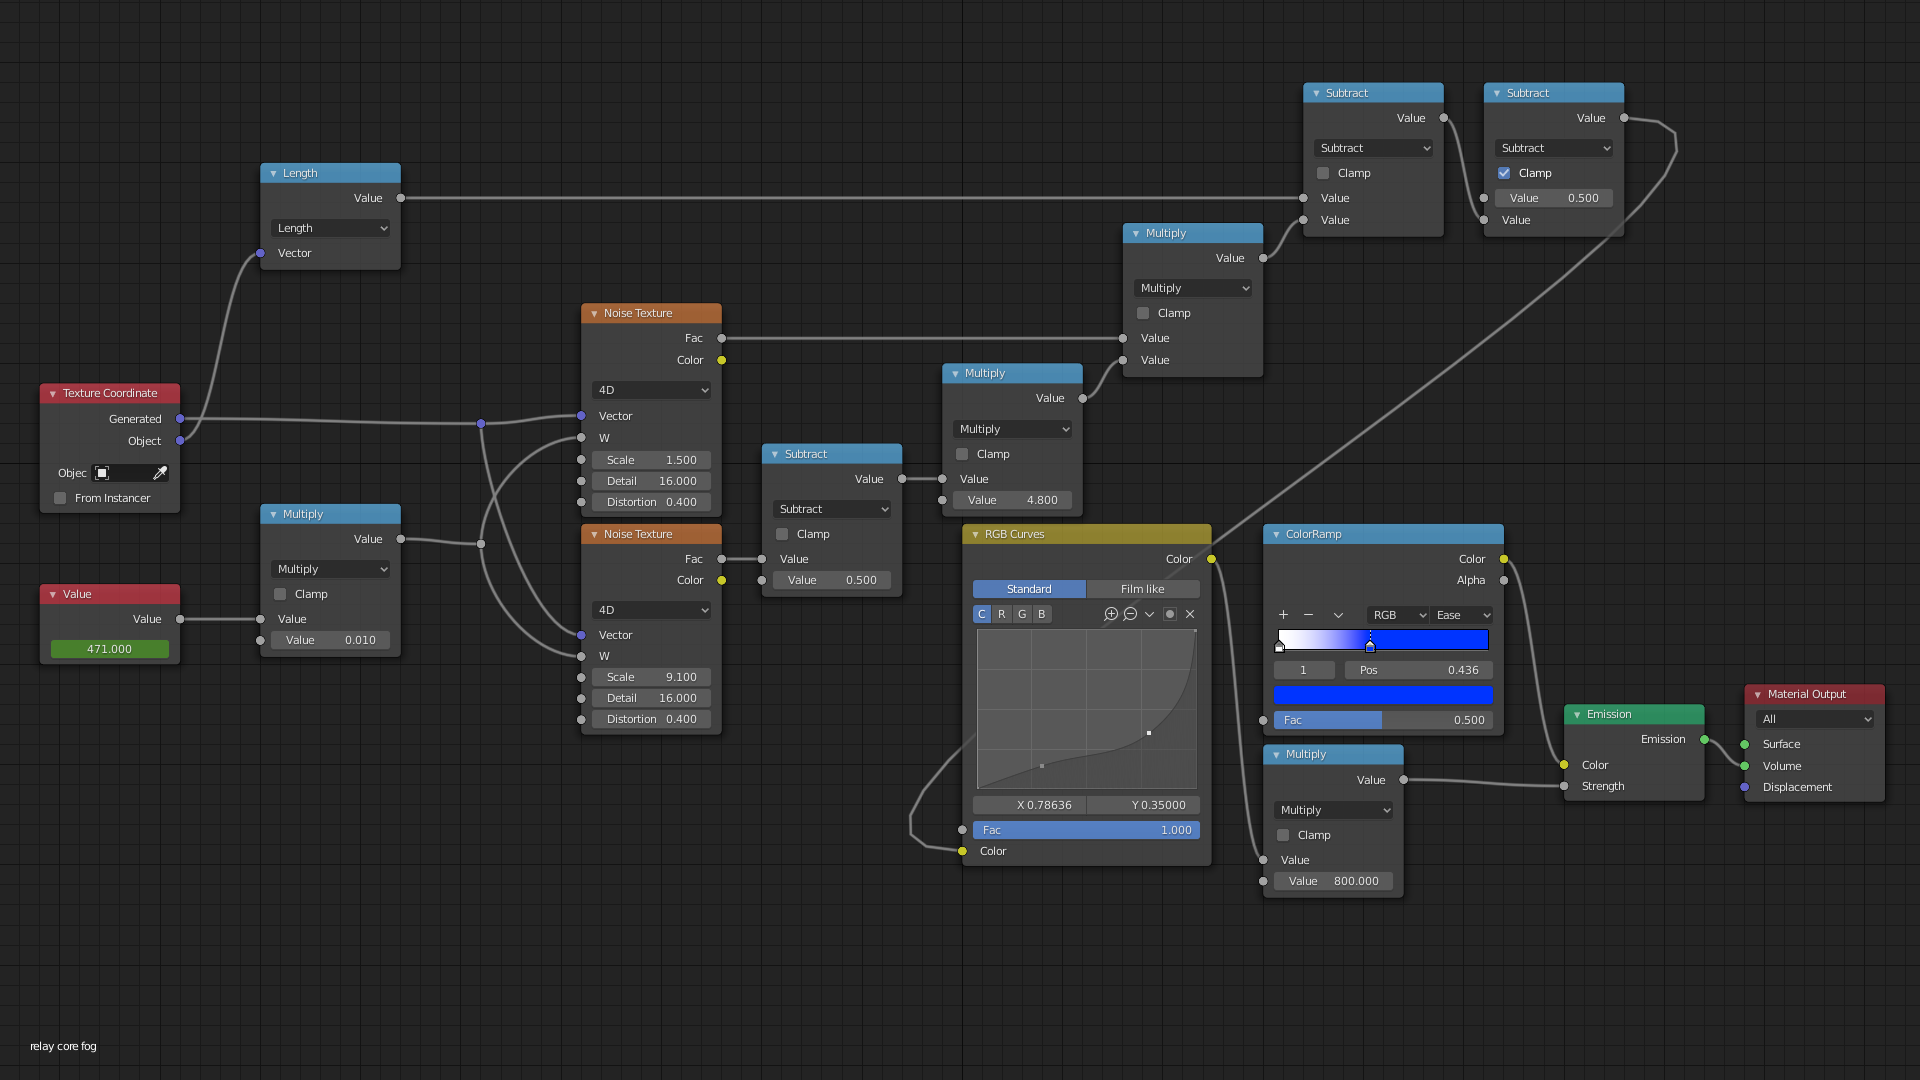
Here’s the node tree:

I also tried using the scale of the sphere as a driver for the factor of the mix shader node, but that didn’t work unfortunately as that value doesn’t actually update or change when the particle is changing size, only when the actual object does.

So, if you have any tips/ideas on how to achieve the same result as in the first material, but instead with a volumetric material, please let me know!

Thanks!

(Edit: added picture of the node tree of the volumetric material)

I wouldn’t call this volumetric. You could do the same thing with Eevee volumetrics I guess, but you’d need a cube bounding box and then recreate the sphere in the nodes, and do your math on density instead. 3D density isn’t quite the same thing as 2D emission (unless you constrain it to a single depth’s sample, oriented toward the camera, I guess.)

But to do what you want, all you have to do is remap the sphere gradient, so that the brightest parts are also dark instead:

Well the second material is a “volumetric” one. An emission shader is plugged into the volume socket of the material output node. This method unfortunately doesn’t work for volumetric materials, as I showed in the OP.

You don’t have any pictures of any second materials, so I can’t comment on that.

You can do something similar with volumetrics, but you’ll have to get the coordinates in camera space to cut out the center, otherwise the outer shell will obscure the hollow center.

I didn’t think I needed to add a picture of that, I thought I explained clearly enough how I did the volumetric material, but I added a picture of the node tree to the OP now. As you see, I use the same nodes as in the surface material that I showed first, and I also took your advice and set the texture coordinates to camera, but it still doesn’t seem to work. This setup seems to only work for surface type materials, it has no effect of volumetric ones at all.

I didn’t mean just use camera coordinates instead. You have to use camera coordinates correctly.

Here’s an example (not doing exactly what you were doing in your original 2D mat, but something similar). Rendered preview in Eevee. I’m using different rotations and scales with the same mat:

Thanks! This is great! Though I like my original look for the material (the second, volumetric one), and I’d like to keep it, and I’m not sure how could I modify your material to make it work for that. Maybe you could modify the original material to make it work with that? I’ve uploaded an empty scene with that one object appended, here.

The main issue with the volumetric nodes you posted is the use of Fresnel, which depends on a surface normal-- something that doesn’t exist for a volume, because there’s no surface. (It’s essentially a function of dot(normal, incoming), a function you can recreate to your taste with a curves node if you want.)

But you can get something like a spherical surface normal by taking object coordinates (possible normal mode transformed to world coordinates to avoid object rotation issues) and normalizing them.

Blender’s nodes do something weird with normals, where they need to be able to trace themselves back to a “real” normal node, so you may need to replace Fresnel with a curves node that’s been fed dot(incoming, pretend normal) like I talked about.

With what you’re doing, there are a number of different issues, and it’s worth separating them in your head. There’s making it 2D and oriented toward the camera, which I demonstrated above. There’s making it fade with scale in both directions. And there’s understanding the exact curve with which you fade, and what methods you’re using to create that fade. These are each independent problems that are worth understanding separately. (In fact, I shouldn’t have included fade with scale in the above mat, because it only confuses things-- you want to understand these issues as simply as possible.)

Oh, I think you misunderstood, the fresnel part is what’s supposed to be replaced with something else. That part just a failed attempt by me. I’ll try to explain it again: What is in the frame called “volumetric”, is the main material. I’d like to keep that part intact. Then all I did was mix that with a transparent shader. So if you adjust the slider of the mix shader, you can adjust the transparency of the whole material. What I’d like to happen, is that as the object increases in size, the material becomes more and more transparent. In other words, as the object’s scale increases, so should the factor value of the mix shader.

Then this is the part of it that scales by object size:

I’m just comparing the length of an object space vector to the length of a world space vector. As the object scale increases, the world space vector increases in length, while the object space vector does not.

The power for scale up, and the curves, should be tuned to eye.

Thanks! though it’s still not with the material I showed. Oh well. I’ll try to make this work with my material somehow. Also, right now it seems as it’s working like when the object’s scale is 1, it has 100% of the volume, and as I scale it up, it fades out. My question is how can I adjust the where this range of fading out is? In my case I’d like it to have 0% of the volume when it has a scale of 1, and 100% at maybe about .5 scale. Can I adjust that with a color ramp in the nodes somehow?

It’s not going to be, because like I said, the material you showed uses concepts that don’t make any sense for volumetrics. Nothing with a normal input should be used in a volumetric shader.

But also, my goal is not to do it for you, but to help you understand how to get there.

Absolutely. Ib that latest material, your scale is measured as the difference in length between an object space vector and a world space vector. It runs through two branches: object/world or world/object, then picks the minimum. So if the scale is larger than 1, the smallest will be object/world. Instead of taking this to the 4th power, you can run it through a mapping node, to remap the 0.2, 1 range (0.2 is 1/5) to the 0, 1 range and use that to fade out your volumetric when it is smaller than world/object.

Okay, I got the second bit working with the remapping, but you’re saying there no way to fade out this material with this method?:


It’s already got a bunch of math stuff to get it’s look, but I just can’t figure out how to incorporate your node setup into it. So is there no way?

Multiply the strength of your emission with the strength of my emission.

1 Like

Yep, that actually worked xD. Thanks!