Making a Cave

So here’s something that’s giving me more trouble than i had originally anticipated…

I’m trying to make an animation and it takes place within a dungeon like cave. And i say dungeon like in that there is little obstructions on where to walk and the ground is mostly flat.

It’s kind of funny that when i pictured this cave in my head, i thought back to an old game i use to play. The cave was blueish and had luminecent things all over like mushrooms or weird vines on the walls or things like that. However when i went back and found a picture of the area for reference… i learned that sometimes our brains make up information because the cave was so pathetic it had the floor texture on the walls and had no decoration whatsoever.

I think what may be troubling me the most is how to detail the walls.
I’ve created a basic flat version of the cave (it’s also hard to get the camera in it without that flying mode but that flying mode is kinda difficult to use…

Anyway, Textures, bump maps, sculpting, odd modifiers we rarely use…

Anyone have any tips on how to make a believable looking cave? d:

I’m goin pretty open ended here so i’m happy with any tips (:

Thank you ^-^

Making a cave in Blender

It is the Andrew Price’s tutorial.
A good one, with an exception.
The use of pre baked normal maps.
It doesn’t work this way.
Wrapping a prebaked normal map on a more complicated topology than a simple cylinder results to wrong tangent space.
Just keep this in mind.

What would you do to fix this or what would you do instead?

Razc. I suggest finding a Seamless Rocky Texture for the inner side of your cave. Since it is for animation, you can get away with Displacement modifier to give it a natural look.

here is the way to do it.

Create Cave,Subdivide, unwrap and add subsurf modifier. Add displacement modifier, use your seamless rocky texture. use same texture as material too. Posibilities are endless.

Here is a simple cave blend. made with cylinder, curver modifier, array, displace and a seamless texture with 2 lights. you’ll get the idea.
http://www.pasteall.org/blend/26145

What would you do to fix this or what would you do instead?

The use of 32 bit exr depth maps (displacements or bumps) is easier to handle for a not advanced user.
You can always convert these to excellent normal maps after.
Just ask blender to bake them to a new normal tangent map. (multires or active unchecked)
You may use a new UV set for doing this.
This asks for a small tutorial to explain further.
It is all about the right tangent space.

Michalls, I think that what people are really asking for is that you explain what you mean by “the right tangent space.”

It could be just a few simple [English] sentences: “this is what normal-mapping will do, but this is why that’s wrong (here’s what goes wrong visually when you try it), and here is the better thing to do.” Just enough to give us all the most-important key ideas.


Thinking about “how to model a cave,” to my way of thinking “if I’m zooming through the space, looking at and/or looking for the pretty mushrooms,” quite honestly you might not need much detail at all. Mere textures might do just fine, because in a cave presumably there aren’t too many light-sources anyhow except ones that are very close to me, the player. As long as I can’t “see through a stalagmite on the floor ahead of me,” it might be completely unnecessary to do a whole lot more. I’m not “admiring” the rocks … I’m “dodging” them at breakneck speed! :slight_smile:

Zooming on some possible “columns” inside a cylinder based - cave, having applied pre baked normal maps, the first you’ll notice are visible seams. Having a closer look you’ll realize that lighting goes wrong.
What I’m trying to say is:
If you don’t know what a normal tangent space means, better avoid the use of normal maps. Use bumps instead.
OK, a tutorial. Not much free time these days.
I promise, I’ll post something. Soon.
Just to start with. The default cube. Turn every edge to a seam. This creates six square islands in the UV editor (after U unwrap).
Now, apply a pre baked normal map.
Try to subdivide the cube (by subsurf)
You’ll see what I’m talking about.

There is a solution of course. You won’t find it by rotating these quad islands though. Be my guest LOL
(the hard way to learn, oh… I had similar questions, some time ago)
This is all about the tangent normal space.

Wow d:
I got alot more responses than i expected d:

Sorry if the reply is a little late.
That tutorial was absolutely great! it has just about everything i was looking for in it.
I’m trying to go through ti one more time and follow it step by step but… I don’t know if it’s my ‘noobieness’ with cycles and nodes or what but when he is texturing the walls, he seems to have more nodes available to him.
Such as when he adds a glossy shader node to it all. I don’t have a Gloss Node in my blender at all that i can find… Even if i use the search.

And then also, he has a Bump map, specular map, and what not… Is there a way to make those fairly easiliy?
I remember in the past i use to just turn on the normal geometry in the texture panel when i wasn’t trying to use nodes and that often sort of did the trick. But i’ve never used a specular one either.
I have photoshop at my disposal if that helps make those sorts of images.

I think Andrew uses a program called Crazy Bump to make normal maps, AO maps, bump maps and specular maps from photographs. I’ve used the GIMP to make those maps, so I expect photoshop has that capability too, hidden somewhere in it’s twisty maze of confusing menus, all alike. It’s a matter of finding the right filter (or combination of filters) to modify a photograph to look like the desired map (except for normal maps, I think that one was a plug-in or add-on).

Making the maps was ‘fairly easy’ with GIMP but with Crazy Bump they are lead pipe simple, because Crazy Bump is designed to create those maps. All you do with Crazy Bump is feed it a photograph, check the maps you want and press the 'Go!" button.

As to available nodes, he may have a later build. I think they are still adding nodes to Cycles even as we speak.

We have to start a new blender testing thread,
how to create similar maps as crazybump does.
It is possible you know. Two steps

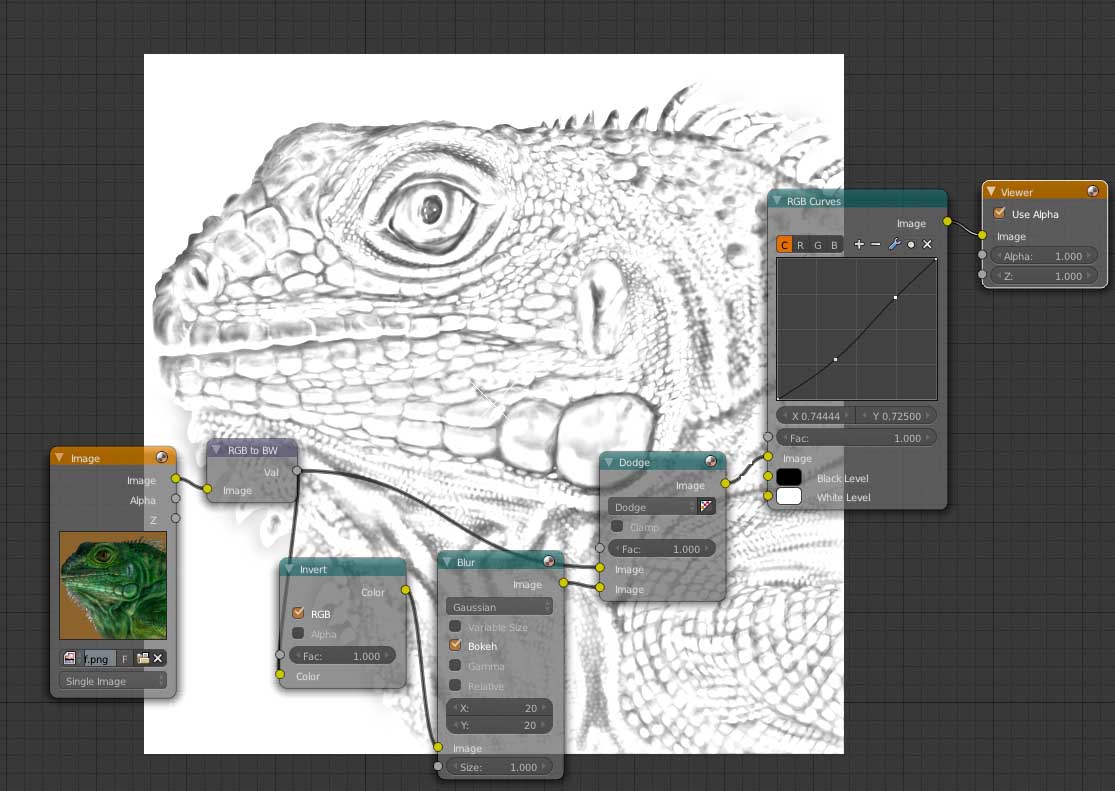
  1. A little work in compositor to get fake bumps from images
  2. a fast baking, a conversion of this bump to normal tangent maps.

The first is the more tricky.
Here, a pencil like conversion of a painted image by Craig Jones

Made for fun, but you see my point. If fine tuned differently and adding a little more blur, it can work as a bump map.

the second step is much easier
-Apply this bump map as UV texture on a square plane.
-in BI of course, use it as bump only, avoid values more than 1.00
-create a new image file (active in the UV editor)
-under baking properties of BI, ask for normal map baking, uncheck multires or bake to active methods.
-bake this normal map as tangent space.
voilà

Just remind you.
You cannot use prebaked normal maps on something more complicated than a single surface, a cylinder or a corridor something.
You can’t use such maps on a simple cube by example. Or on a fireplace (as A.Price did in the christmas tree tutorial. It doesn’t look wrong there because the “ceiling” part of the opening of fireplace is not visible)
What you can do easily is to use the bump map instead and only after, you can create a new fresh texture file and ask blender to directly bake-convert it to a normal map. A decent UV unwrapping is needed first of all.

I’ll be honest that i think at my level, reading alot of this is hard to tackle all at once xD

I noticed Andrew price is using Blender 2.69 and i apparently have 2.68^

i thought i’d give you a bit of an update on where i’m at.

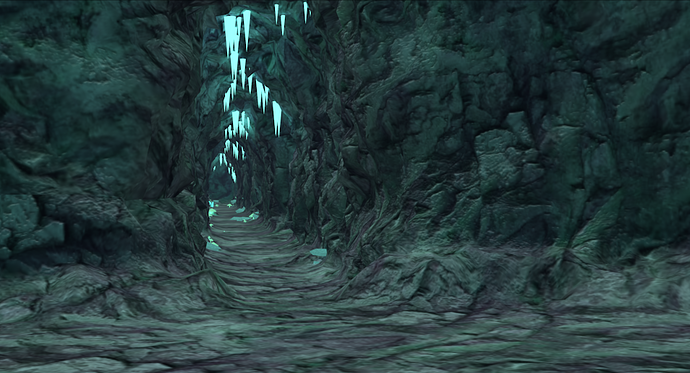
I made a cave system that resembles the shape of a key for some reason (as this will be an animation instead of an image, they’ll be movin around some)

Then to get square typology for the displacement modifier i used the Remesh modifier… which i have only recently discovered and i’m not sure why other people don’t use it more often! it’s amazing xD

I unwrapped the cave for better Uv’s however i don’t think i did a great job because the seams are a tad too visible. But that’s my fault for being lazy and wanting to Alt click a selection rather than work on some corners where an Alt click ran into many poles along the way around.

anyway, after setting up the cave, making a vertex group to tell blender to ignore the floor on the displacement map, i moved on to some light sources. I kinda asked around for some ideas of what light sources may be found in an area like this and i mostly hear ore, crystals, mushrooms, or wisps surprisingly. I think wisps may be a bit complicated for animation…

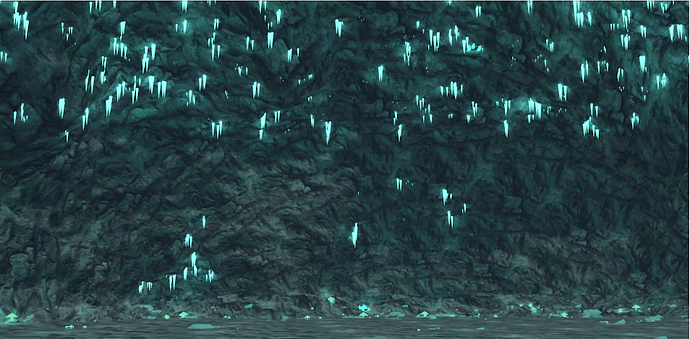
So far i’ve made some extra rocks, Glowy Mushrooms, few deposits of glowy ore, and then glowing stalagmites.

I think it’s pretty close to being ready. I’m just wondering if i want the area to look like it’s natural, or try and add broken bits of architecture to make it look like people use to be there at one time.

The animation is just a proof of concept with character’s ive made, and it’ll be of a knight fighting a dragon.
I already have the knight and dragon ready so this cave is just one of the last steps before animation.


Then to get square typology for the displacement modifier i used the Remesh modifier… which i have only recently discovered and i’m not sure why other people don’t use it more often! it’s amazing

Square based topology doesn’t quite means quads only.
The remesh modifier creates bad topology. Quad topology is for having loops. Render engines will triangulate it, after all.

Nice work Razs! Better discuss it on another topic? (tests or WIP?)
For a cave subject, I could go quite differently than in A.Price’s tutorial.
There are many (and easy) tricks to model caves and rocks.
Here an example, long time ago, using 3DCoat then. LowPoly version with the use of Normal maps
Blender is capable today for similar and better fast results.