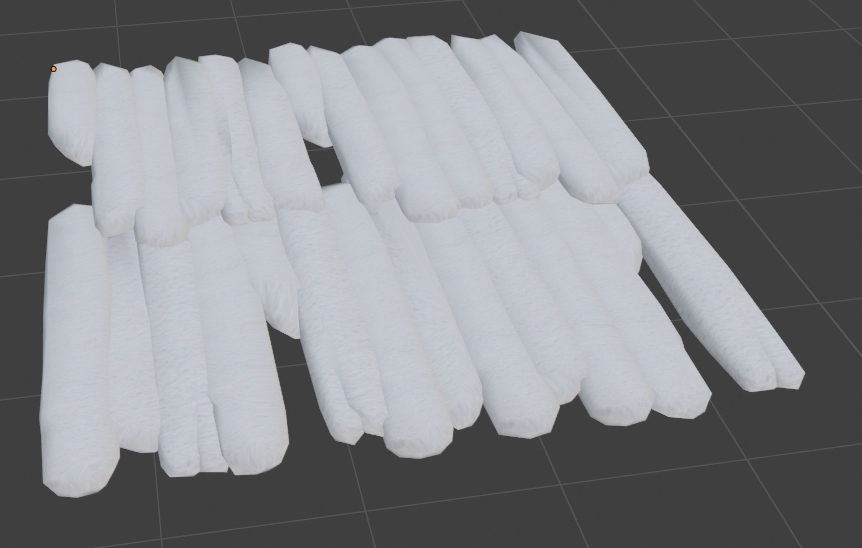
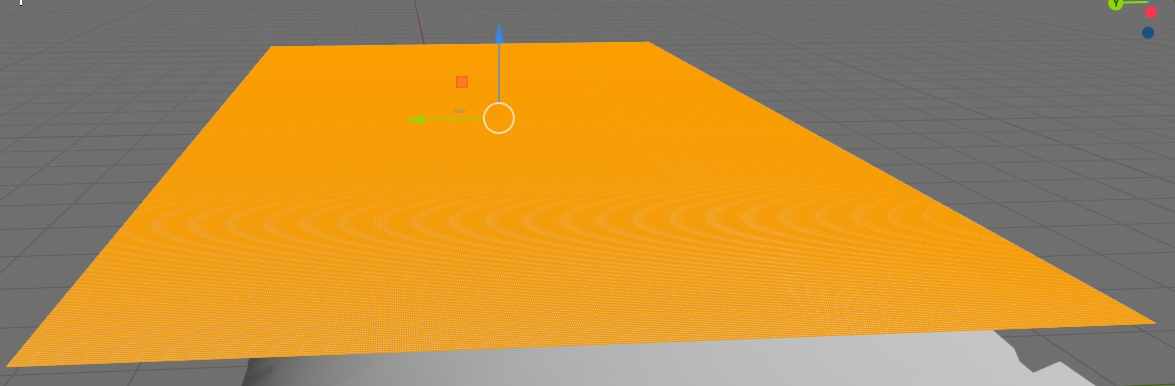
the first image i made from selecting the top and side faces of a wooden plank roof, creating a new mesh from the selection, using the solidify modifier, then the subdivision surface modifier.
but as you can see, it is clear the snow got it’s shape from each plank of wood underneath. i’d like for each plank of snow to be less accentuanted.
my question is regarding an automated way (with a modifier preferably), and ideally not by modifying the mesh manually, moving verticies around.
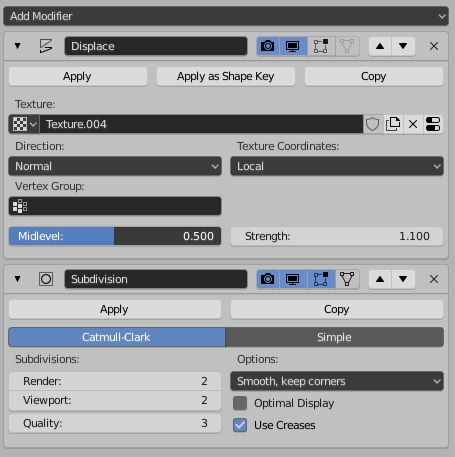
Here’s what I’d do. Go into edit mode. Hit alt s. This will fatten up the mesh until you get a little over lap. Now separate the parts and use boooltool to boolean them together. Now us the remesh modifier set to smooth. Adjust it to a decent density and apply remesh. Now (in edit mode) use randomize command. (Search f3 randomize). Adjust the randomize to taste, Now add a subdivision surface modifier to smooth things out.
i tried the height map, wasn’t able get a decent height map (im sure this can be done, but i just don’t know how to atm). theoretically a good idea, i think.
using the booltool to merge the planks together into one mesh is something i will definitly use (thanks), but again, i wasn’t able to achieve the look i wanted.
results:
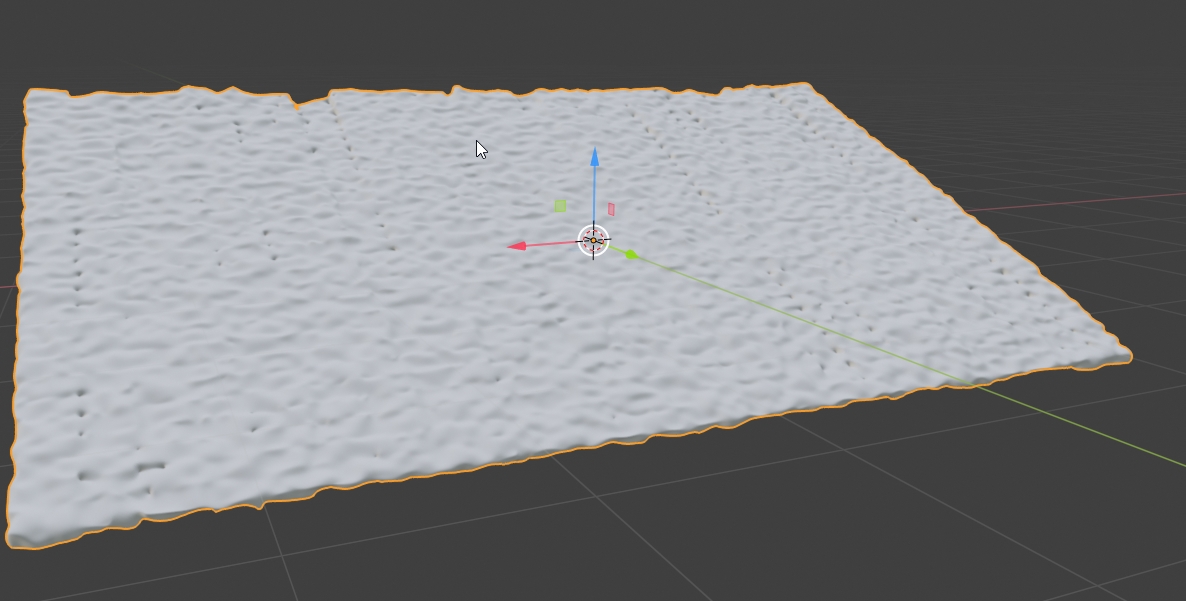
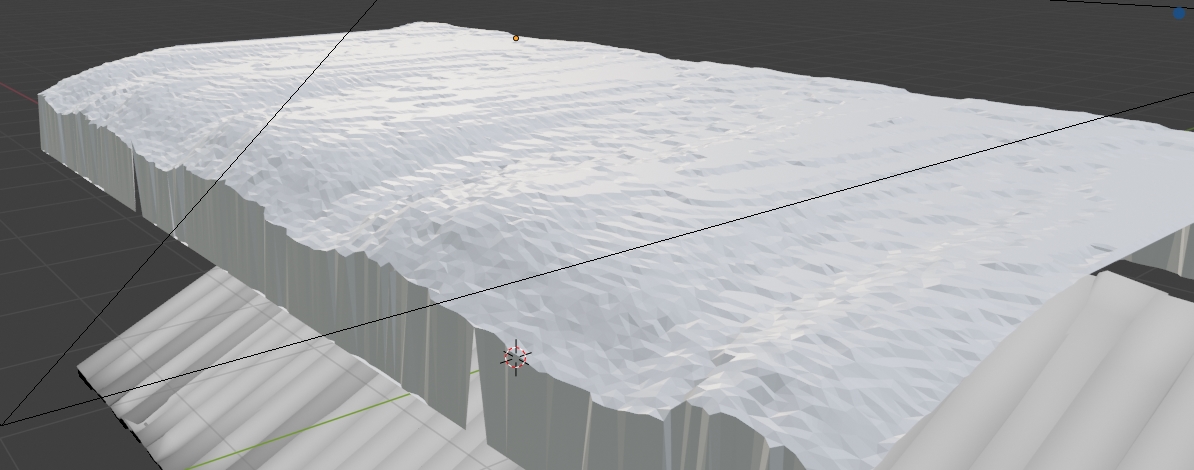
these are the planks, separated, overlapped a little bit. alt-s
and finally with subdivision surface modifier. it kinda looks like snow and has a few holes here and ther, but, it’s not the look i am looking for. is this how you would have done it @Cybermonk?
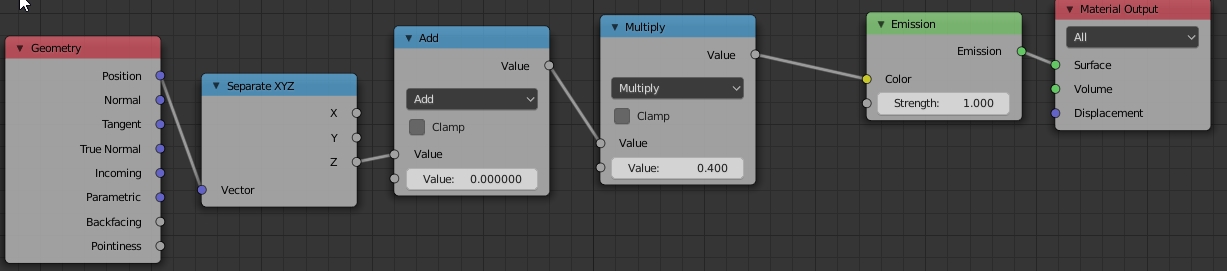
By rendering. Use an orthographic camera in top-down view. Use a plain emission shader on the planks. Feed z-coordinate (or Camera Data->View z-depth) into emission strength (after appropriately scaling and shifting the value with math nodes).
this doesn’t feel right. shouldn’t the darker areas show on the lower positioned planks (in z) and the whiter areas on the higher positioned planks, more or less? (the result image is also upside-down btw - i think)
Do away with the color ramp and replace it with an add and a multiply math node. Upside down can be fixed by using a negative value on the multiply node.
does this seems good enough? next is the result with the plane and displace modifier. ( i had to stretch the heightmap image later on, to be 2k x 2k, as that’s what i set the camera to be, and the planks are not 2k x 2k)
a couple more images. towards the middle and right of the plane there’s still a noticeable crease (barely noticeable with the texture tho) but towards the left of the plane, the creases appear to be less accentuated and looking ok)
The node setup should work as such. But you have little contrast in the height map (not a problem for the modifier with a 32 bit float image, but difficult to checking for correctness by looking at it). This can be tweaked better with the add/multiple values.
What I just now realized is that the planks are not aligned to the xy-plane. Should also be okay, but the precision of 8 bit RGB probably does not suffice then. Could be the reason for the waves. You certainly should use 32 bit floats for the image.
The curvature of the plane I guess is the result of a mismatch of color spaces between the saved image and the settings of the image texture on the modifier. This should also go away with a 32 bit float image.
now just to add a blur to the heightmap. (which i already tried, and went through the process of applying the image as a displacement to the plane. result:
the plane is still wavy, and a bit curved, but the creases where completly gone and it’s starting to look much better.
in this image the plane was removed of the absurd amount of subdivisions it had - i wanted to see if i could smooth the waves by having less geometry - nope. i might need to do something else.
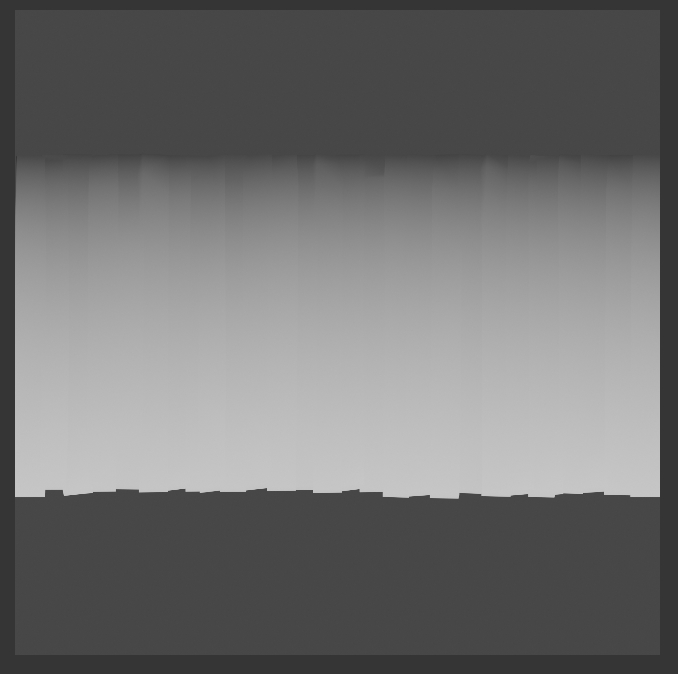
question 1 : is the wavy because of the noticeable patterns in the heightmap image, as seen below?
question 2: how would i get rid of these noticeable patterns? with a 32 bit float image? how do i now save the heightmap render image, so the image usess a 32-bit float? save it as .exr?
The waves are indeed odd. In the image I just see strong color banding, but no waves perpendicular to the planks. Or do you?
Yes, exr should work. Use File Format = OpenEXR and Color Depth = Float (Full). If that doesn’t solve the issue, it would help if I could see the blend file.
for the holes, i have to fiddle with it a bit more but ima gonna play around with it by adding a solidfy first, and basicly play around with it a bit more.
(truth be told tho, this is starting to be a lot of tinkering for these results, compared to my first snow, so i might not go this route for the work i’m doing atm.