http://www.sendspace.com/file/w21u61
^ the blend file if anyone feels like having a look 
Well I’m just getting massivley deformed ‘nets’ (the unwrapped mesh - not sure on the correct term at the moment) in UV editor. Not sure why this is happening, but it happens without fail on every mesh I create, so naturally it is a headache to me. I can’t seem to correct it, so please tell me what I’m doing wrong!!
Thanks in advance
Boonze
You need more seams to split the model into definable chunks.
Just one seam down the middle doesn’t magically lead to the wings, mouth, legs and feet having a perfect unwrap.
No, I know - Sorry I meant to add that I had seams as per a ‘snurgle’ mesh, but I deleted them because they were making it worse - this is the best it has looked. Will add some more seams to show what I mean.
http://www.sendspace.com/file/oqr6im
The layout at the moment is doable, I guess, but ideally I want it laid out as a flat net - I’ve seen it done, but I can’t find any good 2.5 tutorials on it…
Really? Nobody else has any answers? I see some pretty good stuff on here, so there must be a trick.
Well, I downloaded it and realized it was a Blend1 file, not the blend file. Any chance you can reupload the right file? Also, a picture would be nice, so we could get some idea =)
I’d love to help, but I don’t entirely understand your question. These things can be very hard to put into words, so if you could attach a picture that’d be helpful. It’s also not really a trick but a skill you can learn.
In general, the process for unwrapping in 2.5x is the same as unwrapping in 2.4x. At least the method I think you want is. However, this is a slightly difficult thing that you have to learn - essentially, you need to be able to - roughly - mentally unfold a 3D object to get good results. Knowing where to put the seams is the main factor in getting a decent result.
The method I use is:
Put the mesh in edit mode + edge mode.
Select some edges (remember alt+click will select a loop, or use B or C selection). Ctrl+E, mark seams. When I think I’ve got it, I’ll select all (A) and hit U for unwrap. I’ll then have a look at the UV editor - is everything nice and flat, or are there overlaps? If there are, the problem is too few seams in some area. I try to identify the section that’s problematic, add some seams and unwrap everything again.
Also, if you have some seams in place and go to face select mode, L will let you select only the section that’s connected. That way, only that island shows up in the UV editor, which can be a fast way to find your way around the UV map.
If the model is symmetrical and has complex unwrapping, e.g. a hand or similar, I try to get the seams right before I apply my symmetry modifier. I generally apply since I don’t want a seam down the middle as a rule.
When I’m satisfied with the seams and islands, I turn on the stretch option in the UV-editor’s N-panel. That way, I can see if something stretches too much.
After that, when the time comes to lay it out and decide where I want my texture detail, It can be a great help to generate a test texture inside blender (new image dialog). That way, I can make sure there’s adequate detail where I need it, say, a character’s face, before I start texturing. It’s a pain to go back and edit the UV map after I’ve started work on the texture, at least the way I do it with a regular image editor.
If you’re not making a game / realtime model, you can skip this process by just unwrapping everything with lightmap pack or follow active. Then, you can paint the model directly in Blender or via projection paint. I think you get better results the other way, and it’s a nice skill to have once someone wants to use your model in a game.
There is also a very good chance you need to recalculate normals. If your polygon normals are not all facing the same direction it can throw off UV mapping quite a bit. One thing to check off the list to be sure.
Other than that try looking for some tutorials on the subject and see if you can get it sorted out.
A picture uploaded here would help. The site with your download requires installing an app, so not really into that. But if you can find another way to host it, I’ll download and have a look.
One more thing to point out: I was texture mapping once, and I didn’t mark the seams well enough, so they started overlapping each other. When you do this, you start to get some really weird effects that you probably won’t want, so check there too.
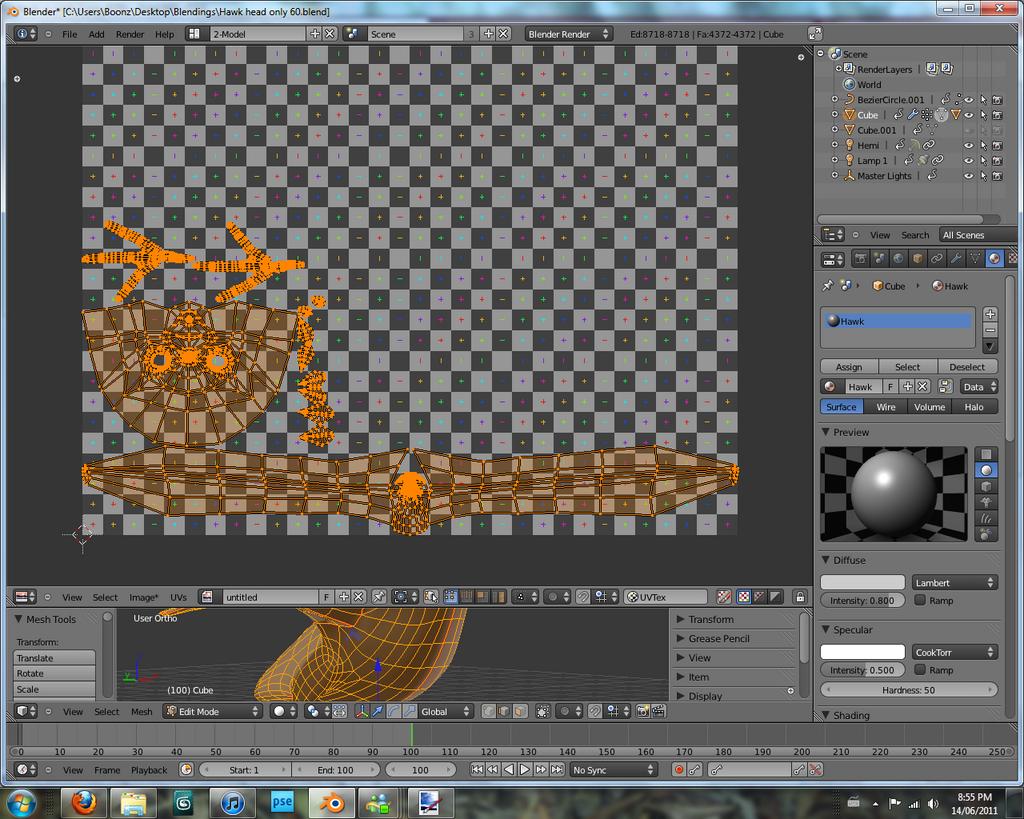
Sorry guys, been away for a bit with no internet >| but anyway back. This is actually a different model, but both have the same problem, and this happens every time I try to unwrap anything. Also, F9 used to bring up conformal/angle-based toggle, where has that gone in 2.57? I can’t seem to find it…anyway, some pics and the blend included, again so sorry for abandoning this thread temporarily  BEWARE high res pics
Also, blenderartists won’t upload the file for whatever reason, too big or something I guess, which is a pain, but otherwise I have to send it through sendspace…

Attachments

I think you need seam around the legs to separate from the body.
http://www.sendspace.com/file/seviyc
Hawk Model
@ Ridix
I did have one but it made it so much worse, so I took it off - I really have no idea whats the matter with it…