Hello everybody,
i’m teaching Blender to Interior Design students and it’s very difficult to explain them how to correctly manage texture placement, in particular the UV Mapping concept is quite difficult to catch for newbies.
My idea has been to control the mapping of an image with a 3d cube (an intuitive option available in Maya), so that the texture maps accordingly to the transformation of the cube.
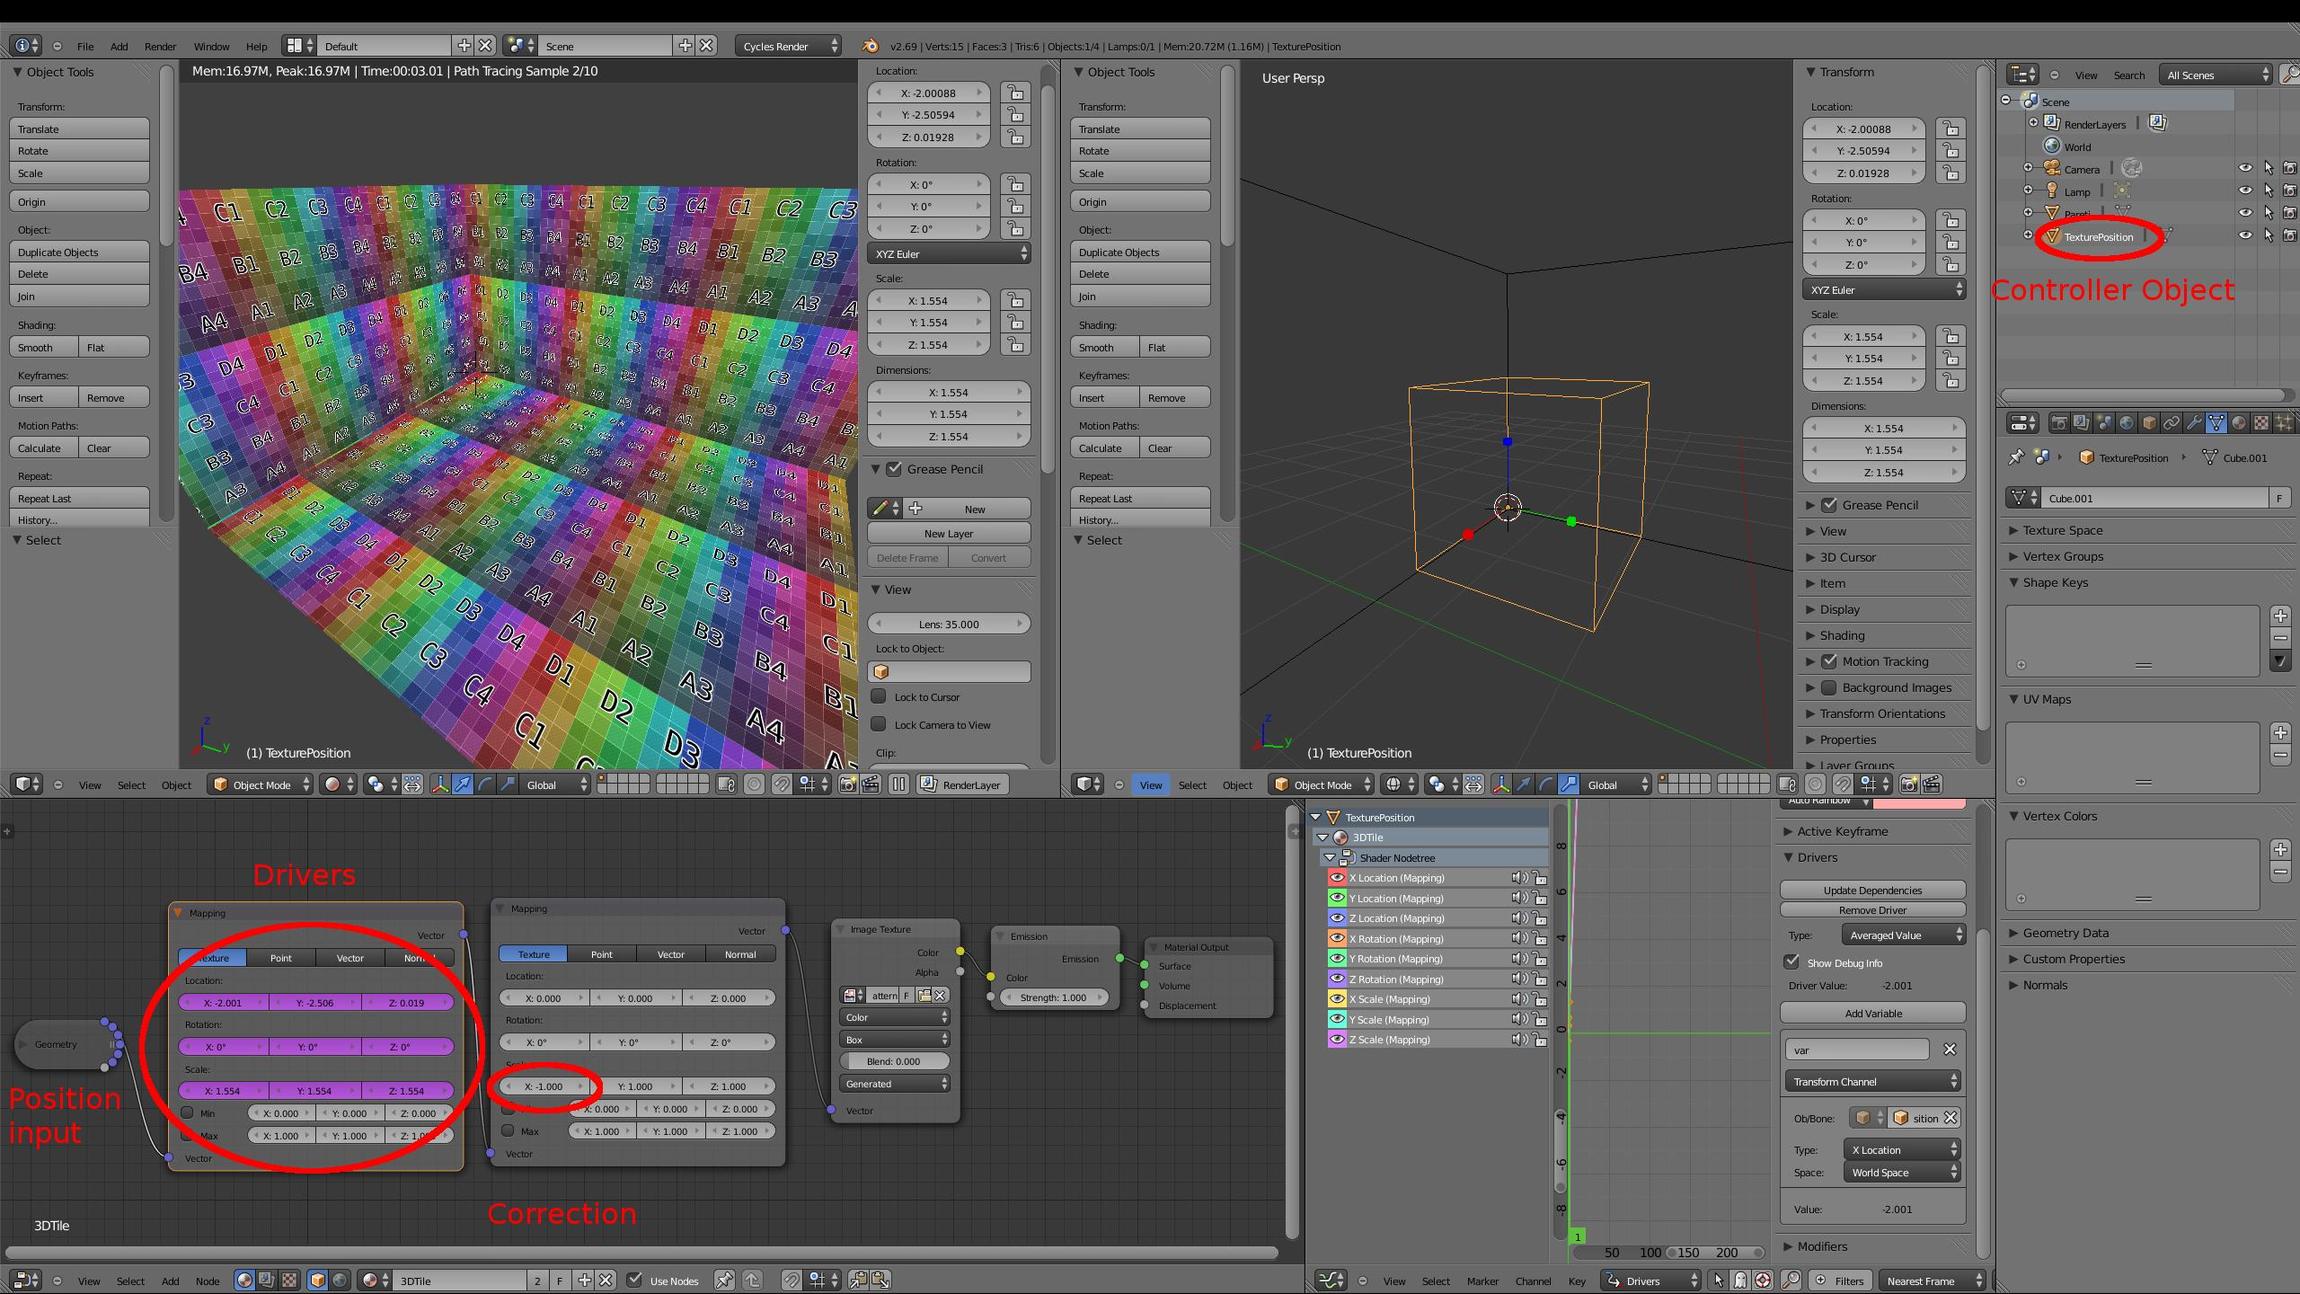
The Cycles Node setup is quite easy, a Mapping Node is controlled by the cube transformation via a bunch of Drivers, as shown in the picture:
The system works quite well and i want to create a series of Interior Design Shaders for my students with this approach.
It would be good being able to Group the Nodes taking care of the Mapping, but as soon as the Group is created, Values stop updating, i’ve been searching around in forums and i coudn’t figure out if it’s a bug or a feature…
Any idea on how to improve the system? Is there a way of having the Driven Values updating inside a Group?
Any comment / contribution appreciated…