Me :p

Well, first you have a good model going there.
I took the liberty of scaling your reference pic to the size of your screen shot and did a paint over ot the photo and overlaid onto the model. You can see the profile needs some tweaking to be exact. I would have done the same for the front, however I discovered that the picture plane is not square to your face in the photo. I did try the overlay and it looks like some adjustment is needed, but I couldn’t tell for sure.
Also, I recommend making sure your reference images are not only as perfectly square to the picture plane as possible, but as close to the exact same size in scale. This can be easily done in PS or Gimp by overlaying the layers, making one semi transparent, then scaling one or the other to be the same size. Then place the images in the background of Blender for your reference. Each corresponding the view port you are working in (front and side views).

Attachments


I was looking at your ref pic and your model and something was still bugging me a bit, I figured out what it was:
Your profile ref pic is at a different angle than your model’s profile. I corrected for the angle and redrew some contour, did some fast PS stuff in one pic to “correct” the model’s profile and left one pic with the model and just the contour overlaid. All 3 pics are the exact same size and place. So, you can copy all into PS or whatever, and toggle the layers to see how the contours change, one to the other.

Attachments


Very good modeling Corninger! Topology-wise I think it’s clean but with perhaps a few too many edgeloops around the chin/neck area. Also very good crits by Soter!

Wow… Soter, that’s what I call a thorough analysis!! Thank you!! Wish I could do something similar for you in return :slight_smile:

I should probably have added a little something, and you can kick my butt for that - the references I posted are different to the ones I used! I just did’t want to post the originals because on those I really look like a BUM :smiley: So the angles are different for sure.
Also in the originals something’s crooked, because the ears don’t match from front view. They appear to be lower than from the side. So I made them match side view exactly.

kick my own butt

I didn’t expect such extensive help so I didn’t bother about the references, just wanted to put up some picture that doesn’t look too ugly :stuck_out_tongue:

This is ONE community! I have never experienced anything alike. Seriously.

kicks Corniger’s butt lol
np, honestly it didn’t take long to do. However, unless the shape of your head has totally changed between the two pics… lol. There are probably still some areas that need tweaking. :wink: Sometimes when you’ve been working on something for so long it becomes difficult to see where the model has to be shaped.
btw, the best way you can thank me is to keep going! At least finish the modeling part! :slight_smile:

OUCH you hit the nads!! :pb That was on purpose…

Of course there’s a TON that needs tweaking! Just wanted to get some more feedback and post progress :slight_smile: There’s always somebody who gives useful comments, and that’s worth a lot!

You can bet your butt I’ll finish this - down to the last pore and booger! You could already fly far into my ear canal, but I wouldn’t, if I were you!

Ok then. Again a few tweaks, it’s getting better. More bumps to remove, the ear needs to be redone (attaching it to the head is a nightmare, merging vertices to merge with head mesh created lots of junk, I have to learn this better), but it’s coming along.

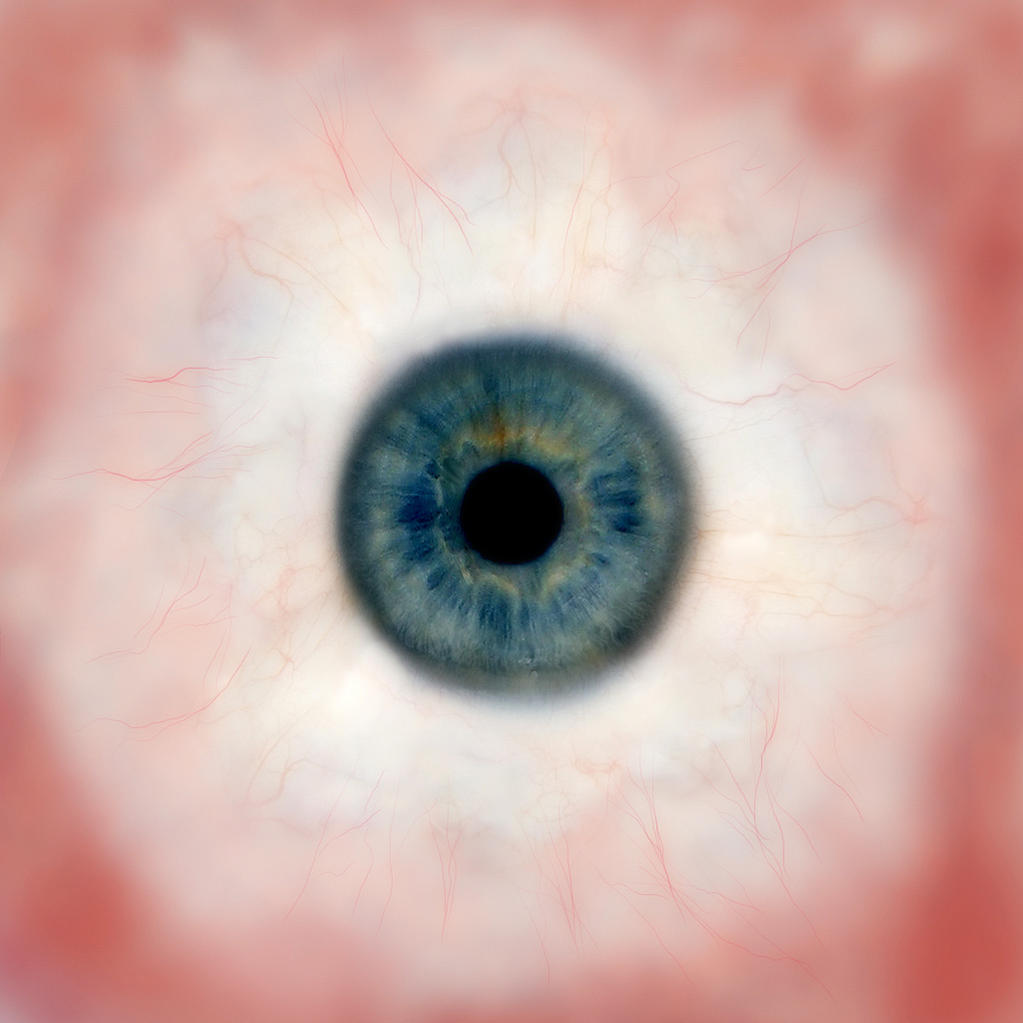
I learned (?) UV texturing today and so I attempted to texture the eye. It looks dull, it looks like crap. I used two tutorials :this one and this one. I don’t know what went wrong. This is nowhere near pixar, it’s more like near butthole. So please, somebody kick me in the right direction if possible! Generally, there seem to be very few tutorials available on UV unwrapping/texturing - I hope I’ll soon get Kernon’s DVD and my beautiful Ballistic book that seems stuck at the customs (got a notification from those ripoffs today, I’m curious what I’ll get after standing at the post office for 40 minutes), so I can figure out hov to make EYEBROWS and BEARD with textures - or does anyone advise using particle hair? Or tapered mini-curves?
Then comes the skin!

Also, suddenly after I switched render modes, when rendering, it outputs a sqeezed version (50%) and when the render is finished it pops up to full res. Weird.

OK, good night after 2 fulfilled 12hr Blender days before a few days of boring work! Cheers!

Attachments


There’s a setting for that compression during rendering… I can’t remember what it is, but I saw the answer in a thread at some point. :stuck_out_tongue:
Here is a link for making some great iris textures. It will probably take awhile to get right, it did for me. Also for UV mapping. Personally, I’ve found that it just takes time, especially if you have anything close to a high poly count. Make sure your UV Calculations are set to “Conformal”(F9).
It’s coming along, :slight_smile:

Hey Soter!

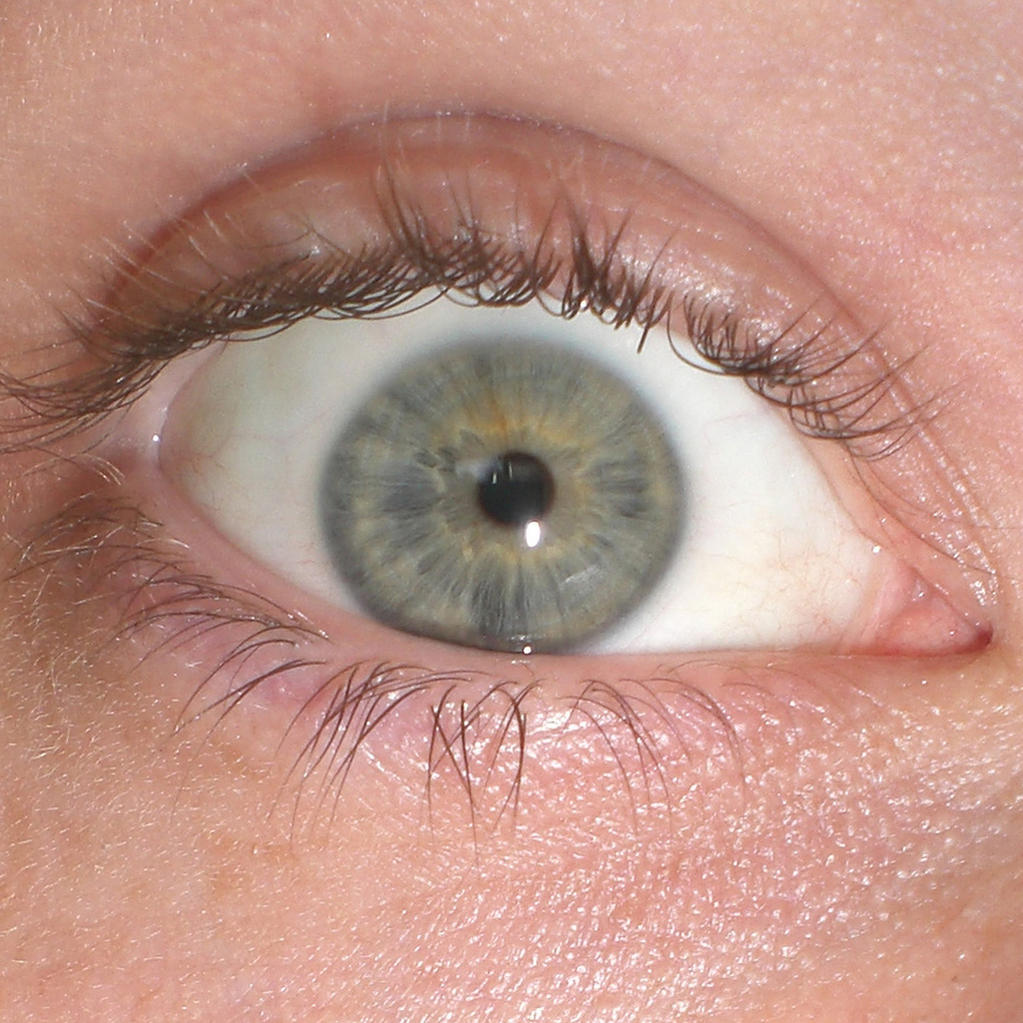
Well - I actually took a picture of my own iris and eyeball to create the texture I used. It looks totally dull, the blood vessels are hardly visible - but only in the render, that’s why I posted the texture, too. As you can see, there`s a tremendous difference in colour intesity between the render and the texture. The cornea has been created according to the tutorials, at least I think so :stuck_out_tongue: So I don’t think the cornea is killing it. But I’ll try around a bit more. The iris’ reflectivity depends on the lighting, and as I don’t know much about lighting yet it might be what destroys my iris.

I have already read about the conformal thing and set it up :slight_smile: Now I just have to figure out why in the UV mapping tut the unwrapped cube pops up 90° straight in the UV editor and why it lies diagonally on my UV map. But that doesn’t have anything to do with it. The mapping worked fine, though it was pretty complicated to get it to do what I wanted in the beginning. Also the tut didn’t say anything about texface… I think there isn’t ONE good tut out there concerning UV mapping - so once I master it, maybe I’ll create one…

The rendering thing is the Fields button:-


The iris problem might the be reflectivity or alpha of the transparent part. If you post a simplified version with just the eye and the lighting and remember to pack the texture someone will take a look at it.

Do you have UV checked on the Map Input panel for the unwrapped cube ?

Thanks for “fields” :slight_smile: That was on.
UV Map is on!

OK, I tried to pack the file, I’m not sure if it worked :frowning: Never did that before! If it doesn’t, I’ll zip up all contents and put it on a server (no access at work). Filesize seems a bit small… So there it is :slight_smile:

Attachments

eyes.blend (196 KB)

A small tip, if you plan to use sculpting at some point:
Use CTRL-SHIFT-LMB-drag (in Sculpt Mode) to select an area to sculpt, the rest will be hidden and will improve computer performance dramatically! ALT-H brings the hidden parts back.

The image packing didn’t work. I think you might have been trying to pack the image from a CD? or maybe it just called for a directory that is my DVD drive.
I’m not sure on what all is involved in packing the images, I haven’t really used that feature myself.
Could you post a screen shot of the UV issue you were referring to? I think I know what you are talking about, but I could be wrong.

Very solid modeling, eye texture is washed out but probably it is easily fixable . So are you the one complaining about noobness ? I do not see anything bad with your work.

I think I figured out your washed out look - in the world settings, Ambient light was on. (Settings AmbR, AmbG, AmbB not on 0.0) This is different to ambient occlusion. Ambient light / colour just adds a certain amount of ‘light’ everywhere and basically just washes everything out the more you turn it on. I’ve never had a case where I’ve needed it. Ambient Occlusion however is more of a (relatively) quick approximation to help with the look of global illumination in a scene. Turning it to Approximate makes it very quick, but less accurate.

Also - you will love that book when it gets to you. I’m not sure if they ship from here or not - I think most of it is out of the USA even though the editing is done an hour or two from where I live. I think. I still don’t fully get what Ballistics does where. Either way I live in Adelaide and half of their stuff I still seem to have to order in because only a few of their books are in local bookstores.

Anyway, amongst other wonderful things there is a chapter just on eyes (materials, lighting, textures etc) done by Steven Stahlberg. http://www.androidblues.com/ Following that and generally playing around I came up with the following texture:

@all - feel free to use.


The book will also explain making a specular texture -


I took a photo of my eye (don’t ask how I did it with minimal reflection on my eye, I was trying to take a photo of the pores around the eye at the time) and built up the texture more or less in this fashion, clone brush and such to merge it all together.


The texture could be made clearer in the iris with some Wacom tablet painting, but for the resolution renders I’ve done so far it’s fine.

Parts of the veins were built up from images I got from here http://www.picfindr.com/app/?search=eye&Input=Go including one or two I paid for - the quality is worth the small amount of money in this case if you have Paypal or similar. (Seeing as you ordered the book I guess that isn’t a problem for you.) Some of the free images are quite good too.

http://www.dreamstime.com/eye-image5505663 - one of my favourites so far. The detail on the full res one is amazing. More for reference than for using in a texture though, except the bottom of the iris is pretty useful.

For hair - particle beard would be much better than texture beard. Eyebrows you can get away with texture half of the time if they are well plucked female ‘model’ type eyebrows, but most eyebrows would gain from the effort of using particles. If I were you I would tackle the rest of the modelling and texturing first, leave learning the particles for a bit. You are learning plenty at once for now, that and the modelling affects the particles anyway so you want to have it finished first.

Anyway - very good progress so far. I can see the resemblance which is half the battle. One other thing for now though - the skin above the eye looks a bit ‘sharp’ somehow. Selecting the verts above the eyelid and hitting smooth a couple of times should do it. The shiny specular line doesn’t help it. Your enthusiasm is contagious by the way!

Finally - I’m following this thread, so if you have issues translating something from that book (they use Maya for most of it) to Blender, feel free to ask. I hope to kick up work on my own character more regularly soon with that book and a few other references anyway.

I found these really useful for eye textures. It may be a bit overkill, and they do need some cleaning up. Also there used to be a note on the site about the images being free to use, but if you email them I’m sure they will clarify it.

http://www.milesresearch.com/main/sampleimages.htm

OK, @all: WOW :slight_smile: Thanks a bunch for the feedback. Starting from bottom up:

@Soter: I will definitely try on sculpting, but only once the whole model is as refined as I can get it without sculpting. I want to know how smooth I can get it just like that! It’s painful, but I’m learning. Every additional edgeloop might create a crease that’s a BITCH to get rid off!
The UV issue: I unwrap a dice. In the tutorial it fits right into the view from scratch, in my UV editor it pops up crooked. The angles are all correct, no distortion (except when I use a non-square image…), but it’s rotated instead of straight, corners touching the margins of the editor grid - that’s all. No problem with the model in this thread (yet)! I’ll try to package it up again later on my own PC, it can’t be that hard :slight_smile:

@Kilon: Thank you :slight_smile: But I definitely AM a n00b. I know nothing. Whenever I learn something new, a floodgate opens on me - but I’m a good swimmer :wink: UV mapping alone… so many options, and I have to learn EVERYTHING. So i count as a total n00b, and I can live with it!

@Ben: floodgate ahead!!! lol Thanks for solving my lighting problem!! It’s coming together, closer and closer! I’m getting there… I totally tingle now!!!
I have already ordered the book weeks ago, and I’ve “read” the online flash version several times to get something out of it. Very promising! Many thanks for that great piece of advice. The specular textures… that will also all come for the skin! I’m almost a little terrified…
I made the eye exactly like you did - looks nicely disgusting :smiley: I duplicated parts of the iris and rotated them to get rid of reflections (eyelashes) and retouched the flash. I used only my veins, but there’s my old Eye Candy filter that does good veins with a marble effect. Thanks for the good resources!
Hair: I just played around a bit once and it sucked camel d*cks. All bushy, uncontrollable and most of all: the rest of the model disappeared during rendering lol But I’ll get to learning that very thoroughly. In time.
I’ll see to refine the eye some more - I’ll have to. from the side, I can see past the eyeball in the inner corner of the eye, I think the eyeball is too small. I had a hard time adjusting the size according to my reference. I think, they’re still a little too bulgy anyway.
I want to see your head model finished - after all, you brought me onto the path of enlightenment (together with Jonathan) - though it’s still quite dark around :slight_smile: One more thing I’ll have to do: reflectivity map to get the liquid on the eyeball. That’s gonna be another challenge.

All righty, so I’ll keep working and whenever I feel like getting on someone’s nerves, I’ll just do it :eyebrowlift:

Thanks guys!! L8er!!

On your UV problem with the dice tutorial: The only thing I can think of is that you have moved some vertice to make the model not square, as long as all your seams are in the right place. I loaded my default cube and couldn’t get anything but a square UV map, until I moved a vertice. I’m kind of “swimming” in the UV world myself, I’m pretty new to UV’s and texturing. Personally, I’ve found a combination of the live unwrap and manual push and pulling has been what has gotten my UV map halfway decent. It is very time consuming, not sure if that’s normal, but I haven’t heard anything different, so… :slight_smile:
Great catch by Ben! I’m glad you have that issue resolved!

That’s what I mean :slight_smile: No UV problem, just that weird vertex-grid position!
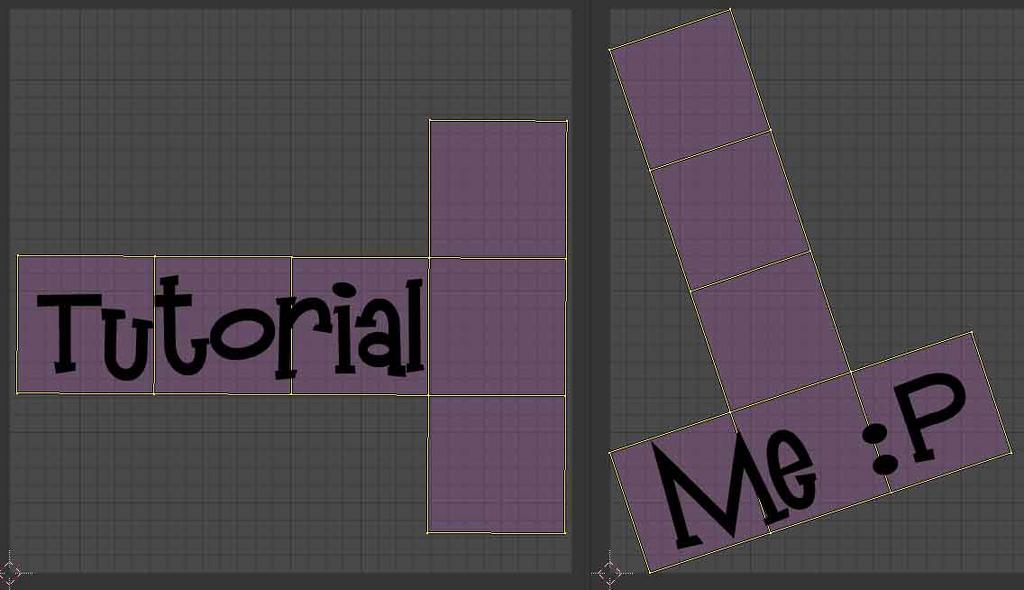
Now that I did my first UVs I can’t wait to unwrap the face… that’s gonna be fun… but first the ear needs to be redone. Sux big time!! Anyway, I’ve got my foot in the UV door and must not let it get crushed and I’ll shut up now.

Attachments


I did notice that the cheeks are a little bigger in your reference pic than on your model…