I’ve looked everywhere and tried every little fix I could find. I haven’t found anything that’s worked.
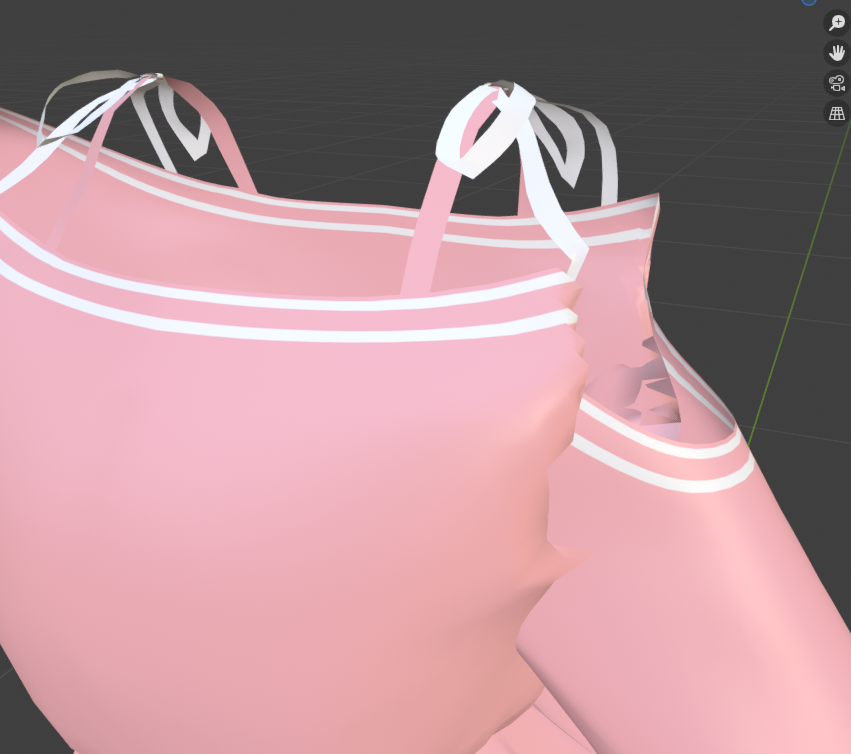
I have a file with a piece of clothing that I added to a different rig than it started with and weight painted it for the new rig. When I pose it the upper arms (either side), the mesh collapses in on itself and has jagged edges. I’ve tried many different types of weight paints, smoothing, blurring, even removing the weight paints and starting over.
There are two bones for each side that affect that area: Upper_Arm_L/R and Upper_Arm_Twist_L/R
I have weight painted both. I have tried only weight painting the twist bone and not the regular one but the issue continues.
I have the original model for the clothing rigged to a different rig entirely. When I move the upper arm the same way as mine, it doesn’t produce the jagged edges and doesn’t collapse in on itself. I can see no reason why it’s any different than what I’ve done. I can’t figure out why that one works and mine doesn’t.
My different rig for the model bending the Upper_Arm_L bone:
Below is the file with both models and both rigs for example. The original rig bends perfectly fine using the arm bones.
Edit: I noticed the weight paint is acting like it’s red no matter if it’s blue or .001 on the weight level. I have even removed all weights affecting a single arm so that it didn’t move and removed the vertex groups and re-added them and it still acts this way. It’s still jagged, still clipping into itself, still acting like .001 weight 1. There is no falloff.
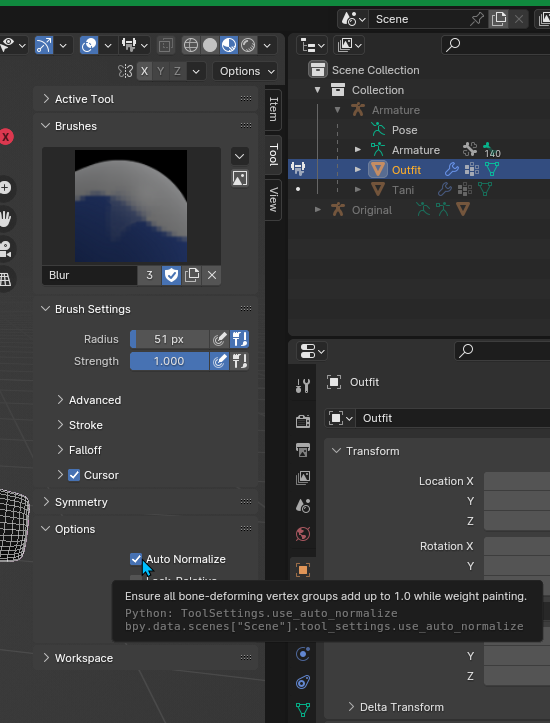
As far as I can tell, it’s just needing more work on the weights. If you paint with auto-normalize checked in the tool settings, it’ll make sure that things balance out to 1 for any vertex groups with a given vertex. As it is, it’s hard to tell what the total is because there are a lot of torso bones that have influence in the general area, but weights are all about relative strength. If a vertex only has a weight of 0.1 in the arm bone group but has no other (or very little) weights in any other groups it’s going to follow the arm bone as if it were 100% assigned to it.
Depending on the rig, I sometimes start with empty vertex groups and assign chunks of the mesh to each group (controlling the gradients between bone influence with say A0.1, B0.9 on one vertex, its neighbor A0.25, B0.75, etc) as appropriately as I can in edit mode, just to know there aren’t any distant bones getting their influence exaggerated from automatic weights giving them an 0.0001 pull on a vertex until the normalize sees you reduce the influence on the main bone related to it and suddenly the ankle has a 0.05 effect on hips. And then you can do careful (normalized) painting and smooth weights etc in the weight painting mode with the rig posed as extreme as you’ll want it to see how it’s working as you edit.
Beyond patience weight painting, some issues will need careful posing (and/or clever rigging and maybe corrective shape keys) to make a loose piece of clothing look natural bending with the limbs of its wearer without sliding around like a fabric simulation.