Hi guys
I can creat a mesh from a heightmap i can create a heightmap from a mesh made in blender but i can’t fror the life of me create a heightmap of a imported mesh why why why??
the steps to failure
1 import mesh
2 new material shadeless
3 new texture . select blend,vertical,ramp color alpha to 1,all to Z,(select generated(this is how i get heightmap from mesh created in blend)
4 add camera ,ortho,place camera above mesh,render
5 if mesh was created in blender i get correct result if imported all i get is a white flat image.
6 tried all option uv,generated,only one that gave some result was reflection and that was not correct.
7 what am i doing wrong here.
What is that cycles?nodes? don’t know anything about that.
Why not render the Zdepth pass? No need for special materials, and works both in BI and Cycles. Save the image into something greater than 8bit format, and then you can rescale the low/high ends in composite or any software that deals with high color depth images.
This was Z pass render i suggested, actually.
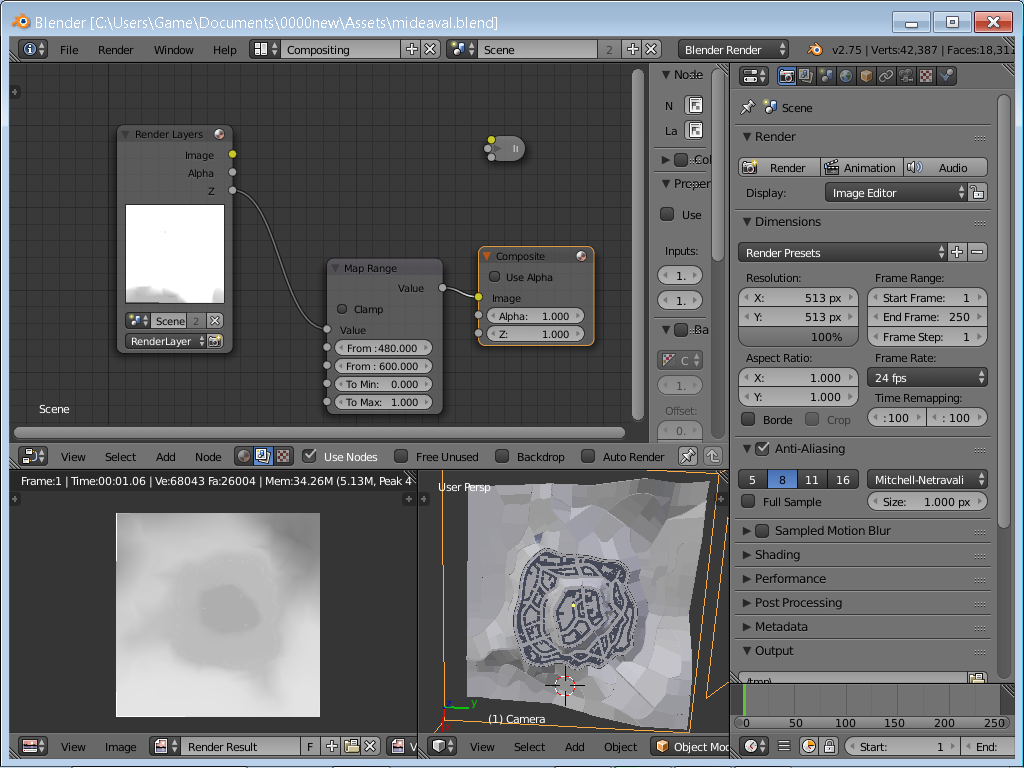
Camera clipping values help to ‘measure’ depth values you then use in Compositor Image nodes as shown.
Start by allowing Camera Limits and then adjust Clipping values so that the line and orange dots you see coming from Camera include part of the object you want render depth of.
Add Vector = Map Range node and copy/ paste Cliping values from Camera. Now, when you render Z output values will represent height in the b/w range 0 to 1.
Use rendered image for the Displacement modifier; render format - as Secrop suggests, more image bit-ness, more precise and less stepping distortions on the displaced mesh.
( What i suspect is that your imported object has scale which is not exactly Blender’s default value range…Have you Scale applied?)
I scaled the model up maybe 40 times the size.
This ;).
Still, Z pass is fast and does not require any material changes.
Hey so i followed your example first time using this node thing:D. Here’s my result does it look ok or did i miss a step?

Yea… Composite node’s input goes to map range output. So that you render that…Viewer alone is not enough and you do not want lighted object’s render be the heightmap either so you do not need to connect anything to the Render Layer’s color output.
Edit: ouch, that was not the Viewer but another Composite… Delete one coming from Render Layer’s Color and you’re good to go. png, 16 bit on Render tab for the starters…
Double post - had power outage…
Nope still not getting it latest try has the dark areas and light areas wrong way round sigh.
[ATTACH=CONFIG]394298[/ATTACH]Could you do me a favor and look at my blend file must be something stupid in there somewhere.
mideaval.blend (1.77 MB)
If the black and white needs to be inverted change 1 and zero on Map Range node’s last two fields.
I’ll take a look meanwhile. … http://www.pasteall.org/blend/37511
Thx mate that did the trick that will save me a ton of annoyance in the future. a Gold star for you.
You could also map “depth” (in any arbitrary direction) using an empty (scale, rotate, position etc) and using a global material in the render layers tab. Allows you to do some really crazy tilt lens focus effects. Can’t remember having seen that in Blender, but here is a photography video explaining what it’s all about:
I know Blender supposedly have a shift tilt lens, but I have only found the shift part. For tilting, I have to use this trick. Feel free to correct me though.
Here is a quick blend of it:
http://www.pasteall.org/blend/37513
Looks confusing Carl tried a render and it closed blender down don’t think my comp can handle the complexities.
Didn’t realize it had 730.000 faces on it, sorry. By removing the subsurf modifier you should be able to bring that down to 188.000.
About the objects:
Cube - some object being arrayed.
Cube.001 - Disabled object holding the GlobalCustomDepth material that CustomDepth renderlayer utilizes. I want a damned material editor, this is ridiculous!  Note how it uses Texture Coordinates “Object” with the Empty (see below) as Object Link (in the material).
Empty - This defines the coordinate system used by GlobalCustomDepth material.
Camera, Lamp, and Plane - not going to explain those 
Rendering:
1st RenderLayer is rendered, using 25 samples (noisy, but this is example only).
2nd CustomDepth is rendered, using 1 sample (it doesn’t really need more).
3rd Compositing, using the CustomDepth to mix between original and blurred/bokehed image.
Probably a bit more complex than what you’re asking for (or need in your case). Just showing how to do custom “depth” to work in your favor when you need it. It’s probably not something you’d use a lot, but nice to have an idea of in your arsenal.