So I was making this model using the mirror modifier, clipping enabled, set on the Y axis, and then duplicated it and mirrored it using the right-click menu. I joined the two together with CTRL-J, then selected the loop around the center and went to Merge Vertices and Merge by Distance. When I did so, however, the model got an ugly-looking depression in down that loop.
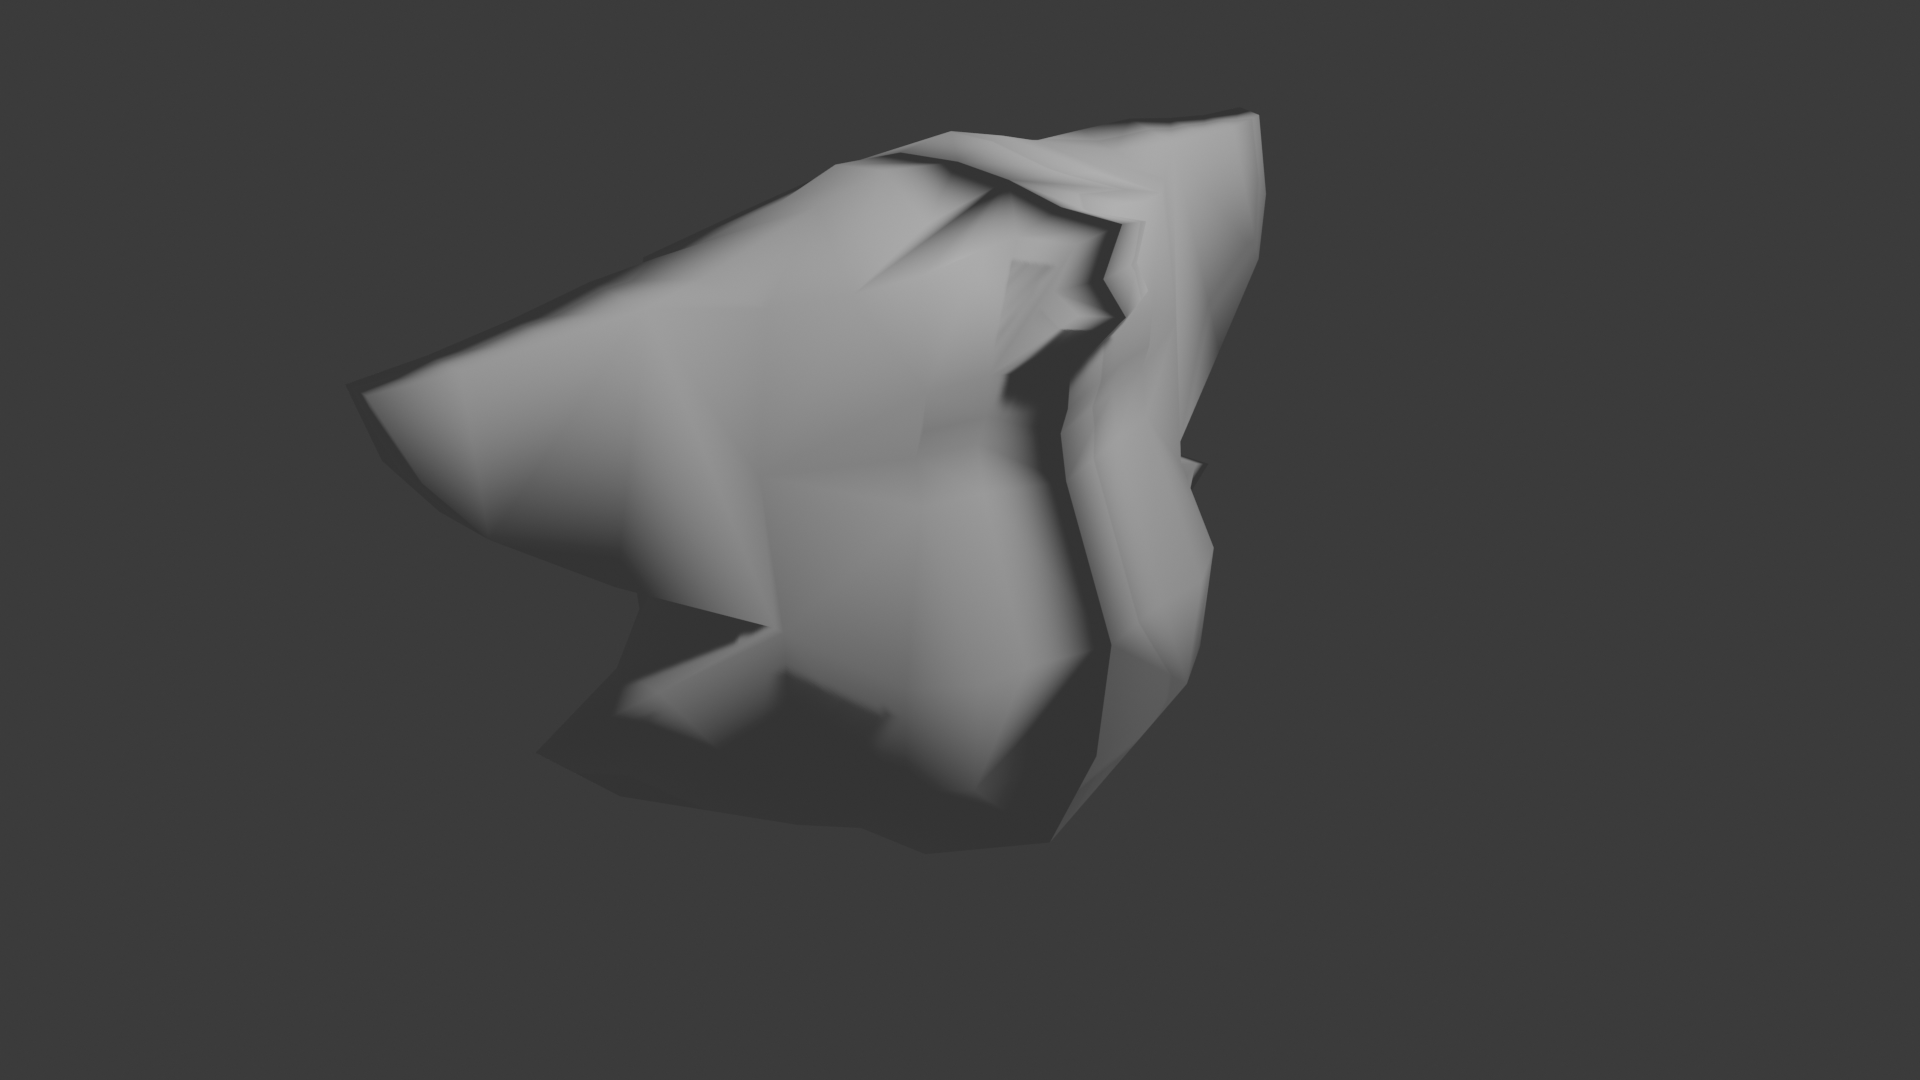
Here’s how it looks after Merge by Distance. I’d post how it looks before merging and how it looks in shade flat, but since I’m a new user, I’m barred from posting more than one embed in a topic.
Hi.
I don’t think, I understand what you’re saying: if you were using the Mirror modifier, why do you need to mirror it by hand? ![]()
Anyway, I’m guessing from this part:
…means that when you joined that “mirrored” mesh to the original one, its normals probably got flipped.
You should be able to see it by enabling Viewport Overlays > Face Orientation - if that part of the mesh turned red, the normals are inside out.
If that’s the case, you can fix the normals by selecting mesh in Edit Mode, then go Mesh > Normals > Recalculate Outside. It should fix shading.
Thanks, this worked like a charm. As for the mirror modifier vs mirroring by hand, by that point I’d finished work and wanted to create a mesh that I could UV unwrap and texture, so I went ahead and removed the modifier and copied it over.
Hmmmmm
Yes, it is wrong that the apply button is now hidden.