Mix Shader output different between viewport and render

Hi,
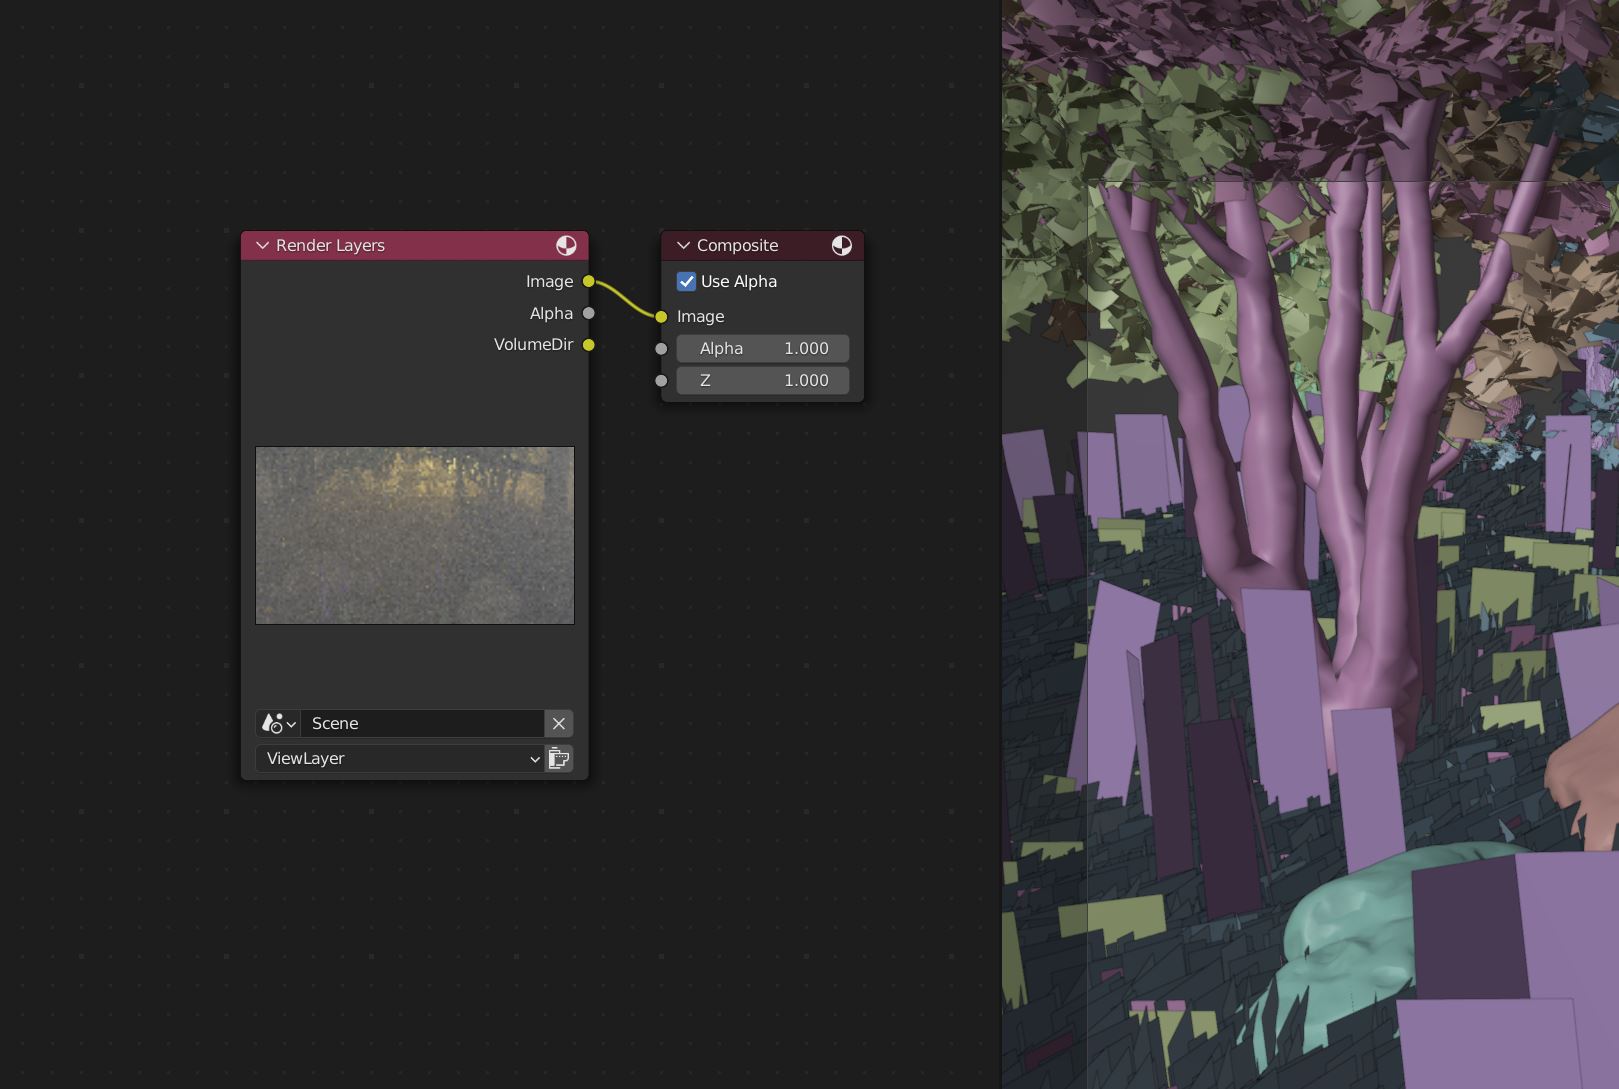
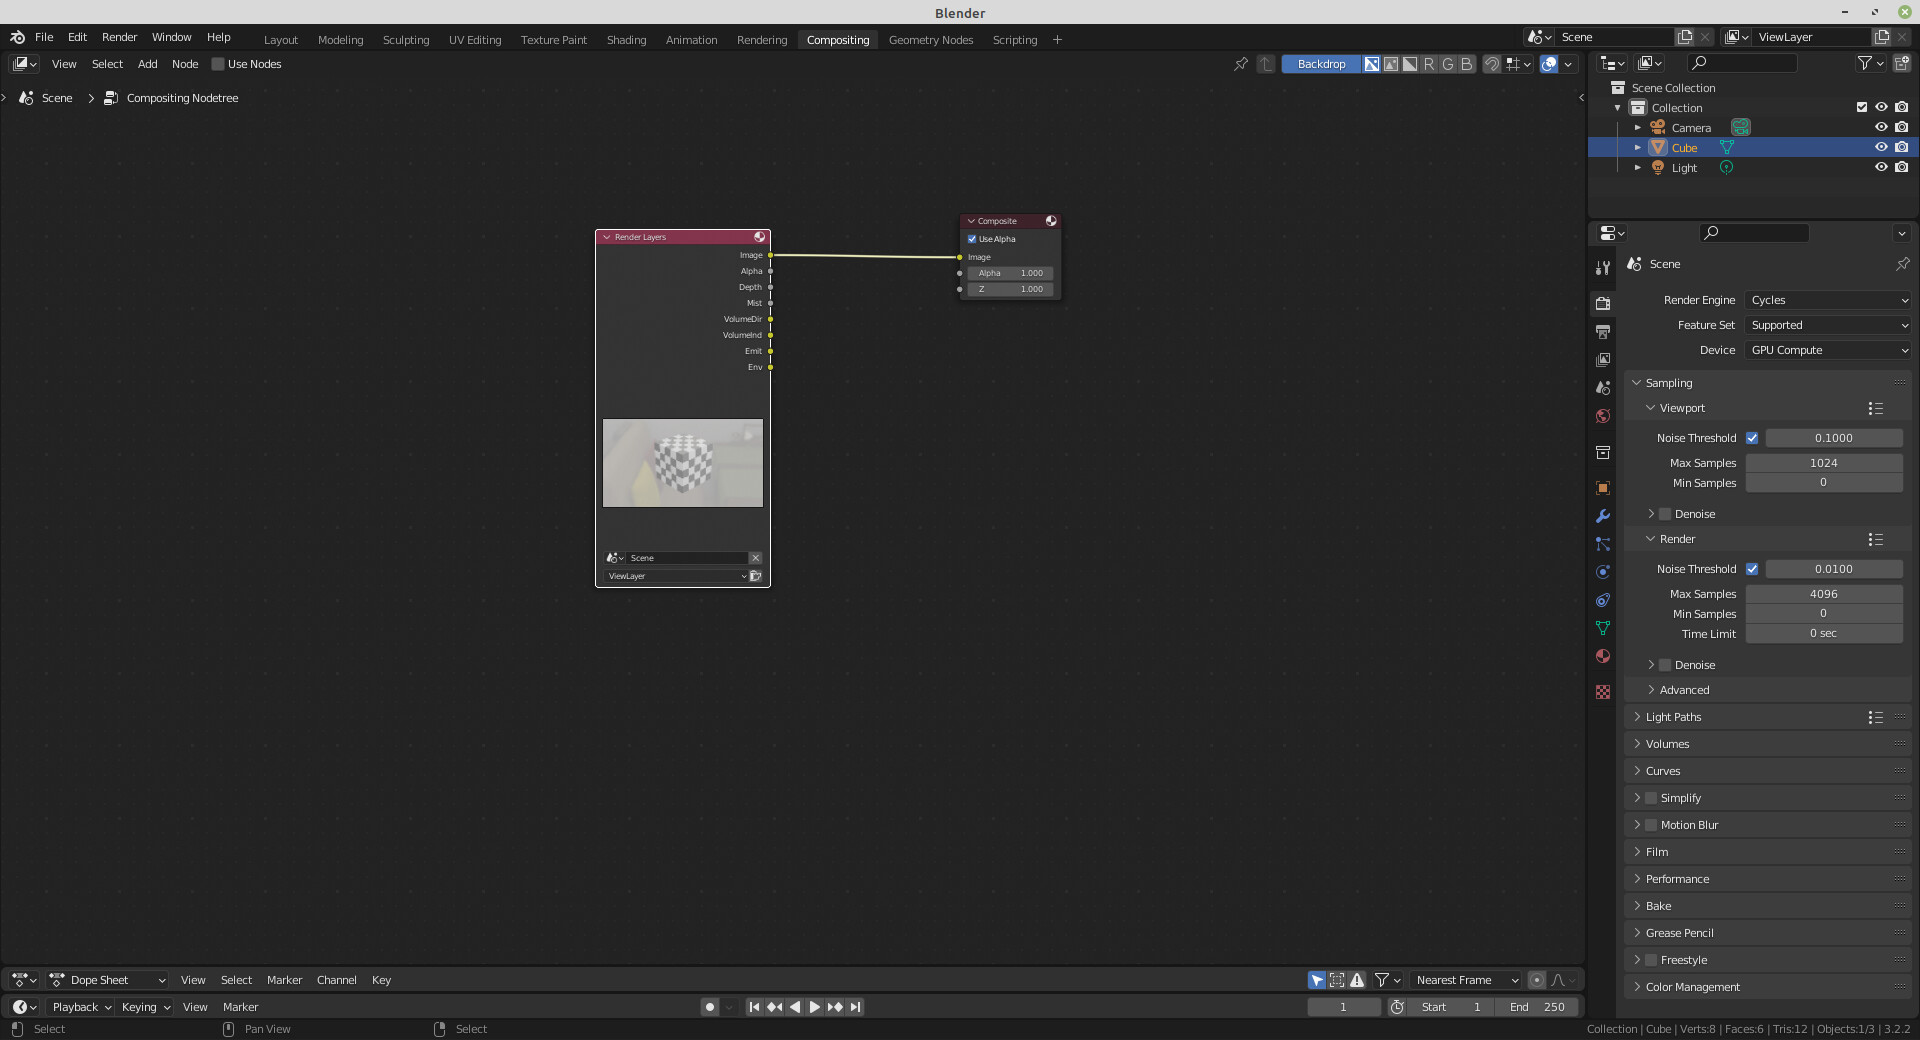
I have a scene with a world shader node tree, where the last node is a mixshader that mixes a simple background color node with a more complex shader node tree.
However, the first frame of my animated scene should only have the background color node mixed through.
I set the mix shader factor to 0 to only let pass the top shader input, which is the background color node.
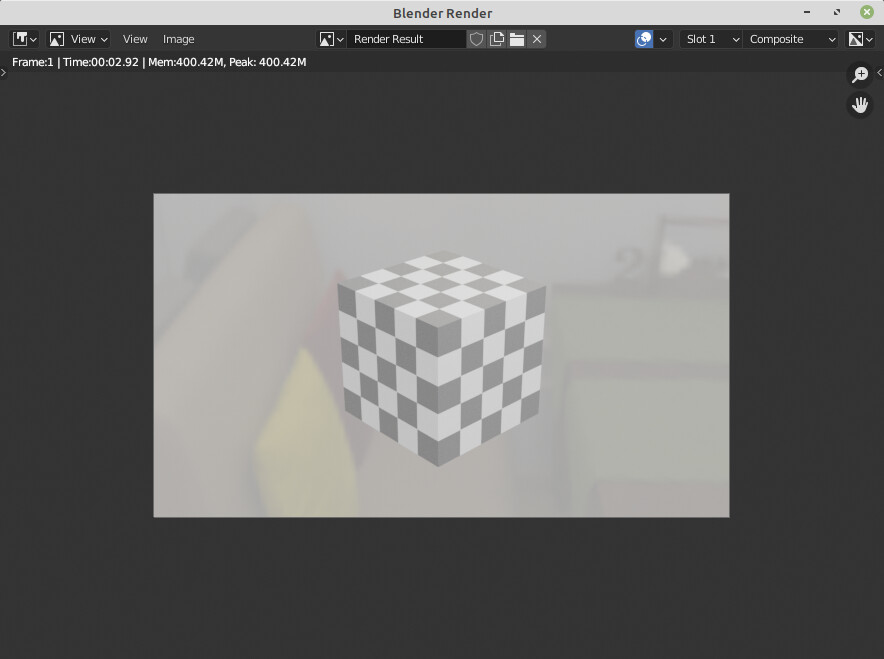
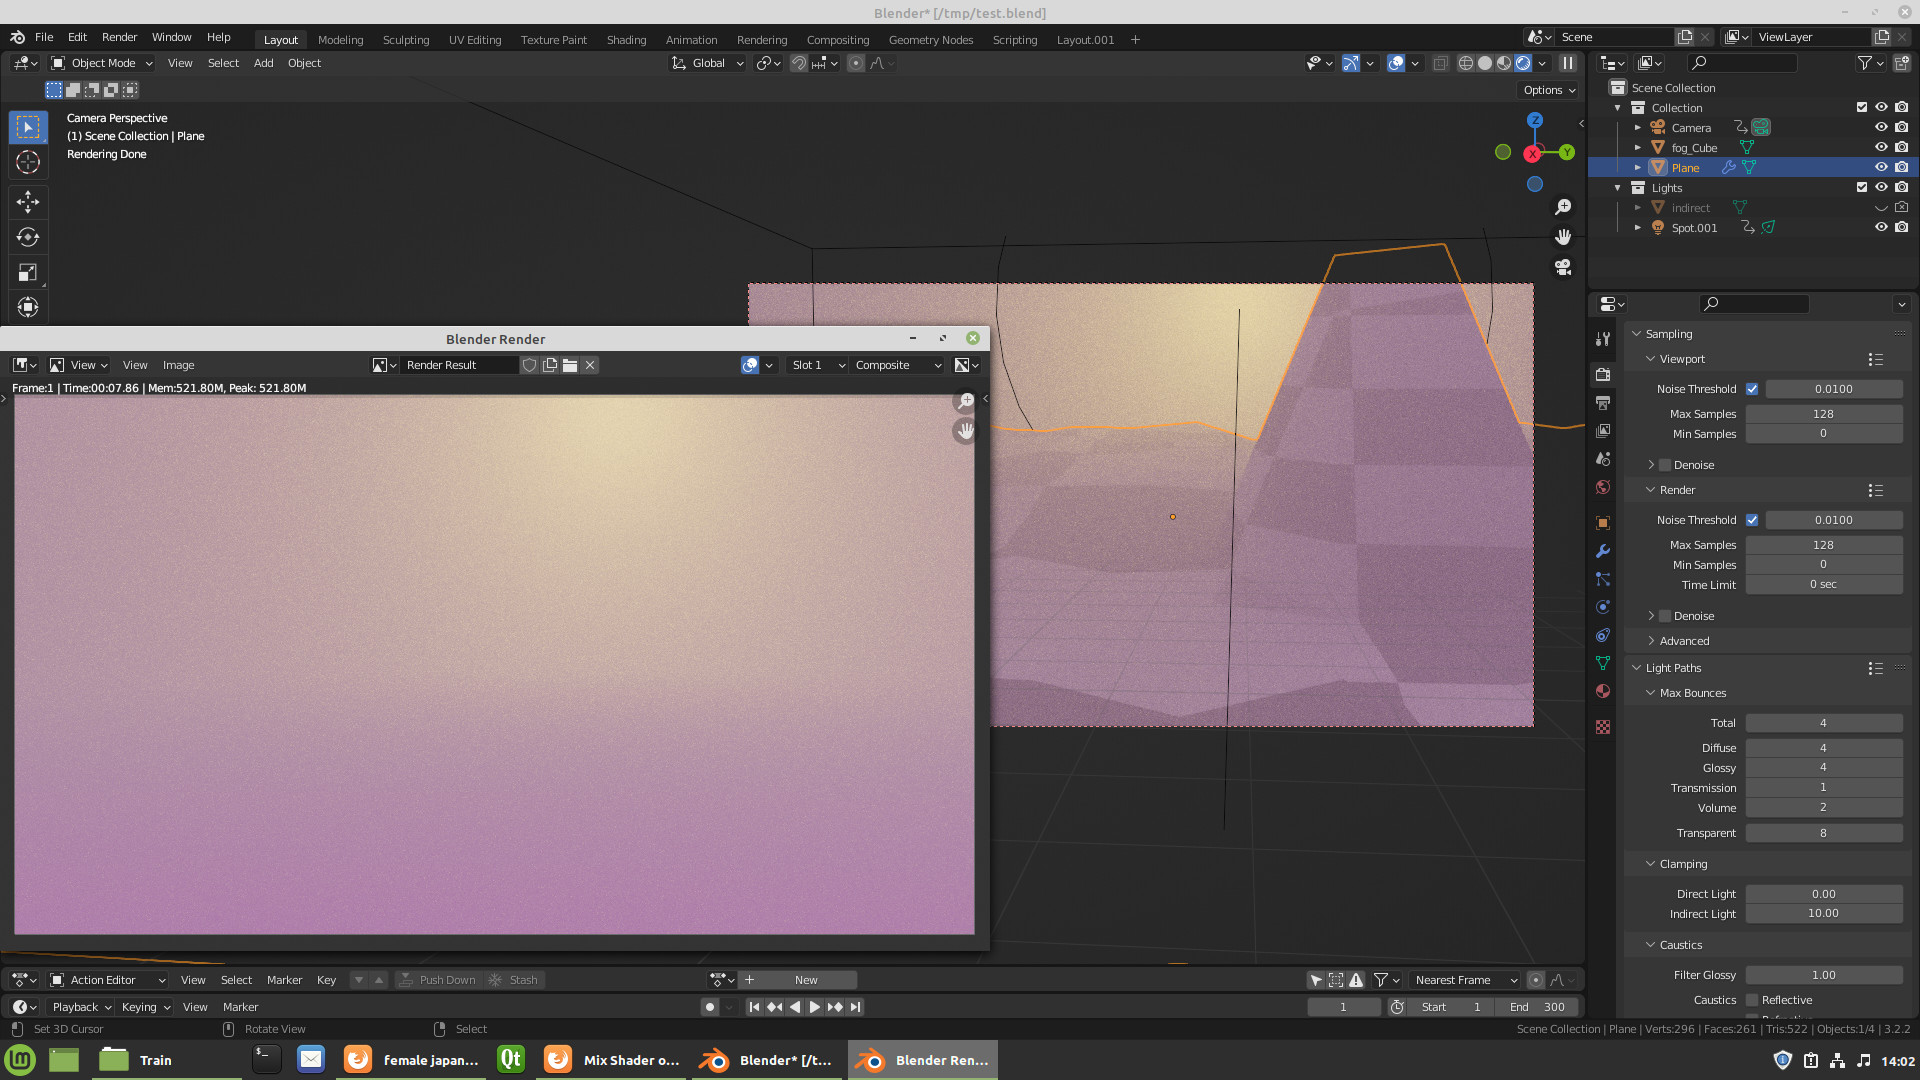
The result in the rendered viewport (screenshot 1 below) is exactly what I want, but if I hit F12 to render the frame, the result is much brighter.

I moved both render results (viewport and final render) on top of each other, so the difference in brightness is pretty obvious. Note that the mix shader is set to 0.

Now, if I set the mix shader to 0.5, both render results are the same (screenshot 2 below)

The viewport result increased in brightness as much as the final render. So the mix shader does work for the viewport.

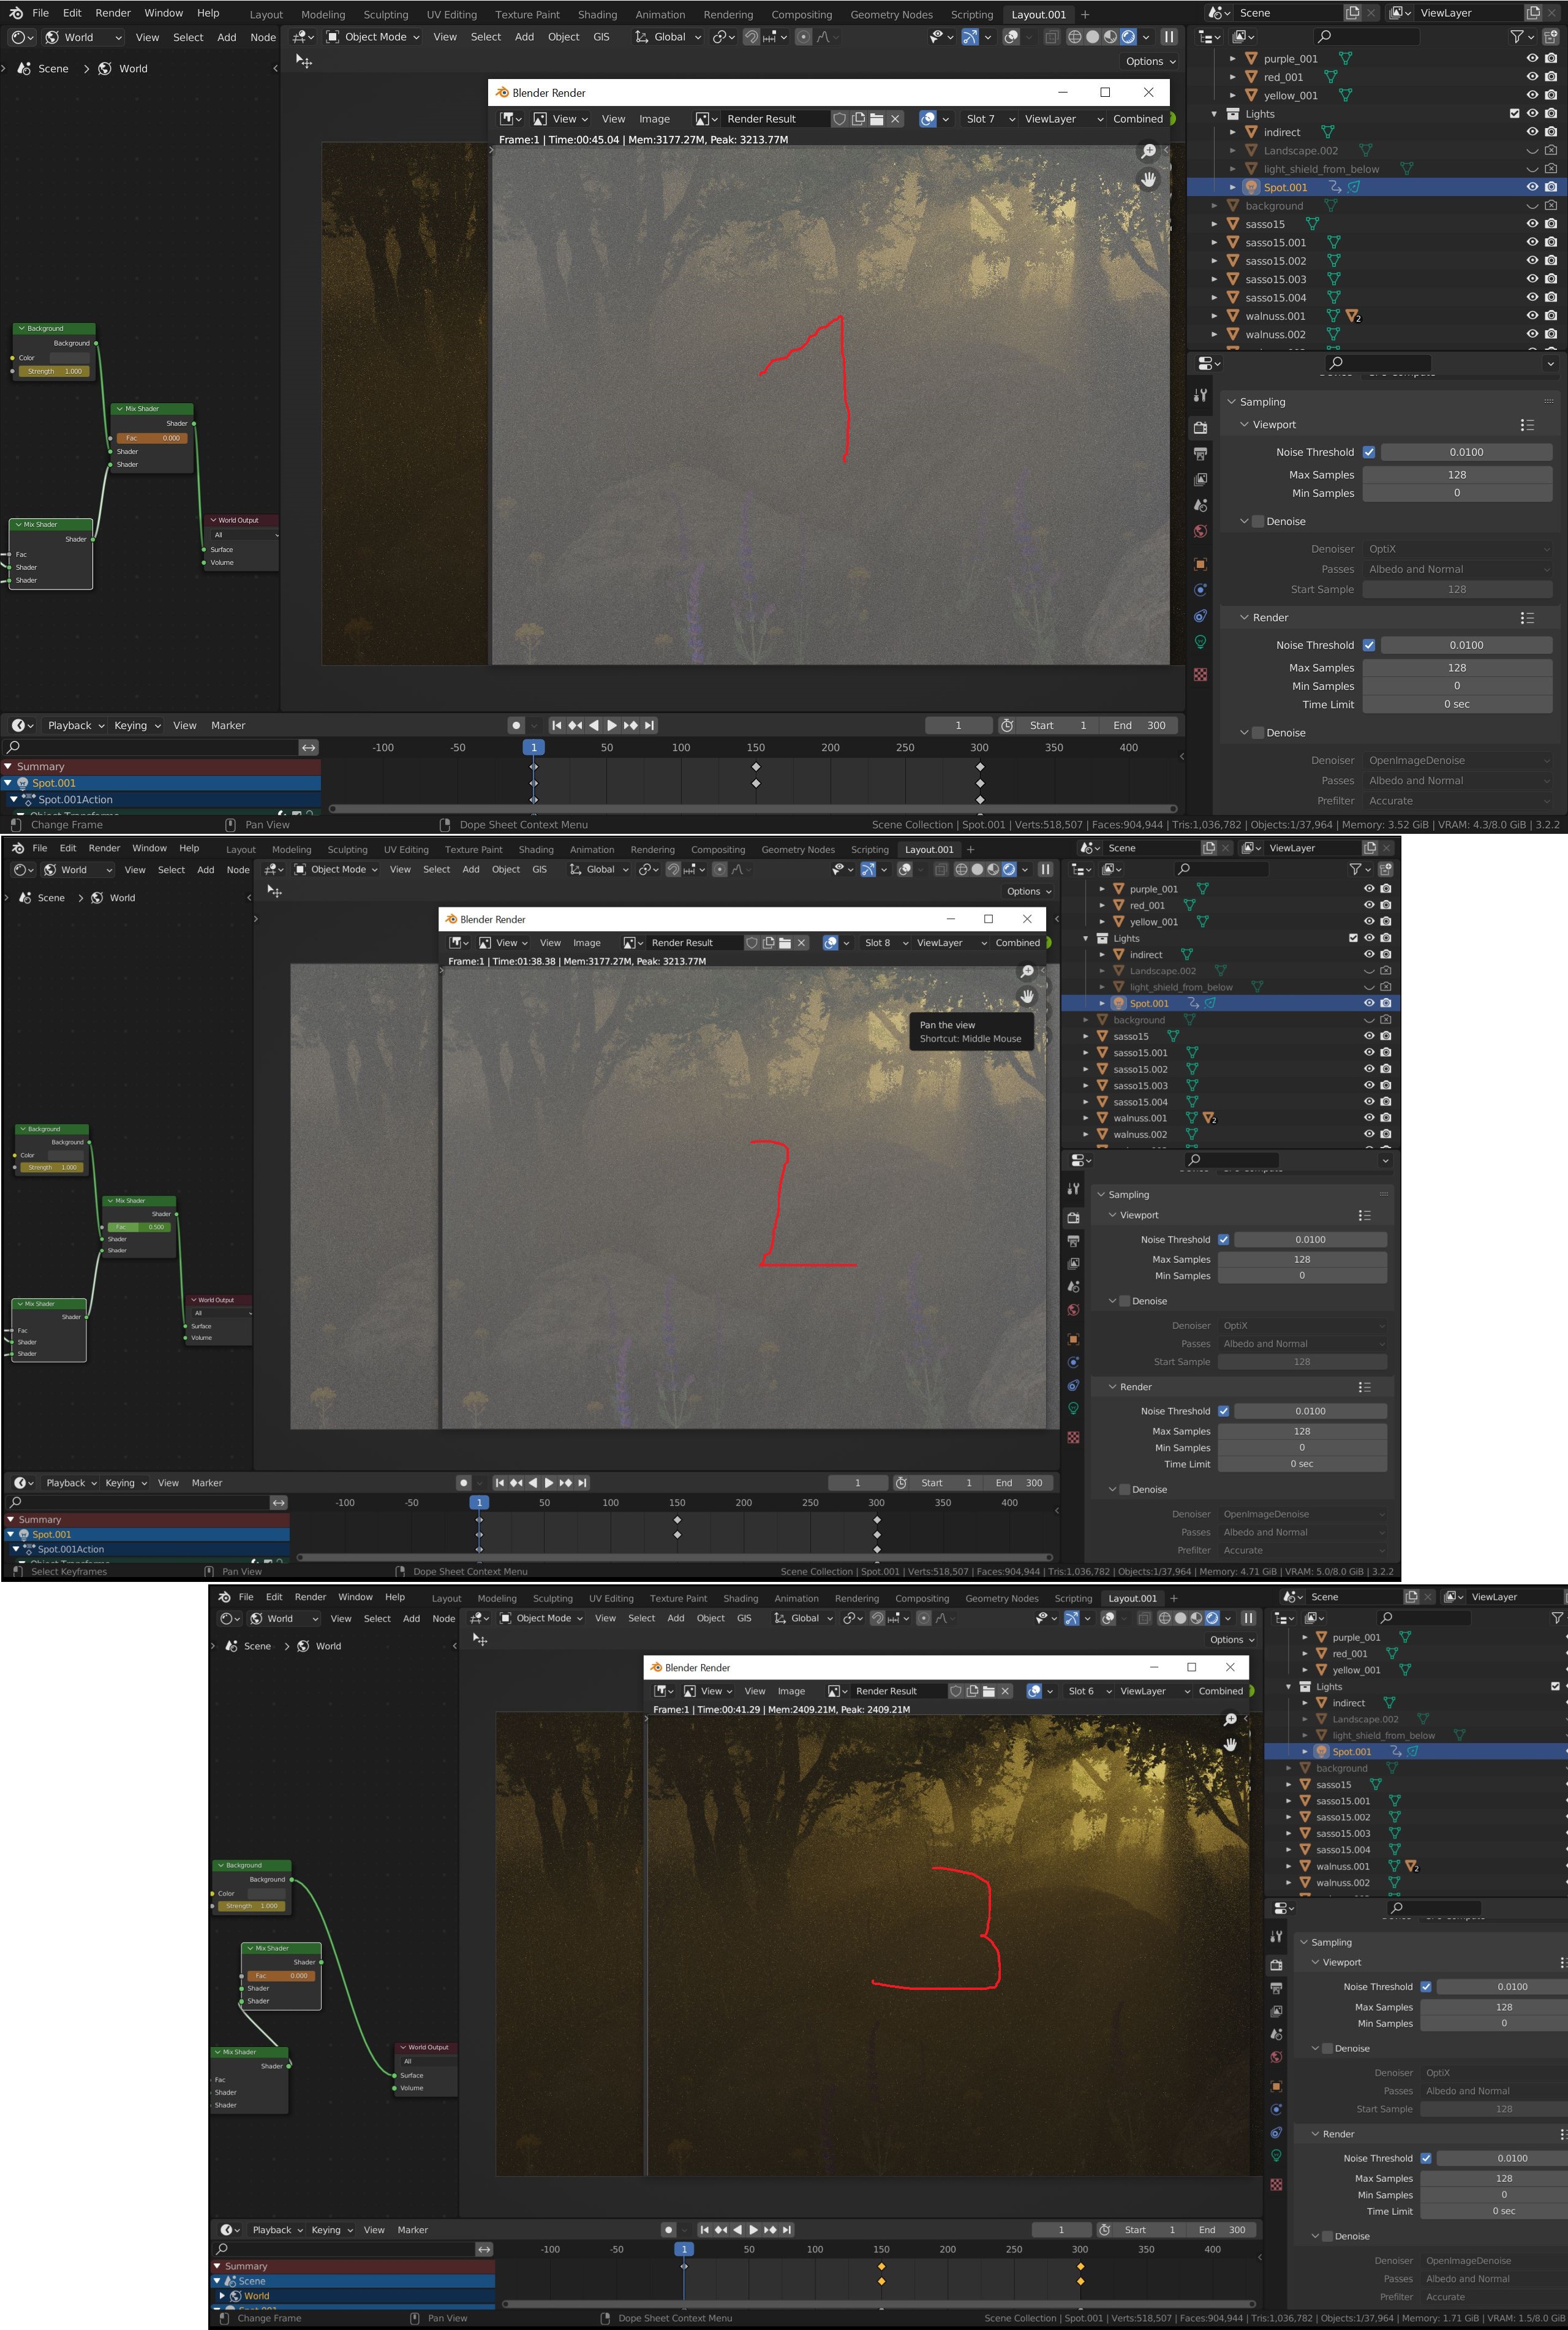
When I totally skip the mix shader and connect the background color node directly to the world output node, the final render gets the brightness, that I intend to get, when I set the mix shader to 0 (screenshot 3 below)

Could someone please explain, why the mix shader is working in the viewport, but not in the final render?

Maybe it helps, when I add the complete node tree here?

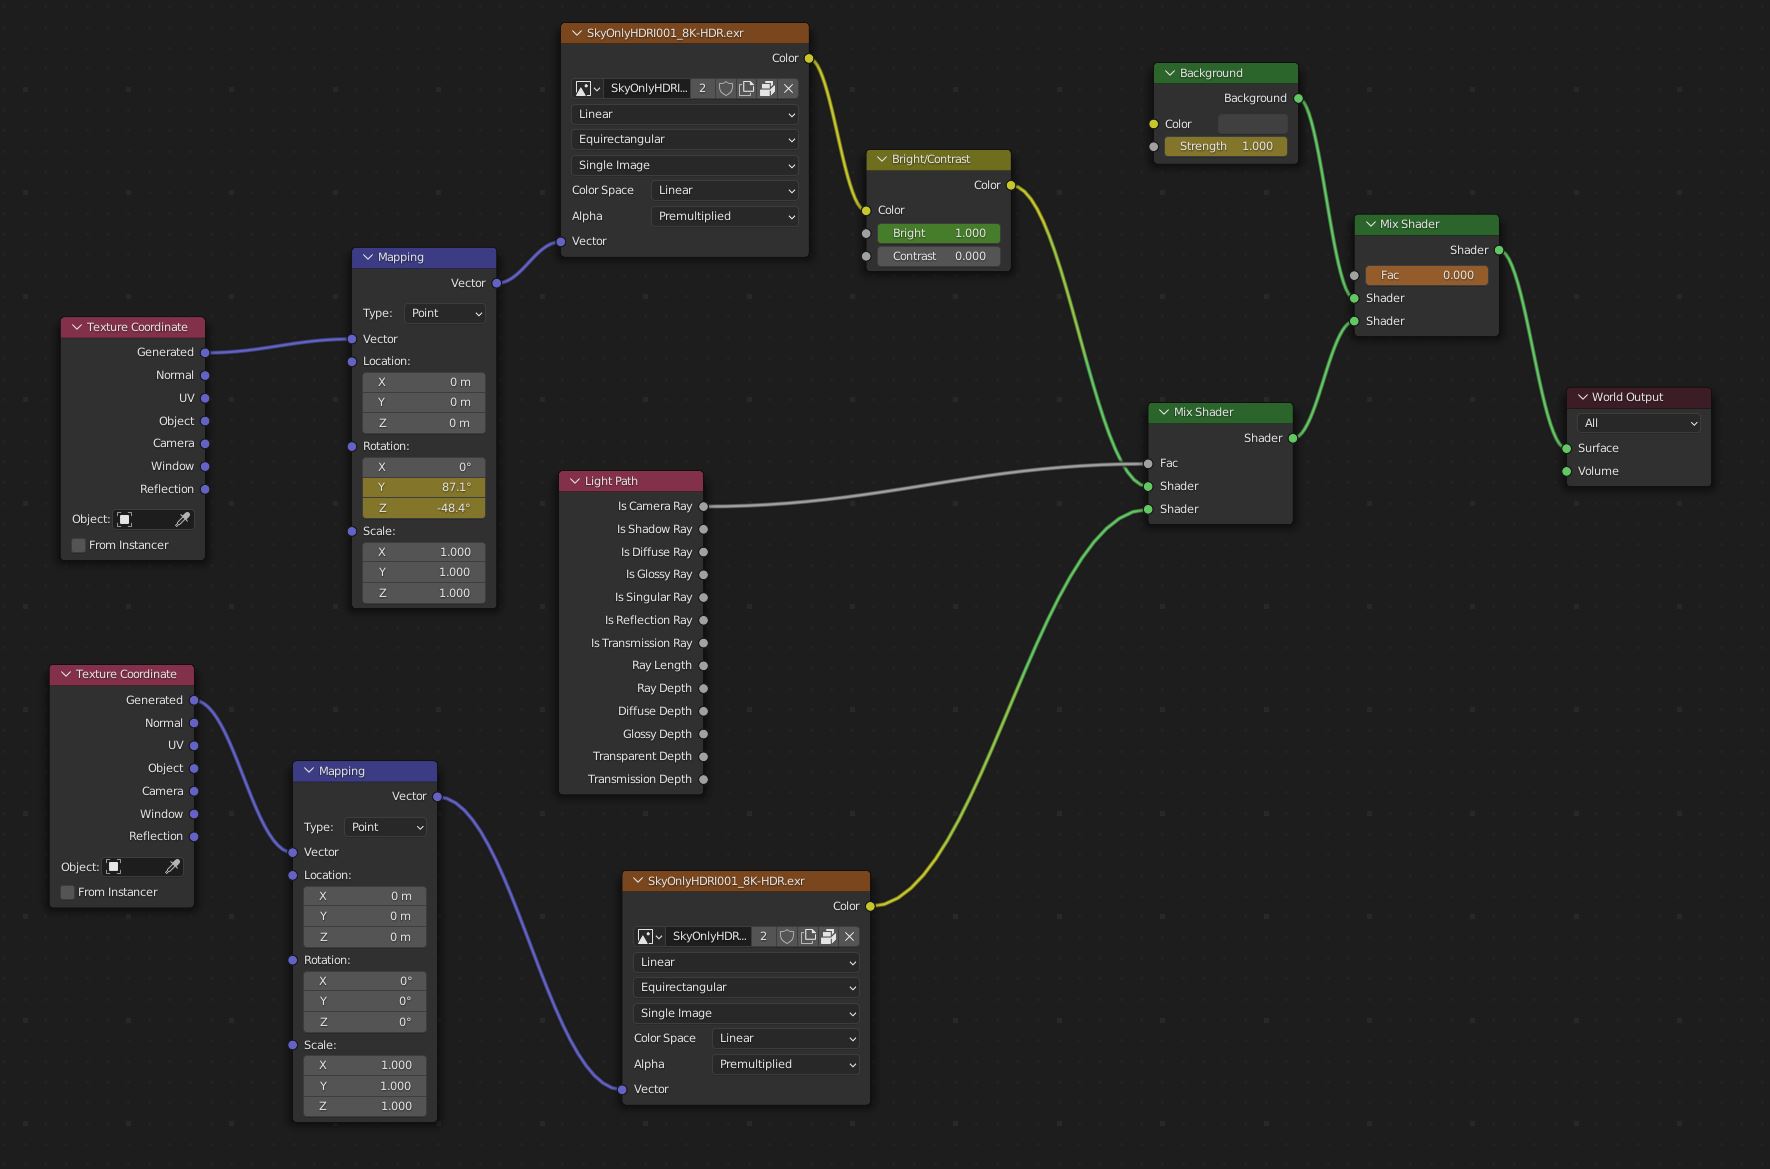
I just read somewhere else, that viewport render is like “material preview” and a default HDRI is applied. Here, I have my own HDRIs, which I setup as one fixed (for the optic) and one rotated (for the desired light direction).
But still, since I have cut of that path by the mix shader set to 0 (in order to only use the upper shader input) I was hoping, that my environment texture just don’t mix into the scene lighting.
Please tell me if my thinking is incorrect and it would be very much appreciated, if somebody could provide a solution for the intention that I have.

I cannot reproduce your problem with your setup, my view and render are the same.

Just a guess: Check if you have the right selection in the render view “composition” <> “view layer” to see the end result.

1 Like

Thanks rigoletto for taking a look at my problem!
I’m sorry, I don’t fully get what you mean by your suggestion. Could you explain a little bit more detailed what I should try?

Meanwhile, I figured how I can make the vieport render look like the final one. I have to uncheck “Scene World” in the vieport shading menu:

Then, my scene immediately gets much more brighter in the viewport. Just like I don’t want it to be :wink:

Now, my guess is that I have to find the same unchecked checkbox in some final render menu, check it and voilá, everything should be working. Maybe it is exactly what you suggested?!?

Edited: Was it this what you suggested? (Compositor “use nodes” was switched off before; now that it is switched on, no change in final render… :unamused:):

BTW: I made a very small sample project with just the default cube and a similar shader node tree like this one here and in that project everything worked fine as well. Just like in your test…

You want to keep that “Scene World” checked,
that makes sure you have the same result in preview and in render result.

There is another setting that makes trouble then, may first guess is that you using compositor and there is a problem and/or you have select not the correct setting in the render result window, “Composite”.


Check top right is set to “Composite”.

If you use Compositor please post a screenshot of that.
Another issue could be if you have changed settings for “Color Management” under “Render Properties” or “Output Properties” → “Output”.

As I mentioned above while you were answering: I havn’t had Compositor “use nodes” enabled. Therefore I believe I have not used compositor before (switched it off again now).

The render result window shows “combined”. In that menu there is another entry which makes the image slightly darker, but not as dark as I wish for.
That entry is called “VolumeDir”.

I don’t think, I did something fancy in both locations you suggested. Have I… ?!?


If you have “VolumeDir” option and it shows your render even it is slightly darker that means you are or had using “Composition”. Maybe turn it on again and post a screenshot of that.
Maybe try to make default setup for it just strait the image to the output:

Could be a rare bug that might be occurred. Are you using special addons that might be an issue.
It you cannot find the cause maybe you can post your .blendfile without textures so we can take a look.

Your “Color Management” is ok, cant see unusal there.

Now I have to reveal what noob I am: I don’t know, how to share my blend file without the textures…
I could upload the file to my google drive as it is for a while for you to pick. After “we” solved the issue, we post it here, meanwhile I would delete the file again, because it has some assets I don’t want to share unrestricted. Is this a way to go?

Anyway, I tried switching on/off/on compositor and I have the nodes in there like you suggest. My “Render layers” does not have as much outputs like yours.
But since I only should connect Image<->Image, that does not change anything.

As off addons, I have flip fluids, spyderfy and Lily Surface Scrapper installed.

So if you have not activated some layer like here:

Some addon maybe has, but your mentioned addons dont do so i guess. Have you created the scene by yourself or you working on a provided file?

Maybe you have more then one scene in your file that are different:
grafik

You can save a seperate blendfile and delete all except some you can share or all. We just need the blendfile to check the options.

As i can see in the screenshot it is also way to big if you share the complete scene.

Sorry, screenshots were mess up.

It is a file I made by myself.
However, this file is the 6th copy of the original because I wanted to make an animation with different lighting and different assets in the scene.
I always copied the last scene in order to start a new one so that I can continue seamless with the next scene.
This time, something went obviously wrong because in my last blend file, the lighting of the last rendered frame was identical to the viewport render of this current scene file. But the final render has to be identical, too, otherwise I have to start all over again…
I also tried to compare the last files settings with this one, but I haven’t found any difference, yet.

When I share my file, where should I upload? I try to make it smaller and upload tomorrow.

It it is smaller then 6Mbyte you can upload here, otherwise an free hoster like https://ufile.io/ or google may do it.

Again, thank you rigoletto for your time and patience!

Stripping it down was faster than I expected, so here it is already today. I hope I did not stripped it too much…

https://ufile.io/6b19hpj2

There is a problem that the render dont uses the current data of the scene. If i change the plane of your ground it does not update for the render, that happens with geometry and shader data.

I dont know why, i would this consider as bug and report to the developers.
Anyway if you delete the particle shaders of the plane (just disable dont work) the probem vanishes.

Probably solve:
You could try rebake particles or just delete the plane and fog_cube and append from an version where it works.

Did you use an plant addon to populate trees, flowers, etc on you plane? I think that might be the origin.

Thanks for figuring out the cause of the problem.

Unfortunately, deleting the particles ist Not an option because it would destroy my scene continuity with the scene before this one.
At least I have a starting point from where I can try things to get around issues. Don’t know If it is even possible… But it is good you verified that something unusual ist going in Here.

I have not used any add ons for placing the particles.

Do you know how I suggest this to the blender developers as a possible bug?

Sorry for not reading entire thread, but you shouldn’t connect textures or any color input directly to a shader socket.

Put shader node in between - Diffuse BSDF or Principled BSDF for example.

3 Likes

Hi silex,

I put a Diffuse BSDF at your specified locations, set the strength to zero on both and I get the result that I’m looking for. :smiley:

Thank you for passing by and leaving this very useful suggestion.
Maybe you can add some information, why the last mix shader in my node tree does care what is connected to the second input because the documentation is as follows

“Factor: Blend weight to use for mixing two shaders; at zero it uses the first shader entirely and at one the second shader.”

Anyway, thank you very very much!