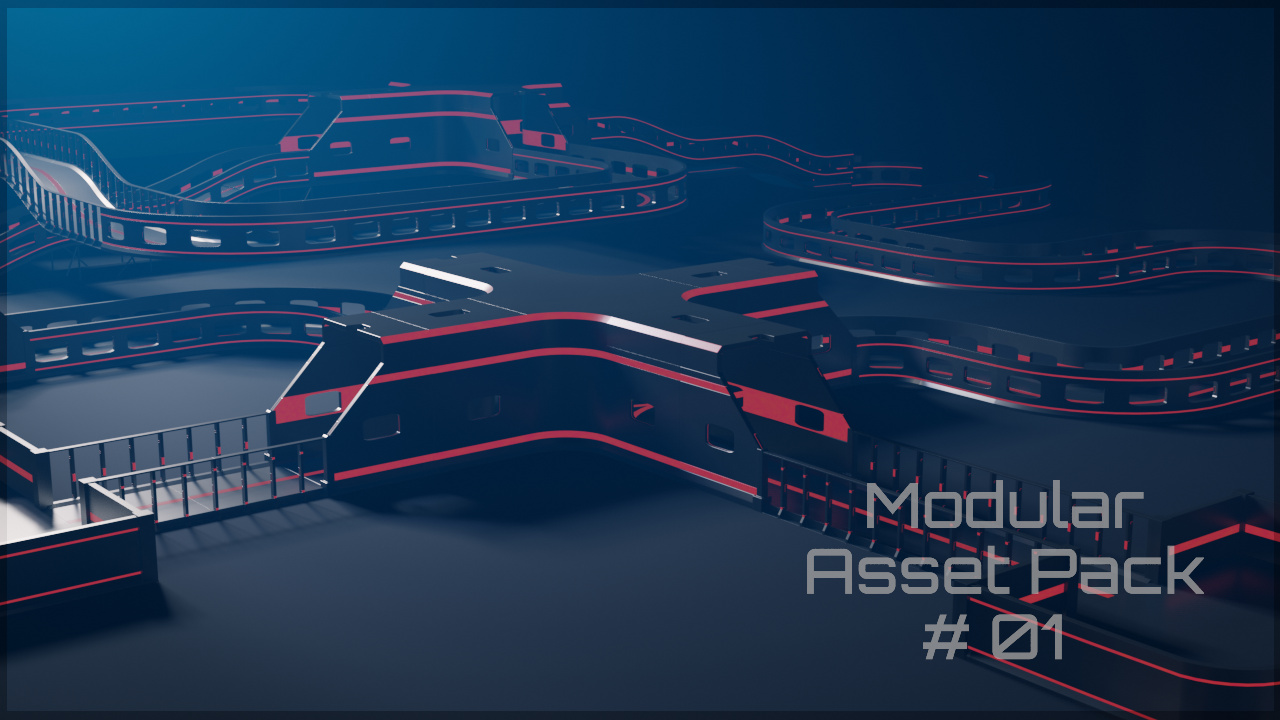
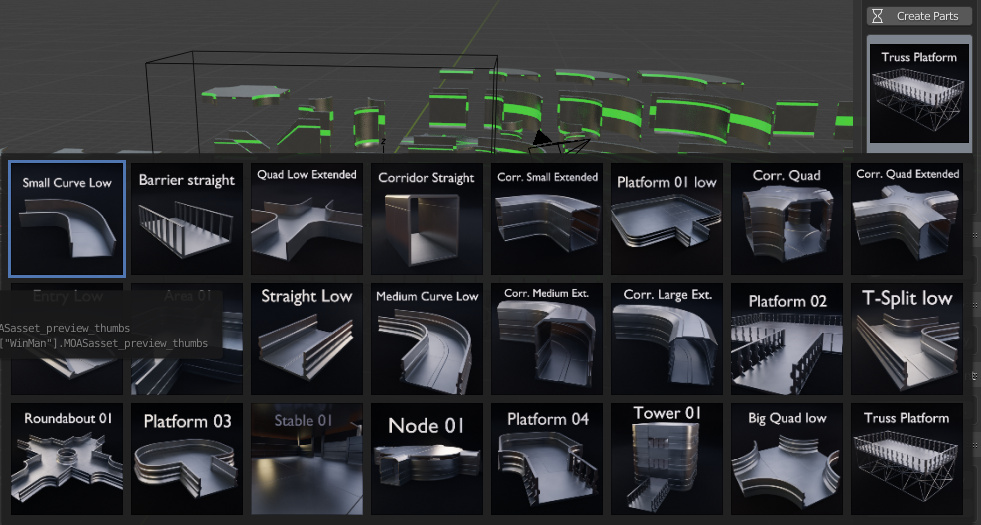
The MOAS-GEN addon batch generates MOdular ASsets (MOAS). This is a pre-release where more 30 modular parts are batch-generated from profiles.
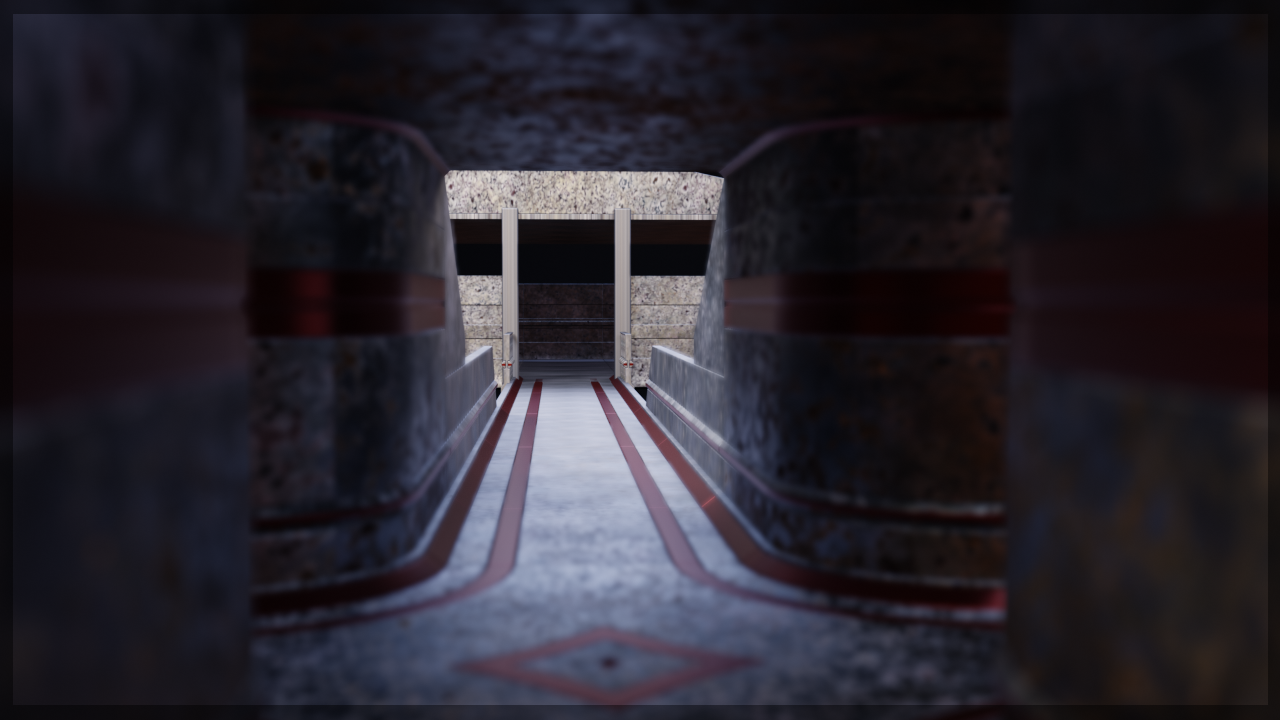
You can assemble these parts to full assets.
In this pre-release you can choose from a set of profiles, or you can load the basic profile preset and edit the profiles in Edit Mode to your liking. (You can also save them, if you are handy, as preset).
In feature updates:
In the end the MOAS-GEN addon will have 4 main functions; Profile factory, Parts factory, Boolean factory, Asset factory. At the moment parts will be created from profiles. In feature update full Assets will be created from parts, and you will be able to define your boolean so the addon can then generate parts from profiles in combination with (radial) booleans).
Philosophy behind MOAS-GEN
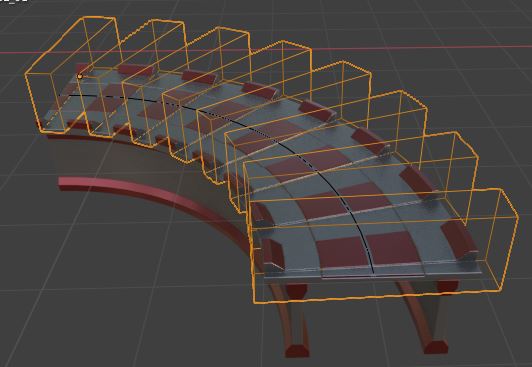
After making many parts for the “Assets for Level Builder”, I decided it’s time to automate the process. It took to many hours making assets. At first I wrote a script, that was like a bunch of macro’s. That created parts from profiles. Then I wanted to have a library of profiles, and so I made added a few profile with a thumbnail viewer. In the current state, we can now generate more than 180 modular parts and if you work with custom profiles unlimited.
So idea’s are inspired by the benefits of the Level Builder addon. I learned from that how efficient it is to use instances.
The basic measurements are there for reasons: 2 meter wide, suitable for two persons. Standard height for ceilings is around 2.40m. So I used that height. But you can use any other standards. (As long as you have standards in mind and use then consitantly).
Later this week, a tutorial with tips will be uploaded.
Hi! A small but handy update for the MOAS-GEN addon:
Update 14-03-2020
Added a function " Join Parts ". With this you can join similar parts (that come from the same profile). In short, what it does: a) Make all selected objects single user and join the meshes, b) goes in Edit mode and deletes doubles, c) removes interior faces and goes back in object mode.
This opens a few more doors for further finalising the asset. You can also use this on other objects. Try it with a cube and you will see that you now can subdivide the object without artefacts. Some artefacts are otherwise caused by interior faces.
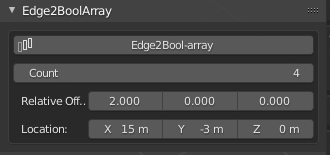
Added a function “Edge2Bool-array”. Select an object (part or asset) and go in Edit mode. Select an Edge loop. (You might want to use Ctrl+R first and then select part of the loop). Then press the button Edge2Bool-array. This will add an Boolean Array on the mesh which you can adjust. See for full description the release log on: https://gumroad.com/l/ojepA
Example:
So far I found this the best way to add booleans in a consistent way and at the same time it leaves room for artistic considerations.
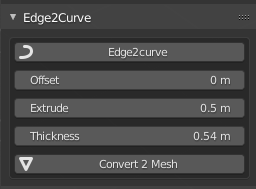
Added a function “Edge2Curve”. Same procedure as previous, but this will add an extruded curve. To rotate the extrusion, go in edit mode and press Ctrl+T, 90 (to rotate 90 degrees for example). Tip: you can add solidify modifier or other modifiers and then convert it mesh. In future update there will be some more controls.
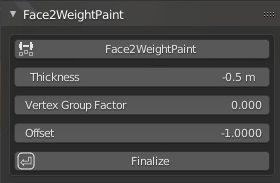
Added a new feature “Face2WeightPaint”. Select a few faces (faceloop or few faces) in Edit mode, then press the button Face2WeightPaint. That will bring you into Weight Paint. (Faces are duplicated into new mesh with solidify modifier on top). Left click then drag the mouse to and that will add a gradient Weight paint. This weight paint defines the thickness of the solidify modifier along the mesh. Go in Object mode, and you will see settings for Thickness, Factor and Offset. Once done with the settings, click the Finalize button so you can use this tool again on same or other objects.
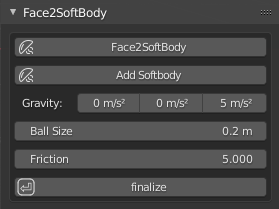
Added a new (experimental) feature: Face 2 Softbody. There are two steps: 1) Go in Edit mode, select some faces and press Face2SoftBody. This will bring you into Weight Paint mode. Drag the mouse (mind you can use linear or radial gradient type). Go out of Edit mode. 2) Press Add Softbody. This will add a softbody with best settings for situations like this and plays the timeline.
Tips: a) Experiment with the force-fields: Vortex, Turbulence, Force, Wind, Harmonic. b) You can use simple collision objects that have thickness, like sphere, cylinder etc.
Note that this is quite an experimental feature that needs some evolution, trials, feedback etc.
Finished with the part that generates assets from parts. So now, the addon has all features I had initially in mind. Therefore the addon is out of pre-release, but expect some updates for the UI, and functions to manage and organise assets. I added another thumbnail previewer that shows asset presets. When you click the convert button, the asset will be updated with parts that are in the scene. So first, select or make a profile, generate parts, then generate asset.
You can edit and finalise the generated asset with the tools provided (like face2wieghtpaint) or 3th party tools like Decal Machine. Then select all the objects in the Asset collection in the Outliner, and move it to another collection. A tutorial will follow later.
Thanks, peetie! Bought the addon a couple of weeks ago, but haven´t had tried to play with it yet, since Godot is taking up my time, but it will be very useful for me
Bugfix: Some profiles were slightly out of symmetry. Result was that when you turn a part 180 degrees, it was not join-able. This has now been fixed. All the profiles are now snapp-able in 0 or 180 degrees. Don’t forget though, to press convert Asset after loading an asset preset.
 Bought the addon a couple of weeks ago, but haven´t had tried to play with it yet, since Godot is taking up my time, but it will be very useful for me