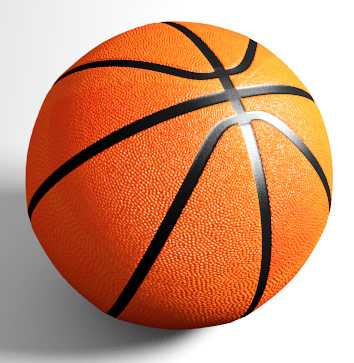
Using this 3DS tutorial for the basket ball, i tried to write a simple version using Blender tools.
http://www.3dvalley.com/tutorials/modeling-a-highly-detailed-basketball-in-3d-studio-max
Read it first as the following assume you noticed the screenshots of the tutorial from this link.
Then using Blender 2.49b as i’m not sure 2.5x has a good enough Bevel function yet or even if it has a Bevel tool in edit mode at all (so if there’s no Bevel tool in 2.5x , you should really use 2.49b for this tutorial)
First, add a new UV Sphere, with the settings made to 16 instead of the default 32
Delete the lower half of it
Then in the pole of the half-sphere, delete this vertice

Then selecting each opposite vertices 2 at a time, press F to create an edge linking them, like this :

Finally, select those new edges, and press the Subdivide button on your Blender interface :

This will have added a vertice in the center of each of those edges

Now you can make faces like showed in the 3DS version of the tutorial , and move/scale the vertices according to the tutorial screenshots, to obtain something like this :

Then as mentionned in the tutorial, move the vertices to obtain something rounded as the sphere poles, as up to now, those new faces make the poles of the sphere flat.
After that, the mirroring of of your half sphere can be done with a simple mirror modifier to obtain a full sphere with both poles using the same topology you just did.
Add and apply a Subsurf modifier to get the topology looking like the one in the 3DS version of the tutorial

I attached the sphere .blend obtained up to that point to this post so you can then experiment with the bevel yourself, that’s the end of the 1st page of the 3DS version of the tutorial too.
Now by pressing ALT + Right Click, select this edge loop :

Press W then select Bevel , instead of doing it with the mouse, type 0.015 and press enter to get the bevel creating the kind of topology the 3DS tutorial show.

Then select each newly created edge loop one by one, press W then Bevel and type 0.003.
You’ll obtain this that look like the 3DS tutorial show :

Do the same for every of the edge loops mentionned in the 3DS tutorial, so you obtain :

Go into face selection mode, and with ALT+Right Click (and SHIFT too) near the correct edge of a face so Blender now what direction is the face loop you want to select, then have all the faces that loop like this selected this way :

Change the default Global into Normal :

Press S to scale the selected face along their own normals (do it manually with the mouse, i didn’t tried to come with any values here) :

That done, go into Edge selection mode, and with ALT+Right Click (+SHIFT) select those edges :

Press W then Bevel and type 0.003

That should be it, in Object mode, click on Smooth (if you were in sharp view) and add an Edge Split modifier

or better , instead of an edge split, add a Subsurf modifier if face count is not a problem for you , it should look better :

There may be a better method, but i didn’t spent more time on trying to find how to roughly do the same thing from the 3DS version of the tutorial, but it works nicely.
Playing a bit with subsurf (+ some crease) , and simple colored materials, with some usage of “voronoi” type of texture (resized) for the normals :

Attachments
basketball1.blend (188 KB)


