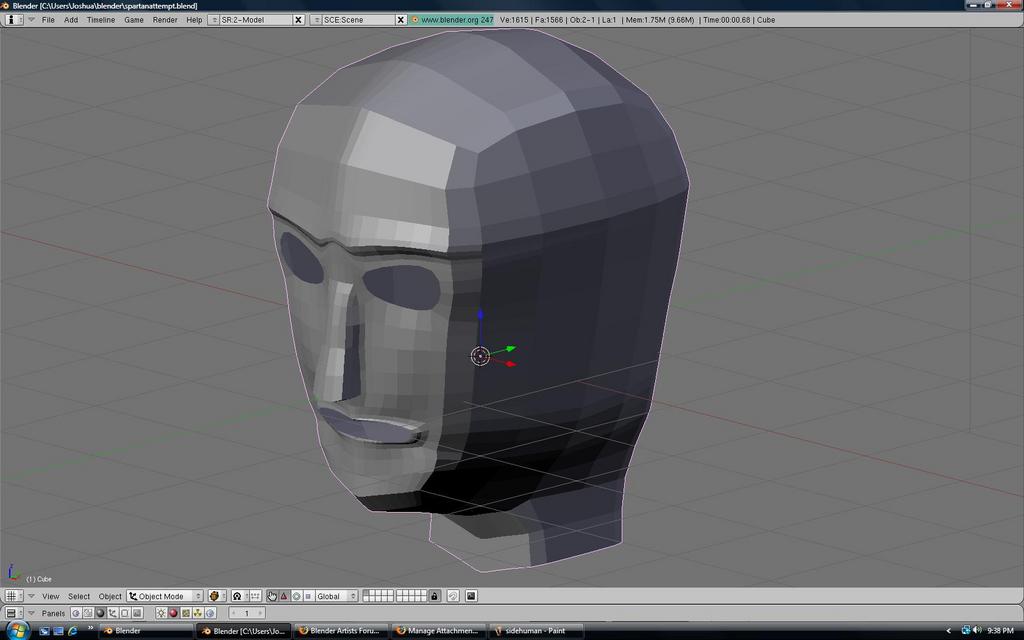
I recently had the urge to make a human face. I was going for a strong male kind of look. There still seems like there are major things that i need to focus on, i just can not figure it out. Please crit as most as possible, i need a lot.
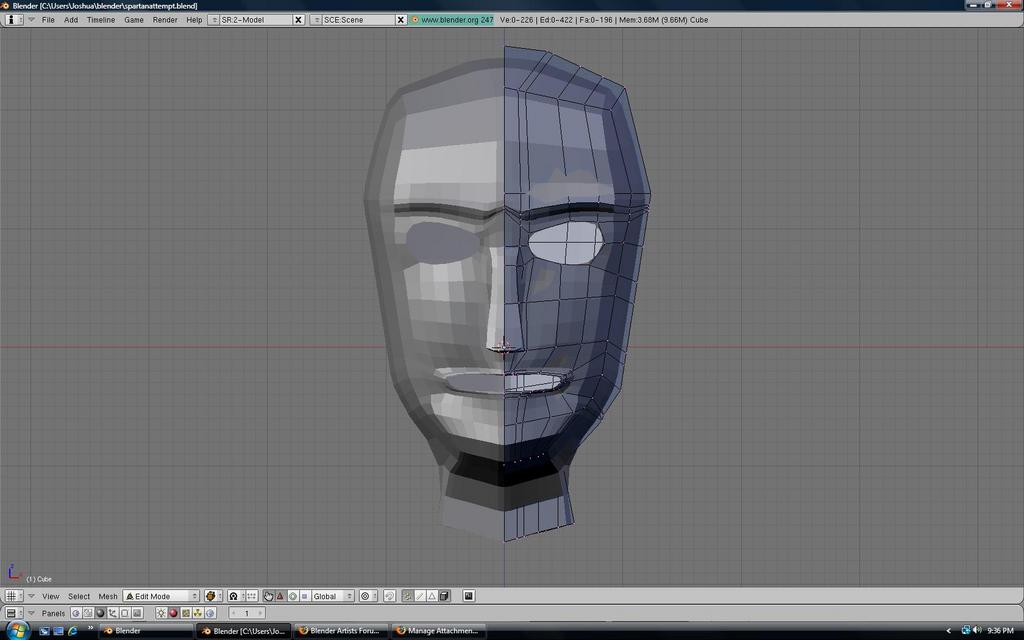
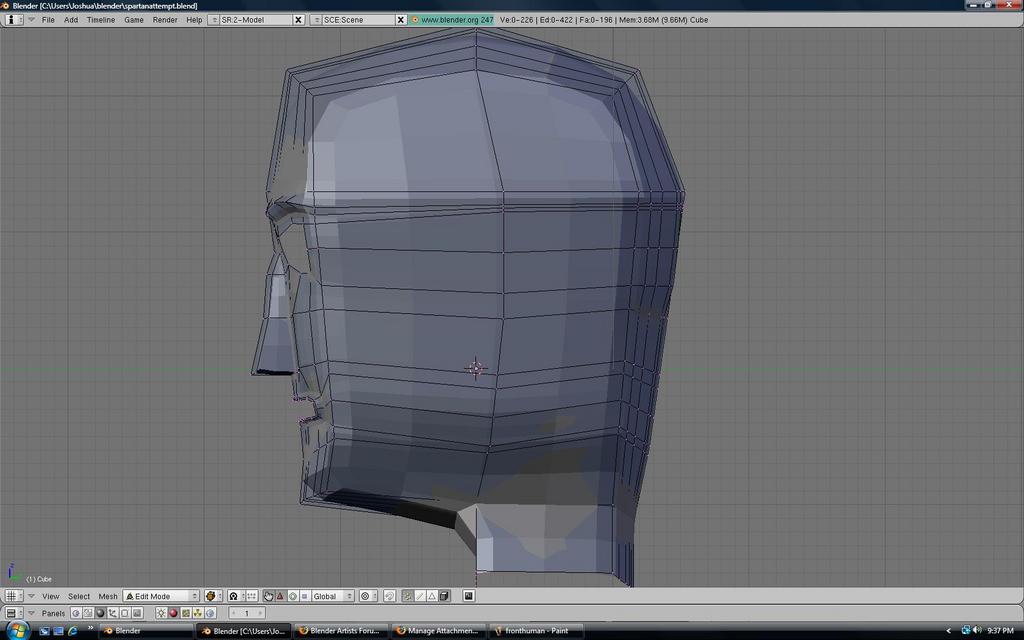
make his neck fatter, don’t make the face so flat. deepen the eyes, make the cheekbones more prominent, give his face a profile, it looks really flat.
Ya, i am not liking it to much i will probably start over, i would like some reference pictures although i do not know where to get them. Does anyone know?
A little hunting never hurt anyone. :]
EDIT: And here’s what looks to be some great reference for a male face. It’d be pretty butch looking if you squared up the top of his head a little and lowered his brow.
http://www.reference3d.com/product_info.php?cPath=195&products_id=6583
I tried to start the tutorial although, i am having problems getting the reference picture to align evenly. The front view is lower than the side view… Does anyone know why this happening?
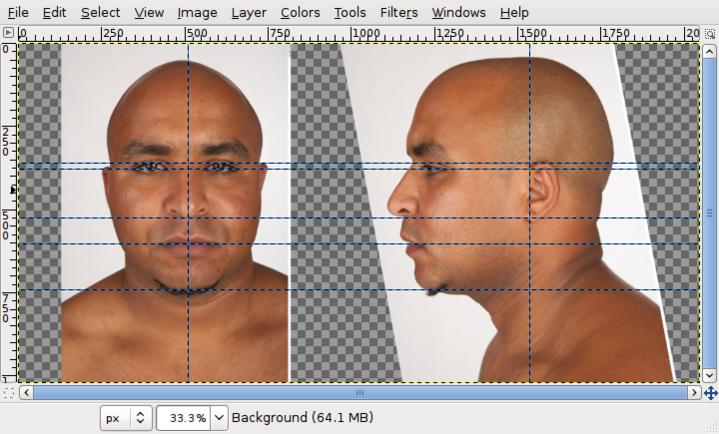
Misaligned reference images are pretty much part of life, but there are a few tricks that keep things workable. For this example I am using the Valentyn reference images from 3d.sk available on this forum through the Blending Life Challenge thread.
Before starting Blender:
-
Create a blank image in your favorite image editor. Set the image size to the desired height and set the width to accommodate the number of references you will be using. While Blender will scale the height of the background image to match the correct aspect ratio in the 3D ortho view, I find that it’s easiest to use square references. For this example I chose 1024x2048 to line up front and side references.
-
Assign each reference image to a new layer. I use ‘File->Open as Layers’ or ‘Edit->Paste as->New Layer’ in GIMP, but other editors should have similar commands.
-
Scale each layer to match the height of the final image. Make sure to preserve the aspect ratio whenever you scale to avoid distorting the image proportions.
-
Create two vertical guides to help center the references horizontally. For the 1024x2048 example, place the guides at 512px and 1536px. Center each image using the horizontal guides to establish a centerline for each reference. If necessary, rotate the front image to match the centerline.
-
Create a set of horizontal guides lined up to the major features on the front reference. In this case, I am using the outer corner of the eye, the top of the ear, tip of the nose, center of the lips and base of the chin.
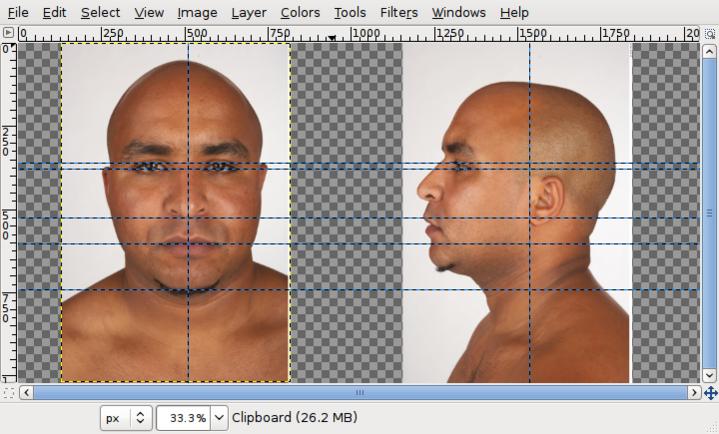
- Now the tough part. Rotate, scale and move the side reference image until the features line up as well as possible. In this case the model has his head tilted slightly back in the side reference, so there’s no way to get a perfect match. As in #3 above, make sure to preserve the aspect ratio whenever you scale the image.
- Fill in the background layer if desired and save two copies of your setup. Crop each copy to give you your final front and side references.
In Blender:
-
Choose one view as your ‘absolute’ reference and stick with it.
-
For large scale features such as the overall shape of the head and face any misalignment should not make too much of a difference. For example, first shape the head using the side view a a reference and tweak the results to match the front view.
-
For small scale features such as the details of the eyes, nose, mouth and ears, you can adjust the Y offset of one reference to better match the other. If you are using the front image as your absolute reference, adjust the Y offset in the side view. You will probably need to enter numerical values for the Y offset since the necessary changes should be very small.
-
Remember that misaligned references are a fact of life. If the model has their eyes wide open in the front reference and is blinking in the side reference then there’s not much you can do about it. Once you have the major details worked out open up a 3/4 view image and keep pushing vertices until things look right.
-
Once you are finished modeling the face and head you may need to rotate the head and tweak the neck to match up with the original side or full body image.
In General:
Study anatomy. Read tutorials. Examine the forms and features on the faces of people you see every day. Pick up a pencil and paper and do a few rough sketches of your subject before sitting down in front of the computer. If your model sucks, delete it and start from scratch – repeat as necessary.
Most of all, keep on Blending!