You’re right about mr_bomb’s tutorial, jrbrusseau, it is an excellent one. This tutorial is not just a text version of the Adrianna tutorial, though. I have a slightly different take on using loops, especially the first one, to get the overall shape correct.
In traditional sculpture, you start with large masses of clay and build them to the overall shape of the head, with very little detail, maybe nothing more than a light line showing the center of the face and the eyeline. If this large amorphous mass of clay is improperly shaped at the stage where there is no detail, the head just won’t look right, and the process of making a portrait bust becomes a huge struggle.
In Blender modeling, we generally substitute background reference photos for that large mass of clay, and add details to this, following the lines of the photographs. This seems to work well for people with a good sense of volume and spacial relationships, but I’ve seen a lot of work by people whose eye is not yet developed. They struggle with the interface, with the hot keys and with the artistic aspects as well.
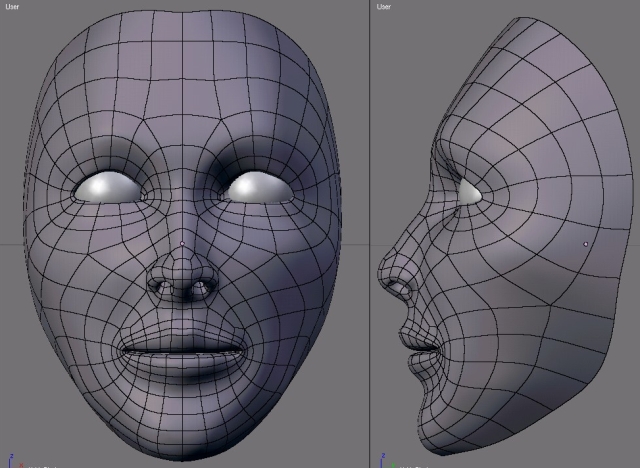
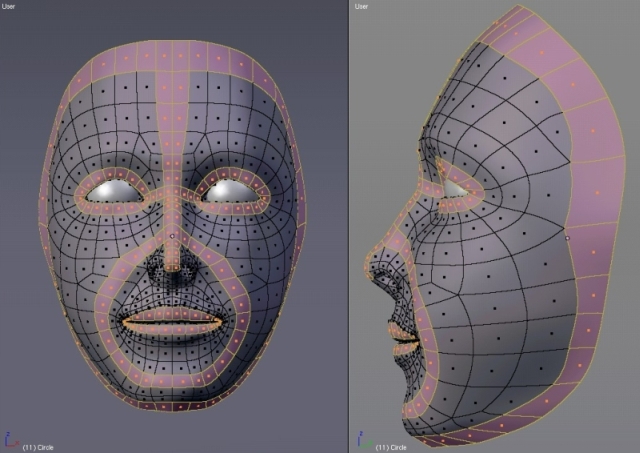
So the intention here is to show, not so much how to make sure there are loops, but where the loops go. In my opinion, the most important loop in a head is the face loop, which is the equivalent of that amorphous large mass of clay. That’s why I put it first.
The face loop defines the overall height and width of the head, the hairline, the location of the ears, the shape of the forehead and the jaw, the cheekbone, the slope of the skull, the shape of the chin. If this single loop is “off”, all those aspects of the portrait will be “off.”
Unfortunately for the beginning artists among us, this loop is usually the last one they build and then wonder why their model doesn’t look right. I say, make it first and make sure it looks right, before moving on. When this loop is the only one in the 3D window, it is easy to move around it, look at it from different angles, and see any problems there might be. In fact, the problems are usually pretty obvious, and, since there are so few vertices involved, usually pretty easy to fix.
This “face loop”, combined with the “loop” running from the forehead down the bridge of the nose provide targets and anchors for all the other features of the face. Experienced artists can start where they like, and place these features by eye. Beginning artists, I believe, need more of a structure, to be shown what is important and what is fill-in. To get some guidance on where it is important to spend time in the initial stages of a work, to avoid tedious vertex pushing in the later stages and still not quite getting it right because some fundamental dimension or angle is off.
Finally, some notes on where this is going:
I’ve found this technique useful for modeling anything with a face. So far I’ve done a wolf, a bear, a camel and a giraffe (heads only), and they all came out well on the first try, by making loops in the sequence shown here. I am planning on doing a pelican and some kind of fish and lizard, just to visit other branches of the animal kingdom.
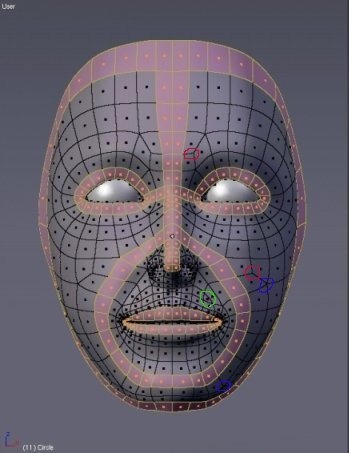
I have an intuition that this technique can be used in cases where decent reference photos (front view, side view, close to orthagonal, neutral expression) are not available, for modeling either sketches or photos taken from an angle (as most are.) I’m still working out the details on this, but it basically involves copying the five loops from the images shown above, then fitting them to an angled photograph.
So, while I am also persuing my interests in the rest of the body and rigging, it might be a while before you see any major tutorial work from me on those subjects. I’d recommend you have a look at shadowman99’s Female Sith, Wim’s Elissa, and toloban’s work on rigging shoulders and hips for ideas, inspiration and guidance.


 Trust me, that’s a good thing…