HI,
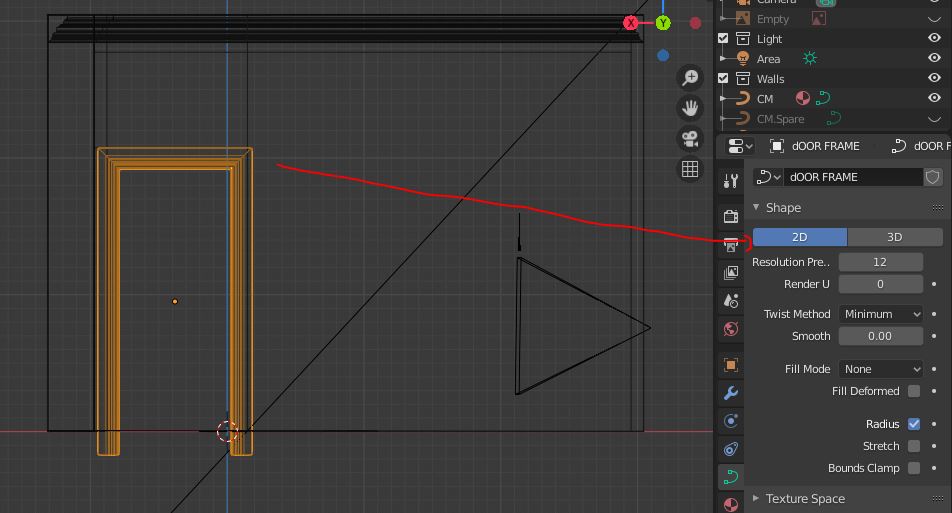
I have modelled door frame from from curve profile. For some reason frame proportions gets bigger at the bottom. I guess there is simple solution for it.

Many Thanks
T
HI,
I have modelled door frame from from curve profile. For some reason frame proportions gets bigger at the bottom. I guess there is simple solution for it.
Many Thanks
T
can you upload your .blend file?
also if you’re using 2.9 version, you can do that with just using the curve and in it’s properties you could use Bevel Profile and edit the points from there
Yes, the problem is the technique used for that. On te corners you have the control points at 45 degrees so the profile you use will be also at 45 degrees. So, when compared to te profile at the bottom it will seem smaller.
I suggest not to use curves for that.
If you make a simple round bevel in a curve like that you will see that the resulting cylinders of the sides are not perfectly round, but elliptical. They will be perfect circles where the control points are, at the corners, but the corners are making an angle of 90 degrees, so the circle will project an ellipse and not a perfect circle. Did I make any sense?
If you still want to use curves for that, you need to create control points really close to the corners, but the result will also be strange.
The best way to do this job using a curve is just extruding the curve and then using a solidify modifier on that curve. At the modifier you need to set it to “even thickness” to work properly.
Sorry for making so many comments.
Sure. I found that option yesterday just not sure how to use yet. If you could take a look that would be great 

Door frame.blend (2.9 MB)
T
Thanks  I thought I have control point right at the bottom. Would you mind to take a look at my file? As far as I am aware I have 4 control point on my door frame.
I ma curious how to extrude from curves? I have my profile converted to curves. Do I just simply extrude it in edit mode?
Door frame.blend (2.9 MB)
T
No, you go to your curve properties tab, under geometry you set an extrude value. You need to be aware that extrusion value is a “radius” value, so it’s duplicated to each side of the line.
I gave a look on your file and the problem there was that your curve was not closed, so when that happens you need to use under “curve” in edition mode and “Toggle cyclic” to close the curve (alt + C) keyboard shortcut. In the case of your file it was also necessary to spin your bevel profile object 90º in the Z axis or the door frame would be inverted inside out.Door frame.blend (2.6 MB)
If your model isn’t to be absolutely accurate that’s enough to solve your problem. If you need to be precise you need to calculate the distortion that spinning the profile object 45º provoques and stretch it properly on the X axis on the model I sent back.
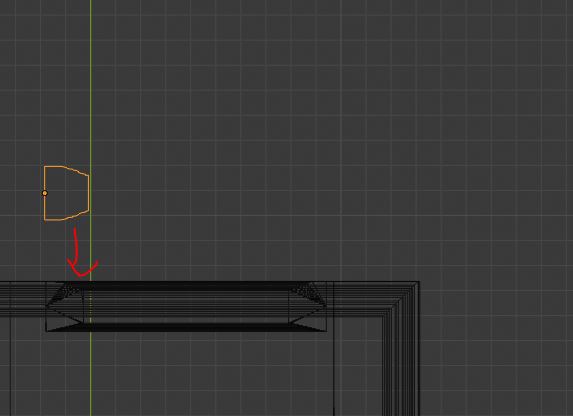
I made a copy of that object and spun it 45º so you can see the distortion caused comparing both lines. It corresponds to a loss of 29,2766934558% in the height of the profile so, in order to correct it perfectly you should stretch it 41,396103896% in the X axis to be precise.
PS: i just found out that if your curve is set to 2d, nothing of this is necessary and everything would be perfect, but your curve needs to be laying on the x,y plane or it will be destroyed.
Only the “3d” curve mode distorts the bevel profile.
New blend corrected. You just need to stand up the frame by rotating the curve outside of the edit mode. (1).blend|attachment](upload://xSyZRErx0OiJbfZ5h92FYDWrCq5.blend) (2.6 MB) .
There is task / patch what fixes 3d curves but it’s not implement yet. For now workaround is to use 2d shape and rotate curve in object mode.
Here’s what i did, i don’t know but it just worked (2.8 version)
-Grab your Door Frame (go to edit Mode & press Alt+T) <–I think you can skip this
-Grab your profile rotate by -90 (R, Z-90), Go back to Object Mode & CTRL+A and Apply Rotation
-Grab your Door Frame, Right Click and Set Origin to Geometry, Then Rotate (R,X,-90), Then Go back to Object Mode & CTRL+A & Apply Rotation
-with your Door Frame Still Selected, Go to its Properties Under Curve, Click 2D (The Twisting should be fixed by now)
-with your Door Frame Still Selected Rotate back (R,X,90) & Place it in your Walls.
Thanks ![]() Actually I managed to achieve the same thing too in my edit, I should have mentioned though
Actually I managed to achieve the same thing too in my edit, I should have mentioned though ![]() I could use this method and then just hide the bottom part. I still want to understand the core reason given my problem. Yes, cyclic does a trick too.
I could use this method and then just hide the bottom part. I still want to understand the core reason given my problem. Yes, cyclic does a trick too.
I guess my main lack of understanding lies in how and where should my object/curve be located. When you say “PS: i just found out that if your curve is set to 2d, nothing of this is necessary and everything would be perfect, but your curve needs to be laying on the x,y plane or it will be destroyed.” I scratch my head " x, y plane" Does that mean that in2D it extrudes only in one direction? ![]()
Interestingly as someone pointed out right at the end is “This language isn’t quite right. The “bevel object” is actually this thing” In contrary to “round” that developers were working I hope this will speed up the patching up.
Works like a charm as 2D.
I wasn’t sure what is Alt+T is for to be used for. I just A selected all control points before rotating them.
Would you mind to explain how rotating control points in edit mode and then doing rotation in object mode works together? ![]()
![]()
I wasn’t aware before that R Z -90 would result in CC rotation. I would assume negative “-” be CCR not the CR ![]()
In edit mode, i don’t know if you can rotate the curve. but in object mode you can.
You just have to Apply the Rotation so it looks as if you’ve drawn your curve on Top View.
May I ask what was the purpose of rotating profile in edit mode? I assume in edit mode is control points’s all I have in my instance.
i think i overthinked and rushed the steps in the original. i guess you don’t need to Apply Rotation if you have already rotated your Door Profile in Edit mode.
“I scratch my head " x, y plane” Does that mean that in2D it extrudes only in one direction?  "
"
The meaning of 2d is what you say, but Blender uses the X and Y axis to create those lines, so they need to respect that 2d orientation.
If originally your line has any control point going up in the z axis it will be dragged to the point 0 of that axis. Your curve can be rotated outside of the edit mode and it will be ok. But the original control points need to respect this rule. They can not have height value.
I just tested the case on a new curve/door profile identical to the one you did. I rotated flat on x,y axis in edit mode and applied rotation when back on Object mode. I did that while in 2D. You can rotate the object as you wish there after. Bingo!  Thanks for sticking around.