Modelling Jam 01 - Iconic Movie Car - Join in

@Everyone,
These cars turned out great! It took me a week, a little at a time, but I read every post in this thread…

@Writers_Block,
The model of “Christine” is well done. It is a great model and you should be proud. I am encouraged and motivated by the level of detail you managed to achieve. The renders are good and I really like the latest (at the time of this writing) studio render you did in your completed work thread. The reflective, glossy showroom floor is a nice effect! Looks good. I have trouble getting my glass to look correct in my test renders for my Dodge Charger model. Can you share how you did the glass material in Cycles?

@chuk_chuk,
Love the mustang Eleanor model. I hope you finish it as it looks like it will turn out great. I think the clay renders look good. That is a great looking car and a nice choice.

@tyrant monkey,
Great thread and a good idea for a workshop. Wish I had joined in earlier. I have learned SO much by reading through this thread and it has helped me to refine my model, techniques and workflow by leaps and bounds. I appreciate it. Thanks.

@Fax how did you unwrap you models, I have been researching the few tutorials I could find and most people seem to just project from view. But I want to see if the are other methodology

@writer’s block I am not sure where you got your hdri images but some high end site usually give away free hdri’s. The downside of using free hdris is that the are overused so you would have seen the background a lot. But what I have seen with the better made hdris is that the usually add a meter cube so that in your 3d app you can create a similar cube and use that to align your images.

@theAngelRoldam thanks for your kind words and I am glad you learned something.

@Tyrant Monkey - project from view seems to be the best and certainly the easiest. And yup, I used a cube in one of my earlier attempts, but adjusted it to the size of the car. Worked well, but hadn’t got some other stuff sorted out. Not seen that done with the cube though - sadly. It would certainly help.

@TheAngelRoldan - cheers for your words. I used standard glass node, although I have been known to vary it. Make sure you add some depth to your glass, and make it white, or at least almost white. In addition you may find it better to separate the glass to a separate layer and render with only certain light sources; maybe even render it twice, with the same lights as the car, and with a specific light or lights. Mesh lights easily look false in reflections - HDRs are usually better; but it is normal - even essential - to have extra light sources for highlights to get that look you are after.

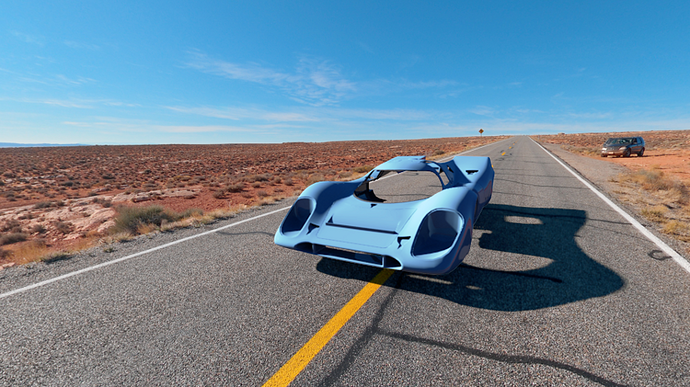
Latest test on compositing car into background; I’m now happy I’ve got the shadows to look good - may be slightly too much in this example though; I change the camera angle but kept the same background instead of the new one - looks pretty close to a match, angle-wise. Colour of the car sucks though - but can fix that /nod.

Attachments


Thank you for the feedback and the words of encouragement. I’m going back to uni this Thursday, so I should have more time to work on this since I won’t be working (Then again the are more distractions). I will try my best to finish all the modelling and texturing before the end of October. I do have a scene planned out for the vehicle but I need to finish my other project, which i’m tempted to restart after some thinking, so it may be a long time before we see it in an actual scene.

I’ve been doing the old marking seams and U -> Unwrap. There’s a few things to keep in mind that I “discovered” and I may do a quick video on those when I get back to Linux, but in general it does a nice job of keeping things as planar as possible if it has good seams to work with.

Hmn, project from view? Do you mean projecting parts of the mesh from a favourable view, then pinning those parts and projecting others and stitching with the previous, then again and again? It sounds like a lot of work to do it right, but I’d love to see it being done, I’m probably missing something.

Unless you guys mean deciding on the final camera and then just projecting from that view… at least that’s what I think of when you say “it’s the easiest way” :eyebrowlift: but then don’t you have to paint in perspective and all?

Hahahaha… Sure you did.

From what I know of texturing, unwraping a car like Fax has done is the best way. Mark seams, unwrap on a uv test grid image. Then look at the object in textured view and look for areas where the test grid is stretched, go back and mark more seams to rid yourself of the stretching, then unwrap again. Areas where the uv test grid is severely stretched will cause you problems when you use an image you paint in a paint program. If you have a 1 pixel line flowing across the mesh, in areas where the uv test grid is stretched, the 1 pixel line will look pixelated, because it’s stretched.

@Chuk_Chuk - I hated to point out the problems I saw with your model. I also noticed my mini had the same problem (not as bad) but still I noticed it after pointing that out… and I fixed it.

@theAngleRoldan - I saw your Charger wip, but didn’t comment on it. I noticed you marked lots of lines as sharp and I don’t really know what the best way is to handle that. I personally add extra edge loops to sharpen areas instead of creasing them. I don’t know what the best or prefered way is, anyone care to comment on this??? What’s the best, crease or extra edgeloops???

@Writer’s Block - my first action when I saw the renders with the pink tint to them was to run to the bathroom and vomit my lunch into the toliet… Just kidding, but imo, cars like that should never be pink in color. I know it was the result of the render. Although, in real life, if I was at a stop light, and a young blonde girl in a 59 pink plymouth was sitting next to me, I would vomit. Painting such a car pink should be a crime, unless it’s a cadaliac… Anyhow, I don’t think the car’s shadows match the background shadows in the most recent render. The shadow from the car looks like the light source is on the right side of the car shining to the left side of the car. The shadow from the tree in the back ground suggests the light source should be more at the front of the car and pointing to the left, but backwards somewhat… I hope that makes sense, if not I can do a paint over of what I mean.

I’ve spent some time (before this thread) playing with hrdi images for lighting and indeed, I don’t think they cast the right shadows. Here’s a BI render of one…


I don’t know… I do plan to shoot a hdri light probe in front of my place, then park a car there and photo it. Then render my car and see how they compare. Should be an interesting experiment!

As to my progress, I’ve added in lots of details and was thinking I was close to done, but I’m not. The Italian Job minis had extra lights on the front… I’ll crank out those extras soon… I got sidetracked again.

@GodOfBigThings - I have a working rig that keeps the windshield wiper on the surface of the windshield and it follows the surface as the wiper shaft is rotated. I need to tinker with it a bit, but yeah, I think I’ve got that to working…

Randy
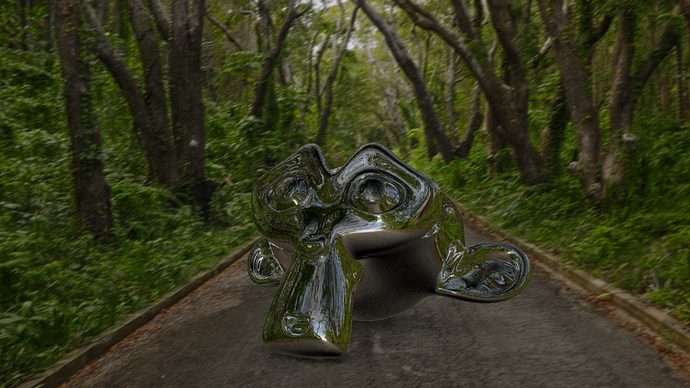
My first efforts to create an outdoor scene for this car. Not really the final scene, but just something to test materials and textures in.

Lighting however, is a skill I lack, (and badly want to improve) so be free to tell me whats wrong here.

HDR from Hdrlabs sIBL Archive

Attachments


@GodOfBigThings

Lighting looks about right considering how bright the hdr is; shadows may not be quite right, but it’s hard to be sure seeing as the only reference is the car in the far background.

I’d be curious to see your node setup, seeing as I prefer your attempts to mine so far. :slight_smile:

I’d turn down the hrd strength a little, then you can add a couple of mesh lights to highlight what you feel needs highlighting.

I think I addressed the issues pointed out by revolt_randy and writer’s block.
Going to make 2 different cop vehicles and try and go for a good cop, bad cop theme.
The first 3 images are the bad cop version and the last 3 are the good cop version.
For the bad cop i’m trying to go for front vehicle ram and a more blocky looking siren. The sirens will also be primarily red. For the good cop, the siren is going to be sleeker and will have more blue in the sirens. I may try something with the wheel rims to help distinction them more.
I’m not sure what the harsh line is in the good cop siren but it’s not there in the viewport, but I’ll see what I can do about it.

image here

@Writer’s Block,
Thanks. I really want to get better results from the glass. Maybe I’ve made them too thick? It looks like the windows are made of frosted glass…i don’t like that look. I’ll try some of your tips and see what happens.

@revolt_randy

@theAngleRoldan - I saw your Charger wip, but didn’t comment on it. I noticed you marked lots of lines as sharp and I don’t really know what the best way is to handle that. I personally add extra edge loops to sharpen areas instead of creasing them. I don’t know what the best or prefered way is, anyone care to comment on this??? What’s the best, crease or extra edgeloops???

I normally mark the sharp edges just because it is quicker while I’m getting my model together. I go back and add the edgeloops when I’m refining the model. It’s just the way I’ve always done it, i’m not sure how “right” or “wrong” it is. I like using the creases because I can make them sharper or softer and then I’ll have a better idea of how I will add the edgeloops later. Honestly, i think that stems from learning on older versions of Blender when you couldn’t exactly “UNDO” things…anyone remember that! LOL.

Although… I’m actually watching the “Modeling a Car Series” on Blender Cookie now and I’m sure I will adapt a lot of what I learn to my modelling techniques…I have a lot to learn! I can already see many ways to smooth out my workflow from what I’ve watched and I’m only on part 4! I’m a total fan of Blender Cookie.

I assume you mean the cycles shader nodes? I forgot to mention that I’m using BI. The material is a simple shiny material.

I’m also using a textured plane for the ground plane, as using a plane with the “only shadow” material doesn’t give accurate reflections.

Other than that it’s just a sun lamp + very weak environment lighting to light up the shadow areas.

Also, in your render, I think you are using the SMCars HDR#5 right?
I think that is a sunny afternoon HDR, and so your renders might just look better if you use a strong sun lamp, since HDRs aren’t good at giving the kind of sharp shadows you get from point light sources. Then adjust the strength of the HDR lighting until it look right.

Looking good GodOfBigThings!!! Could you explain this a bit more?

I’m also using a textured plane for the ground plane, as using a plane with the “only shadow” material doesn’t give accurate reflections.

Do you mean your using a material with an image texture of the road surface on a plane to catch the shadows? And it’s not a ‘only shadow’ material?

@Chuk_Chuk - Looking good as well!!! I like the direction, good cop/bad cop…

Here’s an update of my work…


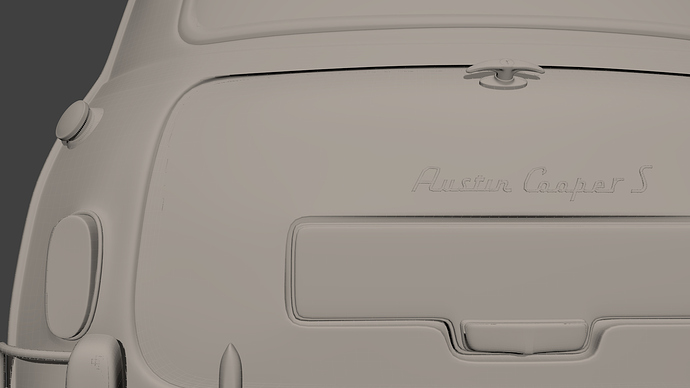
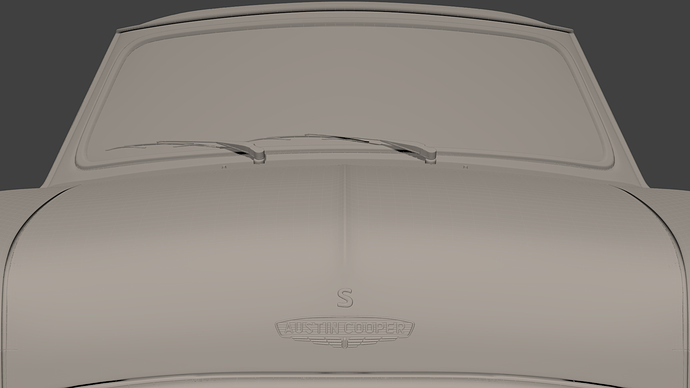
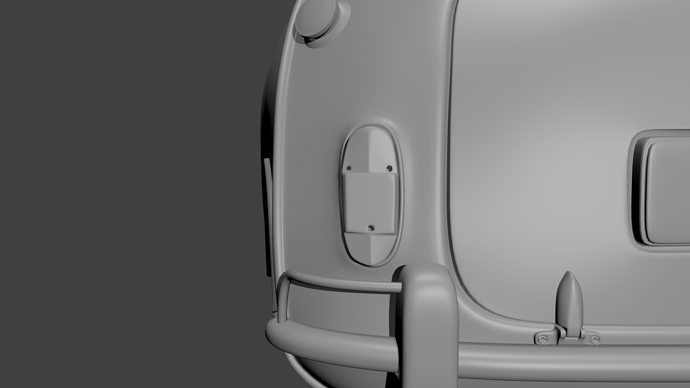
Doing detail work, modelling the chrome badges for the trunk & hood, license plate bracket & light, tail light (still needs work), even modelled windshield washer nozzles. I modelled austin cooper mk 2 door handles, so I made mk 1 door handles. This is where I start running into problems, I can actually drive myself nuts obsessing over the small details. I’d like to move into texturing, but I keep seeing details that need added…

Also, attached is my windshield wiper rig. This rig will keep the windshield wiper blade in contact with the windshield as it operates. It uses 2 armatures, one controls it, the 2nd armature is the various parts of the wiper and mechanism bones needed to make the setup work. There’s a text file included that describes what the bones are, and basically how it works.

Randy

Attachments

Wiper_Rig2.blend (536 KB)

Yes exactly. The reflections are calculated on the basis of the global direction of the surface normal, so the reflection on any shiny object will be just as if that object was where the HDR was taken (the position of the camera in the real world used to shoot the HDR).

So if there is a pink carpet right below the camera in the HDR, it would show up even if your background image doesn’t show it.
Also, if you are using a renderer that calculates bounced light, you would need an actual ground plane to simulate that.

Those are really my main arguments for bothering to do all this, though I haven’t really compared how much of a difference this makes. In a lot of cases, I guess the differences may be negligible.

That said, for the ground plane, you only need to project your background image from view, and don’t need to extract or hunt any separate textures.

About your car now, its looking really impressive. The details worth every bit of time spent on them.

Thanks for posting the wiper rig. Having a look at it now.

EDIT: I don’t get how it works (yet) but its pretty fucking awesome!

@revolt_randy sick level of detail you have going on there revolt…and thanks for the windscreen wiper blend I downloaded it and will try it out this evening. I need to do some work on my car I have not posted for some time.

@GodOfBig what are you render times like using IBL in BI, I seem to recall that Yafaray in direct lighting mode was significantly faster. Cycles is also faster when its comes to IBL but I haven’t tested this out with glass objects in a scene. but if you set max and min bounce to 1 than it basically similar to direct lighting.

@GodOfBigThings - thanks for the explanation, I’m going to try some experiments given what you’ve posted…

@ tyrant monkey - I’m not sure if it’s a sick level of detail, or I have an Obsessive Compulsive Disorder…:spin:

Worked on the tail light a bit:


I noticed the trunk hinges didn’t have bolts to hold them in place, so added those. Think I’ve got a good tail light, but it needs the bolts to hold it in place, just empty holes for now.

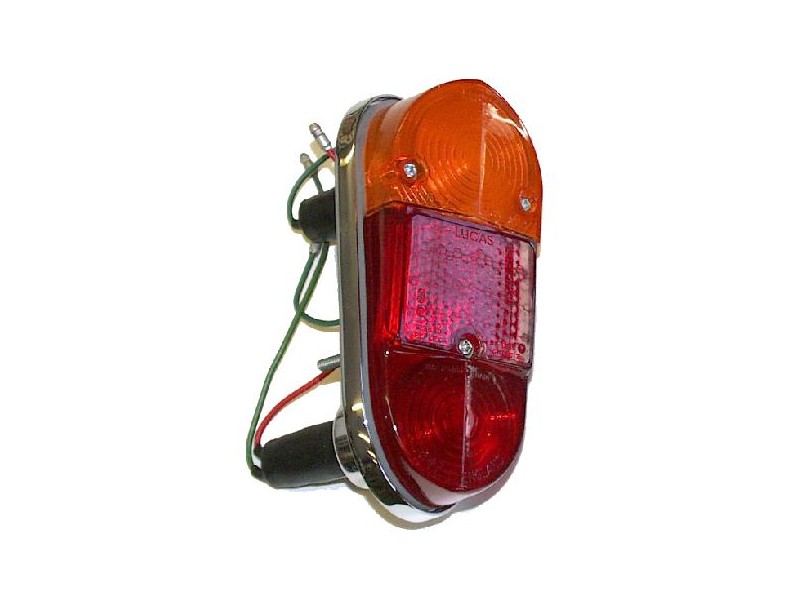
So now I’m wondering, and if Writer’s Block could give advice, I’m wondering how to handle the inside of the lights. From what I read on your Christine thread, you used bump maps for the inside of the lights, to add that detail, didn’t you? Here’s the detail I speak of:


There are several raised surfaces on the inside of the light, which I assume you used a bump map texture on. So did you model the inside of the lights and uv map them with the bump map, or did you somehow use a double sided texture?

off to model some trivial detail…

Randy

Yup, I did; I modelled the details first though.

On the headlight, no real modelling was required for the inside, apart from the mirror/reflective surface and a small mesh for the emitter.

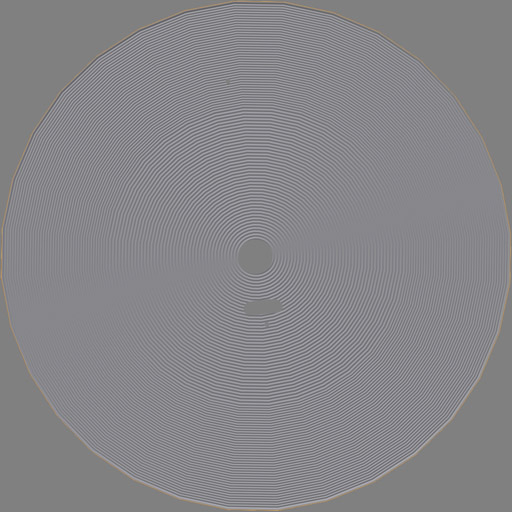
With that light, I’d model the pattern, then render it and turn it into a bump map.

It was simple to model, and yours are similar - especially top and bottom. The middle part is hard to tell what it actually is, so I’d see if I could find a better image - failing that, I’d try and find a car to look at. And if that fails, then it’s a matter of modelling something that gives ‘the look’.

I would, however, model the screw holes and screws. I’d probably try a hexagonal pattern, or maybe even a square/checkerboard pattern first off for the middle part and see how that looks rendered. Remember, believability is always more important than accuracy or reality. :slight_smile:

Image below is for the rear light.

Attachments


How did you do that? How would you model the pattern and render and turn into a bump map?

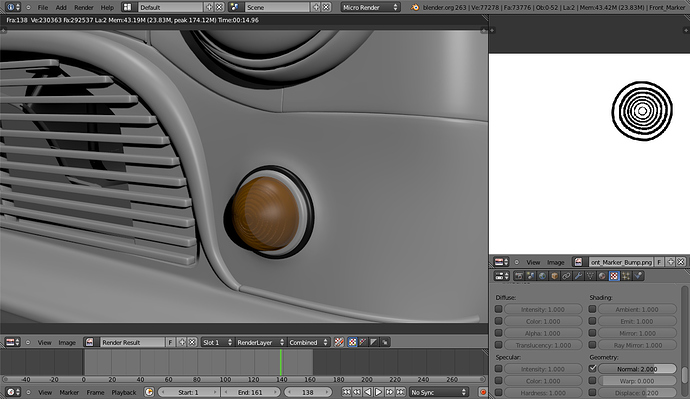
I was thinking of doing grayscale images in gimp and using them as bump maps, here’s a screenshot:


BI render, but if there’s a way to model the details and create bump or normal maps, it might be faster for me. I admit I’m not very good with image editing software…

off to model something,
Randy

Nor me, which is why I looked for another method. :slight_smile:

First I model the details I think will best give me the look I’m after.

Once I’m happy with the results, I switch to object mode and find the camera angle I need - either use a camera or position the view-port to what is required.

Finally I use view-port render to render; if it looks right I save. Normally I make sure the object is not selected as when selected there is colour detail that isn’t required.

I then import the image into gimp and see if it needs editing in any way - certainly it will need clipping

Rendering like that gives me a grey image that is suitable without much - if any - tweaking. Basically neutral bump is rgb 128; raised bumps are above that up to 256, and below 128 are inset or sunk in. Zero being the most. The default render colours seem to be close enough to give a good result - so far at least.

I’ve also found that default bumps are too harsh - so I end up using a multiplier in the node set-up to reduce the amount; ‘1’ is the default, I mostly use less than 0.1 and sometimes below 0.01. IIRC once i had to use above 1.0, which was weird, but it worked… So play around.

Attachments


The references I gathered had 2 different wheel rims. I decided to use the rims from the movie for the bad cop version as they where more aggressive looking, The other style will be used for the good cop.
Decided to give them 2 different tyre tread patterns as well, an aggressive style for the bad cop and a more normal style for the good cop.
Finished the rims and tyre tread for the bad cop, will work on the rims for the good cop later.

Attachments


It’s so weird looking at a car you modeled yourself :confused:

I love those rims, they look so badass all chromed up :smiley: keep it coming Chuk_Chuk, will be great!