@TM,
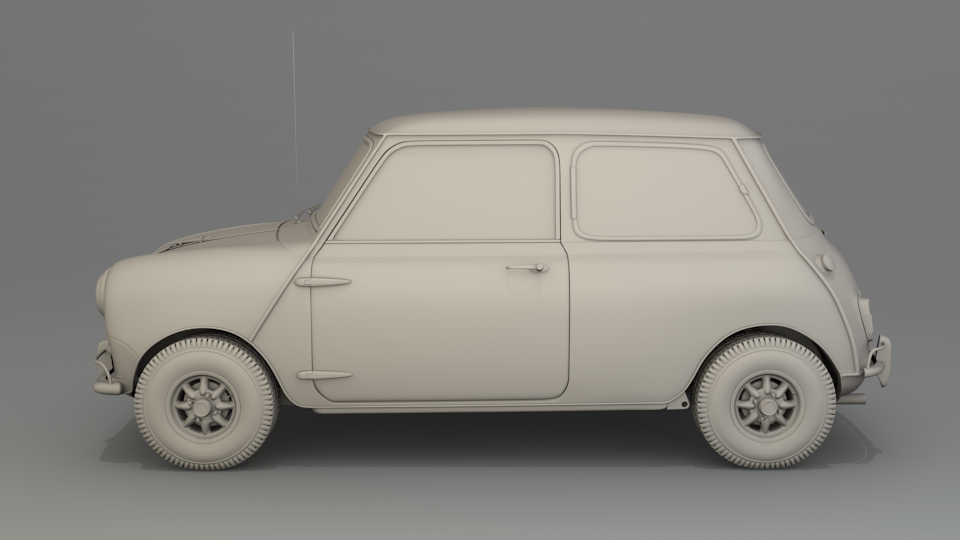
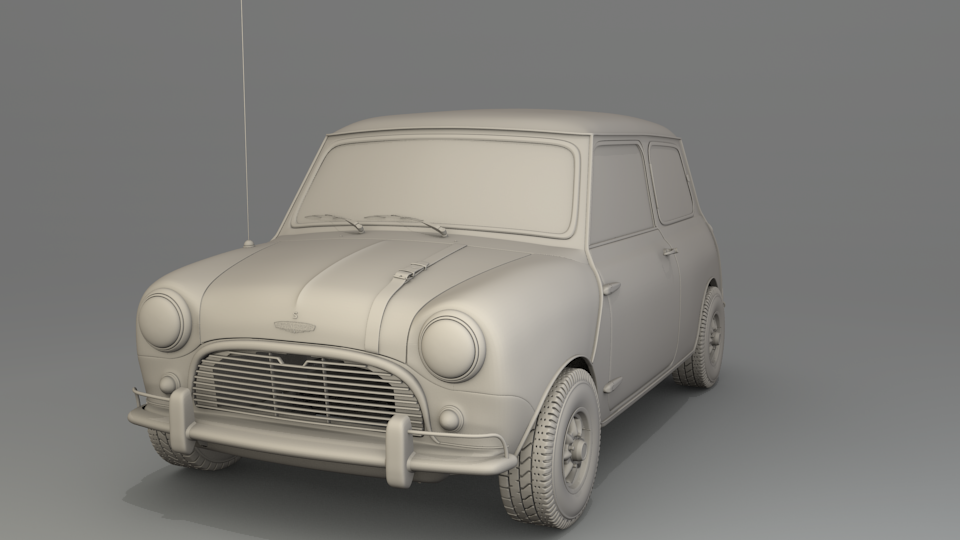
Yeah, that is a great looking model. It is about as smooth as a model car can get! Good job.
What is with the gap at the front inner fender/wheel well? Is that intentional or do you have a secret method of snapping that onto the fender…just curious…
@theAngelRoldan the inner parts of the car are just blocked in geometry. The matched the exterior better at one point but I had to tweak the car a lot in the last few weeks so the no longer match up a well. If I want to snap it back to the fender I will just probably use vertex snapping as the two were once one mesh so the geometry matches up.
@Revolt_Randy
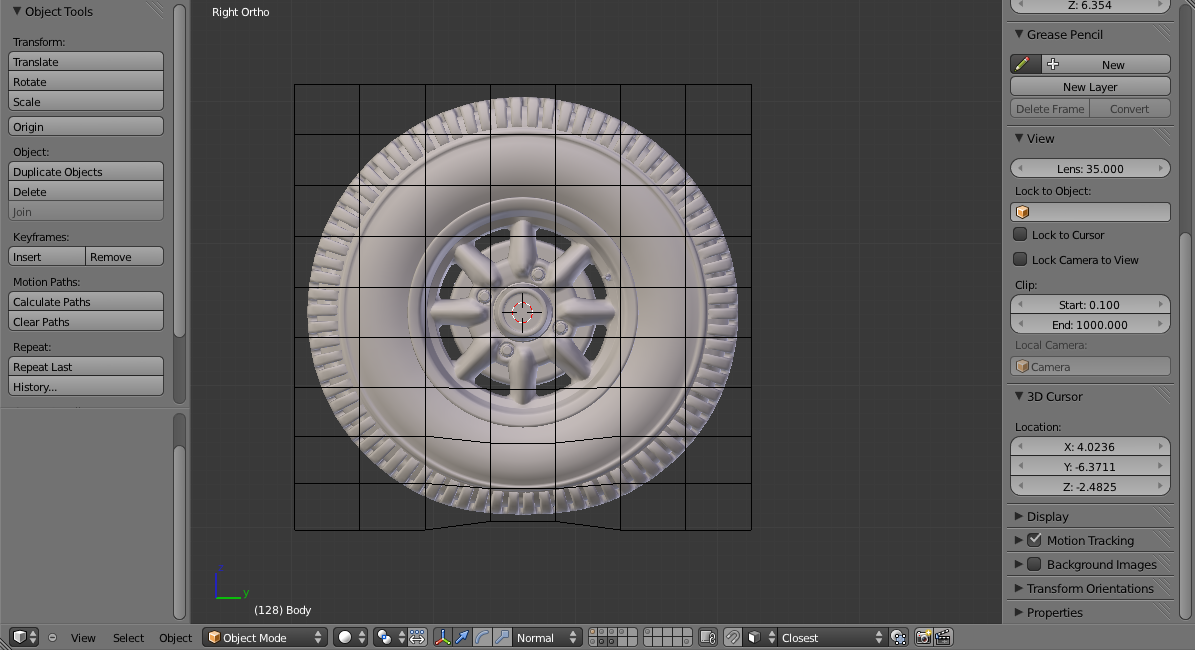
In the array modifier instead of setting it to a fixed count, you should set it to fit curve and select the bezier curve you’re using. Just less hassle when you do decide to scale it and match up the corners.
Does anyone else see a tired face on Tyrant Monkey’s car?
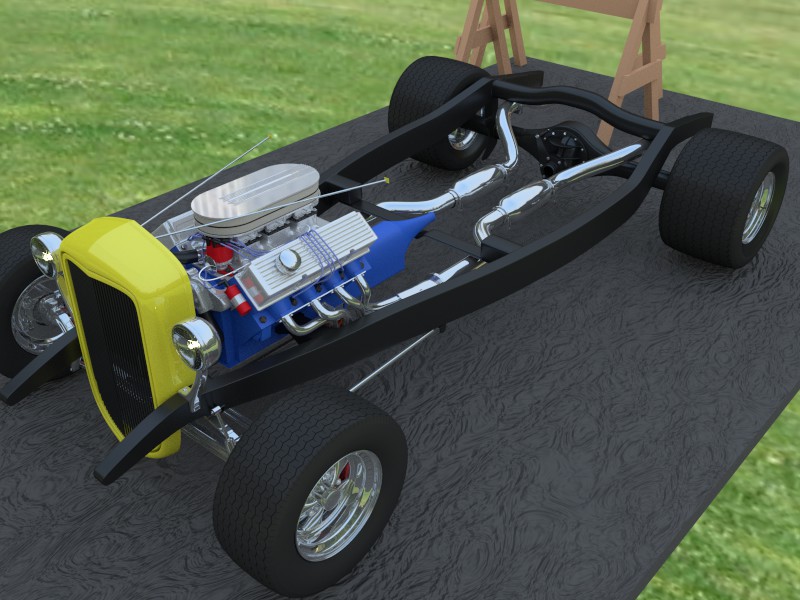
@Kernal_Sanderz that is seriously impressive. Do you have blueprints on chassis, engine and all the other bits? It looks really nice.
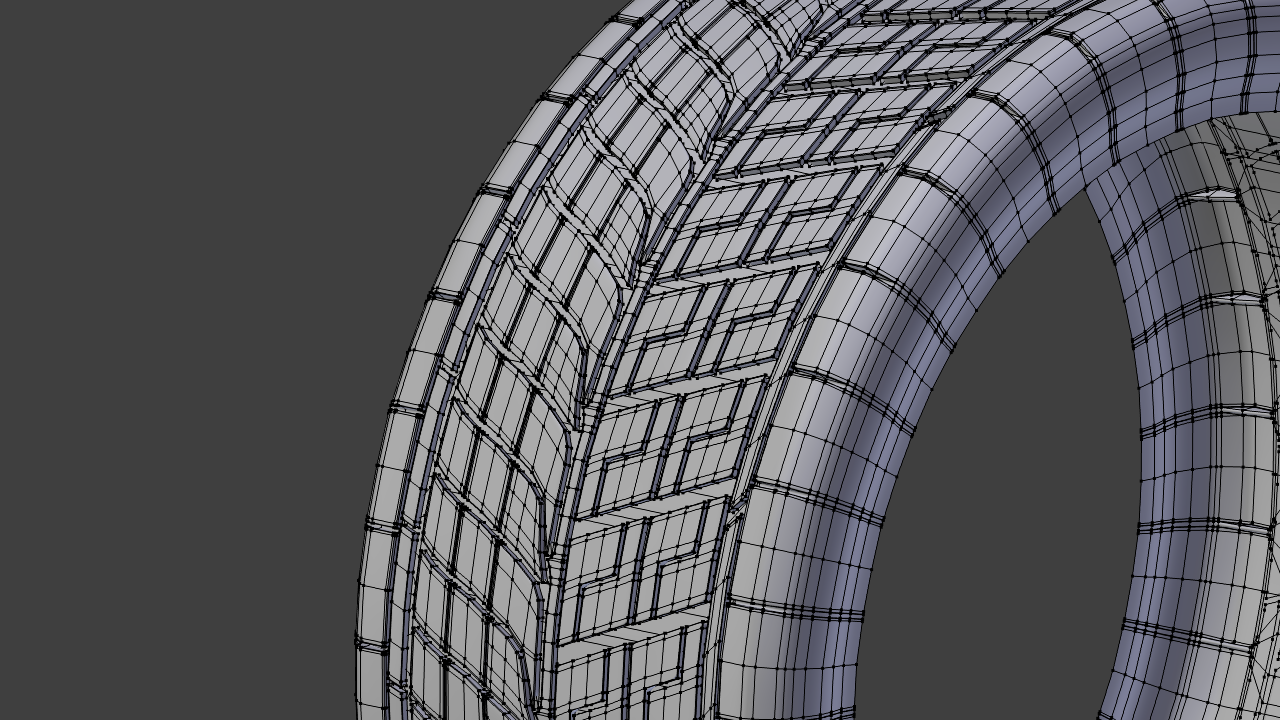
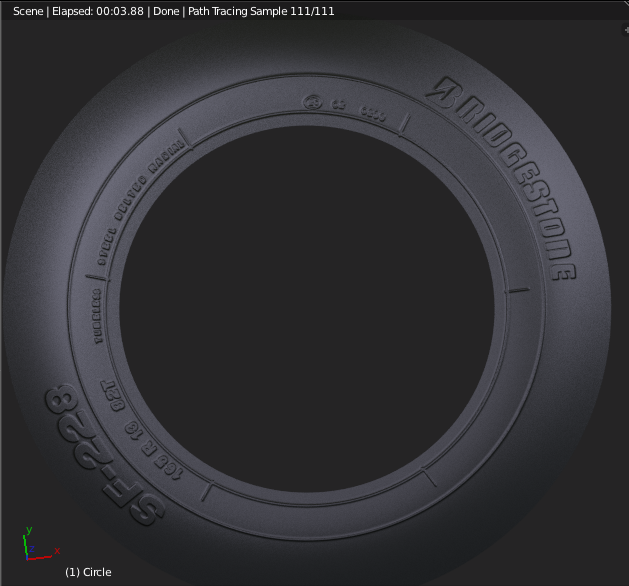
Need to poke some minds for some texturing advice, I am not so good with using photoshop’s pen tool so I adapted Writer’s block lens bump mapping method a bit and and started to work on the sidewall texture of my tire. Aside from the ‘made in japan’ text and I bunch of serial numbers I can’t read properly I think my texture is done.
I have been running some test and it has not been going too well:(. My big problem is that all the side wall text is white and when used as a bump map the edges around it are pretty ugly. What kind of tricks do you guys use so that the raised parts of the bump have clean edges/smoother transition? I am thinking adding a bit of a gradient of greys would help so that it does not go from black to white so abruptly but how to do this.
I will post a test render later to show the issues I have been having.
P.S An additional question, does anyone have an idea on how to unwrap tire treads? I need to add some muck and dirt on my tires.
Thanks TM, no blue prints, just google pics and mechanical knowledge. I used to be a real gear head, and still fix my own vehicles. I was gonna use the same method for my sidewalls too, as my image apps skills suck. Keep us updated on your results. To soften the edges you could use Gimp to blur your image a bit, that should transition the white to black for you. I am enjoying making the details far more than anything so far, right down to bolts and clamps lol. I will never achieve the status of the great Rogper (spelling?), but it is enjoyable. I think I will share my stuff though so folks can grab automotive parts for their cars as needed.
@TM: Have you tried using a small normal value? Something around 0.1-0.2 seems to give the best results. The default 1 is too much. Also, jpeg artifacts can do bad things to edges so make sure you use pngs if you aren’t already.
@Owldude that’s cool dude and good luck with your film. I am not seeing too many posts of late in the thread so I think a lot of people have stopped working on this but I am posting because frankly I need to learn to finish projects and get out of the habit of not finishing. Plus I am starting to work on texturing which I have never done before and with regards to cars I don’t see a lot of it been done on the forums.
@GodOfBigThings I was rendering in Lux so my bump settings where 2.0mm my car is to scale 1BU = 1m so that seemed reasonable. I am using png for my textures, I just posted a jpeg because it was smaller.
@eppo now that looks way cleaner than mine. I will have to study your blend file thanks a million man.
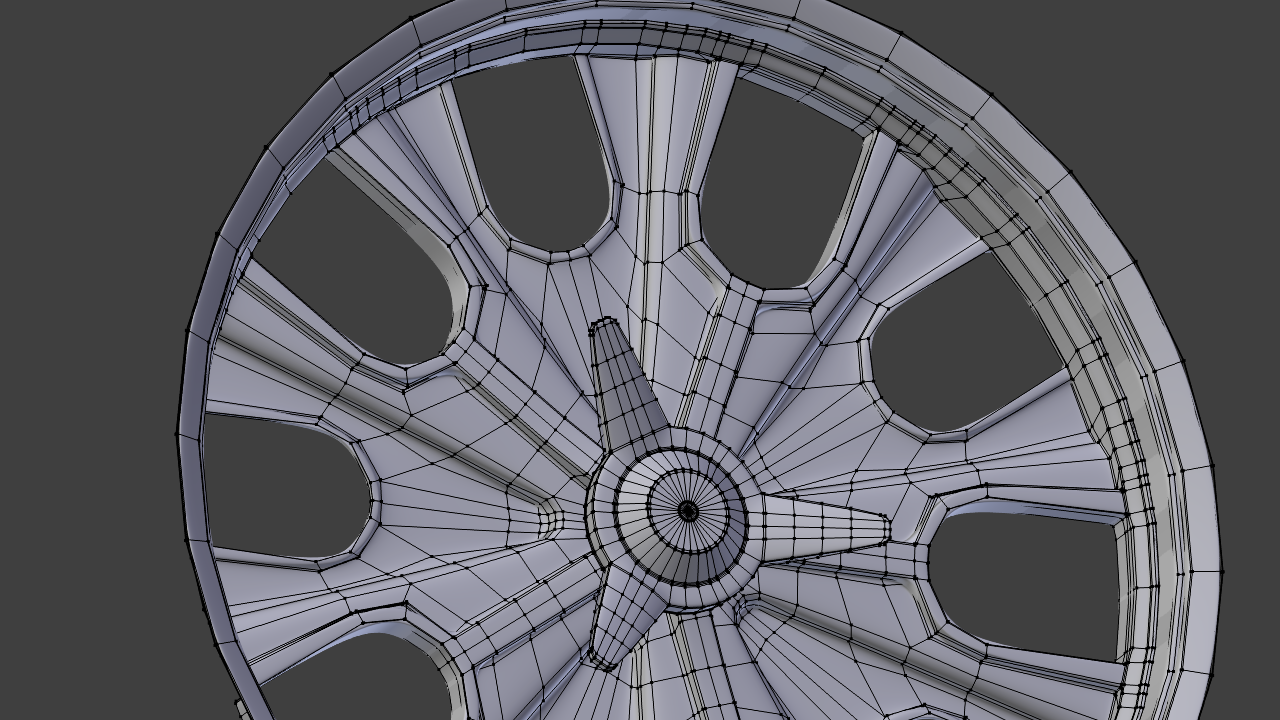
Great point about unwraping a tire TM!! I hadn’t thought about that. Since I built my tire with a mesh and curve/array modifiers, I can go back to my original mesh parts and mark seams, then add the modifiers. When I model something like a wheel, which I’ve never modeled before, I apply the modifiers to a duplicate of the original, so I can always remodel parts like this easily.
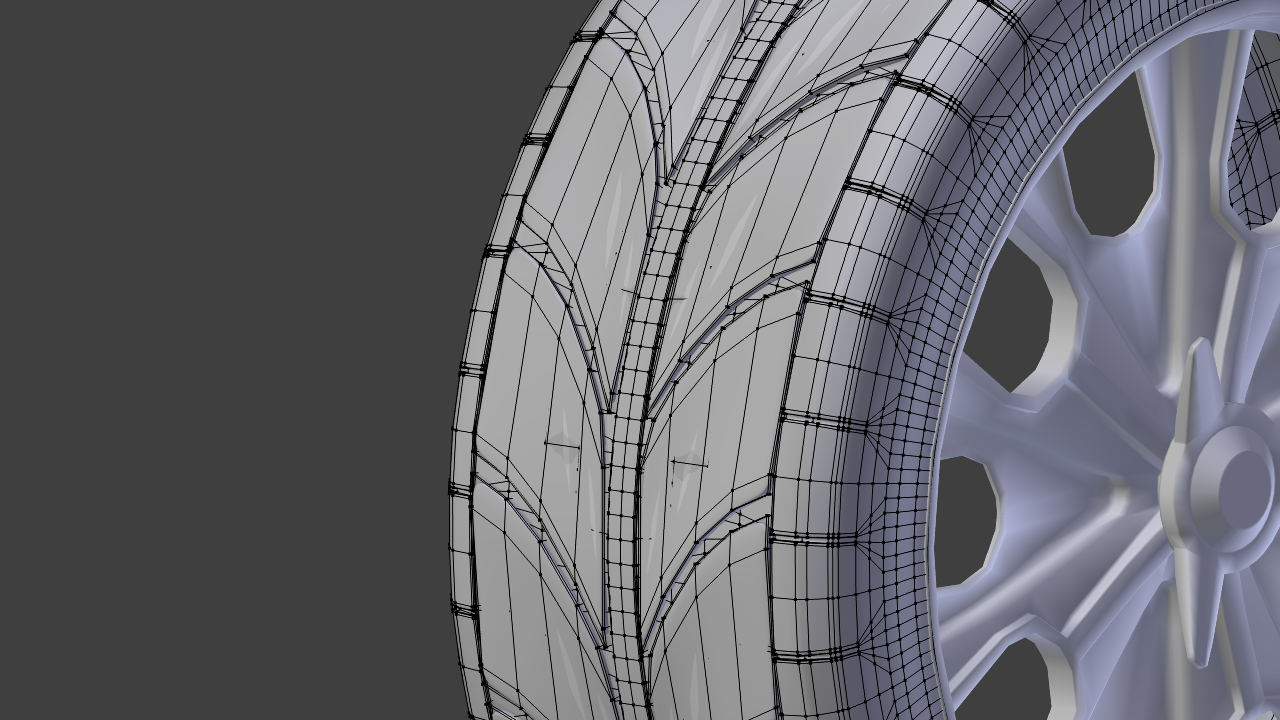
My progress has been slower than I like, but I’m going to start moving into materials and texturing. I’m sick of modelling, time to take a break from that. I will model an interior, later. So here’s the last 3 lifeless images or my work:
So if I want to animate the car, the tire should retain it’s shape while spinning and moving. Along with no interior, this car has a few more things missing from the cars used in the movie ‘The Italian Job’ - extra ralleye lights in the front, and the door windows are roll-up windows. The movie cars had sliding door windows, and I can’t find good reference pics of them…
I’m planning to use luxrender as well, but for now I’ll set up my materials for BI with textures so I get fast render times, then when I’m happy with the work, I’ll move to luxrender and adjust as needed.


