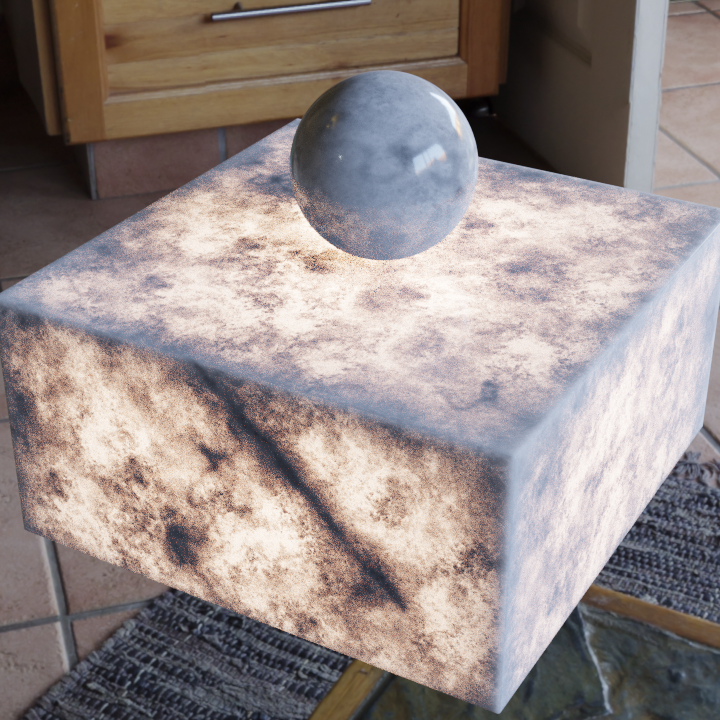
Someone ask me how to make this Morward marble material,this is my quick approach.
notice in the shaderball i made the logo to a yellowish emission shader, with 50strength to simulate a lamp inside.
reference foto on the left
need maybe finetune based on material dimensions thickness,emission str and transmission value.
I will post here soon with some of my results. Using the transmission is giving me some weird darkening. I dont entirely know whats going on that is causing it but I will share my results soon. Transmission and volume bounces are at 6+ each so realistically I shouldn’t be having any problems with darkening but who knows at this point.
yes this is whats happen if you mix transmission in.to me the result looks close to the foto though.
however you can try differend build approaches with SSS translucency and transparency.it all depents of what you want to archive.is it the look like the lamps, then it could be fine.if you want a brighter material, you have to test further.
keep in mind, this shaderball is around 1m tall,if you apply the material to smaller objects/thickness you could go away with lower transmission,that gives a brighter material mix appearence.
Here are the results of the tests. The transmission version keeps crashing, I have no clue why. Its just being a pain. Probably something in my smapling or bounces.
This is the cycles test (1800 aa samples, volume x5) and the main issue is that the brightest part of the scattering is horribly dim. It is basically 50% grey in value. I would hope for the hotspot to be more white but the length of the fall off shouldnt be any bigger. I was able to get it a little closer by leaving the SSS the same but making the light 3* brighter.
This is an arnold test. Same exact settings except the samples add up to 512 samples. Notice at the very top and corners of the model it doesn’t look as waxy. It keeps its solid look but a lot of that is because I was able to set the anisotropy to a negative value.
Even omitting the fact that the anisotropy isn’t an option, the hotspot is so much brighter and looks so much more accurate in my opinion. It really feels like theres a bulb behind it and not some sort of ambient light source. Thats where cycles really seems to be failing because it feels like just a subtle warm haze and if I adjust it any more the fall off grows and it begins to overwhelm the whole model.
here another approach,SSS radius 1,1,1.the emission str set to 100.i like the first version more(the dark edges).
However, with this reduced transmission and added SSS, the base color stays almost that bright, like without transmission (with the current HDRI).
I think if I widdle in translucency and blend it with SSS I could probably ghetto-rig it to only accept light from the back and still have the SSS effect. For the specific application it will not be as physically correct as anisotropy but I think I can leave transmission out of it that way. The other problem I am experiencing with transmission is it is scattering in the wrong places. It is sorta transmitting everywhere and not leaving the dark corners and things, so I will give this a try and post back in a minute.
Edit, that was a bust because it was completely greying out the surface a lot like the transmission… It’s so weird because really the values and colors are right for SSS but it’s just how much light is passing through from the back. Thinking of just saying good enough is good enough with this because if I have to sacrafice one thing or another Ill probably hang onto the values.
It looks light Brecht was working on this once upon a time ago, and other people have also commented on the possible need for it…
For me, at least, I have seen a huge need (and use) in production pipelines with anisotropy so I really really really hope this can get implemented because without it it works for something in the background but for a hero shot, it isn’t going to make the cut.
I think something probably got hosed in my project because now everything seems to be working fine… Ill post my results soon. Also found some better reference photos because I think that one probably had a lot of post work done on the brightness. Ill post the new reference photo with my upload.
This top one is Scattering only. My major criticism to this is just that light doesn’t actually pass through SSS out of the box in blender so the ball almost looks like it was just comped on top.
This test was done using transmission. I used a map to control the strength so the dark black veins with heavy sediment would not be as heavily affected. I still notice some problem though where it feels like the ball is still hovering. Although theoretically light is passing throguh, and turning off SSS confirms light IS hitting the ball, it is not enough to match the amount of SSS. Additionally this method took the longest, clocking in a render time of over 7 minutes at 1024 AA samples. More than 3 minutes longer than Scattering and translucensy (next image) which took only 4:17.
This test was using translucensy. In my opinion this is the best looking one. I used the same map controlling the peak to 0.52 and the veins to near black and it feels much softer in transition, less patchy, and I notice fare more light cast onto the ball sitting on top. It is still not perfect but I do feel like it handles the job much better. The down side to this though is it cmes at a trade off. The translucensy seems to dither away some of the blockage on sharp corners. Given that translucensy is not SSS, and it doesn’t on it’s own have any system to specify depth, corners seem a bit waxy again when back lit but I think it makes up for it in how it handles front lighting.
Here is the low light test with translucency. Again great render but seems to have some problems on the corners but nothing that is turning me off from the render.
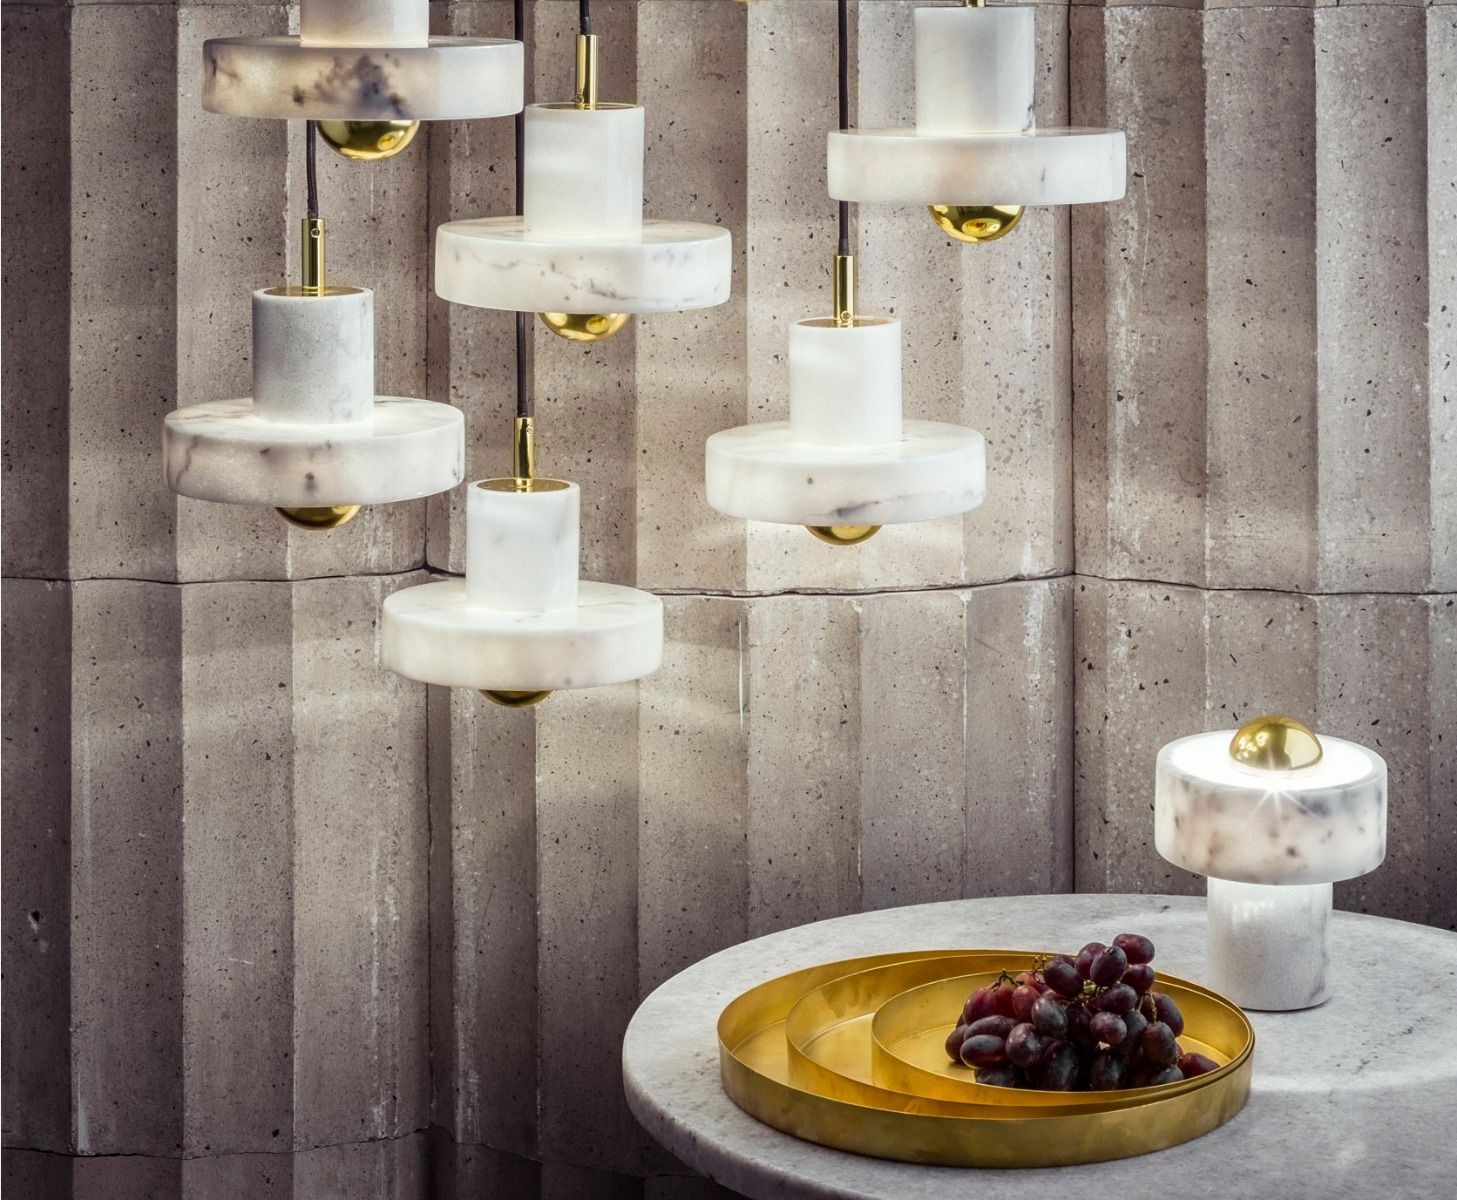
Here is the revised reference photo. I found this while digging around on the tom dixon website. This looks like a much more real world representation of what I think you could expect from the light in terms of SSS. Certainly not as blown out as I originally thought from the other reference photo.
you can try to use some glass rendering tricks with the lightpath node.ie mix in transparency shader at a given raydepth,or if its a shadow ray ect.to help the lighttransport at thick materials.
This is very true. I still fear the render time increase. Then again, Arnold is the only example of an engine that might handle this out of the box faster than cycles so I might just be complaining. If I ran this in any other engine, god forbid a spectral engine, I already know I could expect render times well over 7 minutes so ill probably toy with it a bit to see what the result is. I think the closest out of the box result is the translucency but realistically, some tricks with transmission should really probably yeild most “accurate” results so I will likely in the eend have 2 shaders for different applications.
All of this and I still hope the powers that be figure out anisotropic SSS because this could all be resolved with 1 slider LOL
Yes Cycles has some weakness,but also strongs like many other render engines.the most weak point are caustics,i wish cycles would have the caustics like the corona render.maybe the new mitsuba engine would be overkill.
i think with the lightpath the rendertimes not getting higher,as sayed if the transparency get in at a given raydepth, you can maybe reduce some of the other settings.
I have read the dev thread about the sss anisotropy,it seems they are think this is not that usefull at that point.i am not sure if the implementation is correct based on how the testrenderings looking.
Yeah it is used pretty frequently I would say. Full control over back and front facing scattering is super useful. Especially when it comes to rigid plastic or stone. And yeah caustics are cool as hell on corona (corona also has a direction control in SSS).
Unable to try right now, but I’d give it a shot by mixing diffuse and translucency, then mixing that with rough refraction. Might use geometry/incoming as the refraction normal. Then at the end, mix in the glossy component with fresnel. If you need “light transport”, I’d rather bake out the absorption portion of the effect and use it as emission rather than relying on transparency for shadows. The pattern looks achievable with a wave generator, possibly being fed some UV repeating 4D coordinates if you want to bake the texture for seamless use.
here a render with lightpath node and transparency.this gives a nice control how thick the material should appear.like the light would scatter more inside the material.lower threshold values gives earlyer transparency.5-6 are good start values.i think lower as 4 are too much.
So, I just remembered a rookie mistake I was making which is, in cycles, light will not pass through transmission.
DERRRRR… I read what you said and some how the reason this would fix my problem just didn’t compute at the time… I don’t know why thats the case. It’s a bit stupid in my opinion. I feel like if I set the transmission bounces high enough emission should pass through. But after popping in the node setup for it to work, I quickly realized the transmission roughness is not effecting the diffusion of light. Realistically it would have a sort of diffusing effect because it becomes ““translucent””. On the actual model it’s self transmission is working better than translucency but it should not be completely blocking the light, and it shouldn’t be letting light pass through like a clear pain of glass either.
Alright these are the tests from last night I ran. I did a mixture of what @pixelgrip did along with translucency. I gave transparency one more go and it did a pretty decent job except it was really causing a lot of excess noise on objects receiving light so I again went back to translucency and the result is almost identical after tweaking the light paths. With raydepth-greater than, I had to really throw the values because 6 was letting WAY too much light through but thats the only major tweak I made besides the translucency.