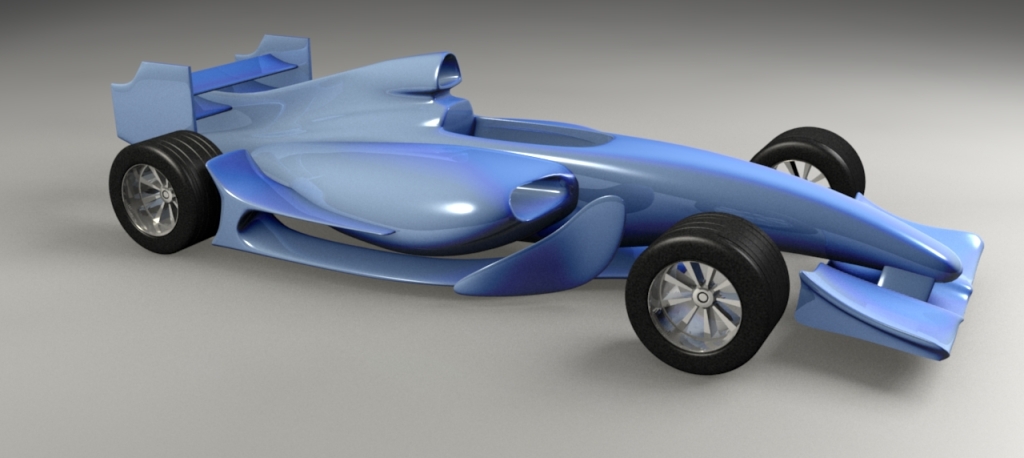
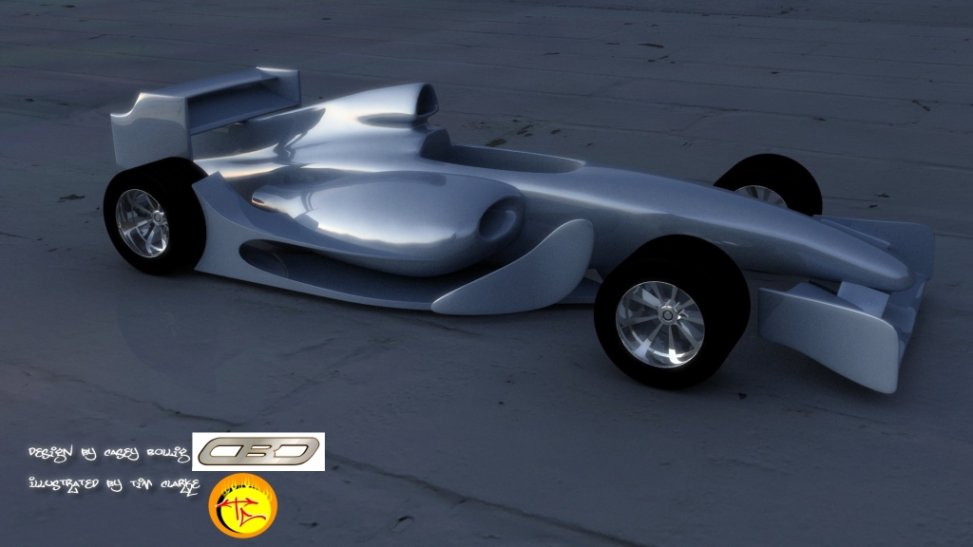
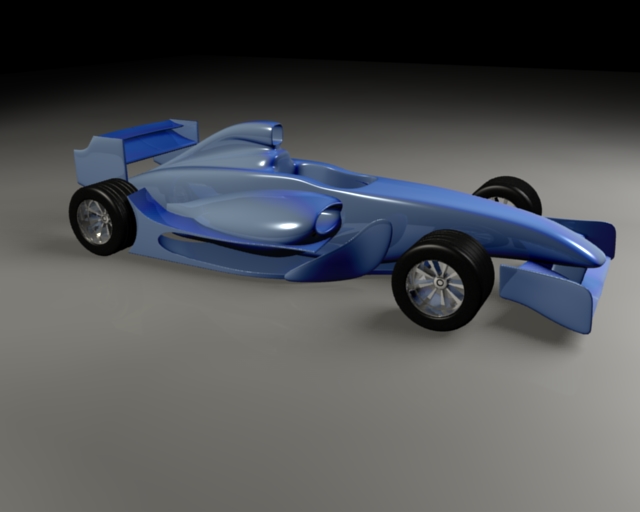
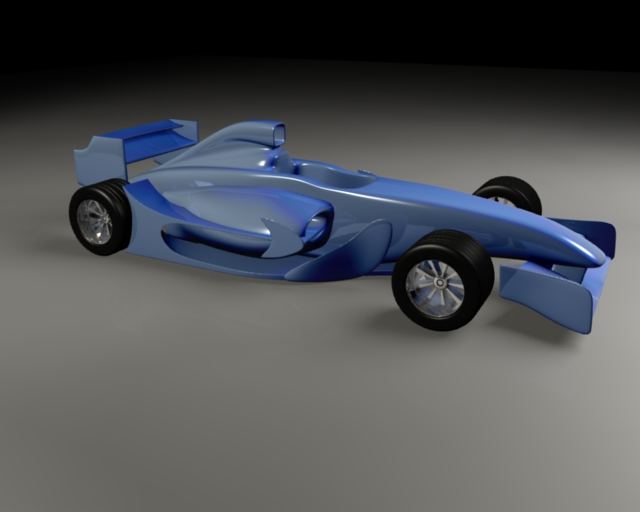
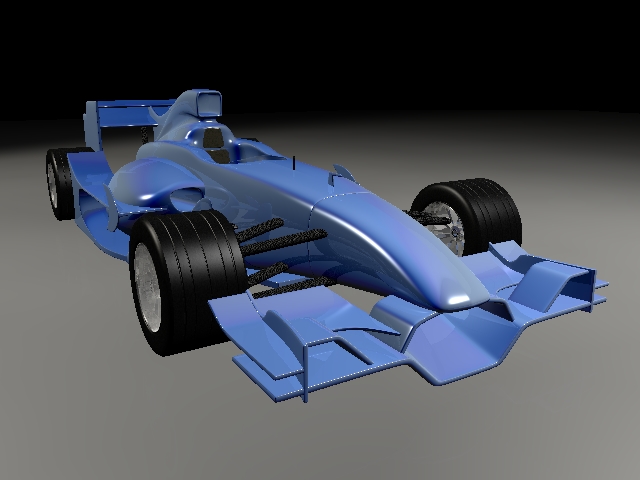
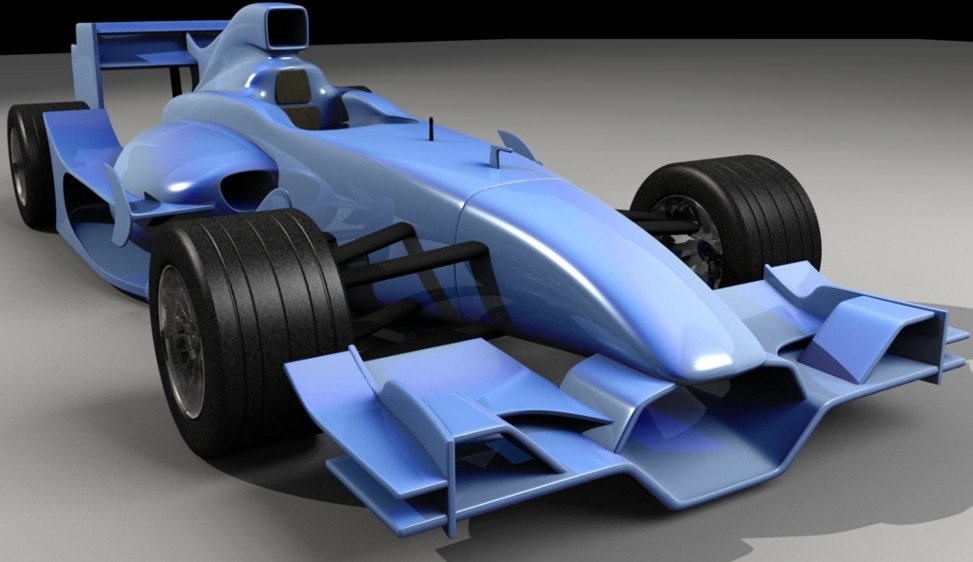
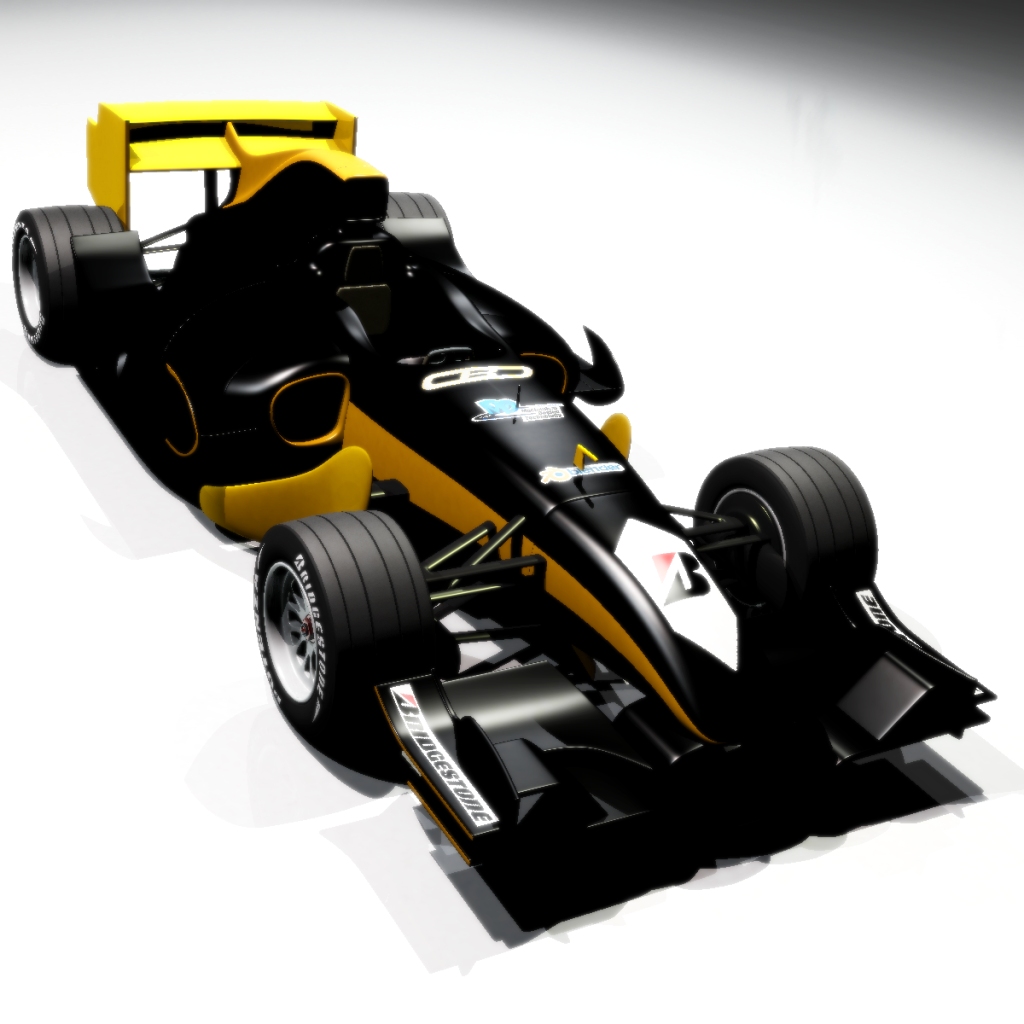
I’ve been working on this one for a couple weeks now. It is a collaboration with a classmate in my mechanical design program. He had been drawing up some orthographics of this F1 car that looked great. I talked him into letting me use them as background for a model. His design is still in a pretty fluid state, so this may change a lot before it is done. I have modeled each of the major features as a separate mesh so that I could move them to separate layers and turn them on or off as needed so I woulnd’t have such a cluttered view when working on it. He has given me a sketch of what he wants for a paint job. I’m pretty new to UV unwrap and painting so help in that area is definately welcome. I’m excited about the way this project has developed so far. My end goal is a scene, a trackside shot, sunny day, with a fence in the background with banners of the school, program, designer’s, blender, and my new logo on them. Anyone come across a good method of coming up with an asphault texture? Maybe with some oil stains, cracks, pieces of grass growing in the expansion seams. The time frame is pretty long on this one. To be completed before graduation in the spring. Here are a few pics of the progress so far… the first two are blender internal, the third is a test setup with yafray and a softglow from gimp.

wow, the jafray render is so cool! Nice design too. I can’t help you with texturing tho.
Is there a possibility you could tell me how you did your tires? Your car looks sweet…very original design.
–
Greg
Yoeri: thank you.
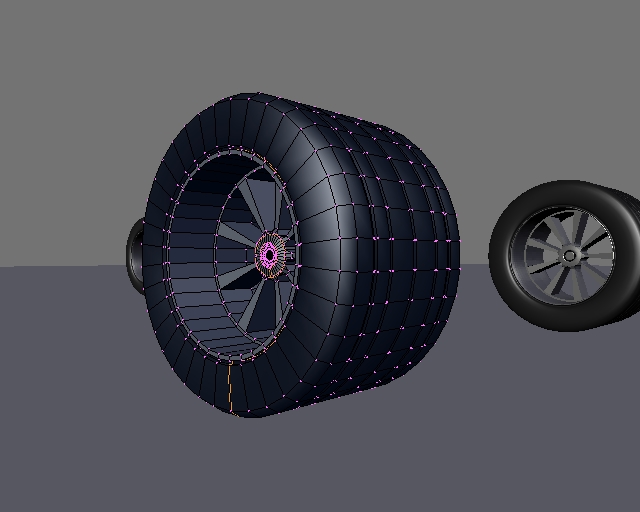
3dak: Thank you. I started on the outside of the tires by extruding a circle, I think it was 36 vertices. From there, I would extrude the circle, cancel the move command, then scale the circle to a smaller diameter. Then, switch to top view and align the smaller diameter ring into the desired plane. I did this until I got to the spokes, then closed off every other face. I selected the remaining open profiles, extruded/scaled to the smaller inside diameter. Get that far and you can figure out, or I can provide some more detailed images for you. The tricky part was deciding which faces should be subsurfed and where the creases needed to be.
Now that I have some pretty pictures, it’s time to go back to the modeling and refine, add in the missing details. A lot of work to go.
Attachments
Thanks for the short tut…I’ll give it a go tonight…you can visit my wip at:
http://blenderartists.org/forum/showthread.php?t=81704
–
Greg
I finally put in the new background images that Casey gave me last week and started tweaking the body. Going back to blender internal for the test renders to save time. Body is getting beefed up, need to look at the side pods next.
Attachments
Here’s the progress for this weekend. I reshaped the front wing, sidepods, backside. I started to throw in the front suspension and started playing with panel cuts. I’ve never worked with such a complex mesh. Good thing that blender has so many layers available. I’m still struggling to get a carbon fiber texture that looks convincing.
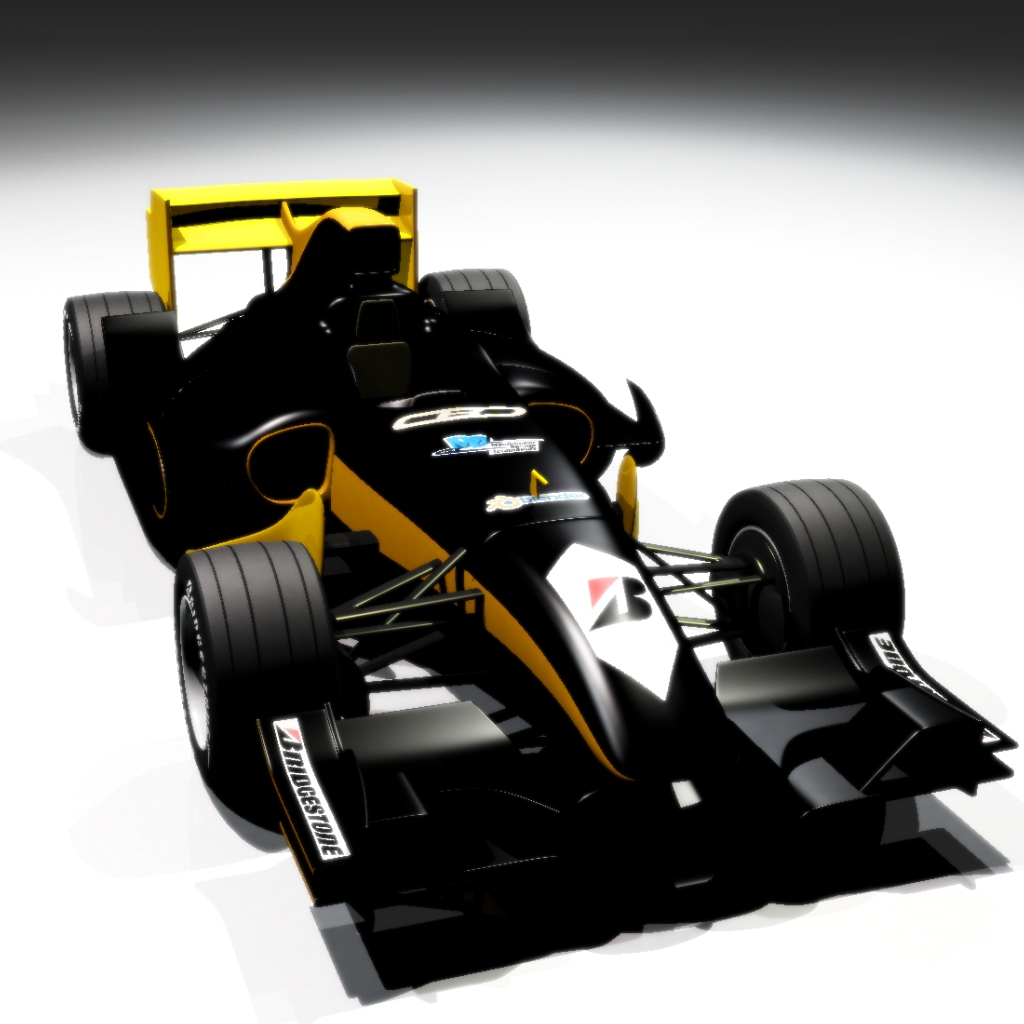
edit - added higher res render, with shadows ![]()
Attachments
It is really looking good stumble…the only thing that it lacks is shadows…your F1 can fly at the moment. Thanks for the tire tut, I didn’t need as indepth but I never even thought to use a circle, I got so use to modelling with a square and then subsurfing…DUH!
I’m a f1 fan, and i like your work so far.
I see you bettered the tail end of the car.
I also found the wheels quite unnatural, I thought from memory the structure wasnt correct, but thats not the case. The thing that gave me that unnatural feel was the central piece of the wheel, wich is bigger in f1 cars to allow the big central bolt:

also the refrigeration hole seems to be small and high, but the tendency here goes that way. Still, even the Ferraris have bigger refrigeration holes.
anyway, good work for such a complicated model.
thank you for the feedback nf3. I’m starting to take another look at those tires. The side pods still need a lot of work, I agree that the openings need to be widened. Here’s a test of a disk and caliper.
Attachments

Hello, it’s a great start!
I think that if you wan’t to do realisitic F1 tyres you have to check FIA rules and more references like this :
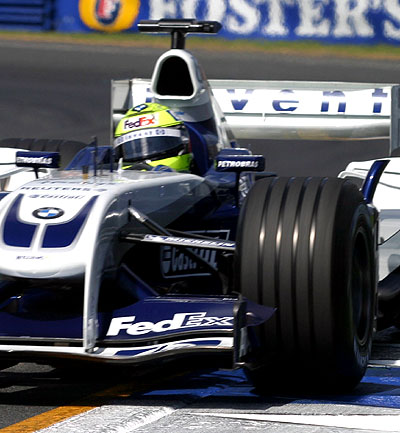
I did it in few seconds to show what I mean :

Waiting for the next step : D
That is really a nice model.
awesome man, i havent ried car modeling yet, a real inspiring piece of work
keep it up man!
Drew
Haven’t had much time to work on this lately. I spent time building a new wheel. The proportions are still a bit off. I have some ugly scaling on the background image I threw in just to give it something to reflect. I don’t think I’m going to use so much reflection on it in the future. More coming soon…
Attachments
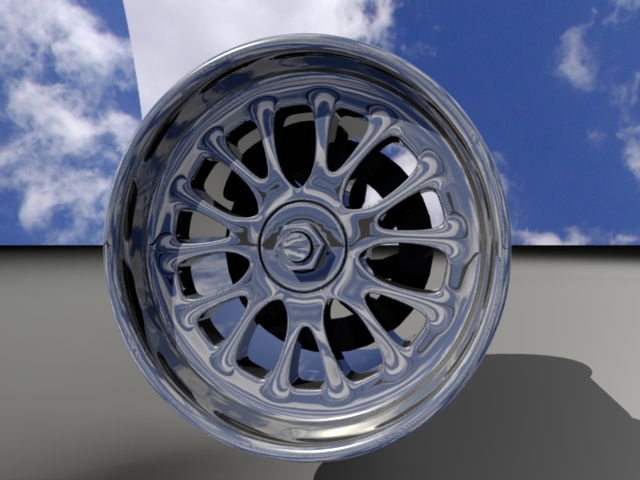
Like you said, the rim has too much reflexion (I think real rims are composed of aluminium or brushed metal).
The mod is nice so far.
I think you put the bolt as a temporary detail.
F1 wheels are locked bay a unique bolt wich has a block system :
Here are the 3 steps to locks a wheel


I hope it will “help” you. Waiting for next step!
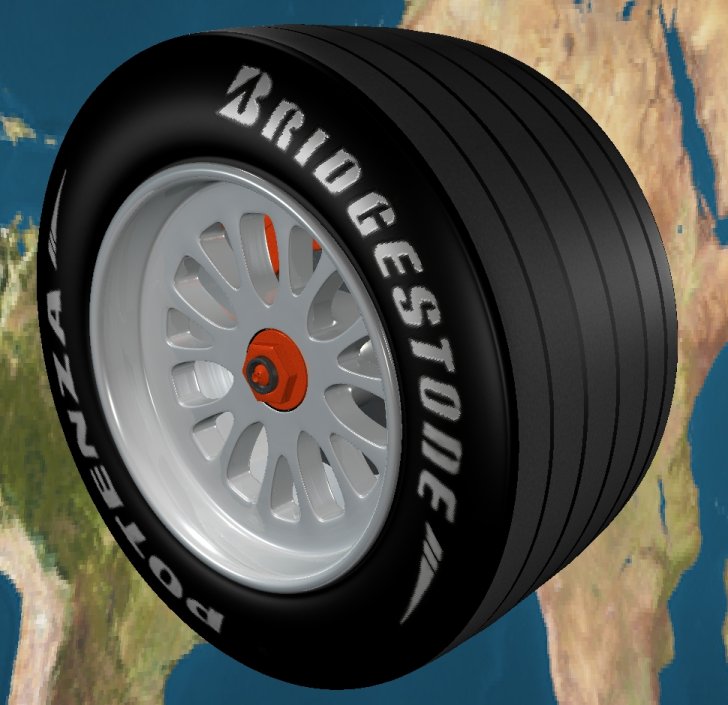
Thanks so much for the help on the wheel Ahuri. I was having a lot of trouble finding a decent reference for the wheel nut. I spent some more time on this and tried modeling a setup that mclaren team used a few years back. I’m pretty happy with it, but may update it to the newest type. I also did some work on the UV and tire shape. Heres a pic of the progress.
Attachments
; )
For your wheel, it’s better !
I have few comments :
- A F1 tyre (front wheel) is about 29,5 cm large. (32 cm for rear wheel)
- Each Tyre has 4 sculpture and so 5 Treads.
- I think you should mod the sculpture, you did great mod so far so you should continue ; )
- Look after this adress, all the technical F1 regulation is archived ; )
http://www.fia.com/sport/Regulations/f1regs.html
Waiting for the next step !
It’s been a long time since my last post, but I am still working with this one when I have time. It’s been a busy school year. I get sidetracked easily with different material tests. Then of course, I had to play with material nodes. If I get some free time, I might even devote a few hours to learning composition nodes.
For some reason, since I started playing with the node editor, I can’t use yafray. Even if I strip all node based materials from the rmodel. It develops a runtime error while building the kd-tree, whatever that is. So, here is an internal render. I’m working on a scene to put it into for the f1 challenge.
Thank you again to ahuri and everyone else who has helped me with this project.
Attachments
Thats a very accurate design for an F1, well done on getting this far. I don’t use yafray that often as you can replicate most of the shiny crisp effects with the internal render, provided you that you use the correct reflection setting an make use of the toonshader. So i cant help you there.
Are you going to do a scene anytime soon?