Thanks Shaun. I’ve already deleted a few loops around the mouth for that very reason. I’ll take a look at the eyes as well.
Did the retopo on the ear. Not completely happy with it, but I think this will do. At least, for this character. I also changed the color of the wireframe  I went for a simpler ear in part because this isn’t intended to be a fully “realistic” character. There is a 6 pointer, but it’s on the ear canal and mostly hidden and in an area that won’t be seen often.

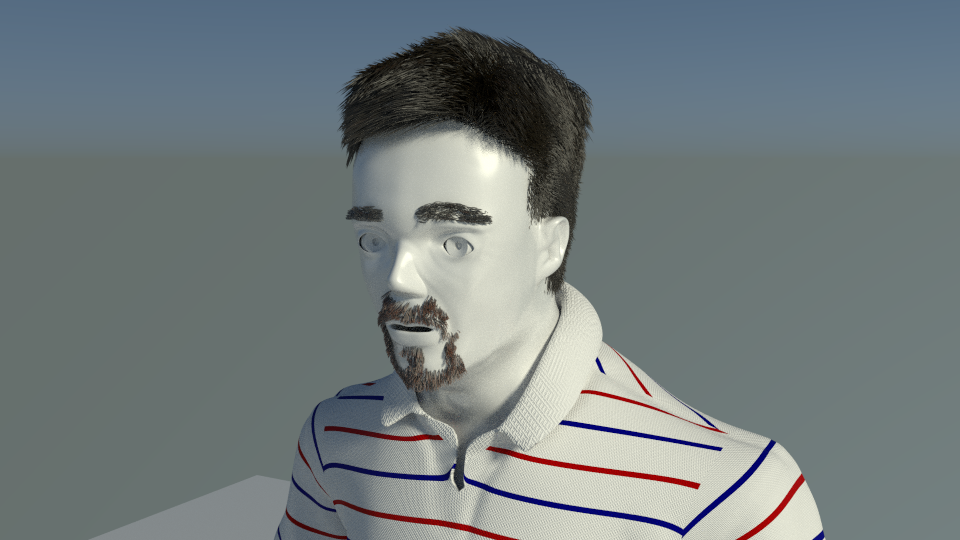
I also did a little “polish” with multires. He looks a little older here than I intended, but I like how it’s going.

Check your head proportions. That dome of the skull looks a bit high. Are the eye sockets centered?
I’ll check that, though if you have the eye line at half way, I don’t think it’s too far off. As for centered, they should be, since I have mirroring on. Or rather I think I did just prior to this, at least.
After not liking the last one, I deleted the multires and went back into the mesh to change a few things. Then I readded the multires and it looks much better and younger.

Closing in on the modeling portion. Just have to retopo the hands and arms. Also need to figure out how I want to do the hair. And with Rigify, it seems as if rigging will be fairly easy. Then I have to figure a face rig. And texturing and posing… and…
Not the best hands, but they’ll do. They’re much better than in the basemesh AND in the sculpt, but they could use some work. Considering this was my first sculpt and retopo on the hands, I’m pleased with where they’re at. I need to add fingernails and a little polish (not fingernail polish… detail polish) before I move on to adding hair and rigging.

These hands won’t pass close scrutiny, but they’ll do… for now. Next time, I can work on better hands ![]()
I fixed the positioning on the thumb for a more natural look, added in the fingernails, and sculpted in some detail on the palms, creases at the bends, and around the elbow.


Got the hair combed, though I may go back and do it again with more points to round out the hair more evenly.
One question I have though… Is there a way to make the hair “deflect” around other objects? For example, instead of going through the glasses, I’d like the hair to deflect around it.
A quick update on the hair. I made it a little finer and gave it more parents and fewer children. Overall, I think it’s a more natural look.

I’m enjoying the progress of this so far. Looking forward to another update.
I think he is shaping up.
Thanks, MasterAeon. And here you go!
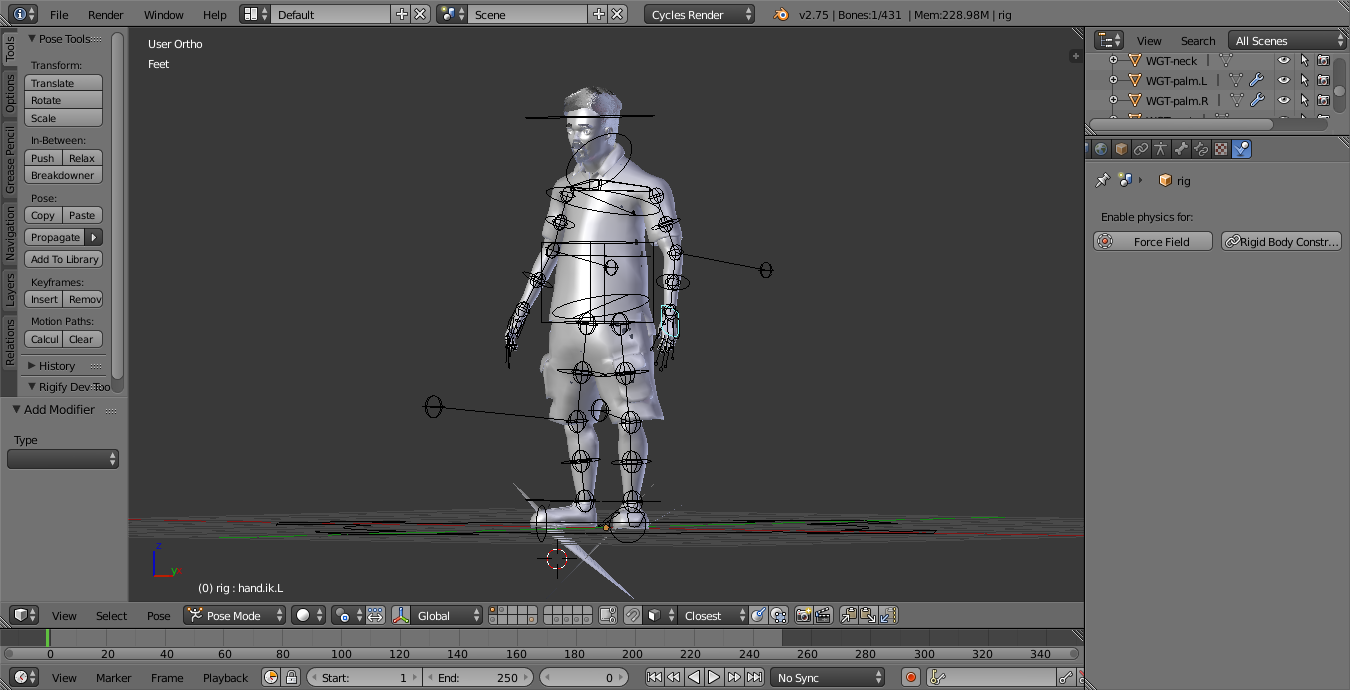
After 11 hours and 3 attempts, I think I have a rig I can work with.
I only have 2 problems with this rig… On my feet, the inside of the shoes seems to push themselves to the outside. And on the two meshes for the hair particles, I can’t seem to get them to follow the rest of the head, though they have the same weight painting as the corresponding parts of the head. Suggestions on these welcome, but while I’m puzzling over those issues, I’ll start texturing the rest.
Thanks to a comment on Facebook, I was able to solve the hair issue. Turns out, the hair particle emitter needs to be below the armature in the modifier panel. Once I did that, it worked as expected.
That leaves the shoe issue, which I think could be related to the fact that I applied the solidify modifier on it for some reason.
Deleted the additional geometry added because of applying the solidify modifier and the layers of multires. I’ll have to redo the sculpting detail on the shoe, but at least it is functioning correctly now.

Started the texturing. This is the shirt. It’s completely procedural I considered doing this with object or generated, but I found that UV, in this case, worked best for both the color and the weave.
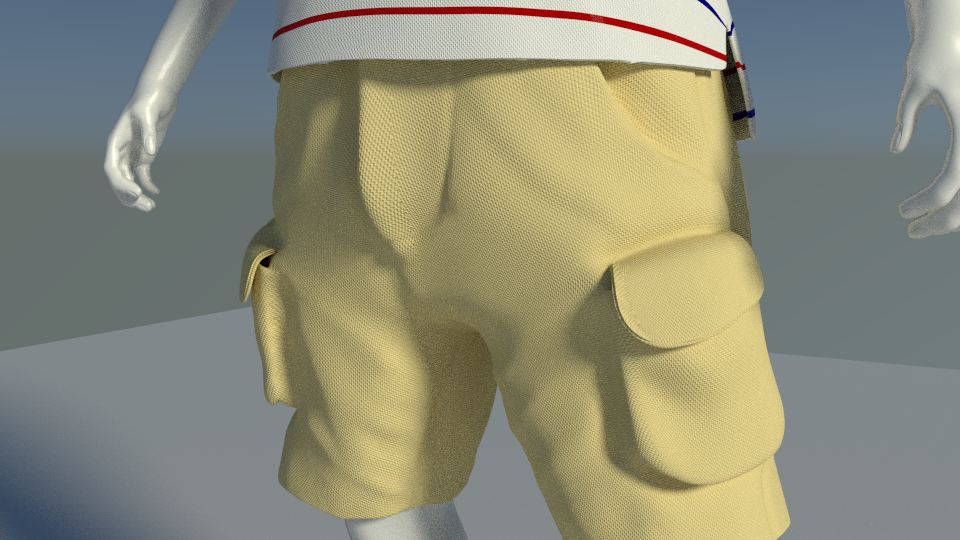
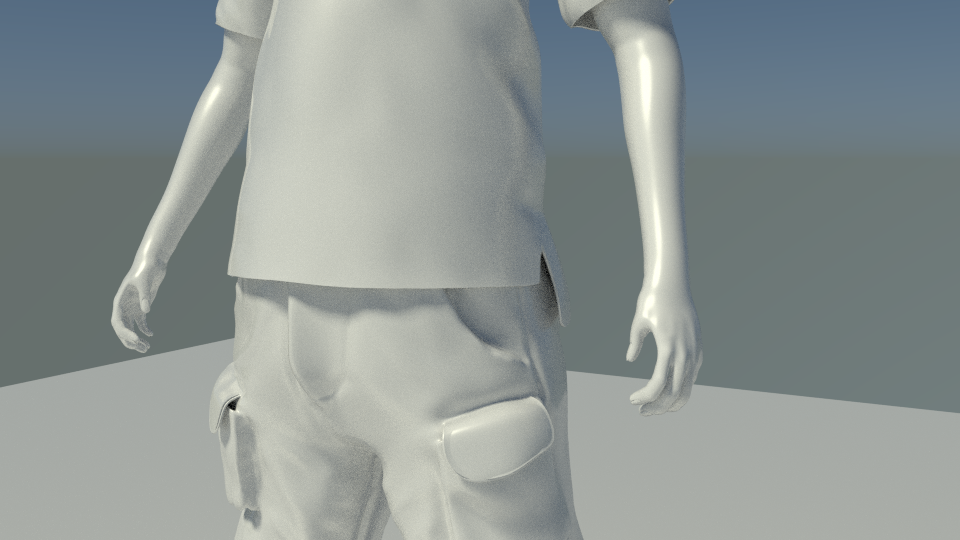
Started texturing the shorts. It’s using the same basic bump pattern as the shirt, but with a different scale. Although not necessary, I did UV unwrap the shorts. I say not necessary because, unlike the shirt, I was using a solid color and wasn’t trying to get a pattern to match properly between pieces, since I really just needed the weave pattern. It’s still good practice, though, for future projects. On this initial version, I used a tan version that I don’t think quite went with the shirt.

Here, I pulled the camera back to see the combined effect of the texturing. Notice that I switched the shorts to a darker blue that goes better with the shirt. I’ve also tweaked the Fresnel so that it works better and gave some subtle differences between the shirt and the shorts.
I’m guessing for the skin, that might best be handled, at least partially, with an image texture, so I’ll have to UV unwrap the skin portions. That’s going to be fun 
One of my projects for this week and/or next is texturing the model. I’ve never done human skin, so are there any good tutorials on UV unwrapping, texturing, and shading skin? I’m not going for a cartoon look, but not quite full on realistic either. Something kind of in between, but a bit more towards the realism side.
A little shading work done on the hair. Might make a few more tweaks after adding the skin, but I think it’s at least a good start.
Though you can’t see it here, I also did the socks. I didn’t show it, because like the shorts, it’s pretty much the same texture as the collar, but with a different scale. Only this time, I didn’t bother UV unwrapping, because it’s mostly hidden and only a small part of it can be seen.