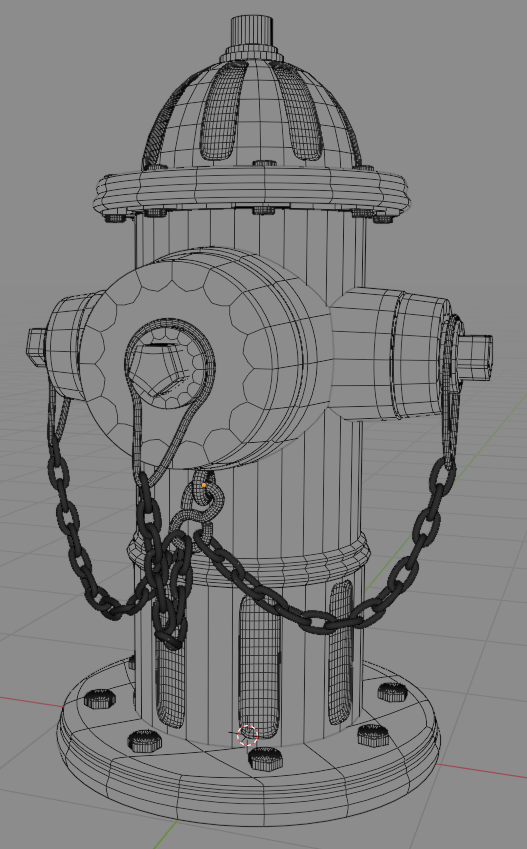
The focus for me was on modelling. I created all of it in seperated objects, exported everything into an OBJ and imported it into Substance Painter. I used the auto-unwrap function from Substance Painter.
I have two questions:
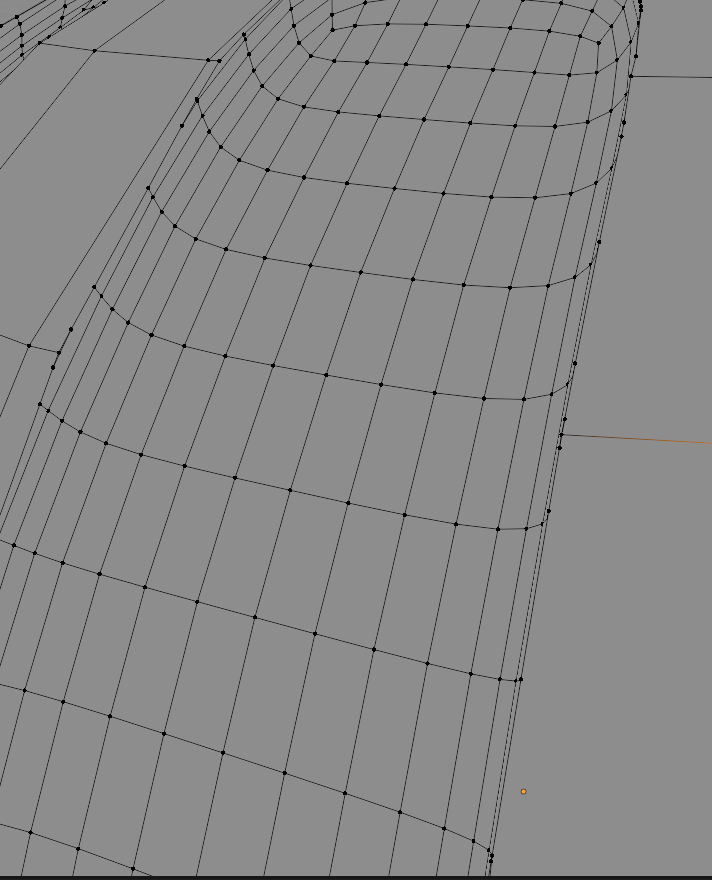
I used a Boolean modifier to create these indentations you see on the head and the base of the hydrant body. These lead to quite unsatisfying topology.
I did not fix that by now and followed the strategy “shut your eyes and advance”. Is this something you would fix… and how? Do you really start to move / merge individual vertices?
The second question is about UVs. I avoided UV unwrapping in Blender by simply using Substance Painter for auto unrwap. Whenever I finish such an object I wonder how profis would go on. Do you merge all seperated objects into one and UV unwrap after that? Do you UV unwrap every object on its own? And do you use plugins like UVPackmaster to pack everything together afterwards?
Thanks to everyone who takes the time to read this and give any feedback.
For the indentations, this looks like a retopology case. You can start the way you did it with booleans, but then you might want to rebuild that part of the mesh, with a technique like this:
In your case, you could rebuilt just the indented part, doing the retopo around a single indentation, then duplicate and rotate it around the origin of the model to create all the other indentations. Then, you could either try to stitch that to the rest of the model or just re-create those parts, as they seem to be simple extrusions.
This will not only give you a cleaner topology, but will also allow the borders of the indentations to be beveled or subdivided for a smoother look.
For the texture, you could do even better by texturing the roughness channel so the paint is shiny and the dirt isn’t. You don’t even need to create a new texture in this specific case, you could get a decent result by modifying the color texture. You could even do it in Blender’s material editior, passing the color texture through a color ramp and playing with it to get the correct level of roughness for every part.
If this is a single object that’s meant to always come together, I would make its texture as a single UV layout. It’s up to you to decide if it’s easier to unwrap each piece before or after joining them, but I would for sure join the whole thing into one object (unless you have a good reason not to like moving pieces) and pack everything into a single UV layout at some point in the modeling process.
If you are in the version of Blender, the packing tool is now able to do the same without plugins.
The quality you need to reach in the UV unwrapping process depends on the use. If you are going to be working on your own, you know how the mesh will be used and you can get away with an auto-unwrap for anything that won’t be viewed too closely.
If you work for a bigger project, a high quality unwrap with hand placed seams might be expected and good practice.
@etn249 thank you for your feedback. Retopo is something I’ve avoided so far… it feels so… yes, useless… to recreate a mesh I already see but it seems to be very common and necessary to do retopo so I think I might focus on this today. And I’ll have a look on the functions the UV tool of Blender has now
Retopo is something you try to use in limited cases, as it’s time consuming. But if you are trying to make complex shapes with nice, smooth topology, it can be the best way to do it. It’s certainly easier than modeling good edge loops floating mid air. With retopology, you can start by creating the shape of a complex object at any cost, without caring about being clean, and then make a nice mesh afterward.
The UV tool I am talking about is the “pack islands” tool. If you haven’t used it recently, it now takes concave shapes into account. Easy to use, no need for an addon anymore.
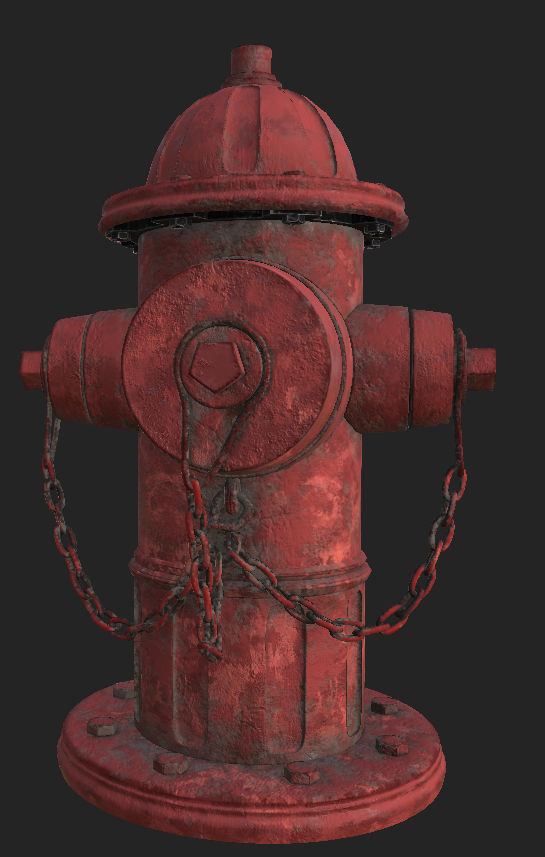
In general, a fire hydrant is usually painted with bright, weatherproof paint. It will not be “dirty” nor “rusty,” as yours now is. The only place where you might see a little dirt or rust would be on the chain or the bolts. But, usually, a hydrant is quite clean.
Your geometry is very convincing and appears to be accurate.