Reduce ambient lighting. Ambient is added no matter what light hits the model. Take a paint tool and pick the color of a dark shadow pixel. Check out the values in %-Scale ( use GIMP, better than pay soft and does what you need: use the color picker tool ) and take the values over to the ambient lighting panel. Then you need to know how strong the light should be. Pick the color of a highly lit pixel and one ( same color ) in a dark shadow. Take the difference between them ( use “value” value for this ). This tells you how strong your light source has to be to raise the lighting from ambient level ( no light contribution ) to the highly lit pixel ( full light contribution ). Usually you have to add around 10% or 20% to the light strength due to attenuation.
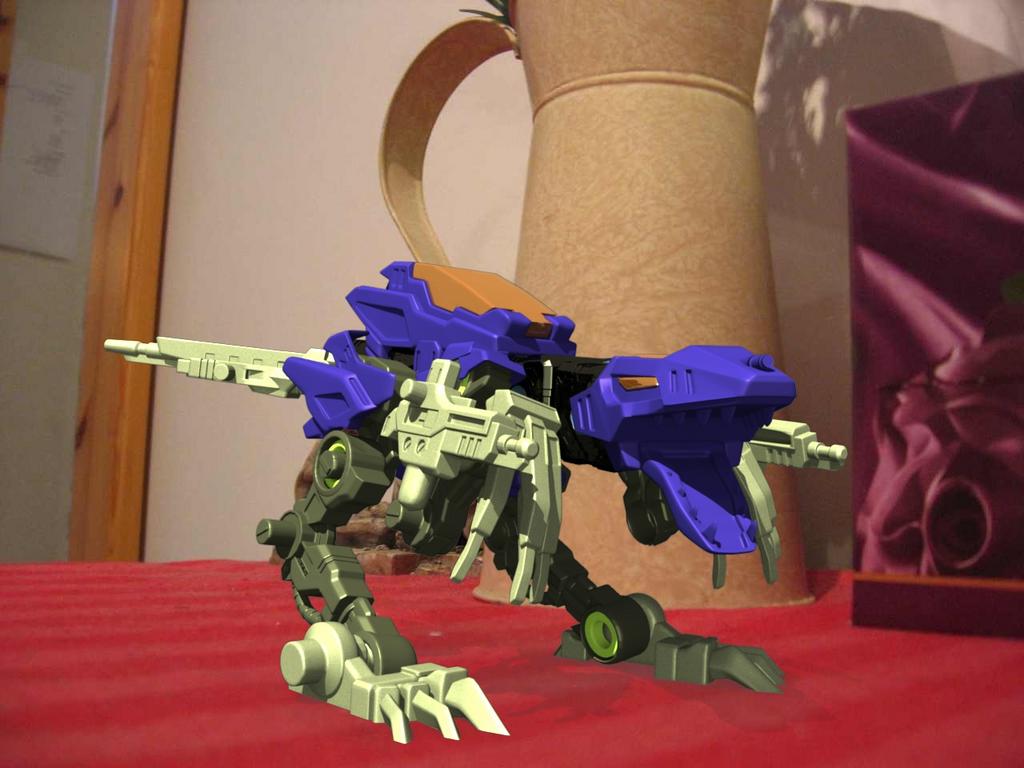
Be careful with AO enabled and light sources. AO is a “local lighting model” while the usual light sources are “global lighting model”. The two tend to bite each other. To get the lighting intensity and ambient correct disable AO altogether. Then use the zoning system to match the dark shadows and light spots with the image behind. Here for example the shadow in the jaw area is darker than the darkest shadow ( incorrect ). On the other hand the shadow on the ground is next to non-existent. Look at the shadows of the vase. They are relatively sharp. Now the shadow on the table cloth below are faint and washy. They should be of a similar quality than the other shadows in the scene.
Once you have the lighting correct you can go back to AO. Again be careful, it’s a big bitch. I never render with AO enabled. If you want a more realistic lighting use bump/normal and specular maps to break up the evenness of the surface. For a toy you can use a faint noise bump-map since plastic is porous. Use the same map for specular and you get something similar to AO without the big disadvantages this technique has. Otherwise filler-lights and back-lights are your friends to get light where you need it
OK, I tried what you suggested, the problem comes when I try to disable the AO. The way I’ve got everything set us it so that the plane that receives the shadows is set to “only shadow”. It is only visible where shadow hit it. But when I disable the AO it’s pitch black, no matter what I do to the materials. I tried using a more complex nodes system…but I’m not to great at nodes and couldn’t get anything to work. Any ideas how I should proceed? I can get your suggestions to work without the “only shadows” enabled, but then I can’t get it onto the backdrop. Thank you.
This time I have a bit troubles to get the problem you have. First off I don’t use the node system. For conventional lighting rigs and materials this is enough especially since nodes and conventional materials bite each other. Stick to one or the other for one object but don’t mix it. So for example shadow-only and nodes bite each other. Drop nodes for the plane on the ground completely and go only with conventional materials. You need anyways nothing fancy there just something to catch shadows. I hope I understood what’s going on at your side there.
This is what it looks like as soon as I disable the AO. The shadow comes from a “shadows only” material. It didn’t show up at first so I started playing with it. Usually, when I use transparencies, I immediately enable “Z transp”. I found that when I disabled “Z transp.” the shadow would show up. When I did this AO was enabled so I didn’t notice the problem that arose when AO was disabled, like I am now. Do you know what I could do?:eyebrowlift2: Thank you again.
I see your problem now. What happens is that your plane receives shadows but no light. Ambient light is though light and therefore excluded. Played around a bit and the best way would be most probably to tickle with nodes. Requires tickling with transparent rendering ( PNG output ) but I would have to give this some more testing since I never used it the way you want. I would render a color and a light pass on it’s own and merging them. Requires the Blender render setup for this to combine the things correctly which I did not touch so far. Gets a bit complicated
So I’ve decided to put off my cg on photo dilemma and start on another zoid. I went to Toys “R” Us and found out they don’t sell them anymore. So I decided to do the crazy thing. The only other zoids that I have left are gigantic. One is Gigasaurus-type and the other uhh… long-neck-type. Both are over a foot long. But since I’ve had nothing better to do, I’ve decided to just “have at it” . From now on this is just my zoid thread I guess…
Anyway! I’ve finished the lower jaw! Here are some pics: