Hello! I am new to this forum, and a relatively new Blender user (I’ll post some of my works eventually) but I’m having a horrible time figuring out how to make a relatively low poly human base mesh. I’ve found many tutorials, but some of them skip parts of what they did, and I don’t understand how they did it. The main trouble is topology. I can’t quite figure out how to rearrange the faces so it’ll look/rig right. Help is appreciated!
Bump.
Anybody? I would really like to get started but I just can’t get the hang of it. 
Just google “head topology” and you will get hundreds of examples.
If you have problems creating the kind of topology shown in pictures, you might want to do some more basic blender tutorials to get used to the interface and modeling in general.
I’m used to the interface, no worries about that. I’ve done quite a bit of stuff (I said relatively new because it hasn’t been a year yet, but it’s coming soon now that I think about it) The problem I’m having is mainly getting the edge loops right around the mouth, eyes, etc.
of course you might want to look into MakeHuman to see a currently working example
Anybody? I would really like to get started but I just can’t get the hang of it.
Post some tries first.
A grab screen.
What you ask is maybe more complicated than most of blender users think.
Because it is related to what you have in mind. What’s your plan.
A friendly retopology for animation became quite different to what the multires modifier loves to see.
I mean:
Maybe two retopo procedures need to take place.
One for sculpting. I this case, an evenly distributed mesh is needed, not many and complicated loops.
A second one, loops where animation procedures ask for.
As I said, it is a little more complicated.
Start posting your tests.
Okay, I’ll try to start posting them, though I honestly think they’re horrible. I just have no idea where to start. Every tutorial I find says something different. I know it’s one of those thing that doesn’t have an “easy” way, but it would be nice to find some agreements within the tutorials. ![]()
It’s the edge loops that are messing me up, mainly. I can’t figure out how to get the edges set up around the eyes and mouth and such. I’ve seen where people start out with a cube/sphere and shape it from that, but I’ve also seen numerous other ways. Is there one that is most efficient?
In theory, No.
The one that is the most efficient in practice is the one you have the most experience with. Eventually, you’ll wind up using a combination of methods. The best anime head I’ve done so far was box modeled following a Maya tutorial. I like the shape, but the topology needs work. So I’m going to have to go in (one of these days) and fix some of the loops, especially around the muzzle (nose and mouth combination – humans have them, too.) Others have good results sculpting the head and retopologising the whole thing. Still others just use poly-by-poly modeling: creating the loops first and connecting them up.
So, follow michalis advice: start posting your tests. Horrible or not. (Everyone’s first tries are horrible. We won’t point and laugh… too much…) You’ll progress a lot faster if we have something specific to give you advice about.
Thanks Orinoco! I’ll get the pics uploaded soon. It’ll mainly be head models (I feel like the body isn’t gonna be as much of a problem at this point. Not as many edge loops and such to deal with in such a specific manner)
There are some topology sand-traps on body meshes, too. Notably the shoulders, hips and hands (and feet, if your character has toes). The main consideration on the body, though, is putting in loops to get the shapes you want, especially with well muscled or ‘endowed’ characters. You do have deformation considerations, but there are relatively few places that deform on the body (with the exception of fingers) compared to faces, where everything moves around.
Thanks again Orinoco!  Every bit of advice helps. I think I’ll be able to get the deformation right on the body. I found a really good picture illustration of how finger meshes deform. I’m gonna give the head a couple more shots before I post anything. But don’t expect anything amazing.
  Lol
Lol
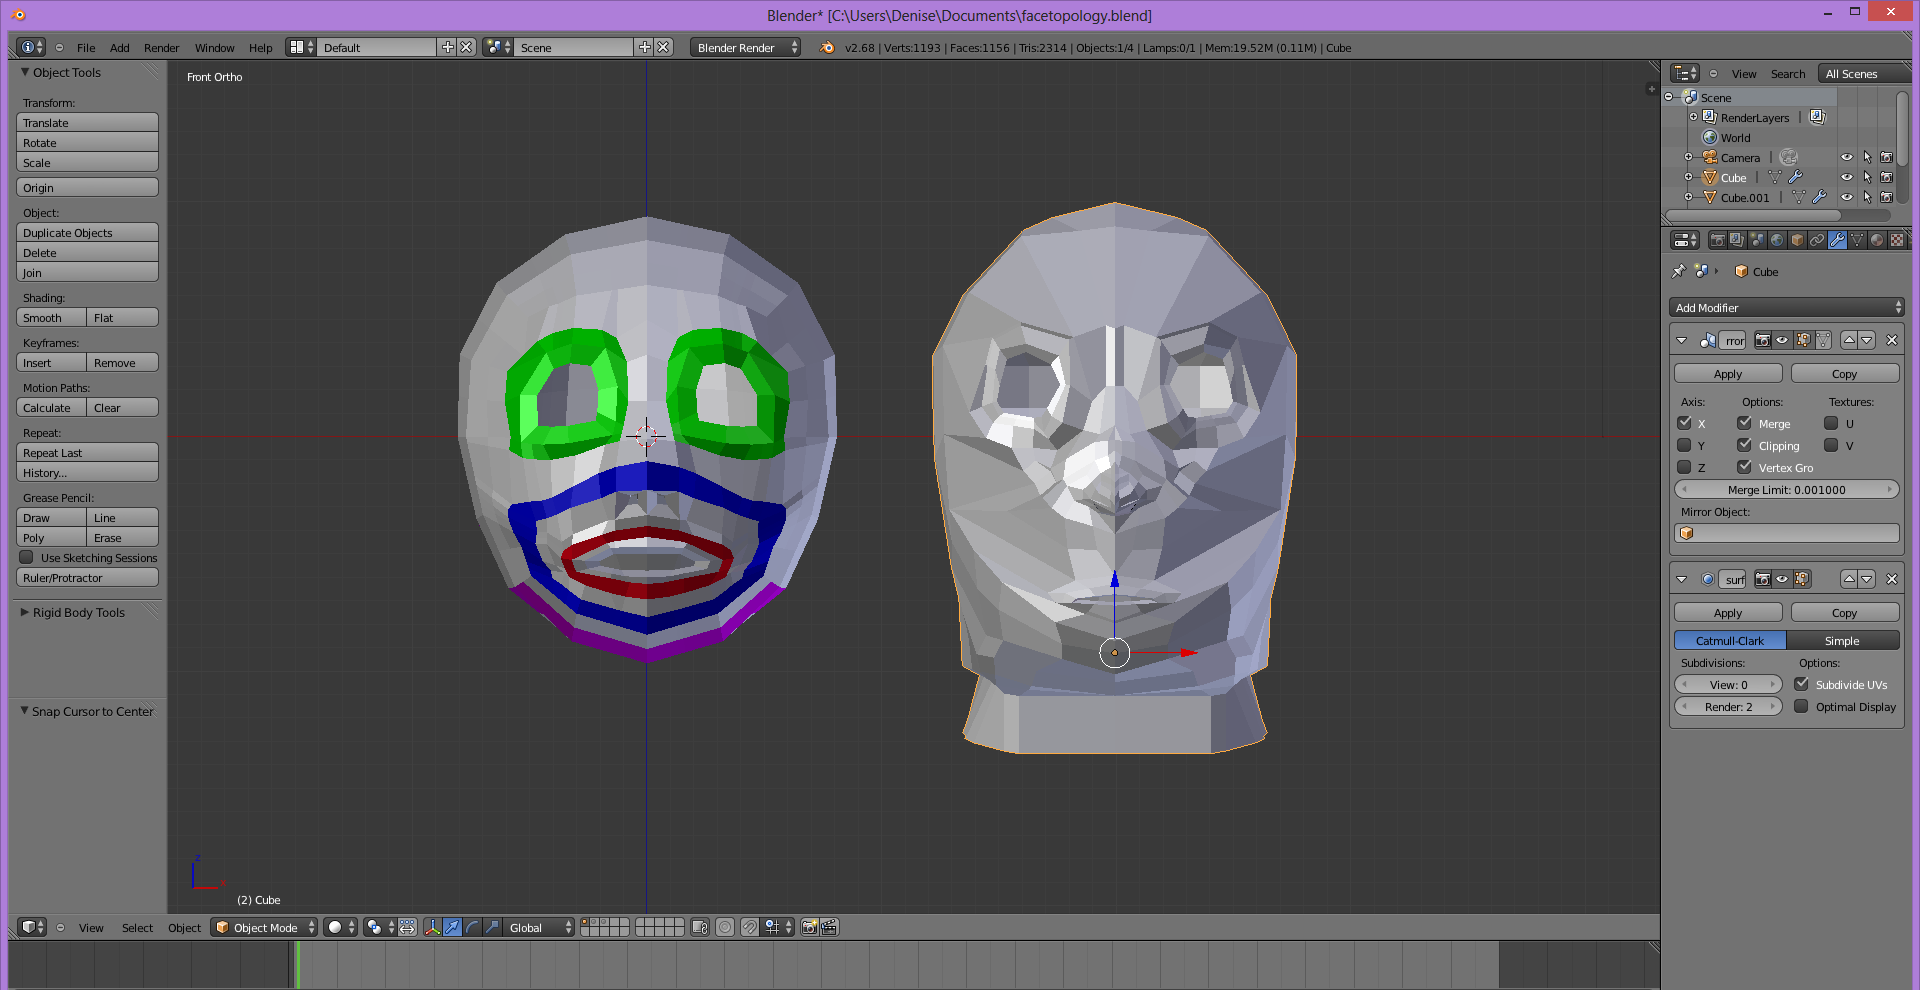
Here’s what I’ve got. The one on the right is the first try I made (No laughing ![]() )
)
The one on the left was done differently, but was better I thought
(Hopefully this picture worked right, never used it before on here. ![]() )
)
You have the basic idea down here - specifically with the Wilson head.
You should look up anything you can get your mitts on by Jonathan Williams that has to do with topology - he has several at Blendercookie.com you can watch and some really good ones you need to be a Citizen for. I expect, by the coloration of your edge-loops here you’re already somewhat familiar with his work.
I would suggest ‘female body modeling’ and his ‘modeling a male (or human, I forget) head.’ These are indispensable resources for us would-be character modelers.
The other aspect is to drill/practice.
The left head’s topology looks pretty good, what I can see of it. I’d suggest you take your screenshots to look similar to this:

Note: Mesh is in EDIT mode, wire select mode. Nothing is selected. The manipulation widget is turned off and the 3D cursor is outside the viewport. There are no background images, and the grid and axes display are also turned off. It is in Ortho view, and zoomed in to make the relevant mesh as large as possible. The other Editors are minimized and any 3D viewport panels are toggled off. In this case I’ve split the 3D Viewport into three to show a front, 3/4 and side view.
Since you can have three attachments per post, you can do the three views as separate screenshots if you like. The idea is to give as much topographical information as you can with minimum visual distractions.
[ATTACH=CONFIG]296472[/ATTACH]
Here is a reference drawing (front, 3/4 and side) from Jonathan Williamson I frequently use, and

here is another from Sergei Caballer.
Coloring in the face loops is a very useful technique to use in the beginning to help keep things straight. Just make sure they actually are face loops (if the loop cut tool can select them, they are a legitimate loop.)
@DorienVincent, I will look up those tutorials, When you say a “citizen” though, you mean on the website? I may end up making an account there then…
@Orinoco, Oh man, I never thought to open more viewports. I was gonna do wireframe but forgot, I’ll remember to next time.
Oh ya! That’s the picture I saw that Jonathon Williams did. He seems to get a lot of praise around here. I’ll definitely look into his tutorials.
I’ll post more pics here as I do more work. I might try to find a couple reference pictures too, it’s really hard to do without a guideline.
Yup, but Citizen is their special paid membership to access all their top-notch tuts. It’s worth the investment.