I am working on a VR-project for my studies right now. The topic is hospital simulation, especially operating rooms and the equipment inside.
I am struggling with the ceiling-mounted OR-Lamp. I got a pretty nice model from a manufacturer, but this comes unrigged. I want the user to be able to play with it in VR (based on UE4). So I thought it would be best to use bones to rig the lamp.
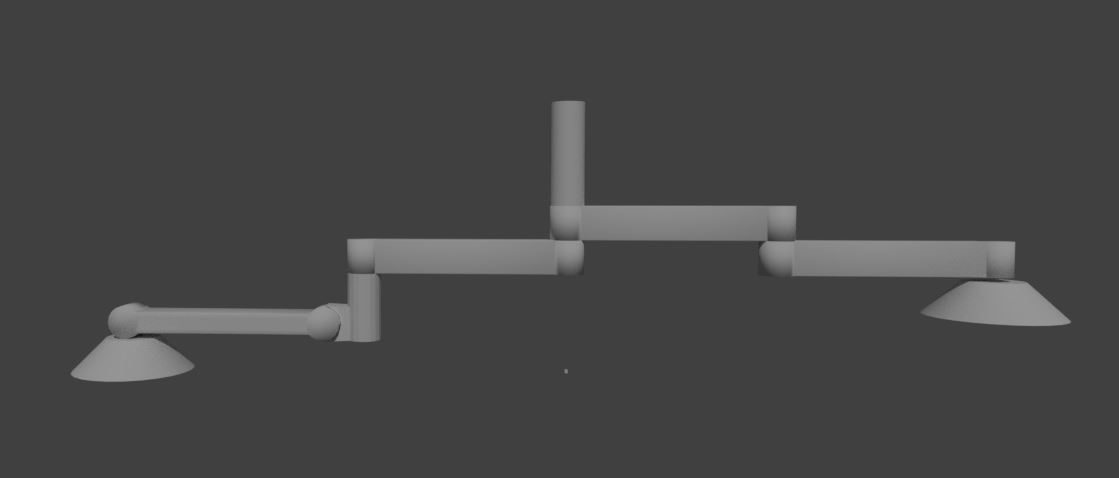
Well, right now I am not able to complete this rig, because I am a realy starter when it comes to rigging. To test it I used a simple OR-Lamp model that i built. I will attach it to download.
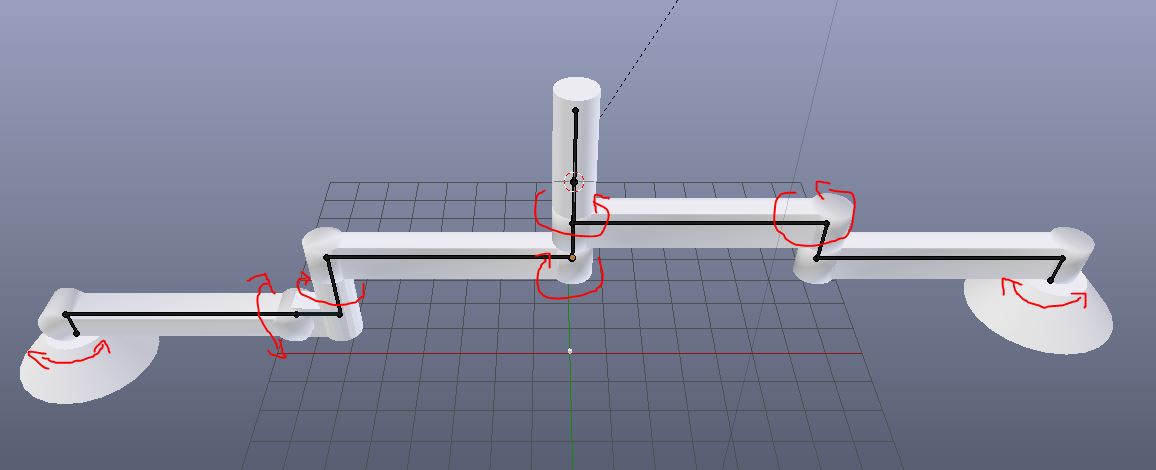
What I achieved was a simple bone structure and parent it to the mesh. Whenever I rotate on arm of the lamp, it twists the mesh. This should not be possible. Any advice how to fix this and properly rig this lamp? I guess it’s very simple, but my skills are not good enough, yet
The problem is you are skinning it with automatic weights. This good for flexible rigs on creatures, but so good for mechanical rigs made of a series of rigid objects.
First of all: put the rig into rest position, remove the armature modifier, and remove all the vertex groups.
After that you have two options:
either split it into separate objects, one for each separate moving part, (using L - select linked vertexes and P separate) and parent each object to the correct bone,
or
Parent it to the armature, but select with empty vertex groups. Then go through using L - select linked vertexes and assign these vertexes to the correct vertex group/bone still in edit mode. It will help if you tick the names tickbox in the armature buttons so you can see the names of all the bones, so you know which group to assign the vertexes to.
Thanks for your answer!
I tried your first suggestion and this worked as intended. Very nice.
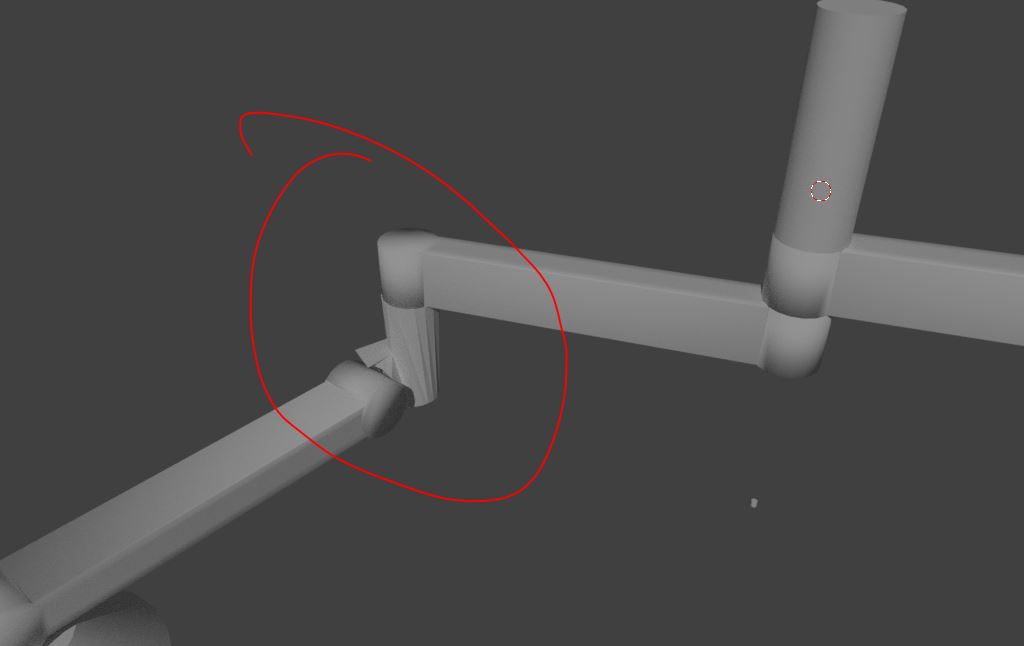
However, when I export the skeletal mesh and import to UE4 it would import all the individual pieces.
So I guess I need to do your second solution, but I don’t really understand how to do this by your description.
Could you specify the steps, please?
Basically, you want each vertex to be entirely in one bone group. This is why it’s easiest if you start by deleting all the vertex groups in the mesh properties in edit mode. Weight paints and vertex groups are the same thing.
Select your rig and click “Rest Position” in the rig properties.
Select your mesh and press Alt+P - remove parent
Remove the rig modifier from the mesh
Go to mesh properties for your mesh and remove all the vertex groups.
Select your rig. In the Rig properties, view, select “name”. This will mean you can see the name of each bone in the rig.
Parent your rig to your mesh, and select Use Armature: With Empty Groups
Go into edit mode for your mesh
Select each individual rigid object with L, and in the vertex group panel in Mesh Properties, select the appropriate bone by name and hit assign.
Go to Pose Position to see if it looks OK every so often.