Hello there ![]()
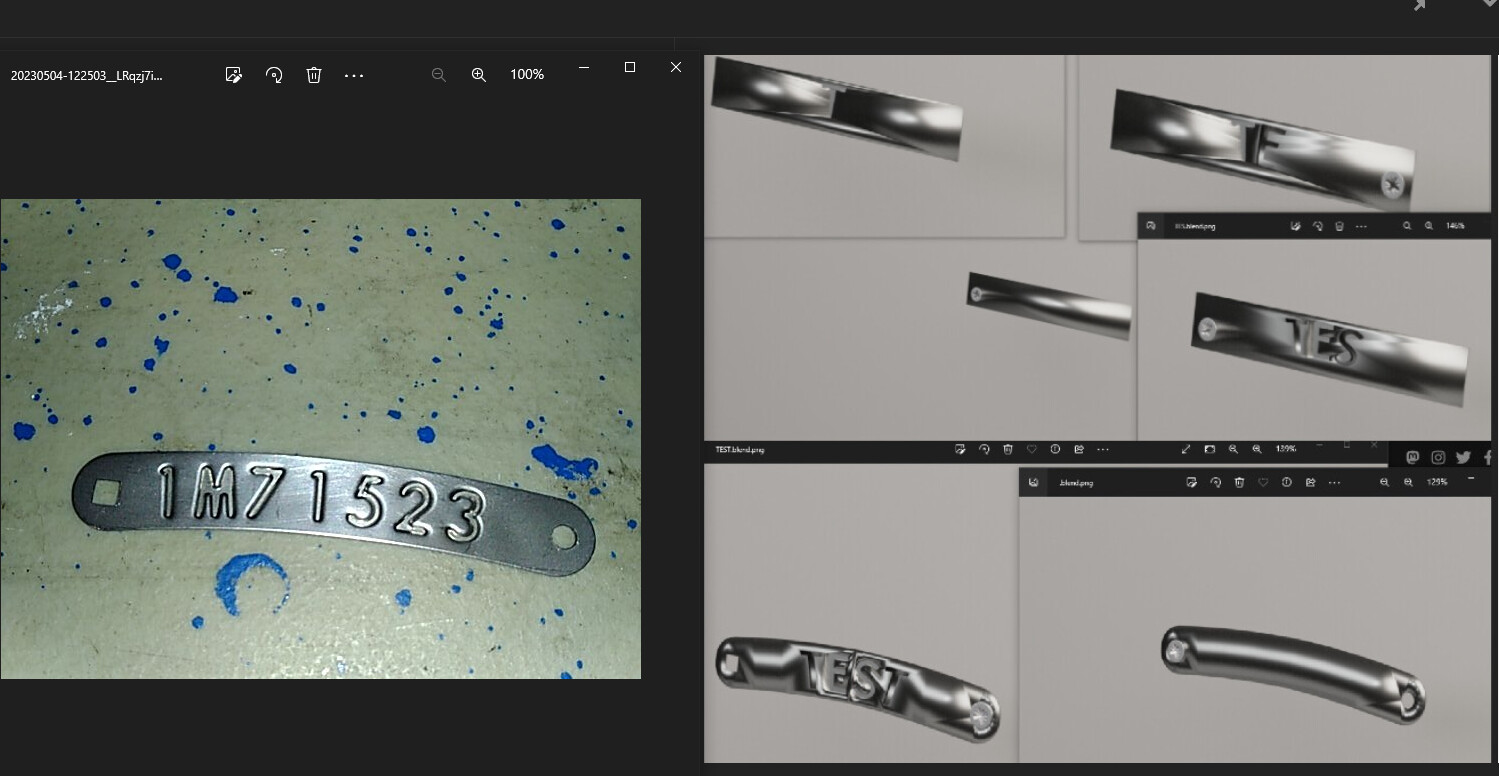
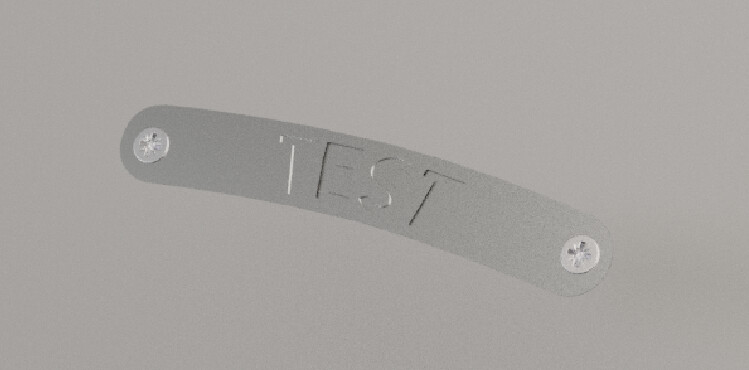
I am trying to set up a really simple scene in blender to make a proof of concept. What I want is to output render images of a metallic plate with some text engraved on it. I took a free material of aluminium here (https://www.turbosquid.com/3d-models/3d-door-handle-modern-model-1679728) What I did was starting with a cube, change it scale to make a flat long plate, put material on it, then make text, solidify it, use a boolean modifier to engrave the plate. Somehow the result is really ugly when I add the text engraved on the plate. Is there anyone with some blender knowledge that could explain me what I am doing wrong, or propose me an alternative method to acccomplish the desired output ? (at the end, I would like something looking like the picture on the left
Welcome ![]() …
…
as far as i can see you rplate does have some additinal curvation… (along the short border) and the different examples do have a different slope to the ends… i assume it isn’t subdivided enough ?? The T has a very long are and the TEST a very short…
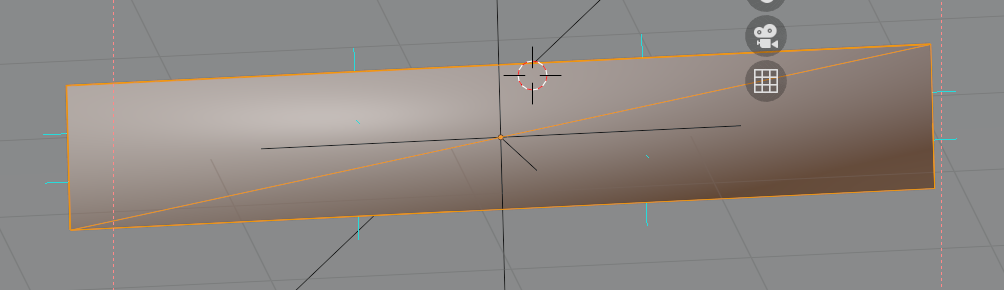
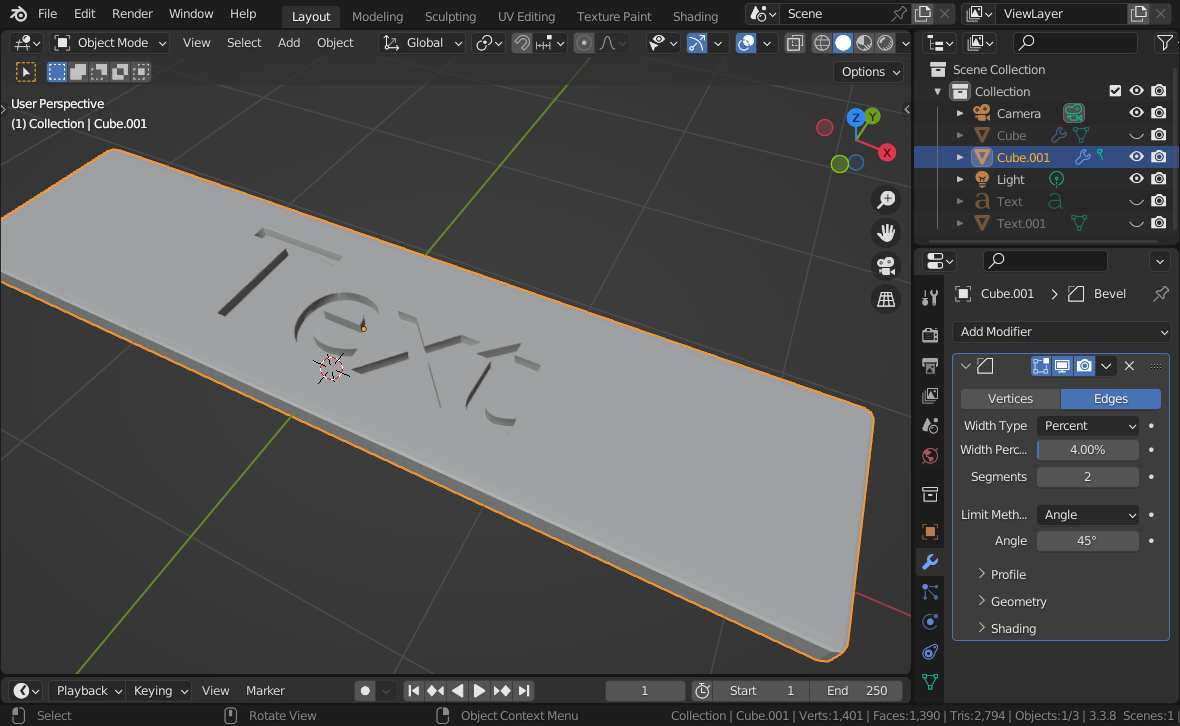
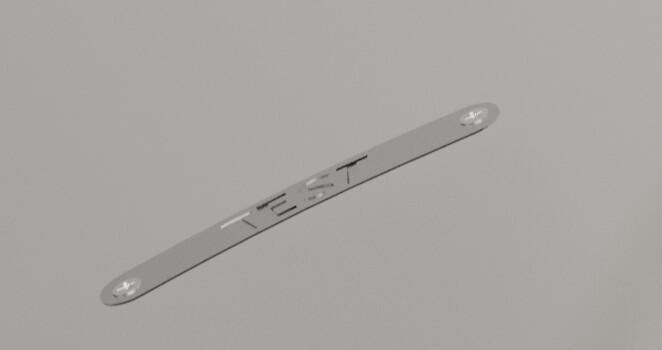
so If I started with a cube that would be subdivided (let’s says it would have 100 vertex instead of 8) that would solve this issue ? My plate currently look like this before adding text engraved
The issue is normal-related. Or in simple words: the horizontal Faces next to the vertical faces cause this issue.
You have several options, depending on your plans.
- use EdgeSplit-Modifire for the most lowpoly solution
- add an Bevel Modifire (Set Angle limit to around 45deg and increase the Segments to 5 or more)
- use the bevel version plus additional Subdivision modifire (this will probably return in the closest appearance next to the original)
Best regards
To me, this just looks like a model with sharp edges that is shaded smooth.
Assuming you are in a recent version of Blender, just select the model, right click and choose “shade auto smooth” and choose an angle that keeps the hard edges hard.
Right now, Blender is trying to shade the model as if the surface was smooth and curved, which messes up the sharp corners.
Thank you so much for your help everybody ![]()
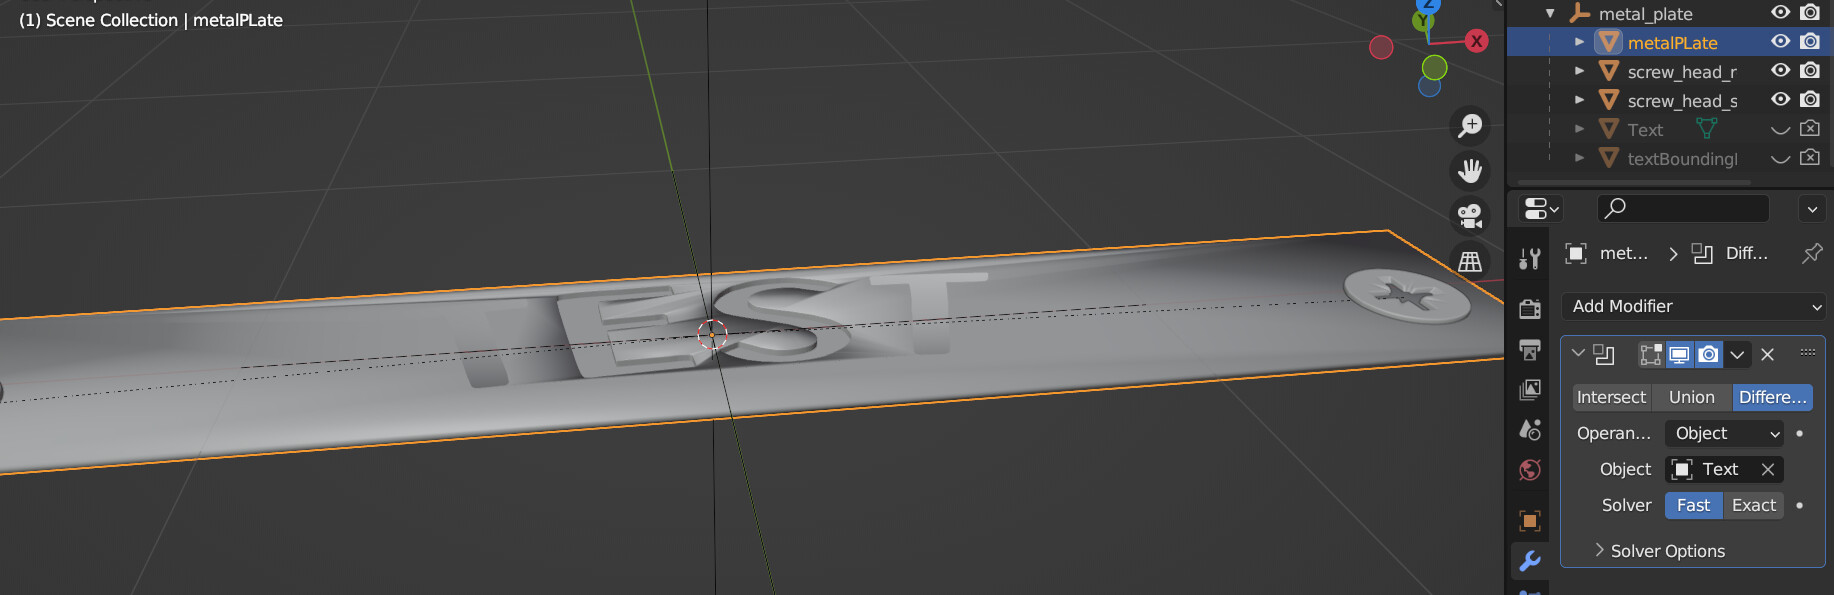
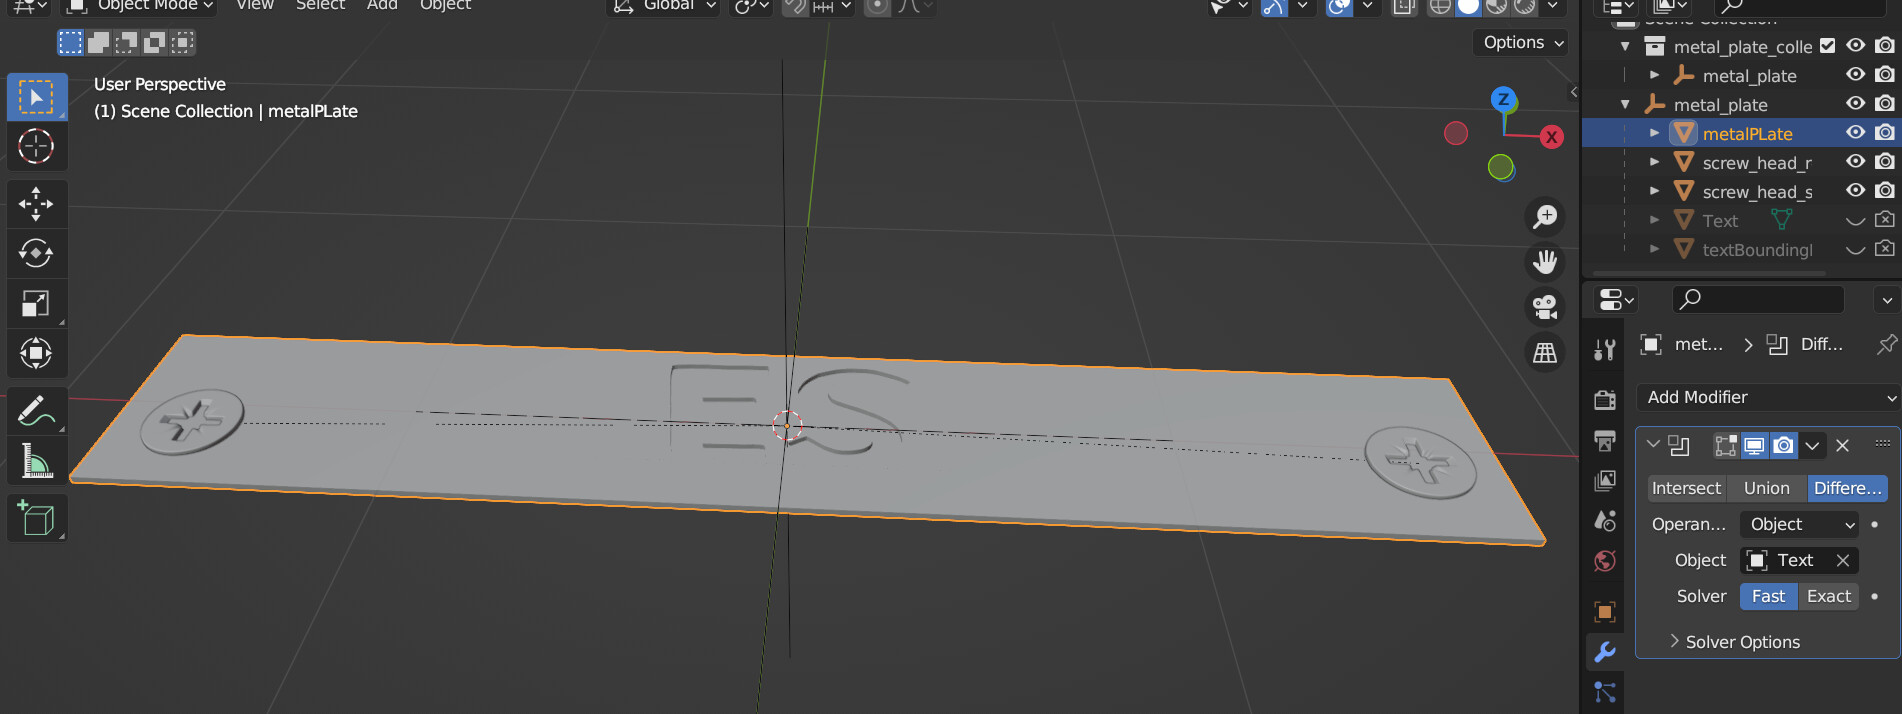
right click → shade auto smooth seems to work great ! But both 'T’s have dissapearead ![]()
before :
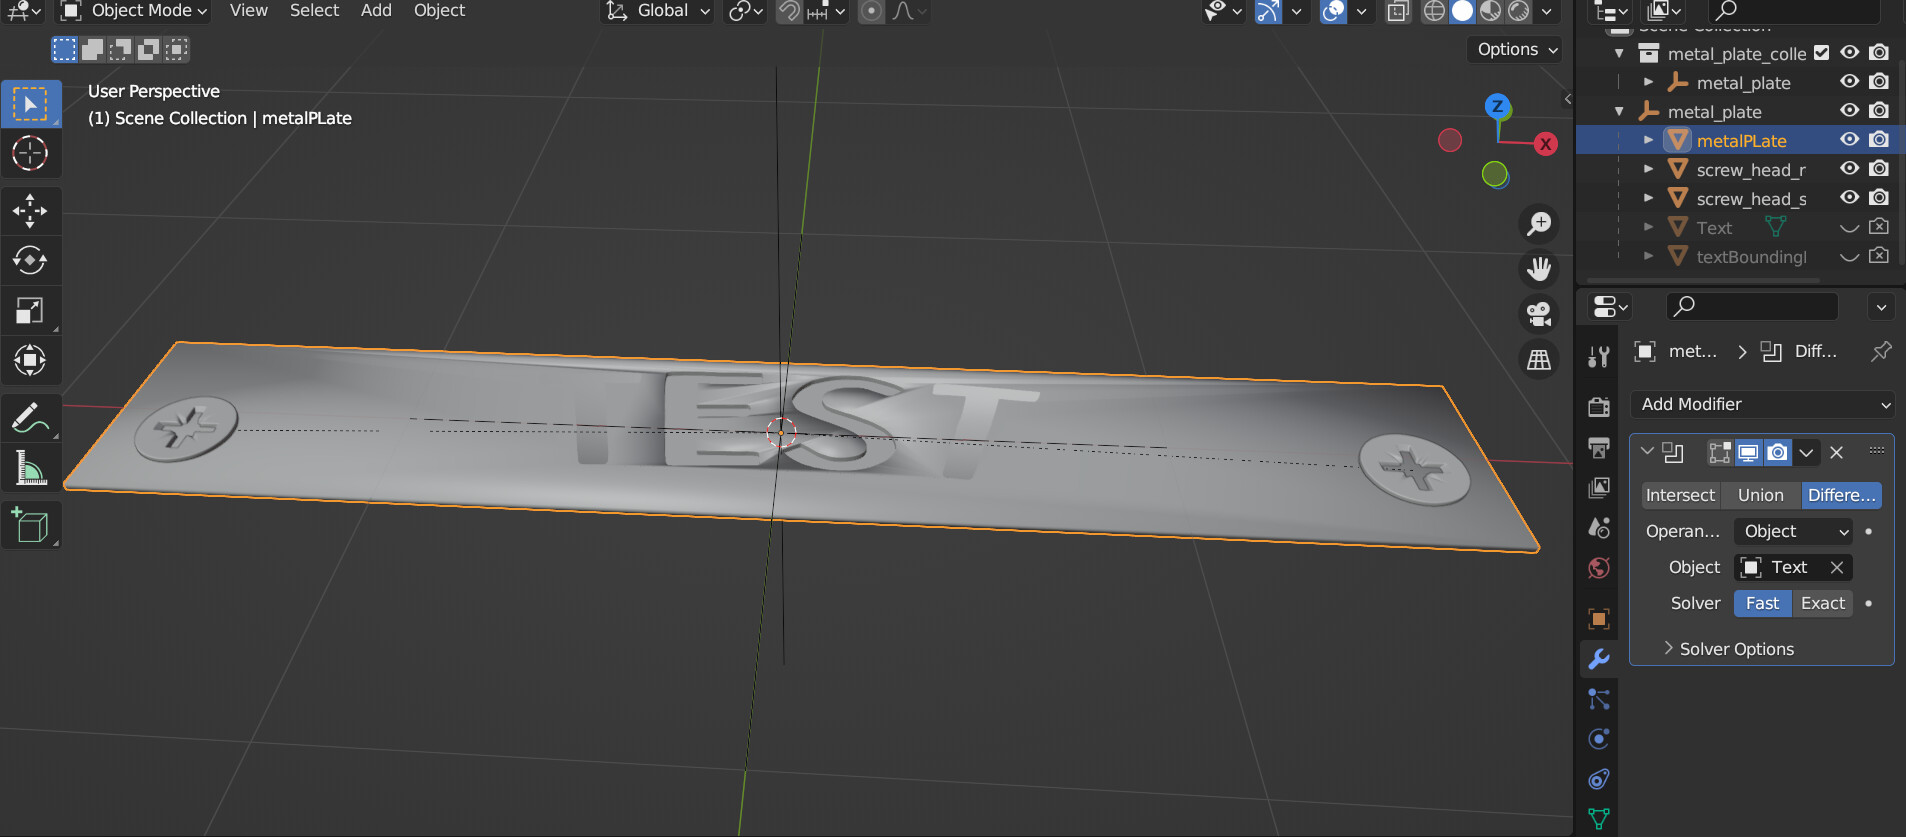
After :
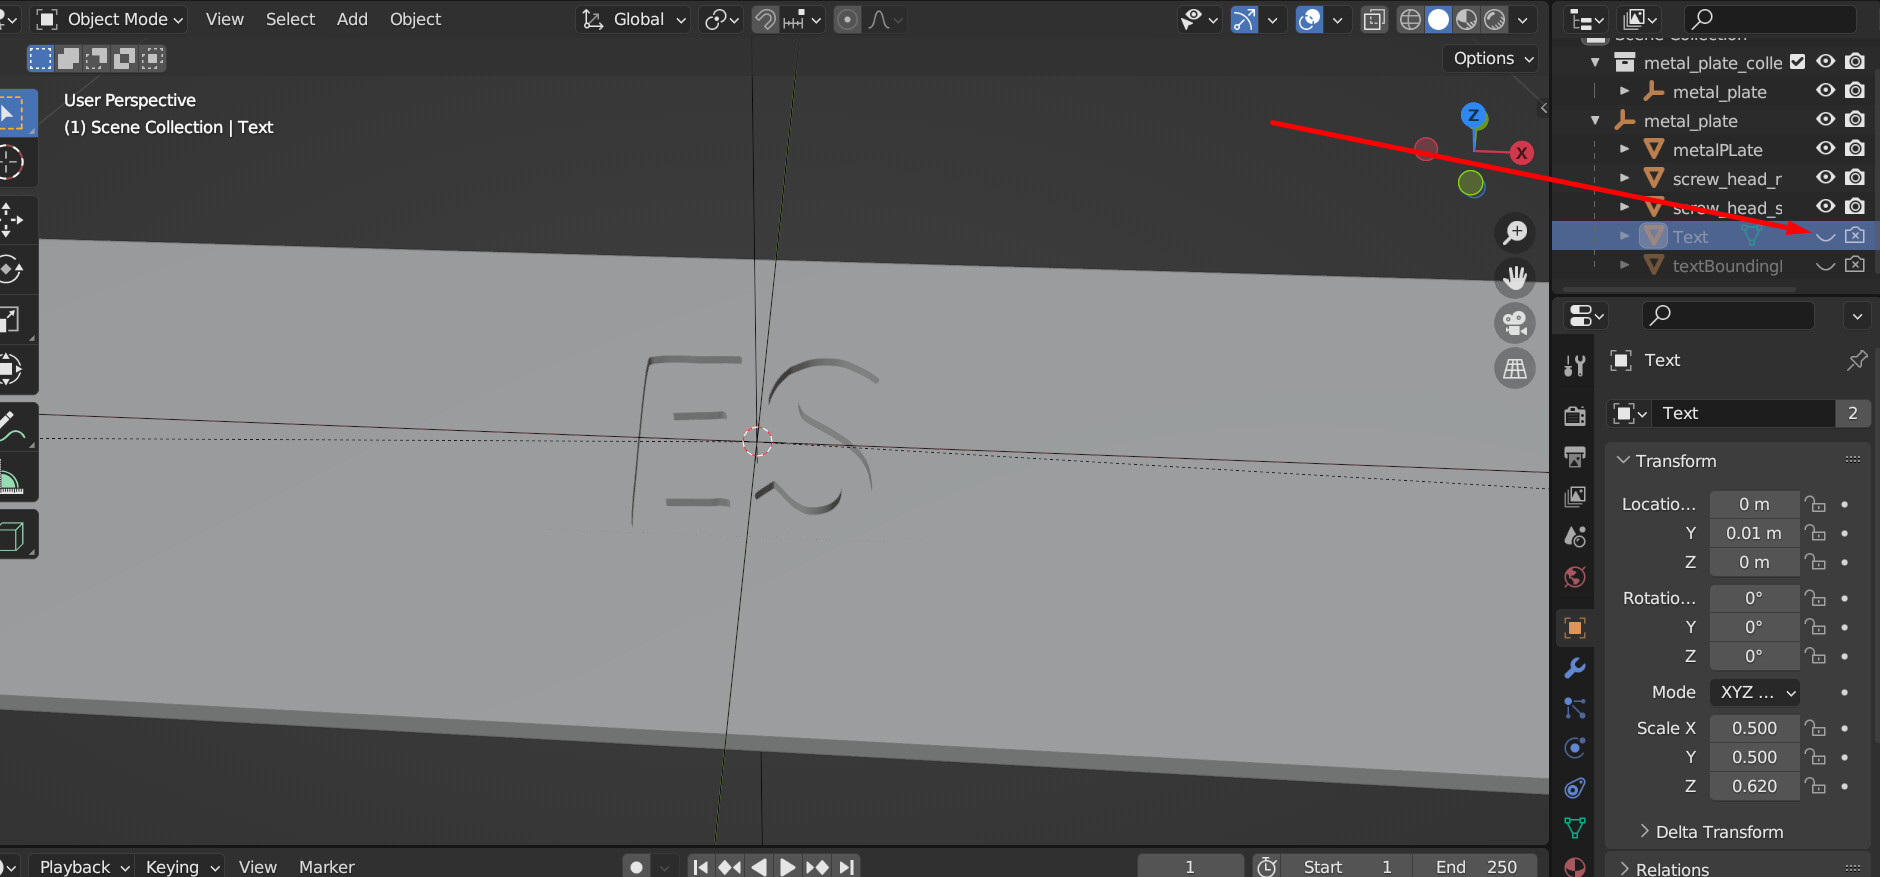
Maybe I should mention that the text have a “simple deform” modifier to add it a little curve
I tryed to reduce the text size but it doesn’t change the fact that first and last letters are lost
Here is what the “text” object looks like

“Assuming you are in a recent version of Blender, just select the model, right click and choose “shade auto smooth” and choose an angle that keeps the hard edges hard.”
→ How can you choose the angle ? I could just right click on the “auto shade” option but didn’t notice any parameters
are you doing the auto shade via geometry nodes? or just in the viewport window?
I right click in the viewport to test it. How should I do it ?
with the viewport, when you first click on “Shade Auto Smooth” there should be a little box that pops up in the lower left of that same pane: " > Shade Smooth " … expand that box, and that’s where you set the angle. by default, should be 30deg, which should work fine for your letters.
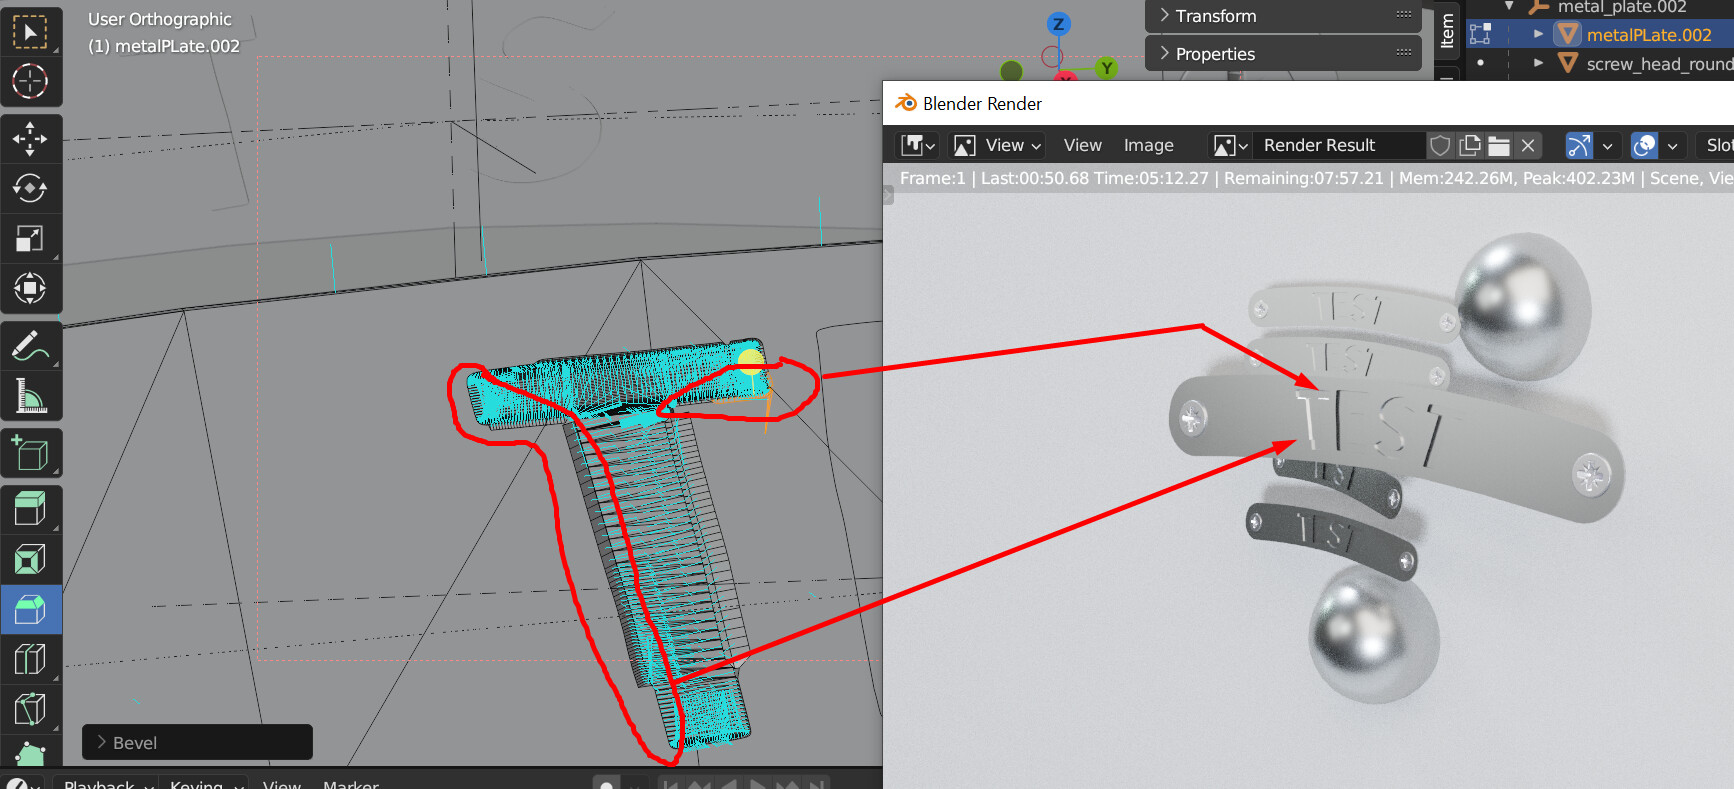
Looking at your previous images, it seems the T’s were never really engraved, they just appeared in the shading. Something is wrong with the boolean, it’s a tool that can fail in certain situations.
-
You could try switching the boolean solver to exact to see if it works better in this situation (each solver has situations where it works better, so it’s good to try both).
-
Make sure the letters and plate don’t have modeling mistakes in them. Booleans are meant to work with meshes that are fully enclosed, with no overlapping faces and normals that point the correct direction (meaning the surface isn’t inside out. Go into edit mode, select all and press shift+n to recalculate the surface’s direction).
They should appear in a little pop-up window after you do the operation.

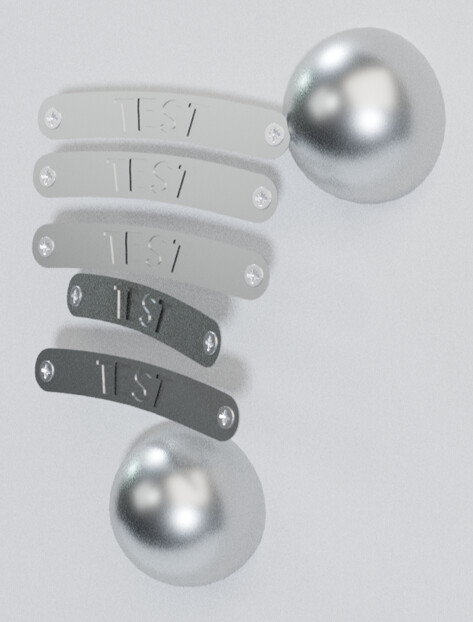
So I went over the process again and this is way better
I guess I need to adjust the light and the camera angle to get a shiny reflect

I am just learning blender so every advices are appreciated. Thanks again for the help <3
Getting closer!
When using a metallic material, there is a very important thing to understand: a fully metallic material is composed of pure reflection.
This means that if you want your object to look right, it needs to have something to reflect. You can either model a scene around the object with different colors and lights that will reflect on the object, or go the quicker way and use an HDRI background (special backgrounds that contain realistic light information, you can find some for free on the Internet, you will need to search for how to use them).
Something else that could help, if you feel like trying it, is adding a small bevel to the object. It will make the sharp edges catch a little bit of light, allowing the shape of the object to look more defined. In your case, since you are doing the booleans using a modifier, you will want to add a bevel modifier after the boolean.
I’m not sure if it will work well on your model without having seen the polygons, because if there are edges that are very close to each other anywhere, a bevel could cause overlap problems.
It might also bring back the shading issues that existed previously (because it makes the angle of the corners more gradual), in which case you could choose a smaller angle for the shade smooth, or use the “harden normals” option on the bevel modifier.
Thanks for the inputs. I am now using hdri sky
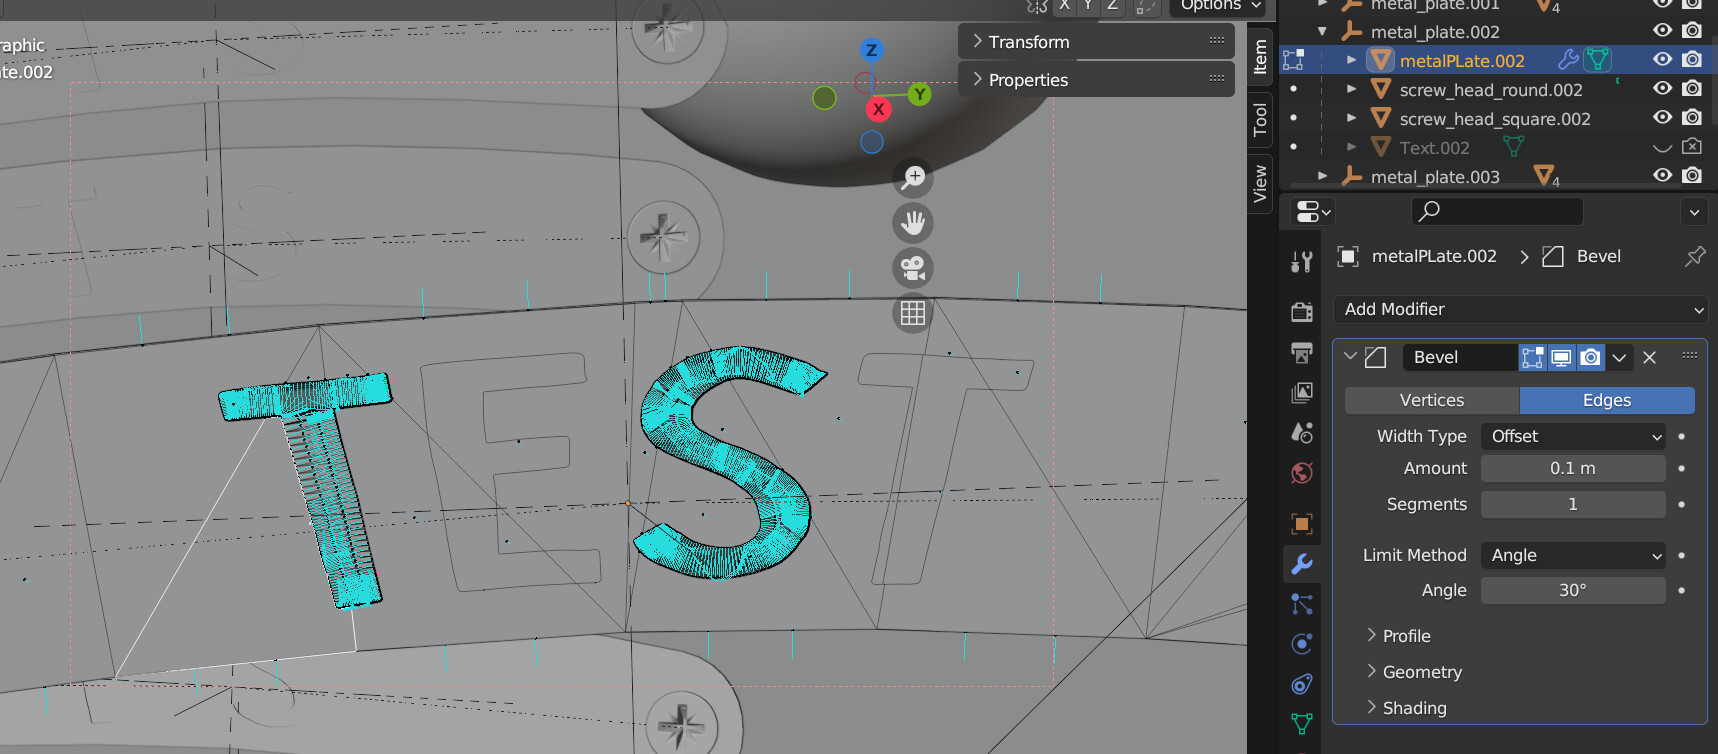
I would like to use the bevel to round my edges as you mentioned, but I have hard time trying to use the bevel modifier on my plate and it doesn’t seems to change anything.
Beside, the geometry looks suspicious to me (
I will try from a basic cube again (instead of my plate model) and without the custom font to see if it behave differently
After seeing the polygons, this might be a somewhat difficult case for a bevel.
You have 0.1m as the bevel amount. Depending on the scale of the plate, that might be way too much. Don’t be scared of trying very small values.
Something I notice is that the bevel seems to append, but only on one side
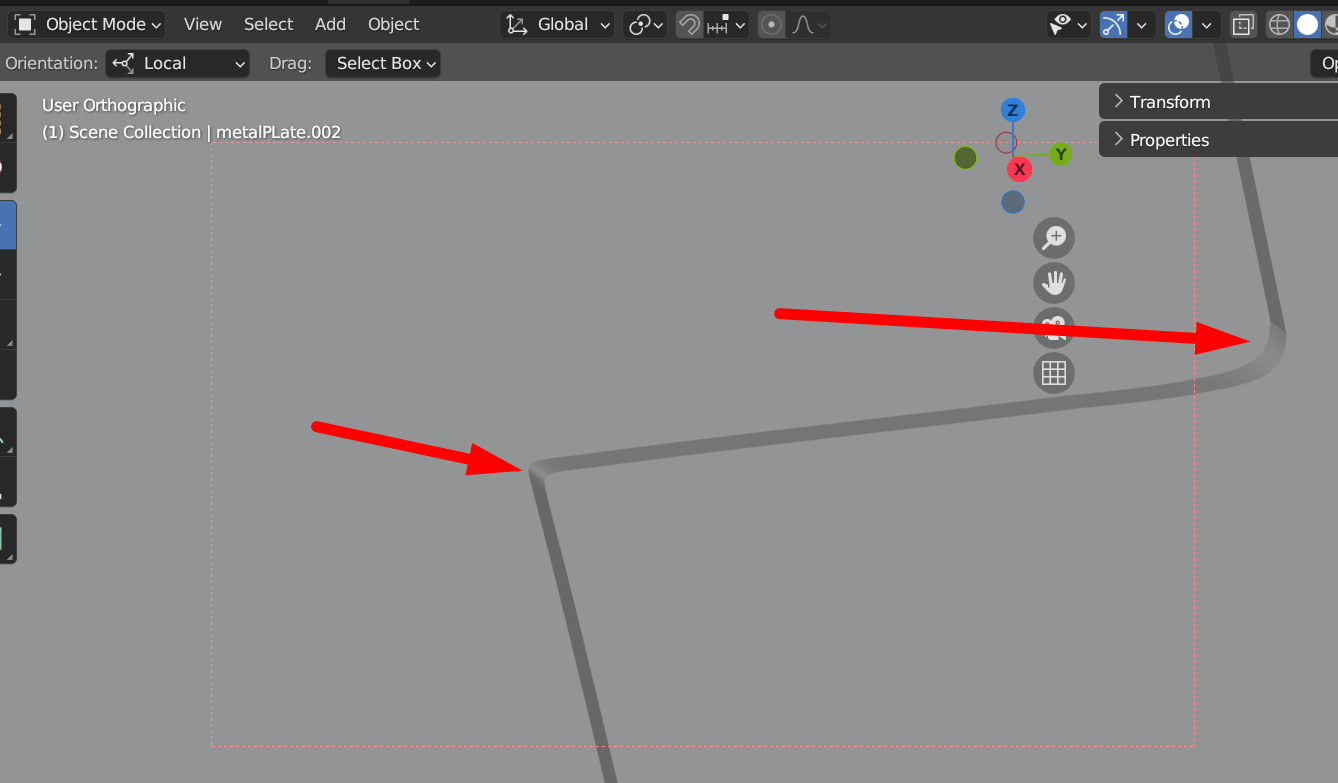
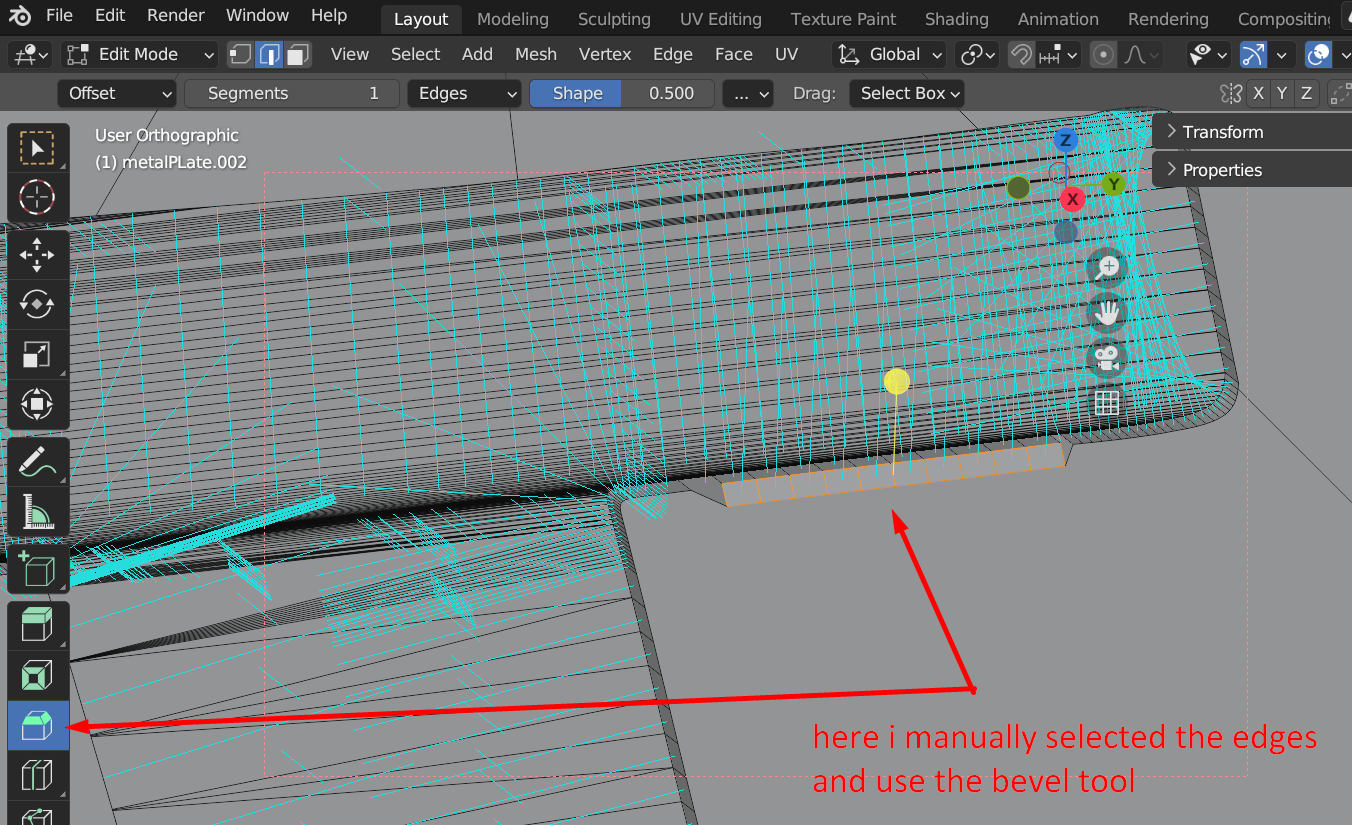
Manually using the bevel tool, I am able to choose the correct edge
Is there a way to select only the edges shaping the letters and apply the bevel tool in python script ?
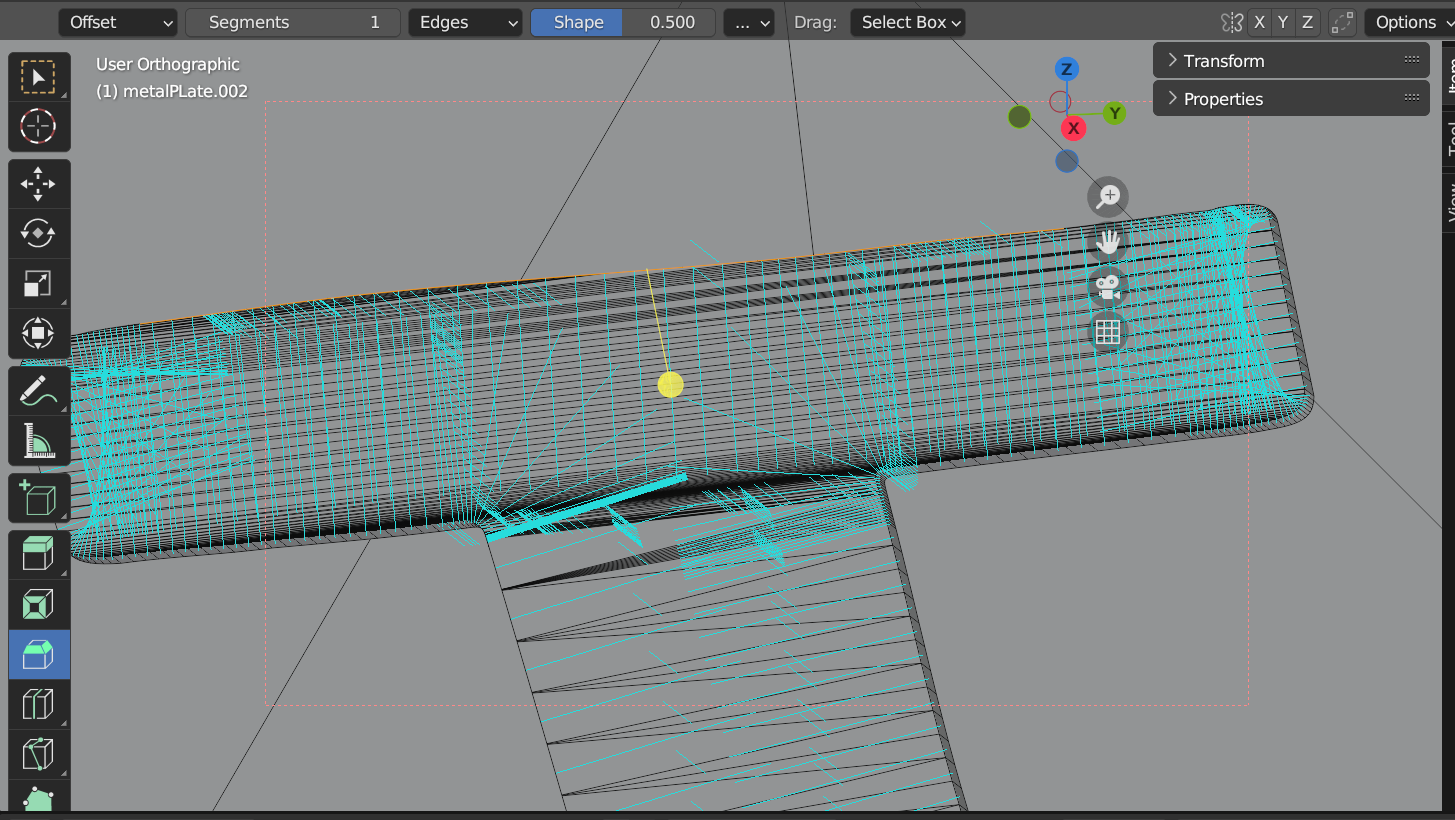
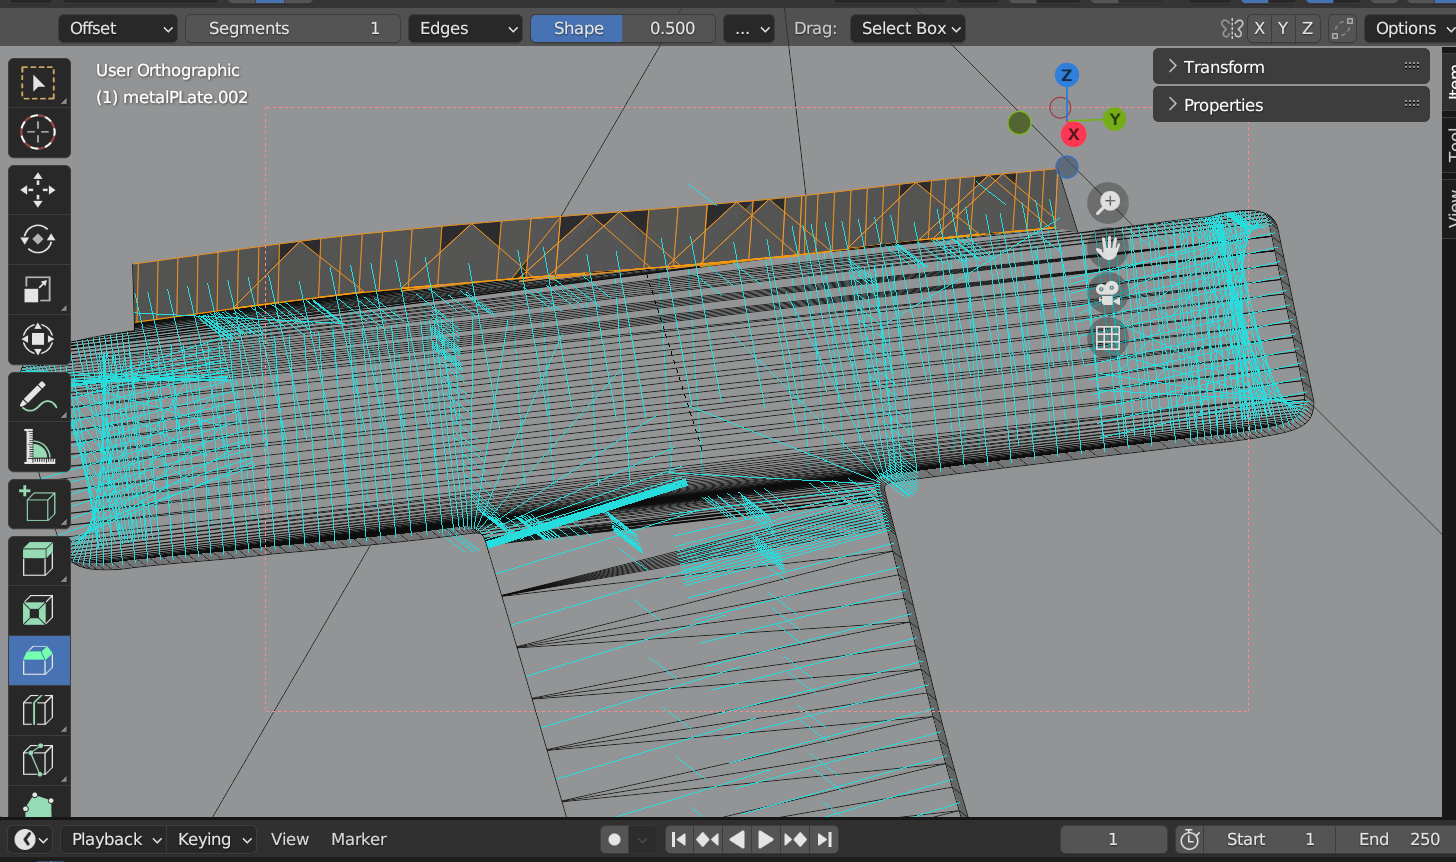
This last image seems like the result of messy topology. Those diagonal edges in the bevel suggest there was something weird going on in the edge’s structure before the bevel was applied.