Hi there,
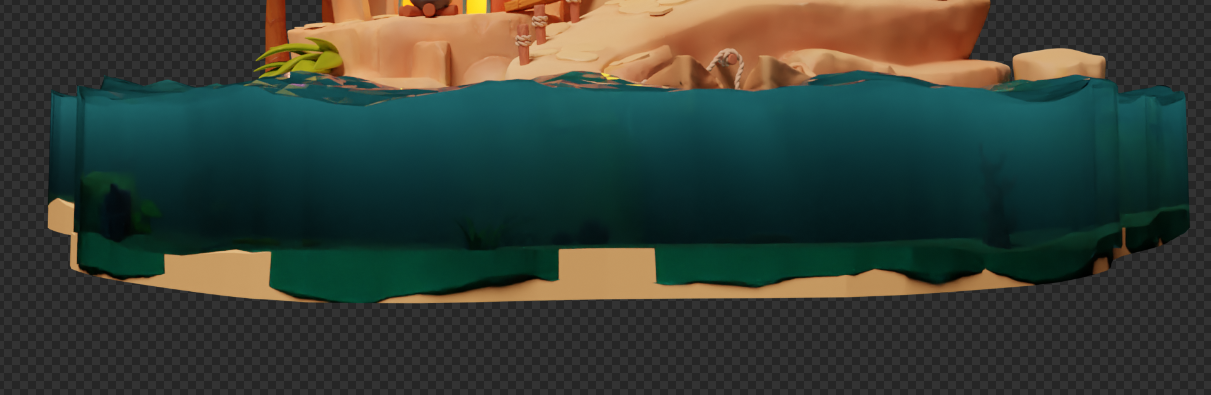
I’m new to Blender, So can you guys suggest any good tutorials or tips on how to make water that I created more clear and watery? ![]() I worked quite some time on the underwater world and want it to be visible through the water.
I worked quite some time on the underwater world and want it to be visible through the water.
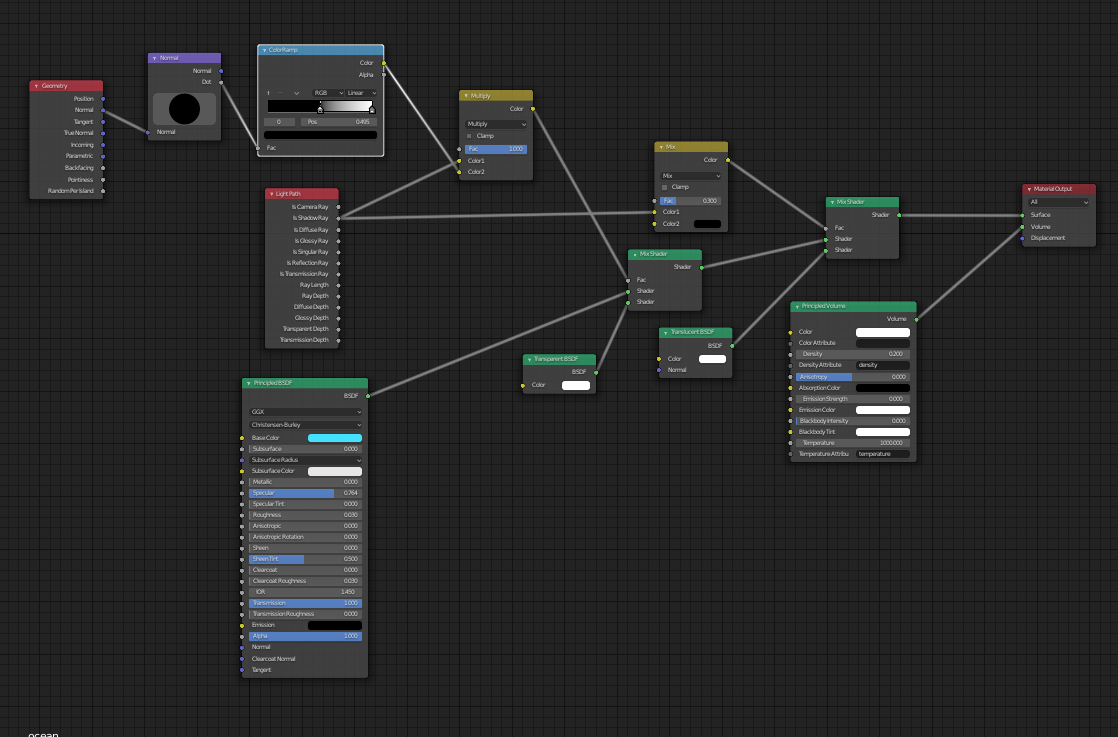
I’m attaching screenshots of the project. For the water material, I followed some tutorial and had no idea what I was doing, and when the results didn’t come up as good I didn’t know what to change in node settings. Any suggestions of good tutorials to understand shading basics would help ![]()
Thanks in advance!
P.S I forgot to mention I’m rendering in Cycles
I don’t know much about water but first thing I see is the Volume density is at 0.200
Volume is kind of sensitive, so even just 0.02 is something, so try values under 0.200
2 Likes
Thanks ! You’re right reducing density value worked and the result looks much better now
Lol nice
And goodluck
1 Like
1-https://www.3d-wolf.com/products/materials
2-http://blendermada.com/materials/?engine=cyc&category=glass&keyword=
3-Blender 2.82a, active > material library vx addon
Water: IOR = 1.33
1 Like
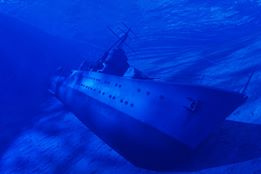
I’m working on physicall acurate water material for cycles. It is not finished yet but absorbtion part is done. To be able to do it in right way you need to understand how water works. Principled volume is not a shader you want to use as it is not behaving correctly in therms of light absorbtion.
First of all you have micro particles in water that differs clean and transparent ocean water from dirty lake. This thing will impact on your transparency.
Second thing is how the light is absorbed. Every wavelength is absorbed in different way. You need to create a model of water absorbtion and then use it as a source for volume. But not for principled as it works different way.
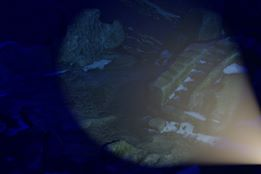
Third thing is depth of your scene. You should be albe to see throught 5m depth with no big problems. If you go deeper your seening will be heavily limited.
Fourth is light strength. Water surface reflect and reract light rays at the same time. That is why if light is not strong enought or is at wrong angle you wouldnt be able to see well throught it. Remember that when setting surface material.
This is one scene. Camera is just at different depth. If you are patient you can wait for material that I will post on blendermarket (for lazybones) and tutorial for those that want to learn. If not follow four tips and you will be able to create good water.

2 Likes
Thanks so much for sharing this useful information! I’ll try to consider all of this when working on water and definitely will check your tutorial whenever it’s released
If you want create underwater scene, then think like create fogged scene. Create blue or green fog/volumetrics, add some volume lights, and create a displaced plane top of your scene and reflect lights (glossy). If you want, you can create some particles for bubbles, dust, planktons etc.
1 Like
Fog is absorbing light waves in different way than water. You won’t be able to get correct results. Water is not “blue” or “green”. These colors comes from light absorbtion and are strictly connected with distance that light must travel in the water.
Same things be for sky. But when we create visual, basically use blue or green color.
Everything depends on the effect we want. From my experience it looks too fake so I don’t recommend it. About sky the situation is a bit different even if it similar  . It is about scale and how fast these changes are visible. To see the difference in light absorbtion in water wee need just 2 meters. In athmosphere? I don’t even know but “a lot”. Athmosphere is 480 km “heigh” and this huge voulume is not allowing to pass only one NIR frequency. 40 meters of the water kill almost every frequency in 100%. Hard to compare. That is why, we can fake sky but we should build correct model for water.
If you want create ultra realistic scene, then you can use volumetric materials with Volumetric Absorption + Anisotropy. But this will decrease your render speed. For artistic purposes, this model is too costly. Basicly sky or water not have a color, but absorb scattering R and G colors and reflect B, and looks like bluish. But we create a visual, not simulation.
I can’t agree with you. Using “coloured fog” method is way more expensive than creating water light absorbtion model. Anyway, you will need both, volume and absorbtion. And yes, it is about visual not simulation. It just looks very bad if you ignore absorbtion fact. But nevermind. Everyone has freedom to work as he or she wants.
Yes, what matters is result, not technique. This model works since render engines not have absorption calculation methods. But if you want use scientific method, this is your choose.
That would be very usefull for discussion if you can show some good renders of underwater environment using coloured voulme. I agree, the results matter, not the method.
These created with UE4, not with raytracer render engine.

Even these enough for visual and artistic purposes.
1 Like
We are talking about Blender… In Blender you don’t have also light raytracing engines (If I understand correctly what you are talking about)… and even if… It has nothing to do. Totally different things. I think you are a little bit confused. Of course as we can see in the video, there IS water light absorbtion simulation  . This is not a “green fog” method at all. Anyway, have good afternoon.
Cycles is raytracing engine.
Eevee is equivalent of the UE4 engine.
Fog is fog. I am not talk about archaic fake fog effect.
Made correction. Thought that you are talking about light ray tracing. Anyway, it has nothing to do as I said before.