This is my first Blender project.
I started with a blueprint project to learn Blender. The underlying blueprint I used has a scale problem as not all items depicted are the same size. My workaround was to scale the model as needed to match up the blueprint. I built the basic UFO model using a UV Sphere.
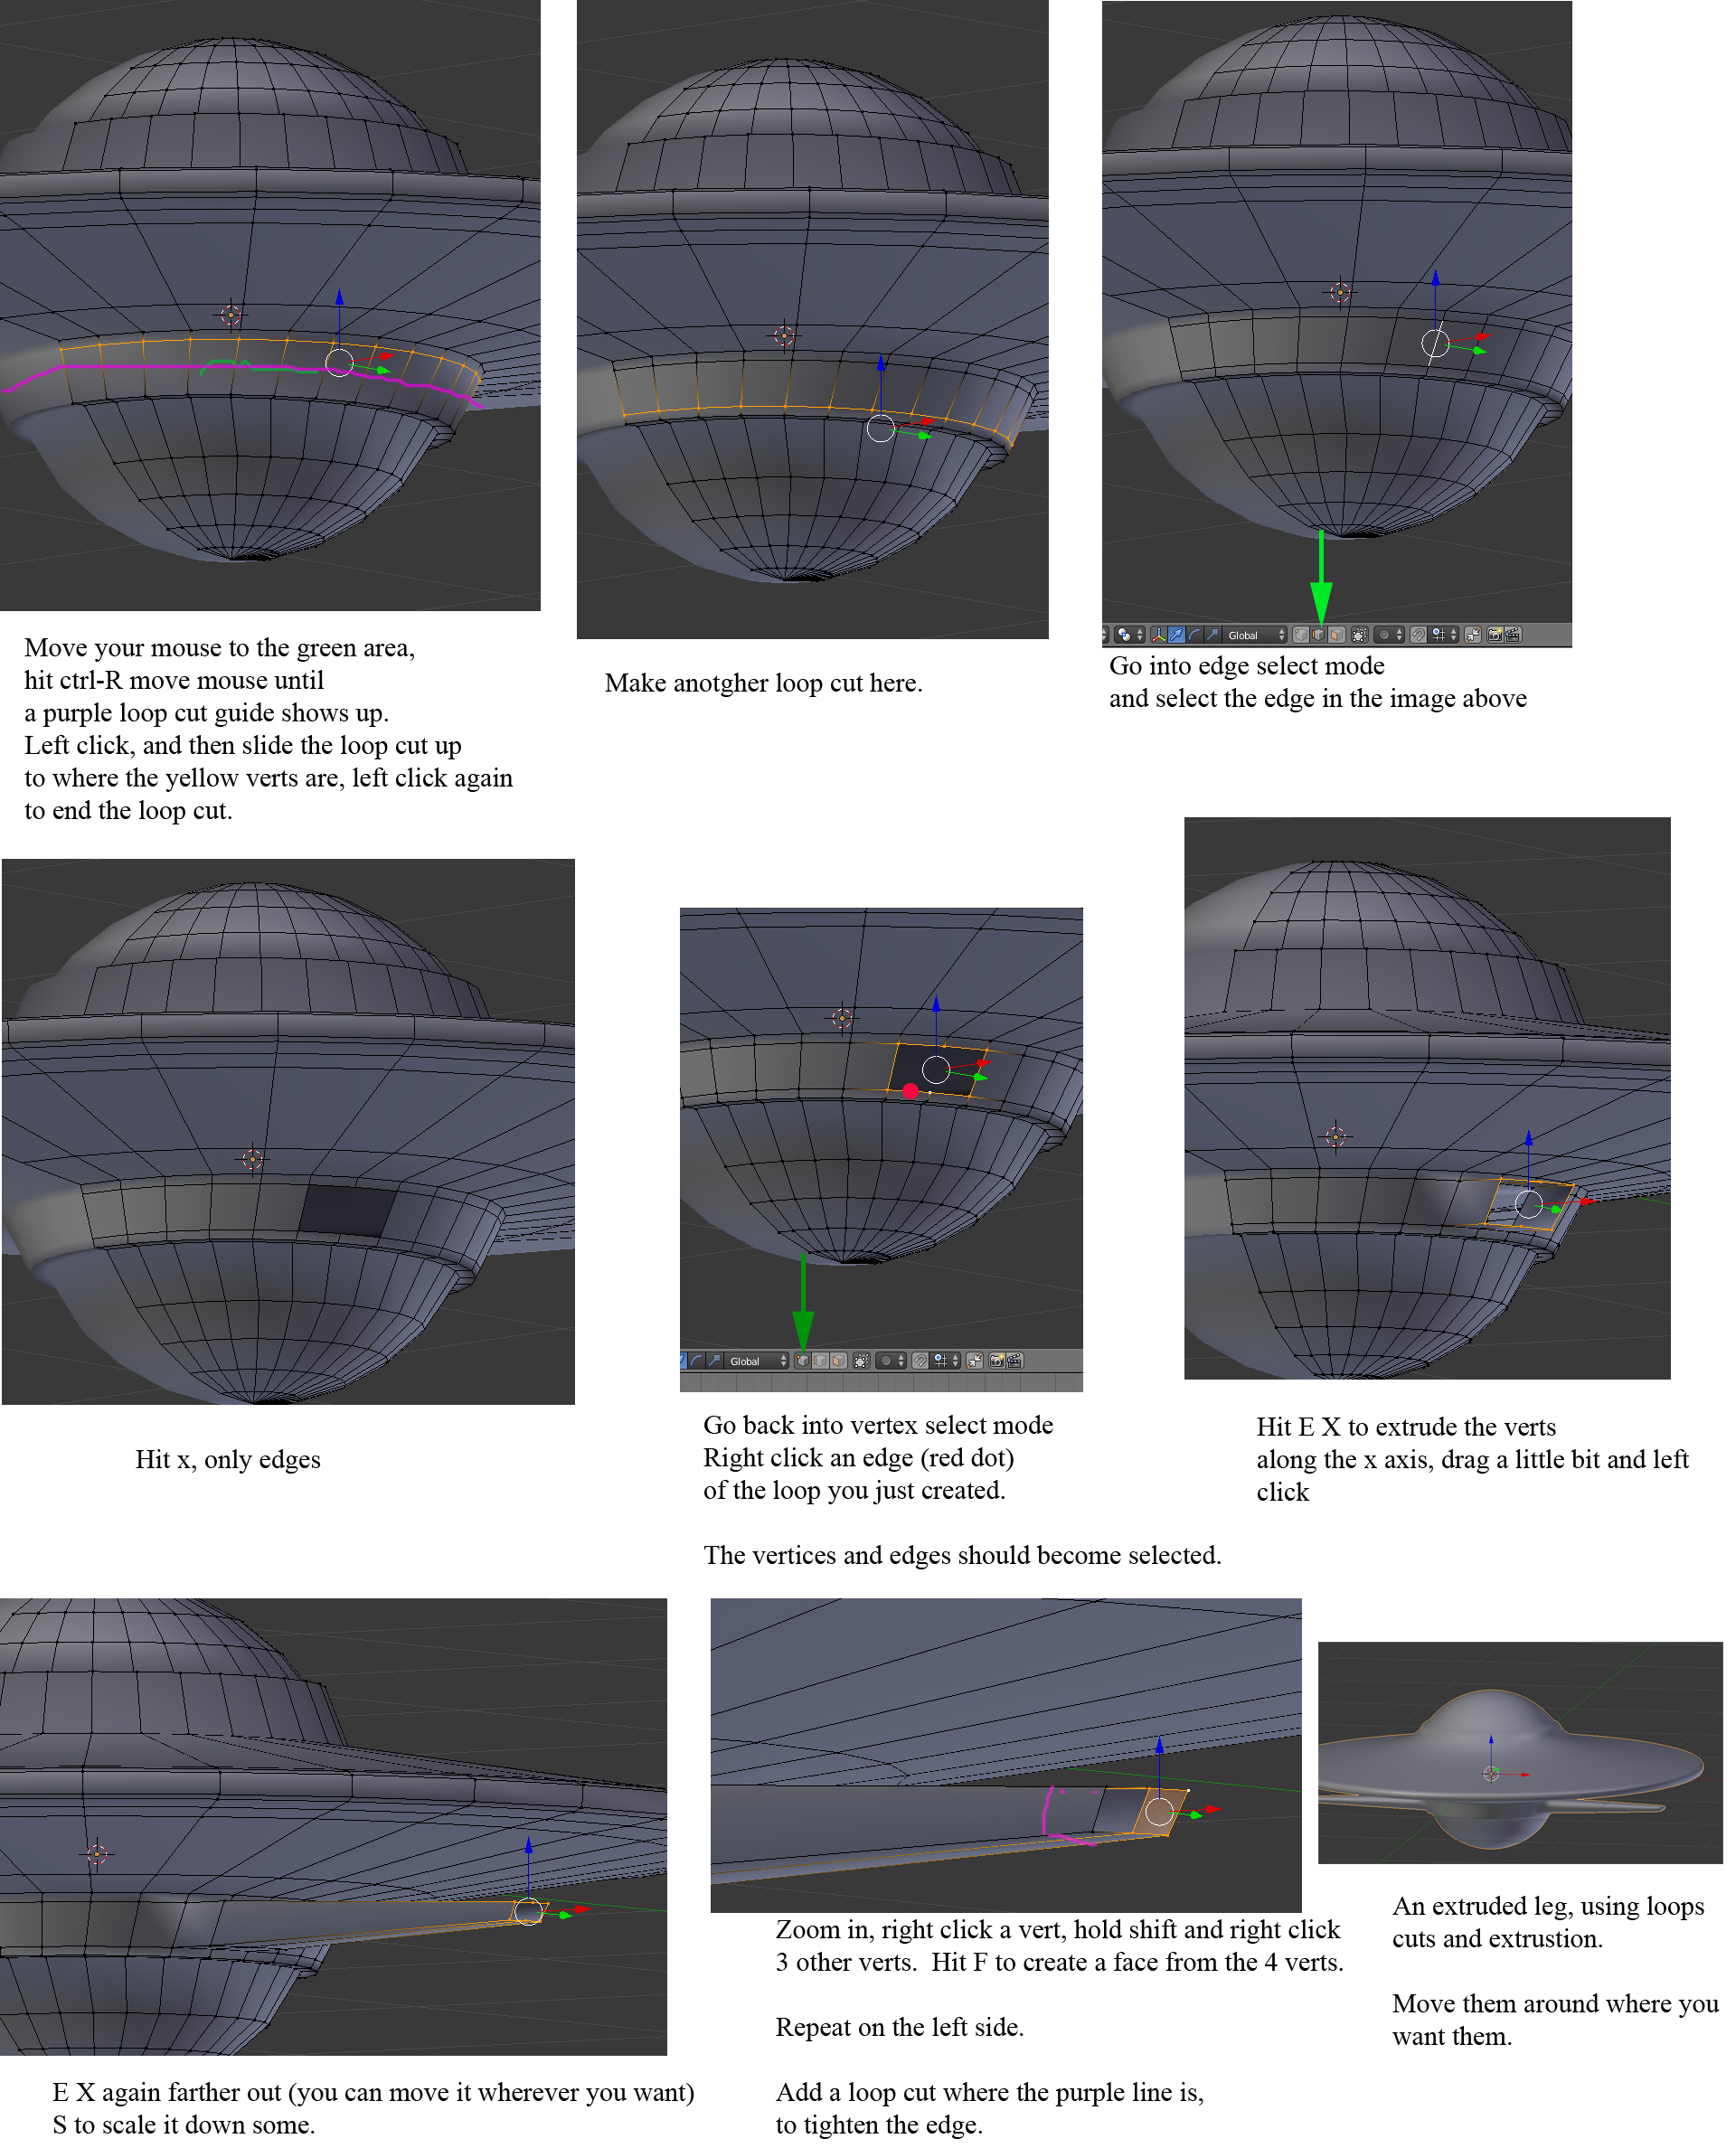
The supports on the bottom of the UFO have proven to be an issue. The goal is to create identical supports in the correct orientation. I am assuming the process used would be the same for the portholes.
Procedurally I think all I need to do is create the supports on one side and then mirror the image to get the reverse side.
Creating the support has proven to be a challenge. I have attempted the following steps:
Created a separate box mesh on the same layer using the Right Ortho view. The problem I could not solve was joining the support to the UFO. Do I create the support as a separate mesh then mirror the support so that I have the two supports I need or do I need to create each support separately?
Created a new layer. Then create a separate box mesh using the bottom view. Again joining and duplicating the support proved to be a problem.
Or am I just going at this wrong. Any help or suggestions would be appreciated.
The first attachment is invalid. And there are no images packed in the blend, so we can’t see the blueprints.
If the ufo is symetric across the x axis, then mirroring is definitely the way to go. You need the origin of the ufo to be in the center of the model though. Select your ufo, tool panel (t) origin-> to center of mass. Object menu, snap cursor to center. Again, Snap -> selection to cursor. Delete the left half verts. Add a mirror modifier.
File-> External data -> Automatically pack into blend.
Select your UFO, In the tools panel on the left (hit t) click Origin -> center of mass
Menu, snap, selection to cursor
Tools panel, shading click ‘smooth’
The UFO should be moved to the world center.
Change the view to front ortho
Tab into edit mode
Hit a until no verts are selected
hit z to go into wireframe mode
move mouse upper left of model, hit b to box select and drag and select all verts less than 0 on the x axis, leave the center line verts. Hit x to delete the left side verts.
You should just have the right half of the ufo now
Make one of the panels properties, click on modifiers (The wrench)
add a mirror modifer, and check ‘clipping’
add a subsurf modifer viewport 1 or 2.
When you are modeling a symmetric object you almost always want to do it with a mirror modifier. It’s half the work and you get a guaranteed symmetry.
See if you can your model to this stage, and then you can start discussing the topology and how you want this UFO to work.
Thanks Photox. I ended up in the same spot you illustrated above. I am going to try to the supports next. If I run into trouble can I ask you additional questions?
Sure. Anyone who puts in some effort and follows up on their posts will get plenty of help. This looks like a good starter project. Simple enough to be doable, and complex enough to be fun.
Jonathan Williamson is an authority in the Blender world, and he has created many excellent tutorials on blendercookie. This is a free tutorial, about 30 minutes long, that any beginning modeler ought to watch. It covers many of the skills you will need for this project. Link to blendercookie tutorial
Layers, in the simplest case, are used to organize a complex scene. You might have your lights and camera on 1 layer, your character on another, your rig on another, the background scene on another. When a scene get’s large and complex it can be taxing on your system and it’s an easy way to hide portions of your scene so you can focus on the task at hand. In this case I think you should work on making the supports part of the same ufo object, which means it will all be on one layer. You coudd argue that it should be separate, but for learning blender it’s important to know how to use loop cuts and extrusion to keep an object manifold.
I would center your back ground reference image and use it in conjunction with this method. Although in this case it’s not like you are modeling a '57 chevy. This ufo doesn’t really exist (or that’s what the government wants you to think ) so I would have some fun and make it your own a bit.
Here are step by step for keeping the mesh manifold (image on dropbox)
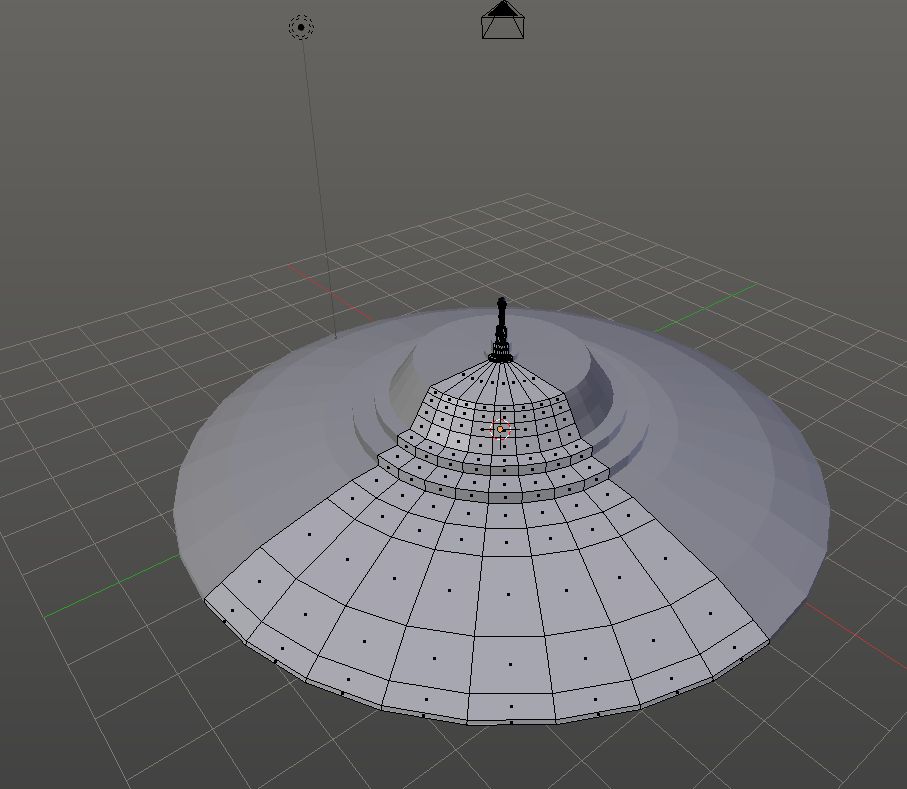
I am now working on a Haunebu style UFO. The Haunebu has 5 half-spheres on the bottom of the UFO. Reference the attachments. I am stuck on the half-spheres. Extruding the half-spheres individually didn’t seem to be a good idea so I elected to create a separate mesh with the idea of joining the meshes once each design element was completed. I have completed the second mesh. The next step is where I crash and burn. My plan was to duplicate the half-sphere mesh and rotate the duplicate into the proper position. This would give me four of the half-spheres. The duplicate mesh will not rotate correctly. This is happening because the base design uses a mirror modifier. Is there a way to force the rotation? I uploaded the reference material to Dropbox if anyone wants to downloaded to see where I am.
Thanks for your input. If the mirror is wrong then I missed a step in my process. I expect this is due to lack of experience and not the advice I have gotten. The short version of the story is this. I am trying to model three different UFOs. My plan was to create a base model (note the conversation further up the thread). Then modify the base model as needed to get three different UFOs. If there is an error in the mirror then there is an error in the base model. Therefore I need to go back to the base model and correct the problem there rather than fight the error through three models. I appreciate your input.
The images make file heavy. There is no need to use almost 4k for one; you had 3 packed.
It’s symmetrical, any details can be spinned, no problems with that. Top part is probably better to keep as a separate element. http://www.pasteall.org/blend/30271
Thank you for your feedback Cybermonk. Eppo thank you for the design tips. I have not worked with Subsurf, EdgeSpit or materials yet so I will spend some time reviewing your changes so I understand how you made them. The changes will be of a great help.


 ) so I would have some fun and make it your own a bit.