I used a cone and a cylinder, connected them together, and extended the cylinder. The bit on the end was done with some duplicating + scaling and then manually connecting all the edges together one by one. Then I extended it out about as far as it should go. Then I reached back in, pulled the inner tube out past the metal bit, and done.
I’ve seen some of the more advanced work, you guys are probably laughing at me for doing it so noobly
Anyway, I’m realizing now that the cylinder isn’t going to be able to be separated into a little area with pencil graphite and a little bit of inner pencil shaving.
So my question is. How do I approach this issue? I’m looking to continually expand my Blender knowledge so if someone could give me more then one way to do this, I would appreciate it. Would it be possible to use a manual paintbrush or sculpting tool (I haven’t gotten into those areas yet, soon) or would I be able to manually add a bunch of ridge cuts and tweak them into position?
Would it even be possible for me to make a little tiny tube and stick it where the lead should be?
Anyway, anything that would help would be appreciated, thank you.
Hey Meed, Now to start I’m very new to Blender as well but I think you went about modelling the pencil in a difficult manner.
Try again, this time start with a cylinder or circle.
Go into edit mode (tab) , then select the face select (ctrl + tab)
Press (E) for extrude. Extrude the face until desired length and click to apply.
Switch to top view (you should only see a circle) Select the face press (E) apply extrusion.
While face is still selected, press (S) for Scale. Move mouse desired amount and apply.
Switch view again, repeat extruding (E) and insetting (I) until you get your desired shape.
For the tip of pencil you could add an edge loop. (CTRL R) in edit mode. Hove your mouse over the edge of the pencil. You will see a pink line. If you scroll with your mouse wheel you will get more pink lines. Click to apply. Then move your mouse to “slide” the edge to your desired position.
Really you should check out some tutorials they really help and this is a great place to find tutorials. Good luck. i hope I didn’t confuse you.
I’ve read a bit of the wikibook tutorial, and have watched several videos on CGcookie. But sometimes I need a very specific answer, not a sign that says “go watch a tutorial”.
Although I will check out the other two links you posted, they might be helpful.
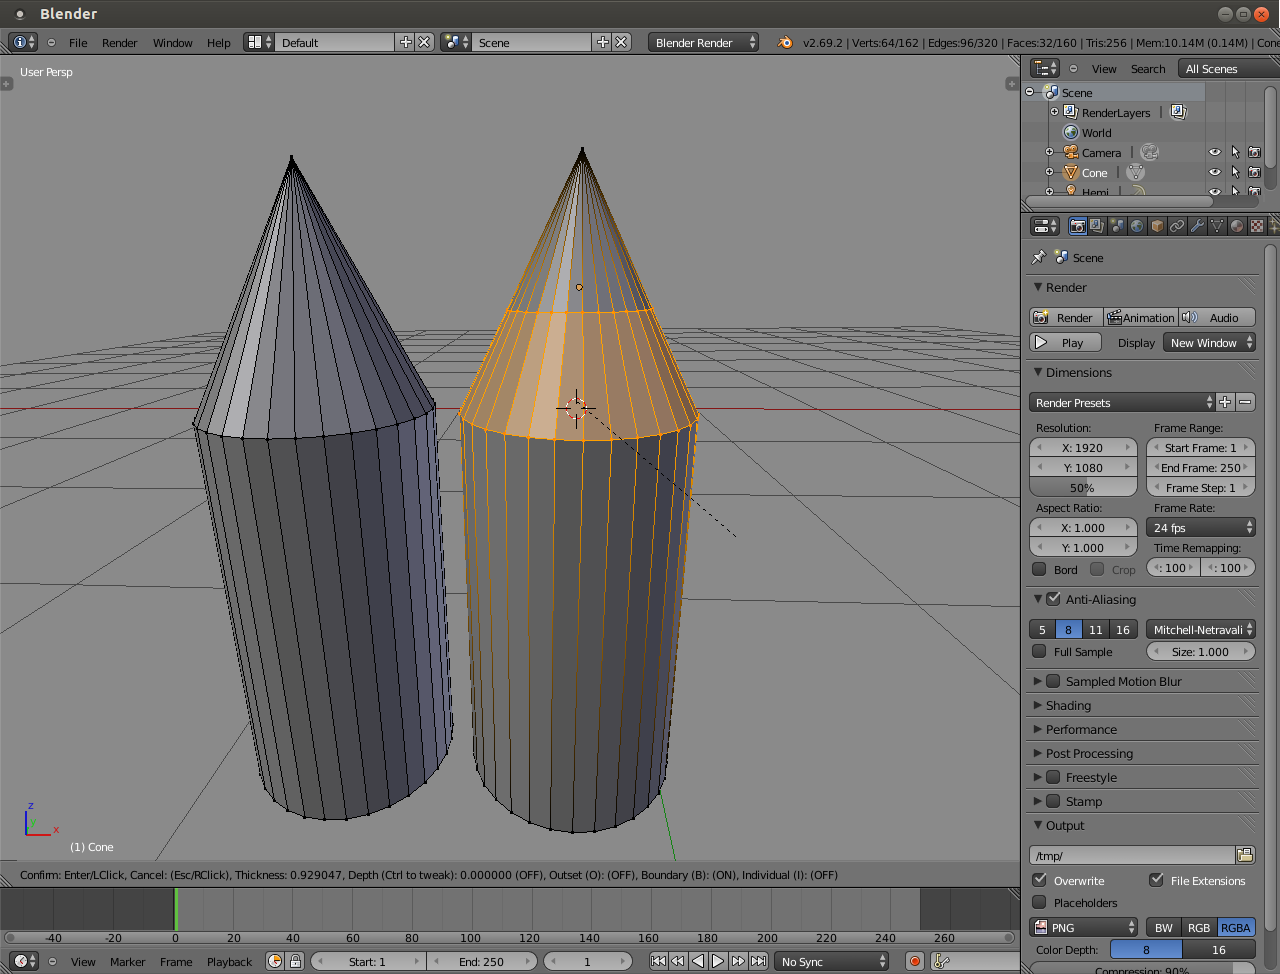
Ok, you can add a bit of graphite looking texture on the end of your pencil using UV mapping. It is an intermediate technique. An easier way (since loop cuts won’t work when your mesh ends in a point) is to delete the single point at the end of the cone, select the remaining loop of vertices, and extrude another pencil point, with two loops around the point part, one for wood, the other section for the graphite. This will give you separate faces for the graphite and the wood. Then you can assign different materials to the faces.
You can also fix the shape of the pencil point, which does not look like it came out of any pencil sharpener I’ve ever seen.
I don’t know where you buy your pencils, but around here, pencils with erasers attached (as yours seems to be) are not round, but have a hexagonal cross section.
Starting with a cone and a cylinder, then spending all that time manually connecting the two shapes is an awfully naive (not to mention time consuming) way to go about modeling a pencil.
I would start with a six sided cylinder, and put some loop cuts in each side so I could get a rounder shape for the ferrule and eraser and the point. You can adjust the flat sided hexagonal shape to a round shape using Blender’s “To Sphere” function, which is a “to circle” function if you only have a single loop selected.
I can understand your frustration with beginner tutorials, I took a look at a few “how to model a pencil in Blender” videos just now, and, while they all do show you how to model a pencil, I wouldn’t really recommend any of them.
I might try the UV mapping, but I’m using materials, not textures, it seems it would give me a grainier image.
I tried adding ridge cuts, it would have been so simple :
I will most likely try your duel cone method, it seems the easiest and quickest.
I’m not going for high quality, just having a good looking pencil and I"ll be happy. But while some pencils do have six sides (didn’t realize until after I started, probably would have been harder) there are some pencils (even a few that I own) that are completely round.
But in the meantime I’m still learning, thanks for all the help, I’ll try this tomorrow morning.
I own some round ones, too, but they are drawing pencils, and don’t have attached erasers. But, good luck with the project. Yeah, the ‘ridge cuts’ doesn’t work with triangular faces, and that’s what you’ve got at the tip of the cone. We generally call them ‘loop cuts’ though.
I do actually own a pencil that’s round and has an eraser…but only one.
Thanks for the “lingo”
Anyway, I tried the two cones option and it seems to have come out really good. The last thing standing in my way is the pencil wood area. I can’t find a material for it. Any suggestions?
Meed, I’m pretty sure you could just add a loop cut to the end of the pencil. Select only the “graphite” area then go to materials. Add a new material and assign to those faces.
No, I already tried that. And I have no area to select as the graphite area. With my original cone I can’t add a material to a single edge (the tip of the cone). But If I assigned it to the entire tip of the pencil there would be no wood-shaved area.
But I’m gonna try the duel-cone scheme first though.
The end of his pencil is a cone: all the verts on the bottom of the cone connect to a single vertex at the point. Therefore all the faces are triangular. Loop cuts don’t work on triangles.
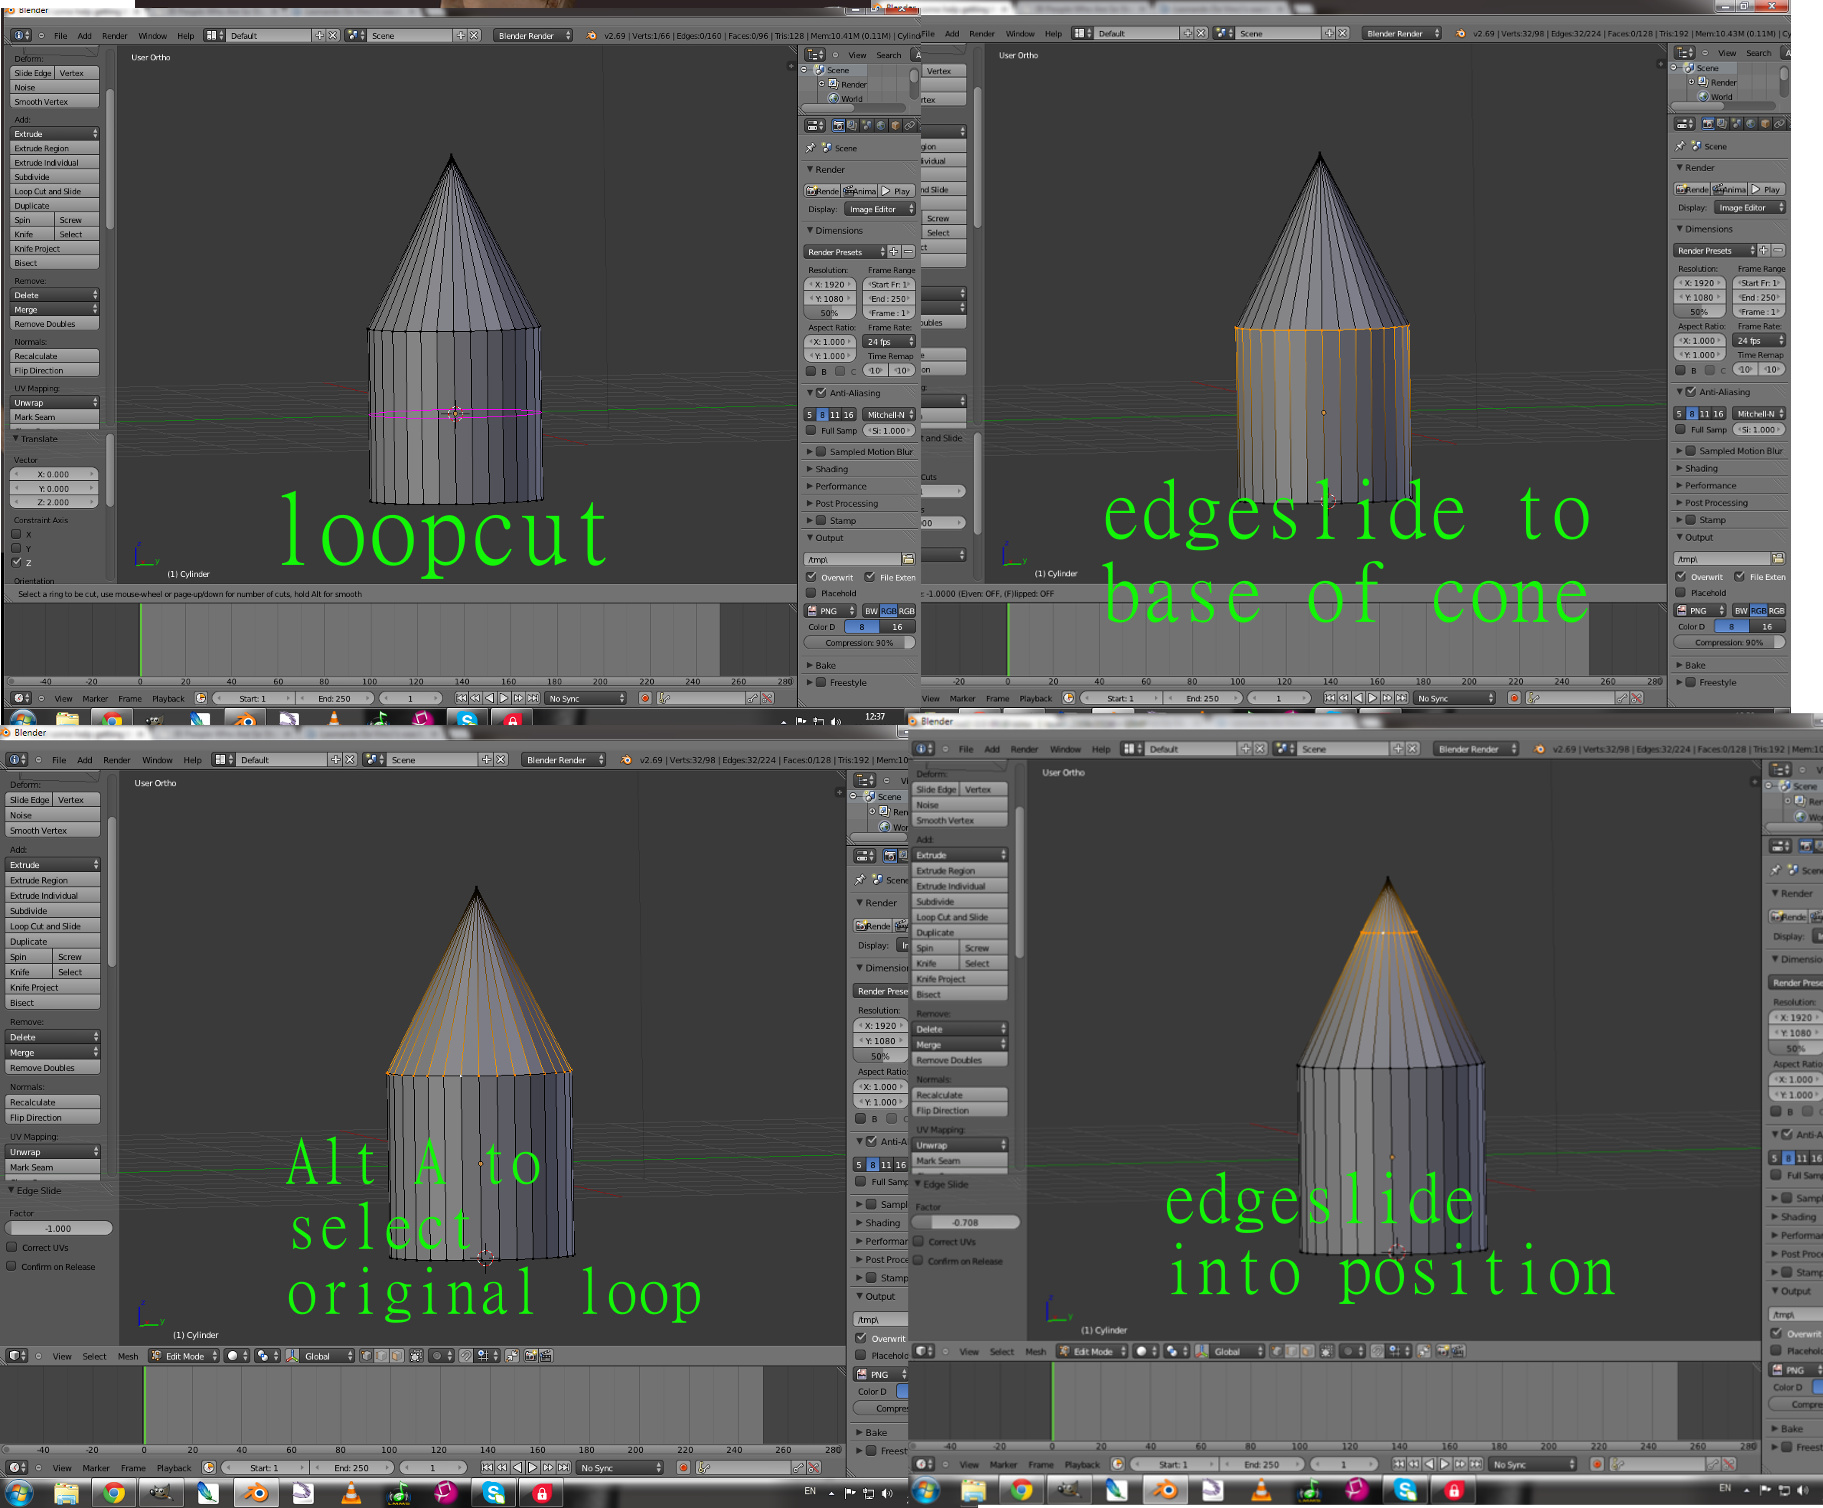
you cnat loop cut triangles because there is no loop. either add a loop cut to the cylinder section and drag it all the way to the base of the cone, then select the original base of the cone loop and double tap G and slide the loop down the cone, leaving the new loop you just made in the position of the original.
or
use the knife tool (k) and cut a loop at the tip of the cone where you need it
I tried that but it didn’t work either. Perhaps I am using the knife tool incorrectly.
In making loop cuts, the cut enters one edge of a face and leaves via the opposite edge. In a quad face, there is one and only one ‘opposite’ edge: the edge that does not share any verts with its ‘opposite’ number. In a triangular face, depending on how you define opposite, there are either NO opposite faces, or two of them. In either event, Blender has no way to determine which way to go, so running into a triangular face ends the loop. In the case of a cone, where all the faces are triangles, the loop never even gets started.
Go into side view, while being in Ortho mode, not in Perspective :
Now press K (to activate the knife) , press Z (to activate the cut-through setting of the knife as we want to cut more than just the faces in front of us) and press C (to constraint the knife angle according to the view, helping to make a straight cut)
Then click there :
And move your mouse to the left, then Click there (the green squares from the screenshot will become red) :
And press ENTER to validate the cut
If you want to move that loop up or down without ruining the cone shape, press G 2 times (to activate the Edge Slide function) or press CTRL+E -> Edge Slide
Then move up or down
My method is probably older than the knife tool - I start from the circle area, snap the cursor to the selection, then select all and move away from the cursor the distance I want the cone to cover, or I make a copy of the circle and move it to the distance I want the cone to reach. Either way, I set the cursor out to the point it should reach to, and then extrude from the circle without moving. I press the Period key and then scale the extrusion towards the cursor - I can repeat as I need to make the loops I want.