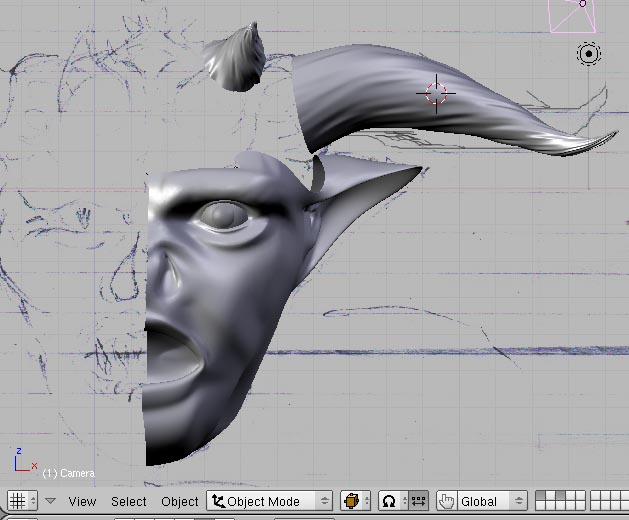
I’ve been playing with Blender for a couple of weeks, and this week tried my hand at a bit of mesh modelling. The attached files are of the as yet unfinished model. I aim to mirror the mesh and then warp it to reduce the perfect symmetry, once I have the basics in place.
The ear needs work, and the top and back of the head are yet to do, but I have a couple of questions in advance of needing them.
Can I put a fur texture (particles) on only part of a single mesh, or do I need to make separate meshes for furred parts?
I can use bump mapping to get things like small veins on the face, but is there a quick way to do larger veins and that sort of thing. I don’t want to cut the face into huge numbers of facets to get the level of accuracy that implies.
well I don’t know much about particles but when you make a mesh into particles the particles spread across that mesh,also the mesh is turned into particles and is not solid,so what happens if you turn you mesh into particles then it will not be solid any more…okay lets say you want to make a beard, go to edit mode select the area that you want to put the beard,lets say form the chin to the ear the select all the verts you want to put the particles then duplicate the,Shift-D, then with those vertsselected press P-selected, this will turn the duplicate into a seperate object. then you use that mesh over the original mesh as particles to make the hair…
If you are going to do static poses, you can use bump mapping for the larger veins, too, just tweak the mesh where the vein rounds an edge in the image. If you’re planning on animating, or viewing the model in the round, then you’ll have to model the large features, or they will flatten at the edges, destroying the 3D illusion. You can use knife cut (select edges and Shift Kkey) to limit the extra faces to just where you need them.
You’ll have a bit more control over your particle fur if you use a separate mesh. It’s simple enough to do, just select the faces you want furred, and use Shift Dkey to duplicate the faces. Then you can adjust edges (eg: for eyebrows, goatee, etc.) without affecting the original mesh, or having to adjust the original mesh to match up with the hair. What HecticHermit said. Except I’d recommend placing the new mesh under the skin, the particles will penetrate the skin as real hair does.
Thanks for the replies. I’ve looked up the tutorial on the fur, and it’s great. Should give me a lot more control than i thought i would have. i take it that to get fur to ‘fade in’ it would be best to use a separate mesh, as i could bury it deeper into the skin mesh to get shorter hairs at the edge of the patch.
I thought i would have to model veins etc by hand, but I just wondered if there was a shortcut. I thought I’d read somewhere that there was a method of applying a bump map as a permanent warping of the mesh, rather than as a normal map. obviously, something to do to the final mesh, not at the sub-surf level.
the original sketch is my own work. Took me a few minutes, hence the front and side views do not really match. I am using it more as a guide than a drawing to adhere to. I have noticed that without the side-sketch in particular, it is very easy to make the features look OK from the front, and then find that they are very flat when viewed from the side.
Thanks again. I’ll post again when I have more progress. I made the mirror image last night, and I now have a face that looks too broad and symmetrical, which I have to work on.
The other common pitfall is to create a corner where the front plane of the face and the side plane intersect. The way around this is to view the model from many angles, not just front and side.
The large vein shortcut you are looking for is called displacement mapping, a variation of bump mapping. In order for it to work, you need a very dense mesh, since the technique actually moves vertices. I was under the impression from your earlier post that you didn’t want a huge number of extra vertices, but I may have misread you. The simple way to put the extra vertices in place is to use subdivide. The downside is that subdivide puts extra vertices everywhere in the mesh, increases the RAM requirements, and can slow blender down to a crawl.
Regarding your idea about burying the mesh to “fade in” the fur: you have the problem solving attitude that will take you far with blender!
I am aiming to keep the number of vertices down whilst modellig, but as this is not intended for animation, i think it is possible to ‘apply’ the subsurf, which converts the mesh into a simple one, albeit with a huge number of faces, and then I could apply the displacement mapping at that poit, couldn’t I?
I currently have about 80000 vertices when rendering. This is going to grow when I add hair.
Applying subsurf and subdividing have about the same effect on your mesh. Once the vertices are there, displacement mapping will move them. If your hardware can handle the load, go for it.
I guess I can use displacement mapping when I’m 100% certain that i have the basic shape right. i don’t fancy moving all the points by hand
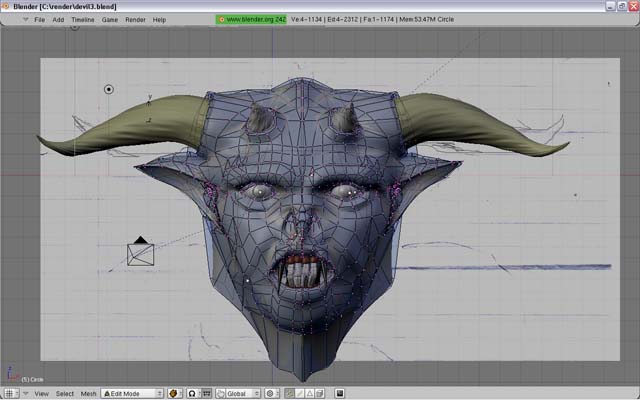
Funny, once i put the two halves of the head together, I noticed that i had a very noticeable straight line across the brows. Had to warp the face out, and the eyebrows backwards, to put it right.
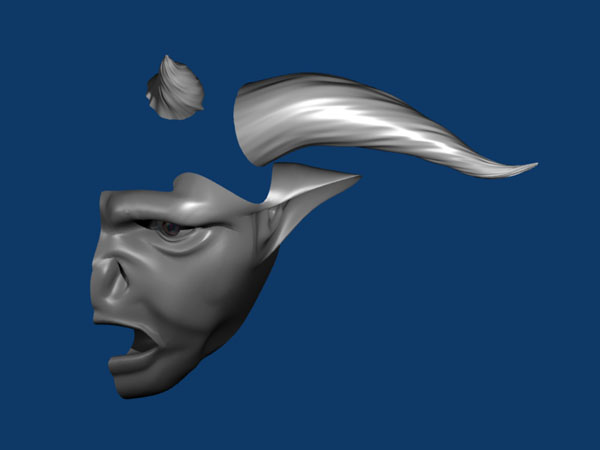
Here’s an update on the head i’m modelling. The picture was rendered with Yafray. Still need to add hair, eyebrows, and eye textures.
is there a way of applying a texture to only part of the face. I’m UV mapping the main bump map, and the main colour map, and then adding the base skin texture as another bump map layer. However, I’d like to be able to make the centre part of the face smoother than the edges, without another UV bump map.
Another problem i seem to have is working out what mapping method to use for the horns, as my original method looked fine, but produced dips on the right hand horn, and bumps on the left hand one. Can anyone point me at a good tutorial on the control of which method does what, and what level of control is possible?
Just reduce the contrast on your face bump map over the areas you want to smooth out. Sounds like you’re using procedural bump mapping on the horns. I haven’t seen any good tutorials on using UV mapped procedurals for more control of line flow. Try unwrapping the horns and moving them around on the uv map to get the texture to flow the way you want it to. They are separate anyway, so you can put them where you like in the UV image editor.
The model is looking really good, except for the expression. Wide eyes and wide mouth is surprise or shock. Dude looks scared. Lower the top eyelid to just above the pupil and see how it changes things. And bring the inside of the brows down a hair.