Hi, anyone have any advice for making a good looking spiral bezier path? I’m going to use a Follow Path constraint on it but I want it to be very circular, not handdrawn like how it looks now… I just created a bezier and then extruded points.
Seems like there should be a fast way to make it look clean
Just so annoying to have to adjust the handles for every point…I’m used to Adobe I guess…
go to addons an find curves> extra objects and activate the plugin.
then under the add menu select curves>extra objects> spirals
adjust the steps and height settings in the operator panel to get the spiral you want.
your welcome 
Thank you, Small Troll. It worked to me.
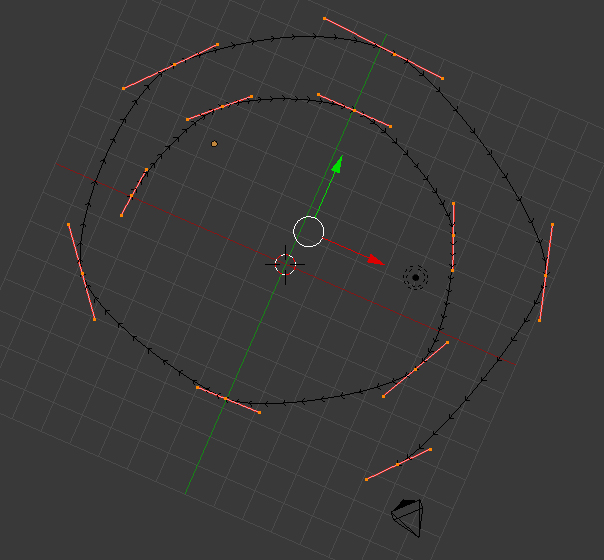
Those small arrows are not laid on the XY plane though what makes the camera rotate around the roll axis.
Any idea how to fix it?
not sure if this will work, but try converting it to a mesh, and then back to a curve. i can’t recall whether you still need the edge2curve script for this. i think you can do it with alt-C
not quite sure what you are trying to achieve. those “arrows” are simply the curve normals and show the direction of the curve.
how are you trying to animate your camera? to follow the path? facing in? out? along the direction of the curve?
there are different ways to achieve those results so i could use a bit more info to help you.
@ Modron yes Alt C cill create a curve from mesh, but i think it is limited to planar surfaces, you couldnt convert a cube for example
smalltroll, sounds like he’s having a problem with his path twisting. i would say using t on the control points ( twist or untwist curve in edit mode ) would be the thing, except that it probably would not work on a spiral.
In the properties panel you can select each point and set the ‘tilt’ to zero. You can select them all and set ‘mean tilt’ to zero. If they all have different tilts though, this will not work and you have to do it one at a time. (That’s because negative tilts and positive tilts still mean out to zero).
In edit mode ctrl-T allows you to adjust the tilt. You can set pivot center where you like and use proportional editing ‘connected’ to progressively tilt points from one end to the other in different amounts.
Hope all this works. There’s probably more about tilt somewhere buried in the Wiki.
this is easier imo to do with the screw modifier.
i hate working blind when trying to work on problems
If ur just trying to have a camera spiral around something, it would be easier to just add a circle and parent the camera to one of the vertices then animate the circle to spin and slowly move along the z axis. The end result will be a spiraling camera. Oh make sure to face the camera toward the center of the circle.
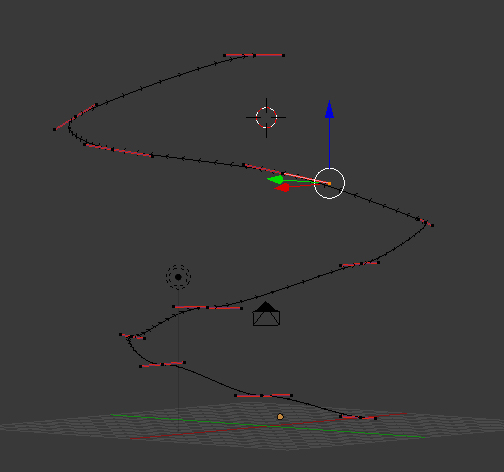
You can also model a spiral out by creating a circle mesh, hitting ‘V’ on one edge and then hitting ‘O’ for proportional editing. Now simply move the vert up and duplicate the mesh using the snapping tool or array modifier.
Once you’re satisfied with the height, exit edit mode and hit ‘ALT + C’ -> Curve from mesh.
Viola, you now have a spiral spline.
Oh by the way I do have a tutorial on how to make a DNA spiral, but it is a bit outdated. When I made it I either didn’t think about how to do it easier or didn’t know how to do it easier. But the video can show you how to make a spiral. You might have to fast forward through a lot of it because the purpose was to make a perfect DNA strand.
Hi all!
Sorry for making you feel as if I would ignore your replies by being mute for two days :).
Yes, I want to use a spiral as a path for the camera facing inwards. In the properties of each point, the tilt is set to 0° although it is twisted. So, if I change the tilt of a point, it happens relatively to its initial twist.
I use v2.68
Thanks, these responses are excellent!